Originally published as an Oracle tutorial on Oracle Docs. Part 1 of 5 in the NAT on DRG series.
Introduction
Two networks that use the same IP range cannot talk to each other with plain routing. A router that receives a packet for 10.0.1.25 has no way to tell whether that address lives in the network on its left or the network on its right. In Oracle Cloud Infrastructure (OCI) this happens more often than you would like: two teams both picked 10.0.0.0/16 for their Virtual Cloud Network (VCN), a company was acquired, or an application was cloned together with its addressing.
Until now the usual answers were to re-address one of the networks or to place a firewall or NAT appliance between them. NAT on DRG removes the need for both. The Dynamic Routing Gateway (DRG) can now translate IPv4 addresses itself, as traffic passes through one of its attachments. The translation is:
- Stateless and 1:1. A
/24is translated to another/24and the host part of the address is preserved, so10.0.1.81always becomes192.168.10.81. - Configured in a DRG NAT policy. A policy is a container for NAT rules. A rule can translate the source address, the destination address, or both.
- Bound to an attachment. A policy does nothing until you associate it with a DRG attachment. A packet is translated only when it crosses an attachment that has a policy with a matching rule.
There is one concept that decides whether your configuration works or not, so it is worth stating early:
In this first part we use the simplest topology possible: two VCNs in the same region, attached to the same DRG, both with the subnet 10.0.1.0/24. Each VCN gets its own NAT policy that presents it to the other side under a unique “shadow” CIDR:
| VCN | Real subnet CIDR | Shadow CIDR seen by the other VCN |
|---|---|---|
uc1-vcn-a |
10.0.1.0/24 |
192.168.10.0/24 |
uc1-vcn-b |
10.0.1.0/24 |
192.168.20.0/24 |
An instance in VCN A therefore reaches the instance in VCN B on 192.168.20.x, and an instance in VCN B reaches VCN A on 192.168.10.x. Neither side ever sees the other side’s real 10.0.1.x address.
Other Use Cases
This tutorial is part of a series of five. Every part solves a different overlap scenario with the same building blocks.
- Part 1 (this article): NAT on DRG Part 1: Overlapping CIDRs between two local VCNs
- Part 2: NAT on DRG Part 2: Overlapping CIDRs between multiple remote VCNs
- Part 3: NAT on DRG Part 3: Overlapping CIDRs between OCI and On-Premises
- Part 4: NAT on DRG Part 4: Shared services VCN
- Part 5: NAT on DRG Part 5: Overlapping CIDRs between OCI and On-Premises with BGP
Diagram
Overlapping subnet CIDRs resolved with stateless 1:1 NAT on DRG
(Two VCNs with the same CIDR communicate privately by translating one side to a unique private CIDR as traffic traverses the DRG.)
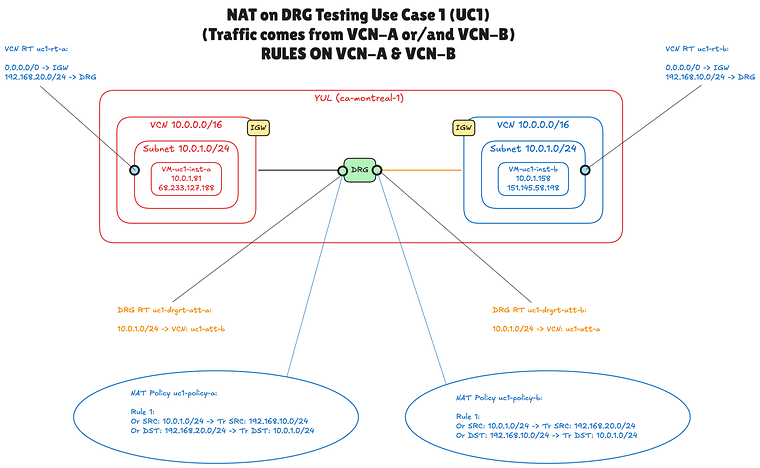
The diagram shows every object you configure in this tutorial:
- Two VCNs in the Canada Southeast (Montreal) region, both
10.0.0.0/16with a subnet10.0.1.0/24, each with one test instance. - One DRG with a VCN attachment for each VCN (
uc1-att-aanduc1-att-b). - Two VCN route tables (blue text). Each one sends the shadow CIDR of the other VCN to the DRG.
- Two DRG route tables (orange text), one per attachment. Each one sends
10.0.1.0/24to the other attachment. - Two DRG NAT policies (the ellipses), one per attachment, each with a single rule that translates source and destination at the same time.
Prerequisites
- An OCI tenancy and a compartment in which you are allowed to manage networking resources (VCNs, DRGs, DRG attachments, DRG route tables and DRG NAT policies) and compute instances.
- Two VCNs with overlapping CIDRs that already exist. This tutorial does not create them. In the lab they are
uc1-vcn-aanduc1-vcn-b, both10.0.0.0/16, each with one public subnet10.0.1.0/24, an internet gateway, and a route table (uc1-rt-aanduc1-rt-b) that is assigned to the subnet and sends0.0.0.0/0to the internet gateway. Steps 01 to 03 walk through this starting point. - A DRG that supports NAT. NAT on DRG is not available on legacy (V1) DRGs, and not on DRGs that have disintermediation, high-throughput mode or route unification enabled. A newly created DRG works.
- Two compute instances, one in each VCN, to test with. In this tutorial they are called
uc1-inst-a(10.0.1.81) anduc1-inst-b(10.0.1.158). Each has a public IP address so you can reach it with SSH. - An SSH key pair for the instances, and the public IP address you connect from (to allow it in the security lists).
- Basic knowledge of VCN route tables and DRG route tables.
Steps
- STEP 01: Review the two VCNs with overlapping CIDRs
- STEP 02: Review the subnets
- STEP 03: Review the internet gateways
- STEP 04: Configure the security lists
- STEP 05: Create the DRG and attach both VCNs
- STEP 06: Create a DRG route table for each attachment
- STEP 07: Configure the VCN route tables
- STEP 08: Create the DRG NAT policies and rules
- STEP 09: Associate the NAT policies with the VCN attachments
- STEP 10: Test the connectivity
Step 01: Review the two VCNs with overlapping CIDRs
We start with the problem itself: two VCNs that were created with exactly the same address space. Nothing in OCI prevents you from doing this, and as long as the VCNs stay isolated it causes no harm. It only becomes a problem at the moment you want to connect them.
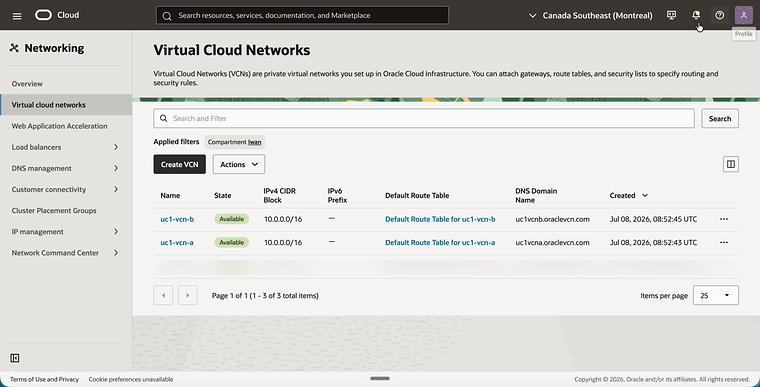
- Open the navigation menu, click on Networking and then on Virtual cloud networks.
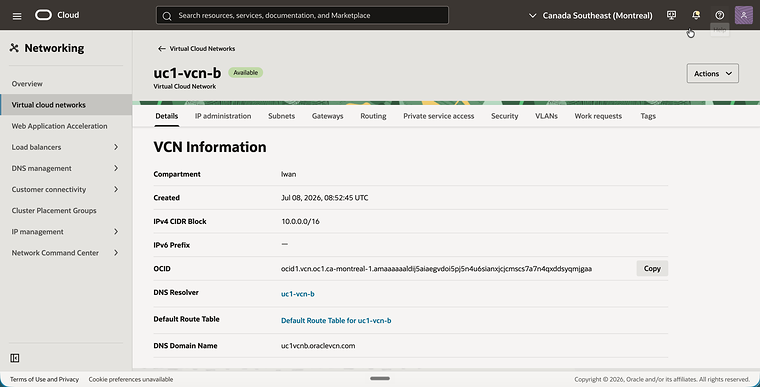
- Notice that there are two VCNs,
uc1-vcn-aanduc1-vcn-b, and that both have the IPv4 CIDR Block10.0.0.0/16.
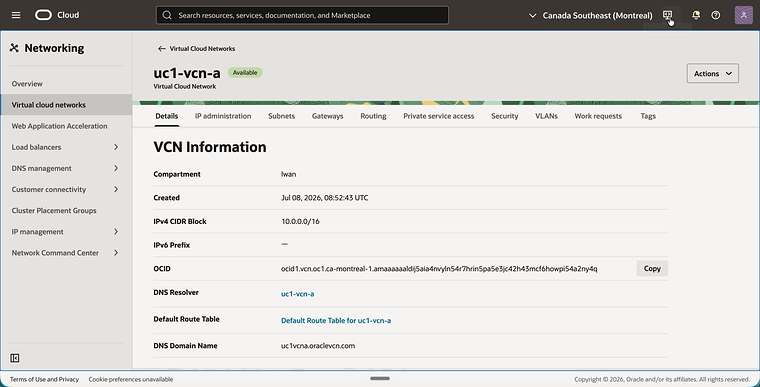
- Click on
uc1-vcn-a. - Notice the IPv4 CIDR Block
10.0.0.0/16on the Details tab.
- Go back and click on
uc1-vcn-b. - Notice that this VCN has the same IPv4 CIDR Block
10.0.0.0/16.
Step 02: Review the subnets
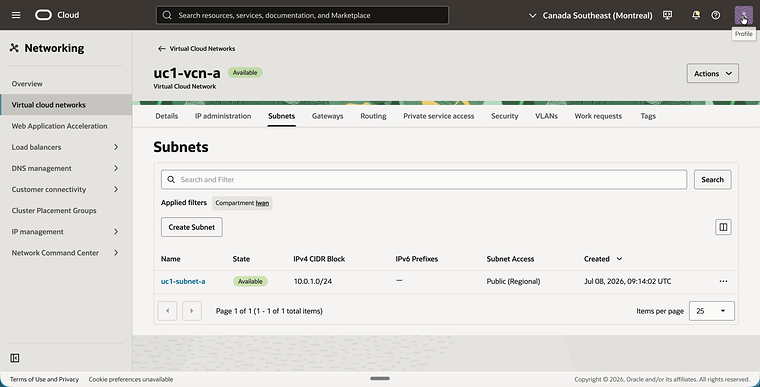
The overlap continues one level down. Both VCNs have a single public subnet, and both subnets use 10.0.1.0/24. This /24 is the range that the NAT rules translate later, so remember it.
- In
uc1-vcn-a, click on the Subnets tab. - Notice the subnet
uc1-subnet-awith the IPv4 CIDR Block10.0.1.0/24.
- In
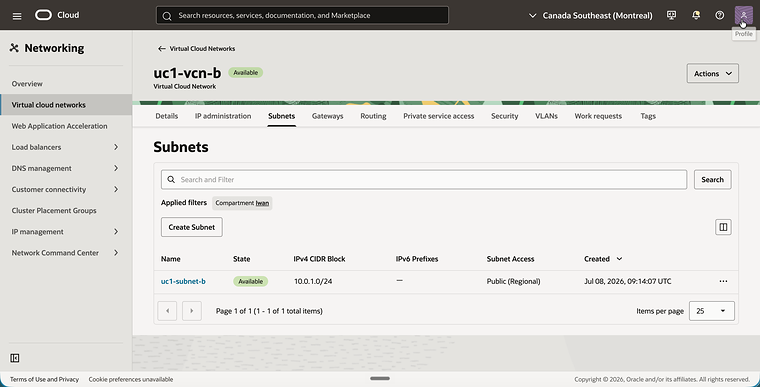
uc1-vcn-b, click on the Subnets tab. - Notice the subnet
uc1-subnet-bwith the same IPv4 CIDR Block10.0.1.0/24.
Step 03: Review the internet gateways
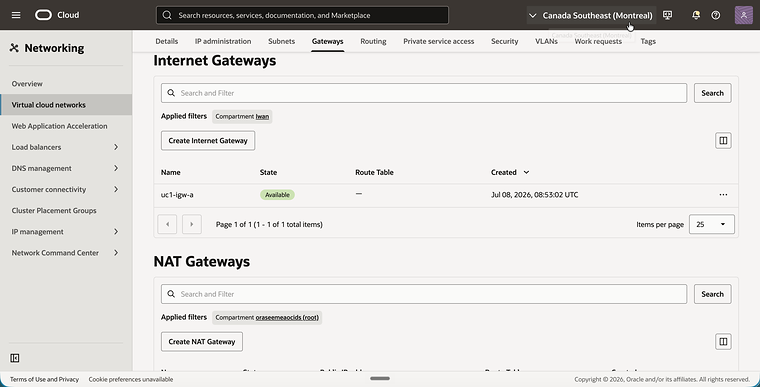
The internet gateways have nothing to do with NAT on DRG. They are only here so that you can reach the test instances over SSH on their public IP addresses.
- In
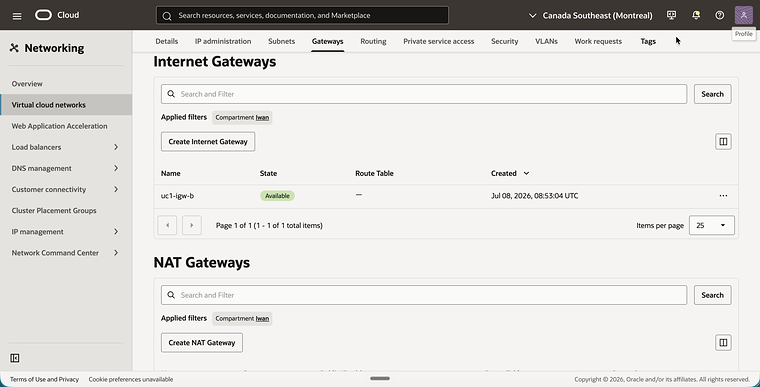
uc1-vcn-a, click on the Gateways tab. - Notice the internet gateway
uc1-igw-a.
- In
uc1-vcn-b, click on the Gateways tab. - Notice the internet gateway
uc1-igw-b.
Step 04: Configure the security lists
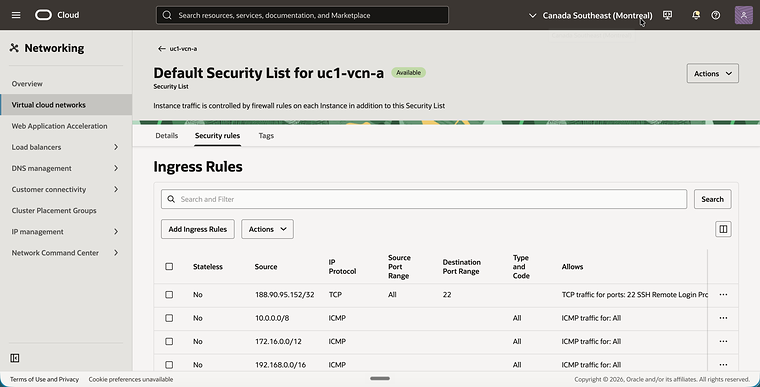
The test in this tutorial is a ping between the two instances, so the security lists must allow ICMP. Keep in mind which source address the instances will see. Because of the translation, a ping from VCN A arrives in VCN B with a source address in 192.168.10.0/24, not 10.0.1.0/24. The rule that allows ICMP from 192.168.0.0/16 is therefore the one that matters.
The lab allows ICMP from all three private ranges. That is broader than this tutorial needs. The minimum is one ICMP rule per VCN, with the shadow CIDR of the other VCN as source: 192.168.20.0/24 in uc1-vcn-a and 192.168.10.0/24 in uc1-vcn-b.
- In
uc1-vcn-a, click on the Security tab and click on Default Security List for uc1-vcn-a. - Click on the Security rules tab.
- Make sure the security list has the following ingress rules, and add the ones that are missing:
- TCP port
22from your own public IP address, for SSH. - ICMP from
10.0.0.0/8,172.16.0.0/12and192.168.0.0/16.
- TCP port
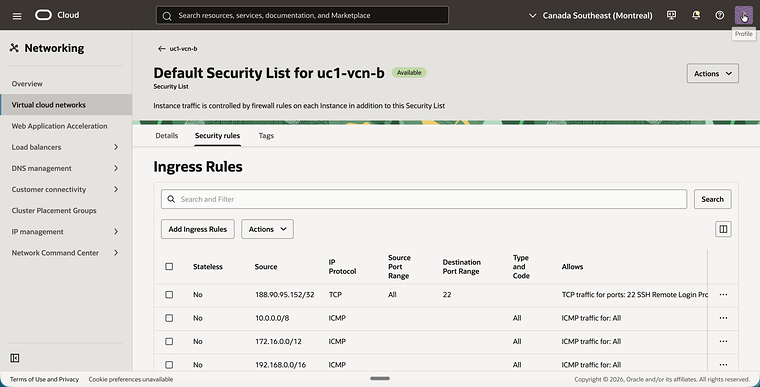
- Open the Default Security List for uc1-vcn-b in the same way.
- Make sure it has the same ingress rules.
Step 05: Create the DRG and attach both VCNs
The DRG is the router between the two VCNs and the place where the translation happens. Both VCNs are attached to the same DRG, each with its own VCN attachment. The attachments are important in this tutorial, because the route tables and the NAT policies are all bound to an attachment, not to the DRG as a whole.
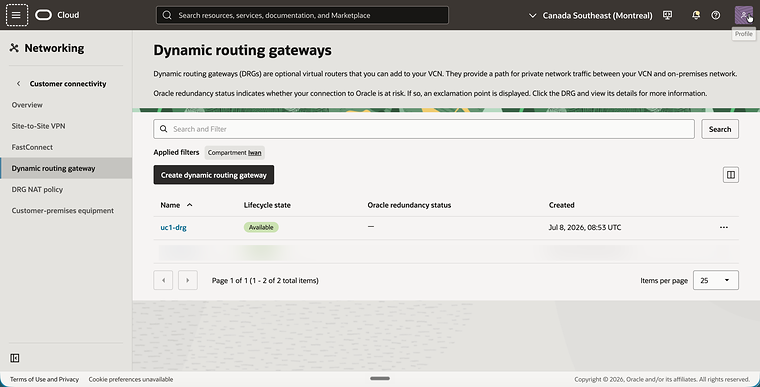
- Open the navigation menu, click on Networking, then on Customer connectivity and then on Dynamic routing gateway.
- Click on the Create dynamic routing gateway button and create a DRG with the name
uc1-drg. - Notice that the DRG is Available.
- Click on
uc1-drgand click on the Attachments tab. - Click on the Create virtual cloud network attachment button and create two attachments:
uc1-att-afor the VCNuc1-vcn-a.uc1-att-bfor the VCNuc1-vcn-b.
Step 06: Create a DRG route table for each attachment
A DRG route table decides where a packet goes after it has entered the DRG through an attachment. By default all VCN attachments share one autogenerated route table that is filled with the CIDRs of the attached VCNs. With two VCNs that advertise the same 10.0.1.0/24, that table can hold only one active route for this CIDR. The DRG picks one of the two attachments and marks the other route as a conflict. Whichever one wins, every packet for 10.0.1.0/24 goes to the same attachment, no matter which side it came from, so only one direction can ever work. This tutorial needs the opposite: the same destination has to lead to a different attachment depending on where the packet entered the DRG. Each attachment therefore gets its own DRG route table with a single static route that points to the other attachment.
The destination in these routes is the real CIDR 10.0.1.0/24, not a shadow CIDR. This is because of the order in which the DRG works:
- The packet enters the DRG through an attachment.
- The NAT policy on that attachment translates the packet.
- The DRG looks up the translated destination in the DRG route table of that attachment.
A packet from VCN A to 192.168.20.158 has already been translated to destination 10.0.1.158 by the time the route lookup happens.
- In
uc1-drg, click on the Routing tab and create a DRG route table with the nameuc1-drgrt-att-a. - Click on the Static route rules tab and click on the Add static route rules button.
- Add a rule with the Destination CIDR block
10.0.1.0/24and the Next hop attachmentuc1-att-b. - Notice that the static route is Active.
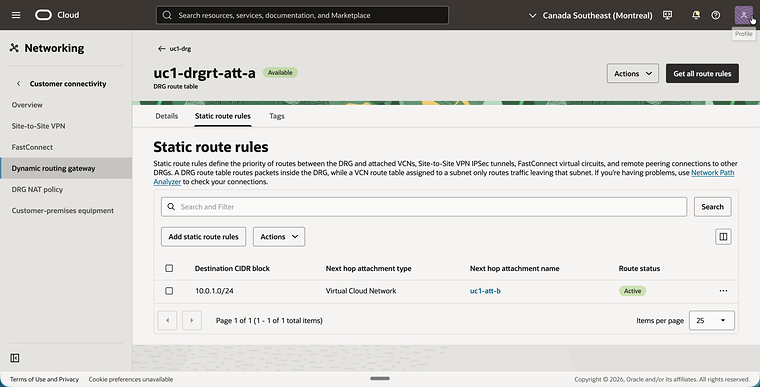
- Create a second DRG route table with the name
uc1-drgrt-att-b. - Add a static route rule with the Destination CIDR block
10.0.1.0/24and the Next hop attachmentuc1-att-a. - Notice that the static route is Active.
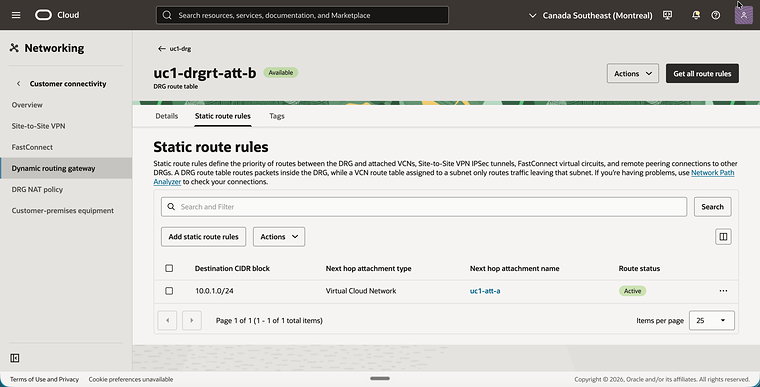
- Go back to the Attachments tab of
uc1-drg, edit the attachmentuc1-att-aand selectuc1-drgrt-att-aas its DRG route table. - Edit the attachment
uc1-att-band selectuc1-drgrt-att-bas its DRG route table.
Step 07: Configure the VCN route tables
The instances must know that the shadow CIDR of the other VCN is reachable through the DRG. An instance in VCN A talks to VCN B on 192.168.20.0/24, so that is the destination you route to the DRG in VCN A. The real CIDR 10.0.1.0/24 is never routed to the DRG, because for the instance that range is its own local subnet.
- In
uc1-vcn-a, click on the Routing tab and click on the route tableuc1-rt-a. This is the route table that is assigned touc1-subnet-a. - Click on the Route Rules tab.
- Add a route rule for the shadow CIDR of the other VCN, so that the route table has these two route rules:
0.0.0.0/0with the targetuc1-igw-a, for SSH access from the internet.192.168.20.0/24(the shadow CIDR of VCN B) with the targetuc1-drg.
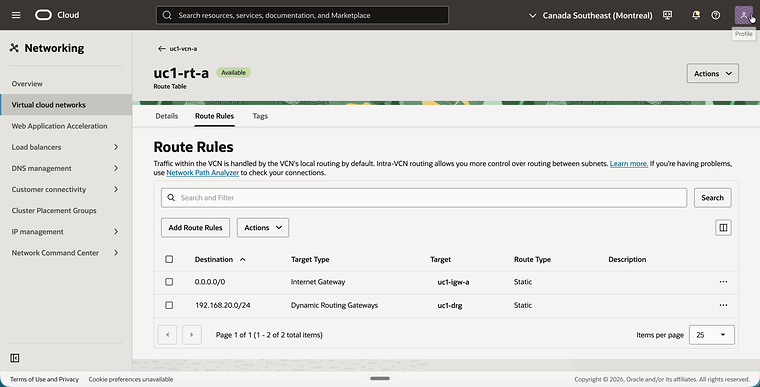
- In
uc1-vcn-b, open the route tableuc1-rt-bin the same way. - Add a route rule for the shadow CIDR of the other VCN, so that the route table has these two route rules:
0.0.0.0/0with the targetuc1-igw-b.192.168.10.0/24(the shadow CIDR of VCN A) with the targetuc1-drg.
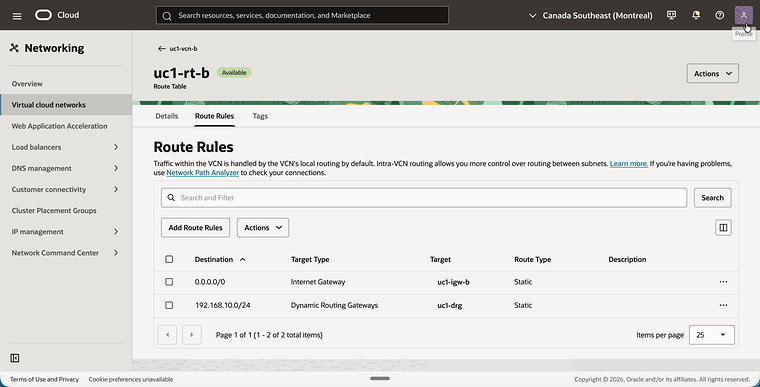
Step 08: Create the DRG NAT policies and rules
This is the step the whole tutorial is about. We create one DRG NAT policy per VCN, and each policy gets one rule. Every rule does two translations at once:
- Source NAT: hide the real address of the sender behind its shadow CIDR.
- Destination NAT: replace the shadow address the sender used with the real address of the receiver.
Remember that a rule describes traffic entering the DRG through the attachment that holds the policy. The policy for VCN A is therefore written from the point of view of VCN A:
| Original | Translated | Meaning | |
|---|---|---|---|
| Source | 10.0.1.0/24 |
192.168.10.0/24 |
VCN A presents itself as 192.168.10.0/24. |
| Destination | 192.168.20.0/24 |
10.0.1.0/24 |
The shadow CIDR of VCN B is replaced with the real CIDR of VCN B. |
The policy for VCN B is the mirror image:
| Original | Translated | Meaning | |
|---|---|---|---|
| Source | 10.0.1.0/24 |
192.168.20.0/24 |
VCN B presents itself as 192.168.20.0/24. |
| Destination | 192.168.10.0/24 |
10.0.1.0/24 |
The shadow CIDR of VCN A is replaced with the real CIDR of VCN A. |
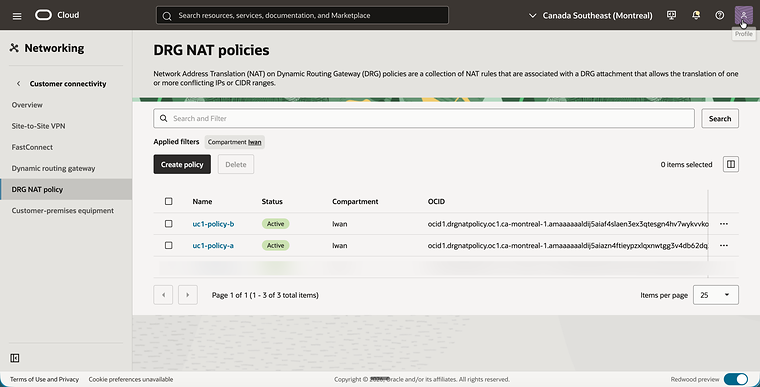
- Open the navigation menu, click on Networking, then on Customer connectivity and then on DRG NAT policy.
- Click on the Create policy button and create a policy with the name
uc1-policy-a. - Create a second policy with the name
uc1-policy-b. - Notice that both policies are Active.
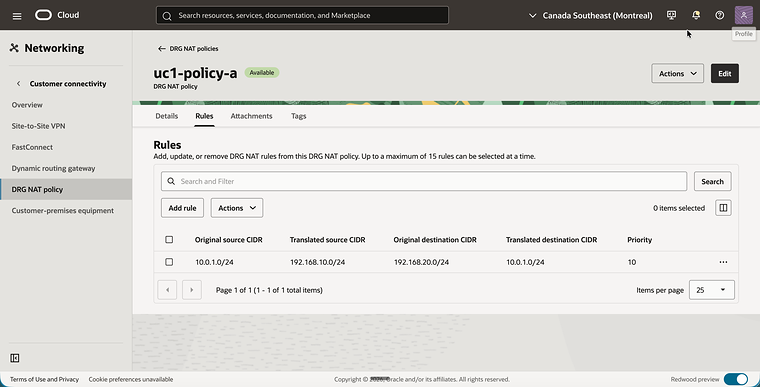
- Click on
uc1-policy-aand click on the Rules tab. - Click on the Add rule button and add a rule with the following values:
- Priority:
10 - Original source CIDR:
10.0.1.0/24 - Translated source CIDR:
192.168.10.0/24 - Original destination CIDR:
192.168.20.0/24 - Translated destination CIDR:
10.0.1.0/24
- Priority:
- Notice that the rule is listed on the Rules tab.
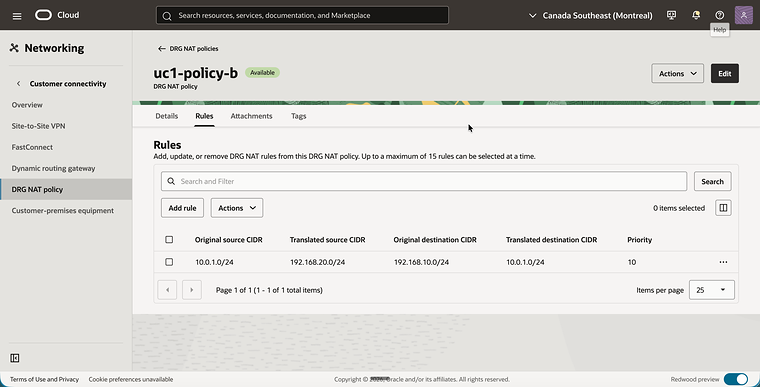
- Go back, click on
uc1-policy-band click on the Rules tab. - Click on the Add rule button and add a rule with the following values:
- Priority:
10 - Original source CIDR:
10.0.1.0/24 - Translated source CIDR:
192.168.20.0/24 - Original destination CIDR:
192.168.10.0/24 - Translated destination CIDR:
10.0.1.0/24
- Priority:
- Notice that the rule is listed on the Rules tab.
Step 09: Associate the NAT policies with the VCN attachments
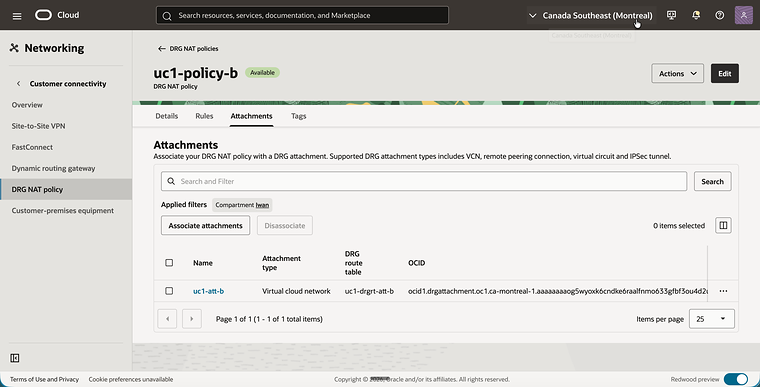
A policy becomes active for traffic when it is associated with a DRG attachment. Each attachment can have one NAT policy. We associate uc1-policy-a with the attachment of VCN A and uc1-policy-b with the attachment of VCN B.
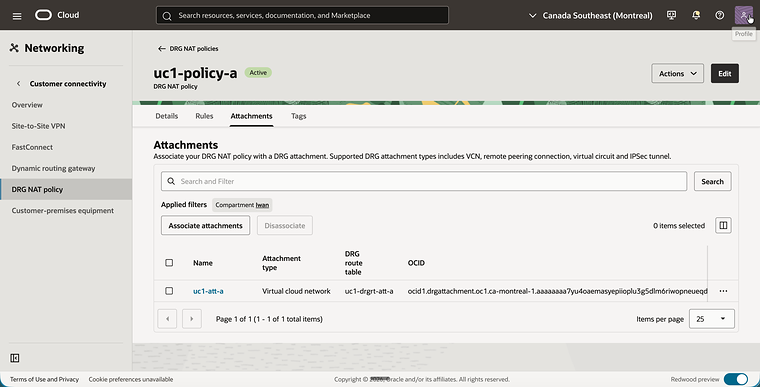
- Click on
uc1-policy-aand click on the Attachments tab. - Click on the Associate attachments button, select
uc1-att-aand confirm. - Notice that
uc1-att-ais listed, together with its DRG route tableuc1-drgrt-att-a.
- Click on
uc1-policy-band click on the Attachments tab. - Click on the Associate attachments button, select
uc1-att-band confirm. - Notice that
uc1-att-bis listed, together with its DRG route tableuc1-drgrt-att-b.
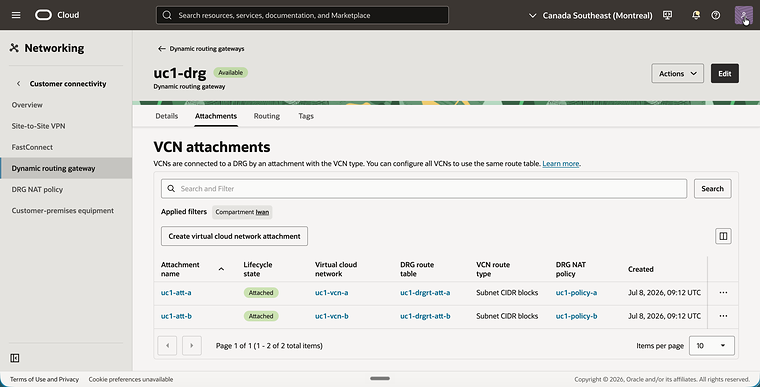
You can verify the complete configuration from the DRG side as well.
- Open the navigation menu, click on Networking, then on Customer connectivity and then on Dynamic routing gateway.
- Click on
uc1-drgand click on the Attachments tab. - Notice that each attachment now has its own DRG route table and its own DRG NAT policy.
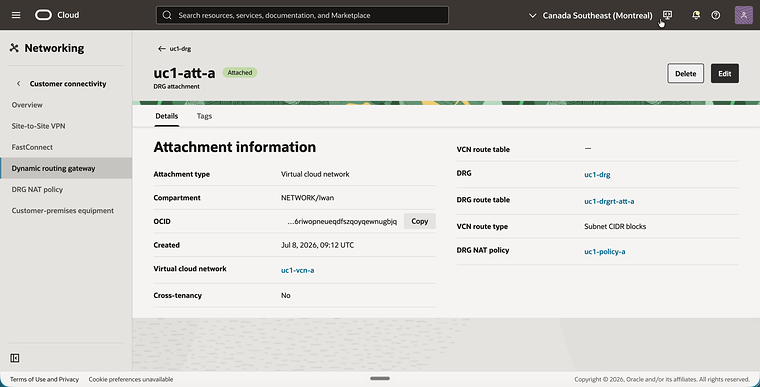
- Click on the attachment
uc1-att-a. - Notice the DRG route table
uc1-drgrt-att-aand the DRG NAT policyuc1-policy-a.
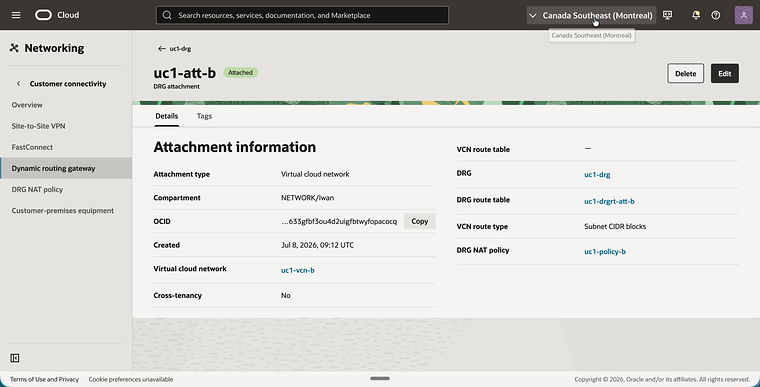
- Go back and click on the attachment
uc1-att-b. - Notice the DRG route table
uc1-drgrt-att-band the DRG NAT policyuc1-policy-b.
Step 10: Test the connectivity
Everything is in place, so it is time to send a packet. The last octet of an address is preserved by the 1:1 translation, which tells you which address to ping:
| Instance | Real IP address | Address to use from the other VCN |
|---|---|---|
uc1-inst-a |
10.0.1.81 |
192.168.10.81 |
uc1-inst-b |
10.0.1.158 |
192.168.20.158 |
This is what happens to a ping from uc1-inst-a to uc1-inst-b:
| Where | Source | Destination | What happens |
|---|---|---|---|
Leaves uc1-inst-a |
10.0.1.81 |
192.168.20.158 |
The route table uc1-rt-a sends 192.168.20.0/24 to the DRG. |
Enters the DRG on uc1-att-a |
192.168.10.81 |
10.0.1.158 |
The rule in uc1-policy-a translates source and destination. |
Route lookup in uc1-drgrt-att-a |
192.168.10.81 |
10.0.1.158 |
10.0.1.0/24 points to uc1-att-b. |
Arrives at uc1-inst-b |
192.168.10.81 |
10.0.1.158 |
The instance sees a ping from the shadow address of uc1-inst-a. |
The reply follows the same steps in the other direction. It leaves uc1-inst-b as 10.0.1.158 to 192.168.10.81, is translated by the rule in uc1-policy-b when it enters the DRG on uc1-att-b, and arrives at uc1-inst-a as 192.168.20.158 to 10.0.1.81.
- Connect to
uc1-inst-awith SSH. - Run
ip aand notice that the instance has the IP address10.0.1.81. - Run
ping -c 5 -W 2 192.168.20.158to ping the shadow address ofuc1-inst-b. - Notice that all five packets are answered.
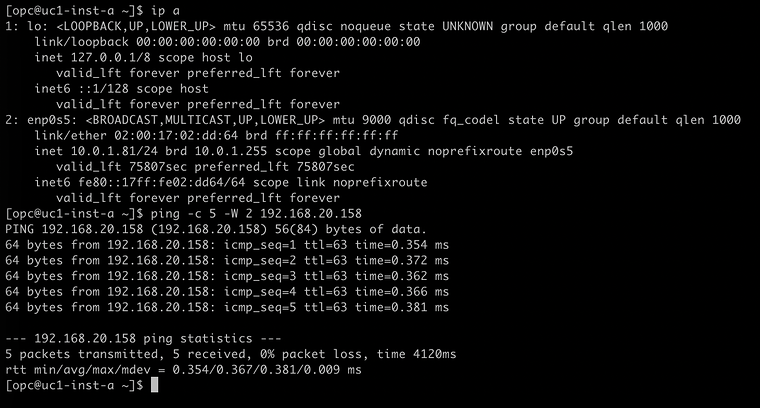
- Connect to
uc1-inst-bwith SSH. - Run
ip aand notice that the instance has the IP address10.0.1.158. - Run
ping -c 5 -W 2 192.168.10.81to ping the shadow address ofuc1-inst-a. - Notice that all five packets are answered.
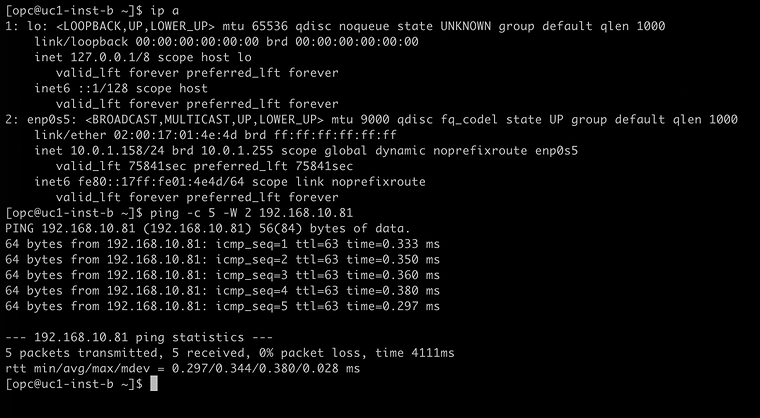
Conclusion
Two VCNs with exactly the same subnet CIDR now communicate privately through a single DRG, without re-addressing either of them and without a firewall or NAT appliance in the path. Each VCN is presented to the other one under a unique shadow CIDR, and the translation is done by the DRG itself.
The configuration comes down to three things that always belong together. A DRG NAT policy with a rule written from the point of view of the network behind the attachment. A DRG route table per attachment that routes on the address after translation. And a VCN route table that sends the shadow CIDR of the other side to the DRG. If one of the three is missing, the translation may still happen but the packet has nowhere to go.
The same three building blocks return in the rest of the series. In NAT on DRG Part 2: Overlapping CIDRs between multiple remote VCNs the two VCNs move to different regions and the translation happens on a remote peering connection.
Related articles