Deploy a NFV Lab with VMware TCA and VCD
Summary
Last year VMware released the VMware Telco Cloud Automation (TCA) platform, which is a platform designed to help Cloud Service Providers (a.k.a. Telcos) onboard new applications, automate the design and deployment of both Virtual Network Functions (VNFs) and Cloud-native Network Functions (CNFs).
This article will give you detailed step-by-step instructions to get started with testing out how TCA is set up and how this integrates with all other Software-Defined Data Center (SDDC) components. In this article, I will use VMware Cloud Director (VCD) as the Network Function Virtualisation (NFV) Virtualised Infrastructure Manager (VIM).
Previous Publications
My colleague Gary Day already published about this topic a year ago, and a lot has changed since then... and when I asked him about an update he told me he was too busy and when I told him that his article contains old outdated information he told me "The movement you start to blog about something 5 minutes after the release, it is old already..." Good joke Gary, but I am doing this updated article anyway.
The reasons why TCA is used are:
- There are a number of challenges in the Management and Orchestration (MANO) space, Telcos are seeing a real lack of cloud expertise by many of the vendors
- The vendor lock-in approach is also common when you take my VNF you have to take my MANO / VNFM stack, this helps with efficiency but doesn’t really solve the promise of an open, agnostic NFV Infrastructure.
- There are also challenges with integration, adhering to ETSI standards that have made the progress towards MANO slower than most would have liked.
The Diagram
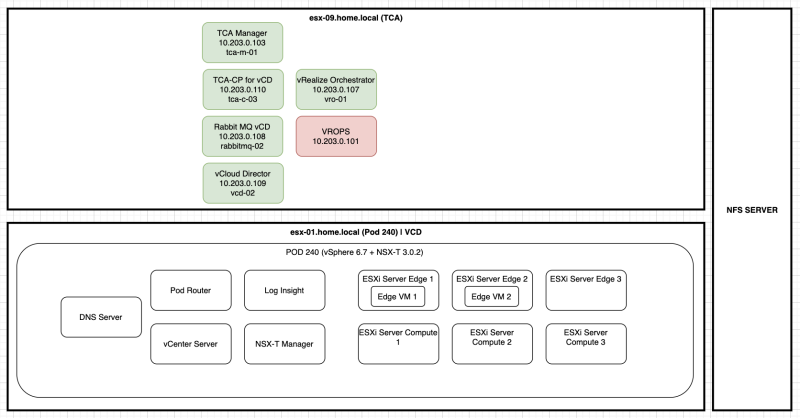
For better understanding let's first start with a diagram with all the components that I used to build this (nested) lab.
Prerequisites
TCA and VCD will need a full-blown SDDC to work with. other than that a Rabbit MQ server is required to "glue" TCA and VCD together in terms of operation.
I don't think I have to mention this but I will do it anyway, you also need to have licenses for everything including VCD and TCA.
Deployment Steps
I have "chopped" the deployment steps up in higher levels so that is easier to understand what steps need to be taken. Each step will obviously consist out of substeps and I will go through all steps in the detailed form below.
- STEP 1: Deploy the vSphere and NSX-T Infrastructure (your plain SDDC Infra)
- STEP 2: Deploy a new vRealize Orchestrator Appliance
- STEP 3: Deploy a new VMware Cloud Director Appliance
- STEP 4: Deploy a new Rabbit MQ Server
- STEP 5: Integrate VMware Cloud Director with Rabbit MQ
- STEP 6: Deploy a new Telco Cloud Automation Server (with the Manager Role)
- STEP 7: Deploy a new Telco Cloud Automation Server (with the Control Plane Role)
- STEP 8: Configure VMware Cloud Director (prepare the integration with (Telco Cloud Automation server)
- STEP 9: Integrate VMware Cloud Director with Telco Cloud Automation (Control Plane)
- STEP 10: Integrate Telco Cloud Automation (Control Plane) with Telco Cloud Automation (Manager)
- STEP 11: Create Compute Profile
The software versions that I have worked on within this lab are almost based on the VMware Telco Cloud Infrastructure – Cloud Director Edition 1.0 Release Notes.
So I am using:
- VMware vCenter Server and ESXi 6.7 Update 3
- VMware vRealize Orchestrator Appliance 8.3 (I should have used VMware vRealize Orchestrator Appliance 8.1 to be fully in line with the VMware Telco Cloud Infrastructure – Cloud Director Edition 1.0 Build of Material (BoM) list, but I have chosen not to)
- VMware NSX-T Data Center Advanced Edition 3.0.2
- VMware vRealize Log Insight 8.1.1
- VMware vSAN 6.7 U3 Standard Edition
- VMware Cloud Director 10.2 (I should have used VMware Cloud Director 10.1.2 to be fully in line with the VMware Telco Cloud Infrastructure – Cloud Director Edition 1.0 Build of Material (BoM) list, but I have chosen not to)
- RabbitMQ server 3.8 with Erlang/OTP 24 on top of Ubuntu 20.04
- VMware Telco Cloud Automation 1.9.5
I have not deployed VMware vRealize Operations Manager 8.1.1 Advanced Edition yet in this article, I will update this article later with this or write a new article when this is added.
STEP 1: Deploy the vSphere and NSX-T Infrastructure (your plain SDDC Infra)
I am not going to explain to you how to build a full-blown SDDC with vSphere and NSX in this article as I have already done that in one of my other articles → NSX-T (nested) Lab with (3) different sites (and full (nested) SDDC deployment)
STEP 2: Deploy a new vRealize Orchestrator Appliance
vRealize Orchestrator (vRO) is a modern workflow automation platform that simplifies and automates complex data center infrastructure tasks for increased extensibility and agility.
I have chosen not to deploy VMware vRealize Orchestrator Appliance 8.1 and in order to make this choice, I went over the VMware interoperability matrix to verify what "newest" version I could use whiteout getting into trouble and I am can also use version 8.3.
The deployment of vRO is pretty straight forward and with the use of an OVA the deployment is pretty much a click next-next-next-finish task. So I will not discuss any detailed steps of this here. Besides that you can find plenty of articles that have already been written about this like this or this article for example.
Once installed you need to start the "pre-configuration" of vRO.
Log in with the username "root" and the password you provided during the deployment.
The following screen will pop up.
I wanted to make sure that the hostname was configured correctly so I clicked on "Host Settings"
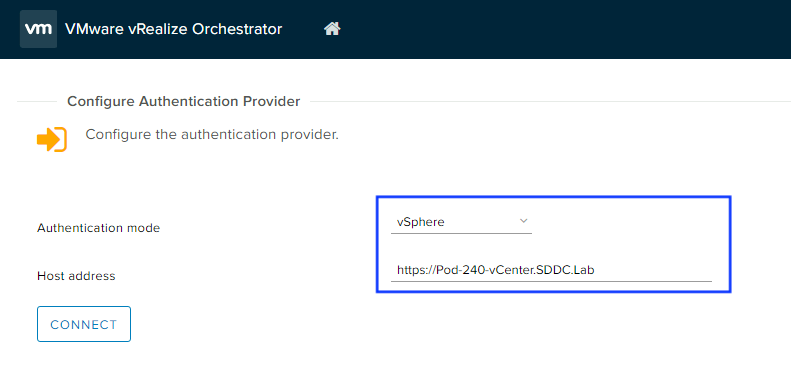
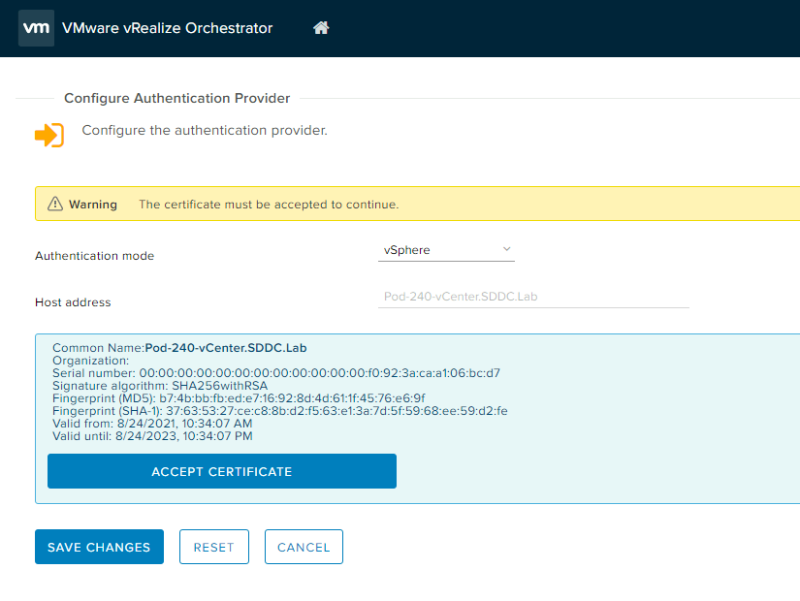
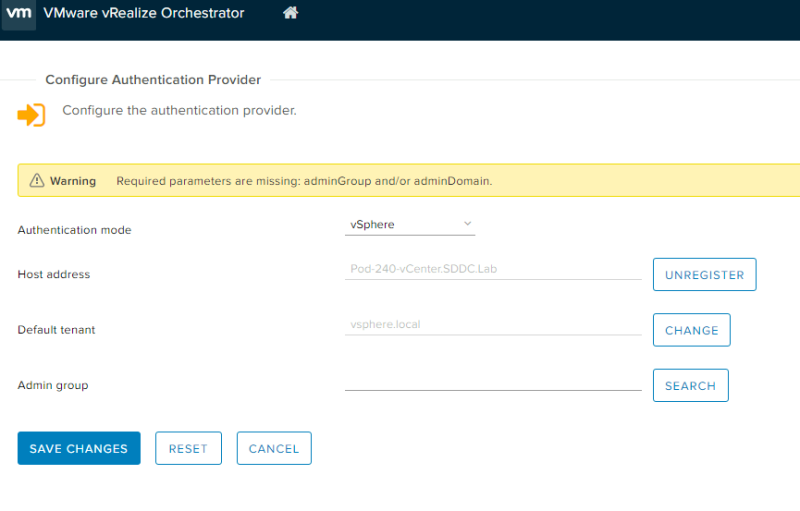
Next you need to click on "Configure Authentication Provider" to configure the authentication provider. Use your vCenter Server host here:
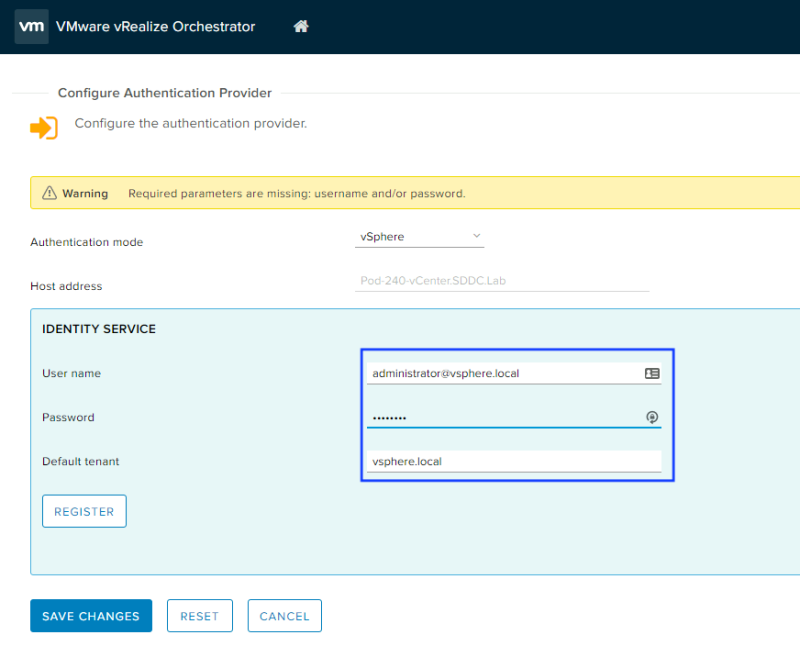
Use the correct vSphere credentials here:
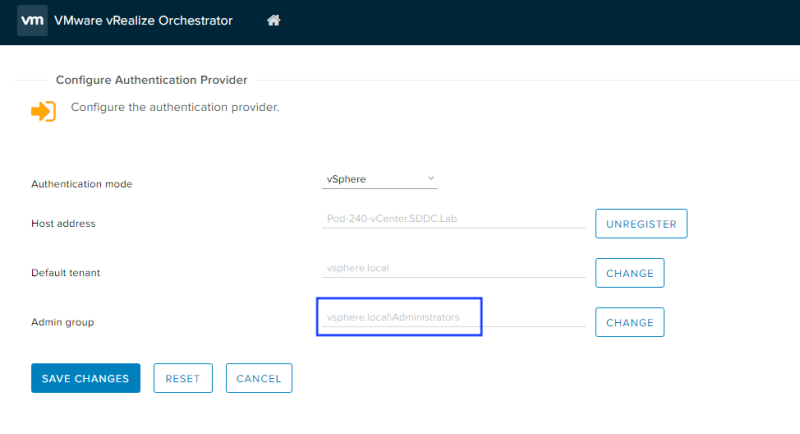
Select the proper "Admin Group"
The deployment and configuration/preparation of vRO is now finished are you will use the appliance later where this needs to be integrated with the TCA (Control Plane).
STEP 3: Deploy a new VMware Cloud Director Appliance
The deployment of VCD is pretty straight forward and with the use of an OVA the deployment is pretty much a click next-next-next-finish task. So I will not discuss any detailed steps of this here. Besides that, you can find plenty of articles that have already been written about this like this.
Below I have only given pointers on how to finetune the deployment a bit without running into issues later on.
Update DNS records
There is no way to specify the hostname during the deployment of VCD. A Lot of us just take this for granted, but when you do not have a correct PTR record in your DNS server your hostname will not be correctly populated. I learned this the hard way, unfortunately.
As I am using BIND for DNS I needed to alter some BIND files
sudo nano /var/lib/bind/db.sddc.lab

user $ORIGIN sddc.lab.
vcd-01                  A       10.203.0.101
sudo nano /var/lib/bind/db.10.203

user $TTL 604800     ; 1 week
101                     PTR     vcd-01.sddc.lab.
Restart BIND:
   sudo systemctl restart named

BIND Status (Useful to show errors in configuration)
   sudo systemctl status named
VCD interfaces and static routes
During the deployment, you can also add in static routes, as my complete SDDC is behind a router and on a different subnet I have specified some static routes. In the lab diagram, you only see POD240 (SDDC) but I also have a POD230 that is out of scope for this article.
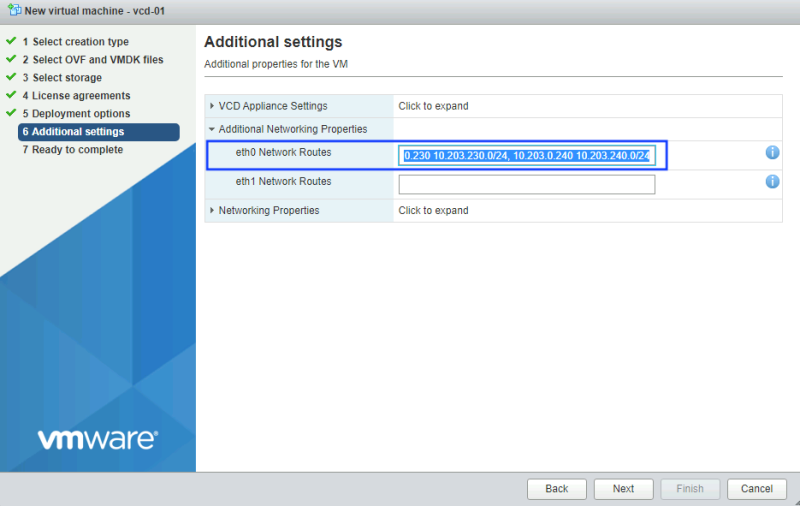
I have added routes for VCD so it knows how to reach POD230 and POD240.
10.203.0.230 10.203.230.0/24, 10.203.0.240 10.203.240.0/24
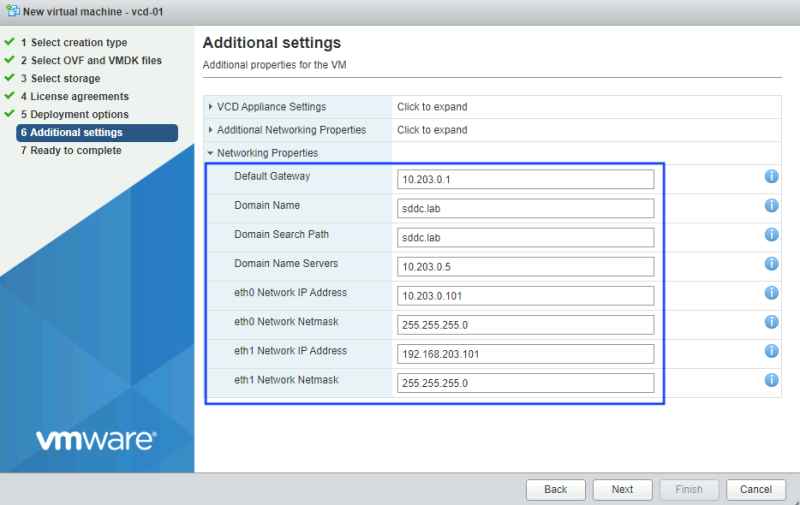
Deploy the VCD Appliance using the OVF deployment and specify all the correct parameters.
Specify network settings on VCD-01.
The VCD appliance has two interfaces:
- eth0
- This interface is used for the management
- eth1
- This interface is used for the Database sync in a High Availability deployment of VCD
- This Subnet/IP needs to be different than the eth0 one
- This IP address should not be routable (when this is routable the management interface may not be reachable and will result in a failure during the initial installation)
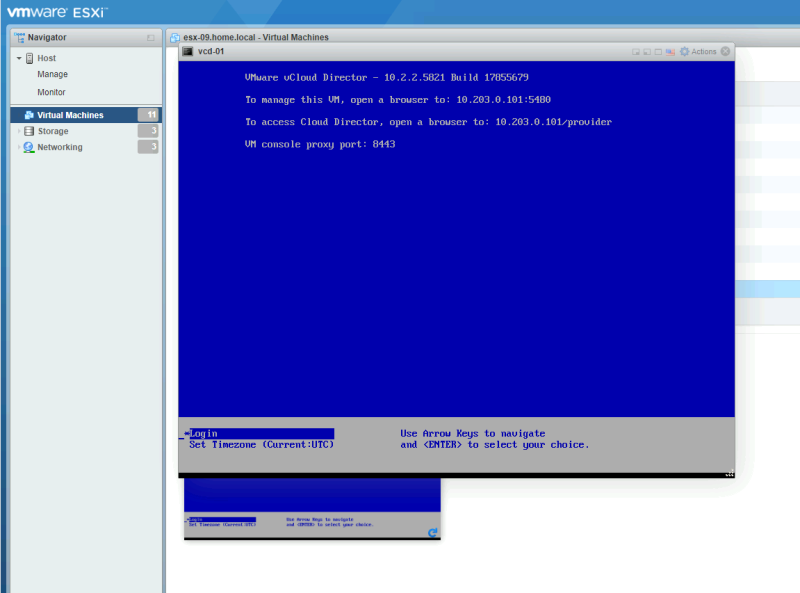
When the VCD Appliance is deployed correctly you will see the following screen on the console.
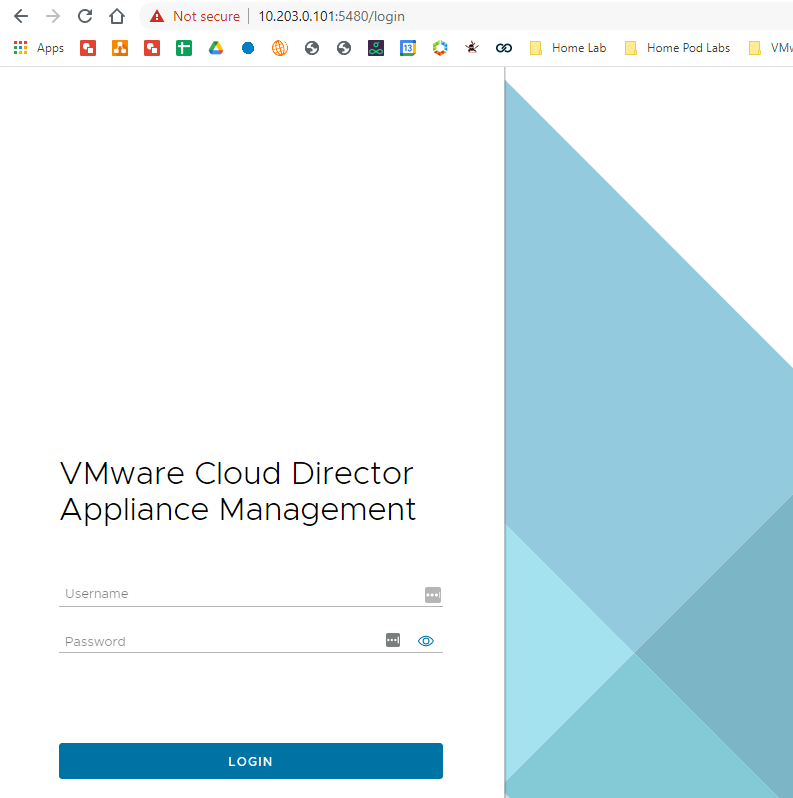
Log in to the new VCD appliance using the VAMI interface to do the initial configuration using "root" and the password you have specified during the deployment.
When you are logged in it is time for the initial configuration.
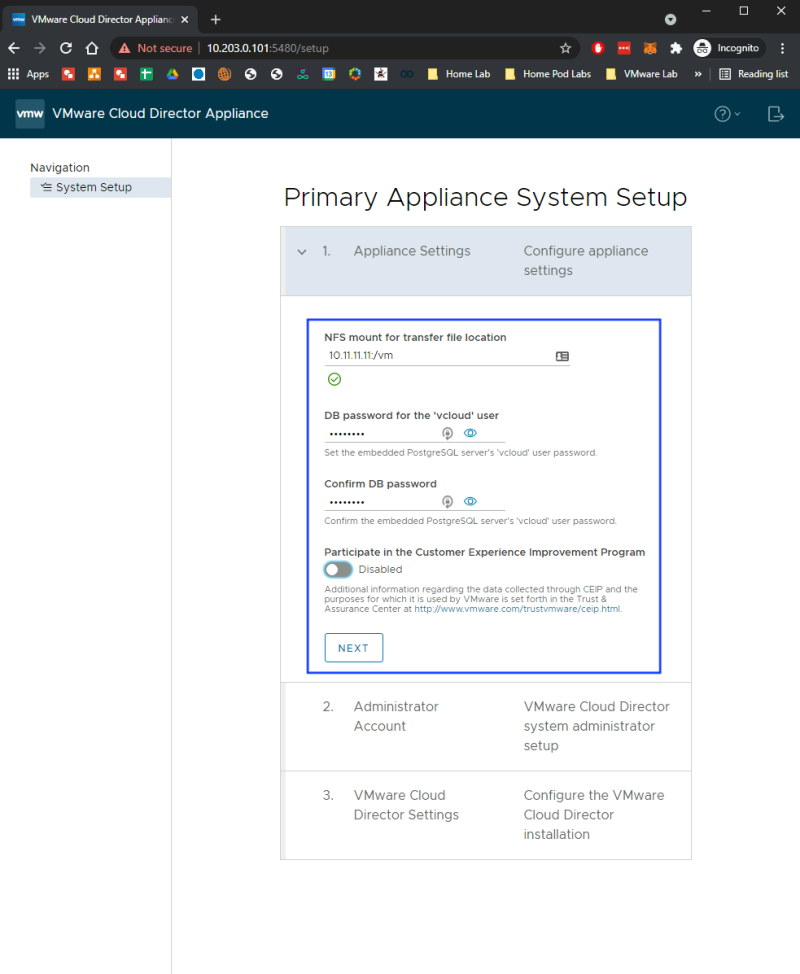
First, you need to specify the NFS mount and passwords for VCD (DB and GUI).
The NFS mount needs to be a unique mount for each VCD deployment. The best thing you can do is create a separate folder with a separate NFS mount for each VCD deployment you do (in a lab).
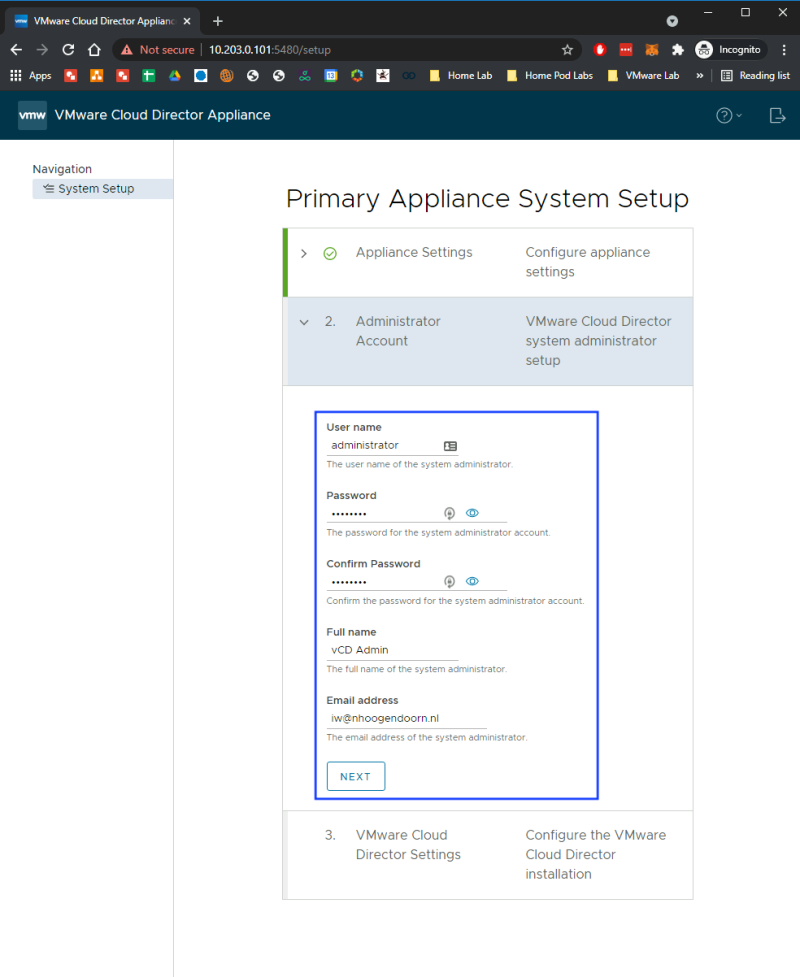
Now it is time to specify the "system administrator" username, password, name and email address.
Last you specify the system name and the installation ID.
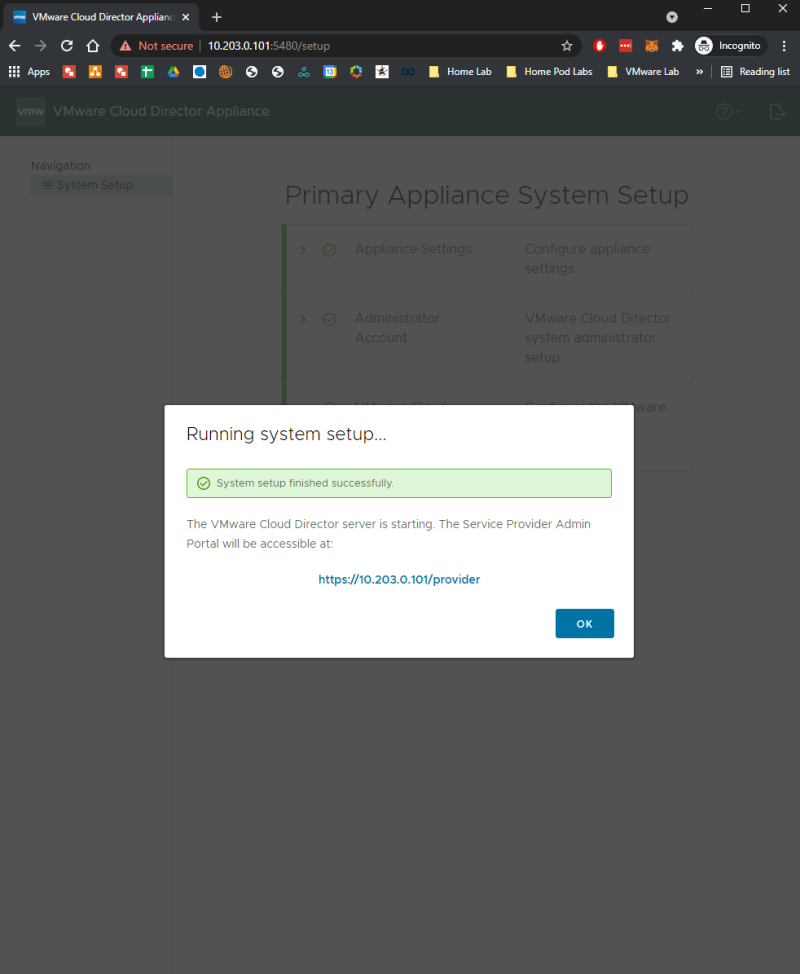
When you submitted the settings and the configuration is done correctly you will get the following screen and you are able to browse to the VCD Service Provider Admin Portal of VCD.
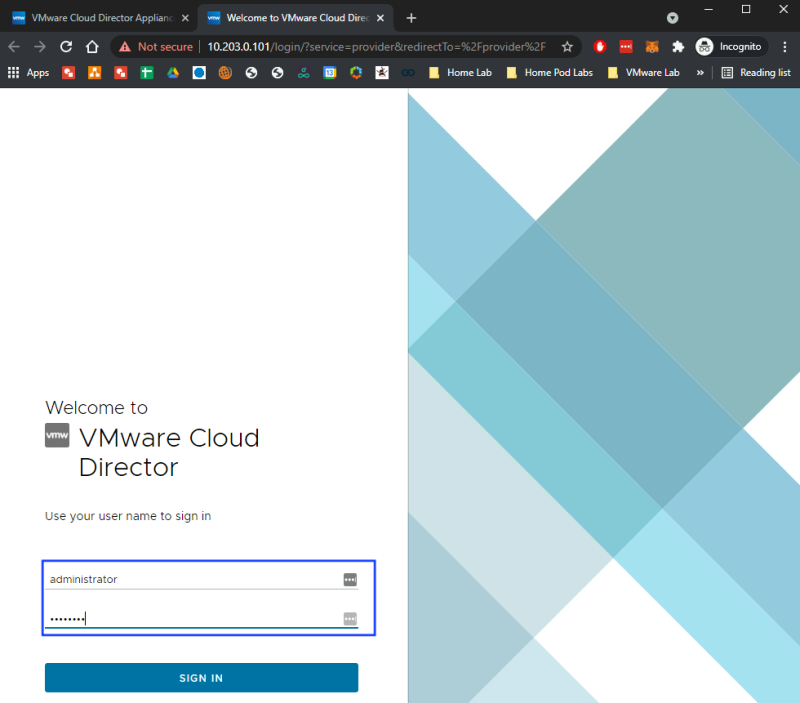
Log in to the Service Provider Admin Portal using the "administrator" username with the password (you just specified).
When everything is ok, your screen should look like this:
STEP 4: Deploy a new RabbitMQ Server
I installed RabbitMQ on an Ubuntu 20.04 server using the instructions on this website.
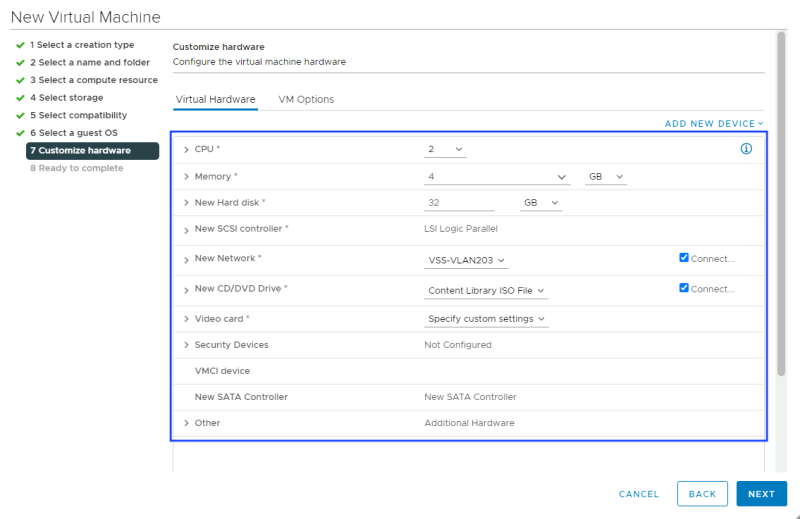
The Virtual Machine hardware specs that I used are :
Before RabbitMQ can be installed you first need to install Erlang and the instructions for this are given here.
I did a quick check if Erlang was successfully installed:
administrator@rabbitmq-02:~$ erl
Erlang/OTP 24 [erts-12.0.3] [source] [64-bit] [smp:2:2] [ds:2:2:10] [async-threads:1] [jit]

Eshell V12.0.3  (abort with ^G)
1>
Because the VCD may have some interoperability issues with RabbitMQ version 3.9 (the latest version) I decided to deploy the RabbitMQ server with a specific version (3.8).
administrator@rabbitmq-02:~$ sudo apt-get install rabbitmq-server=3.8.22-1
After the deployment, I did a quick check if the RabbitMQ service was running on the server.
administrator@rabbitmq-02:~$ systemctl status  rabbitmq-server.service
● rabbitmq-server.service - RabbitMQ broker
     Loaded: loaded (/lib/systemd/system/rabbitmq-server.service; enabled; vendor preset: enabled)
     Active: active (running) since Mon 2021-09-06 11:20:34 UTC; 1min 48s ago
   Main PID: 33392 (beam.smp)
      Tasks: 24 (limit: 4617)
     Memory: 91.4M
     CGroup: /system.slice/rabbitmq-server.service
             ├─33392 /usr/lib/erlang/erts-12.0.3/bin/beam.smp -W w -MBas ageffcbf -MHas ageffcbf -MBlmbcs 512 -MHlmbcs 512 -MMmcs 30 -P 1048576 -t 5000000 -stbt db -zdbbl 128000 -sbwt none -sbwtdcpu none -sbwtdio none -- -root /usr/lib/erl>
             ├─33403 erl_child_setup 32768
             ├─33449 /usr/lib/erlang/erts-12.0.3/bin/epmd -daemon
             ├─33472 inet_gethost 4
             └─33473 inet_gethost 4

Sep 06 11:20:29 rabbitmq-01 rabbitmq-server[33392]:   Doc guides:  https://rabbitmq.com/documentation.html
Sep 06 11:20:29 rabbitmq-01 rabbitmq-server[33392]:   Support:     https://rabbitmq.com/contact.html
Sep 06 11:20:29 rabbitmq-01 rabbitmq-server[33392]:   Tutorials:   https://rabbitmq.com/getstarted.html
Sep 06 11:20:29 rabbitmq-01 rabbitmq-server[33392]:   Monitoring:  https://rabbitmq.com/monitoring.html
Sep 06 11:20:29 rabbitmq-01 rabbitmq-server[33392]:   Logs: /var/log/rabbitmq/rabbit@rabbitmq-01.log
Sep 06 11:20:29 rabbitmq-01 rabbitmq-server[33392]:         /var/log/rabbitmq/rabbit@rabbitmq-01_upgrade.log
Sep 06 11:20:29 rabbitmq-01 rabbitmq-server[33392]:         <stdout>
Sep 06 11:20:29 rabbitmq-01 rabbitmq-server[33392]:   Config file(s): (none)
Sep 06 11:20:34 rabbitmq-01 rabbitmq-server[33392]:   Starting broker... completed with 0 plugins.
Sep 06 11:20:34 rabbitmq-01 systemd[1]: Started RabbitMQ broker.

administrator@rabbitmq-01:~$
Before you can log in to the RabbitMQ Management Web dashboard (when installed) you need some login credentials.
sudo rabbitmqctl add_user **administrator** VMware1
sudo rabbitmqctl set_user_tags administrator administrator
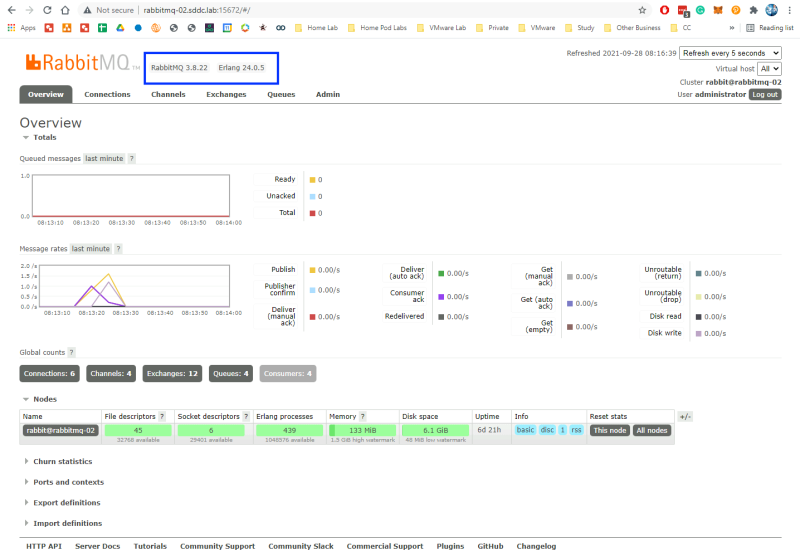
Once the login credentials are created you can log in to the RabbitMQ Management Web dashboard that is listening on port TCP/15672.
STEP 5: Integrate VMware Cloud Director with RabbitMQ
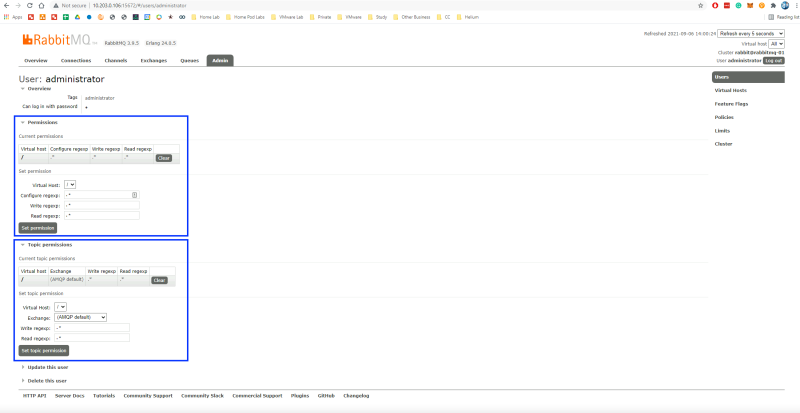
Assign permissions to the administrator user (on the RabbitMQ server)
- Click on the "admin" tab
- Click on the the "administrator" user
- Click on "Set permission"
- Click on "Set topic permission"
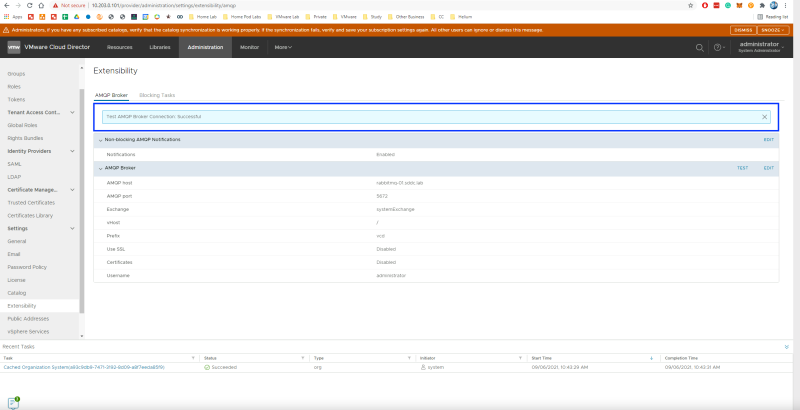
Integrate the RabbitMQ server (on the VCD server)
- Click on the "Administration" tab
- Click on "Extensibility"
- Click on Edit
- Add the RabbitMQ Server settings
- Enable Non-blocking AMQP Notifications
Test the RabbitMQ Server by clicking on "Test".
Once this is tested successfully you can continue with the rest.
add additional "exchange" (on the RabbitMQ server)
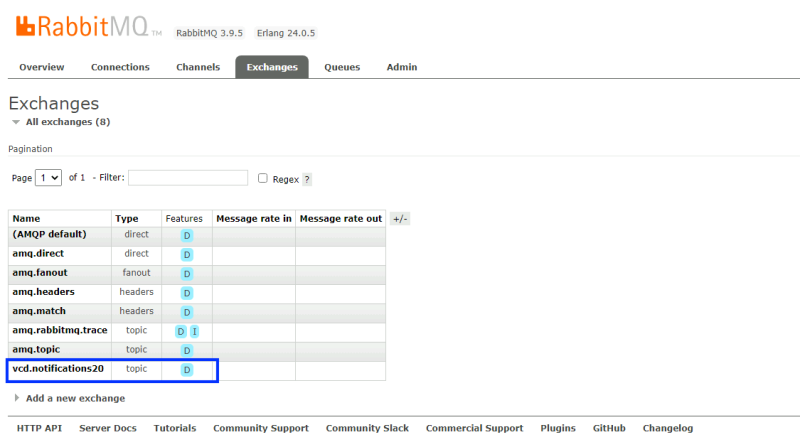
The exchange "vcd.notifications20" was automatically created and you can verify that by going to the "Exchanges" tab.
You can also click on the "Queues" tab, but this will be empty at this point.
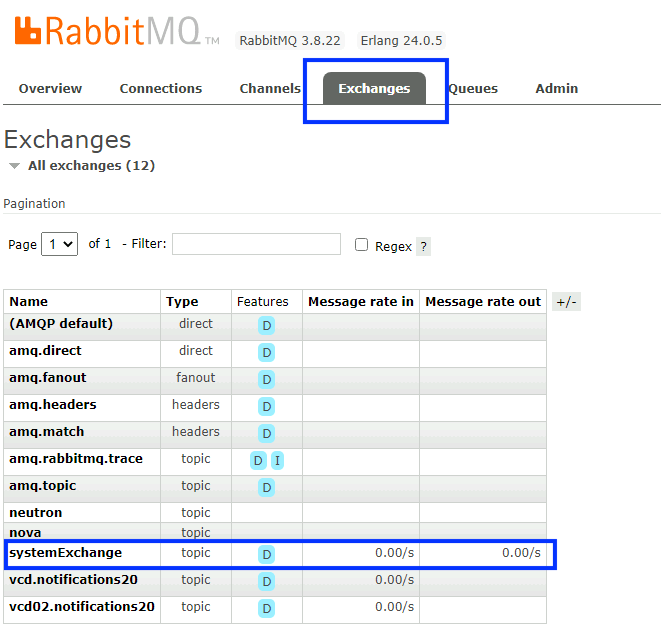
I also created an additional Exchange (with the name "systemExchange") but I am not sure if this is really required (as VCD used this exchange explicitly in the config).
STEP 6: Deploy a new Telco Cloud Automation Server (with the Manager Role)
First, you deploy a TCA with the role "Manager" and then you deploy a TCA (or multiple TCA's) with the role "Control Plane".
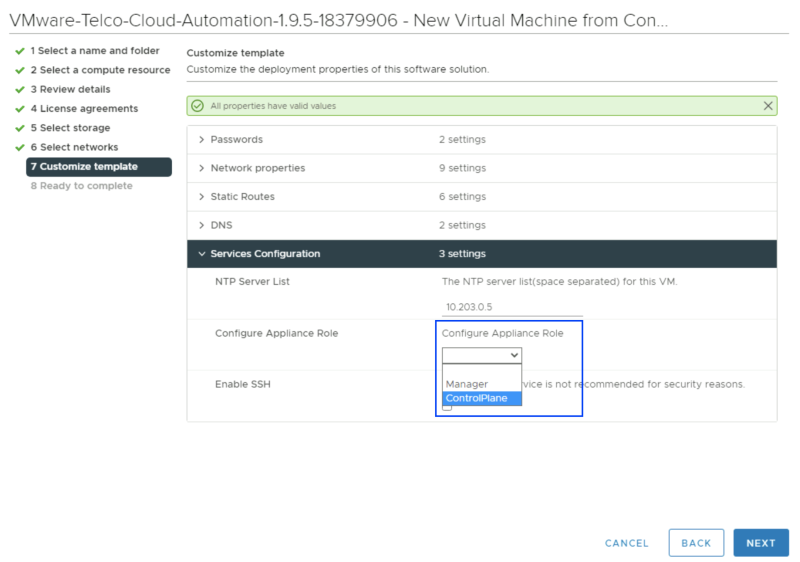
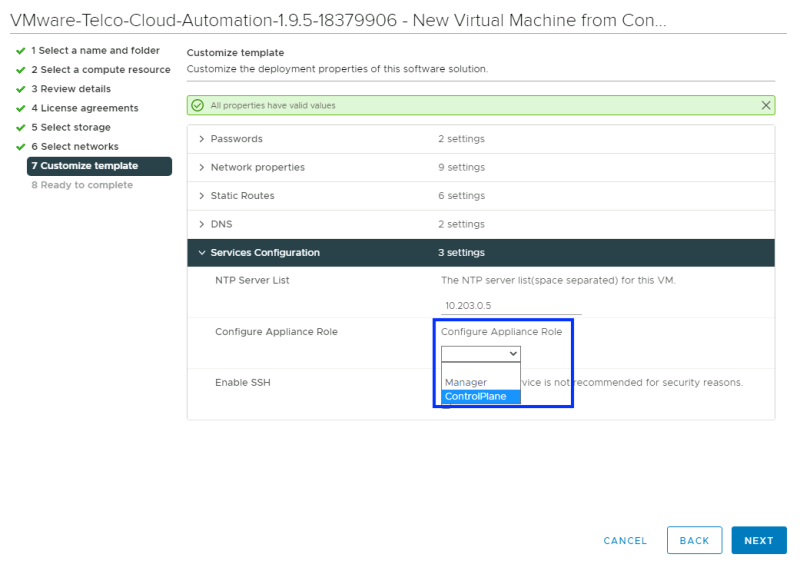
Just do a regular OVA deployment, and have your IP address, NTP, DNS, and password information ready. You will get the option to "Configure Appliance Role" and since you are deploying the Manager first you select manager here.
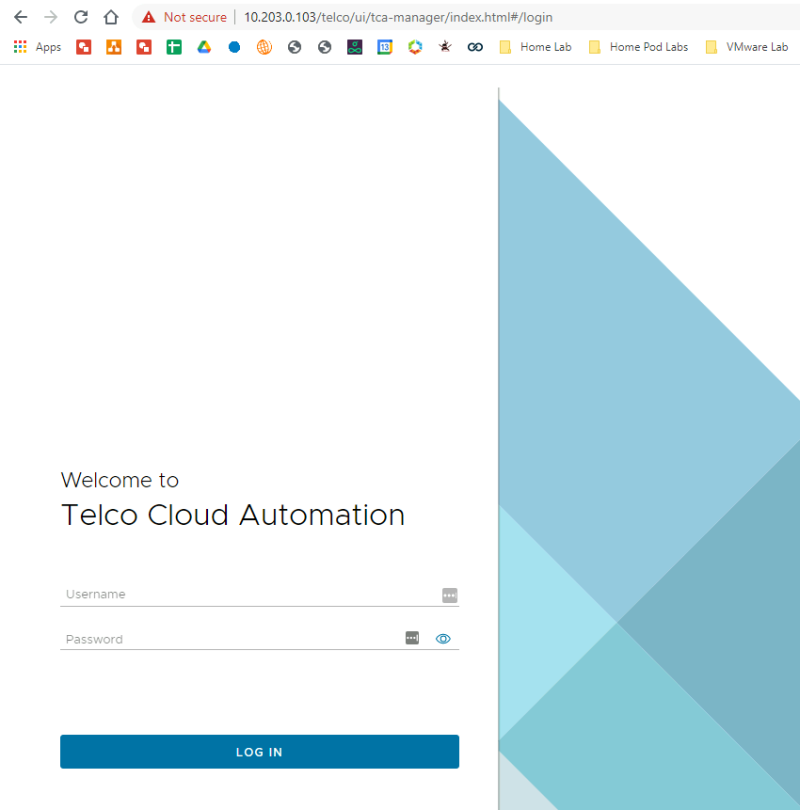
When the deployment is finished you can log in to the non-VAMI part with the username "administrator" and the password you specified during the deployment.
There is not much to see here yet. You first need to do the initial configuration using the VAMI GUI.
NOTE: You can log in to the non-VAMI and VAMI interface, but the credentials are going to be different :
- NON-VAMI BEFORE CONFIGURATION: Username = administrator / Password = what you specify during the OVA deployment.
- VAMI BEFORE CONFIGURATION: Username = admin / Password = what you specify during the OVA deployment.
- NON-VAMI AFTER CONFIGURATION: Username / Password = your vCenter Server credentials.
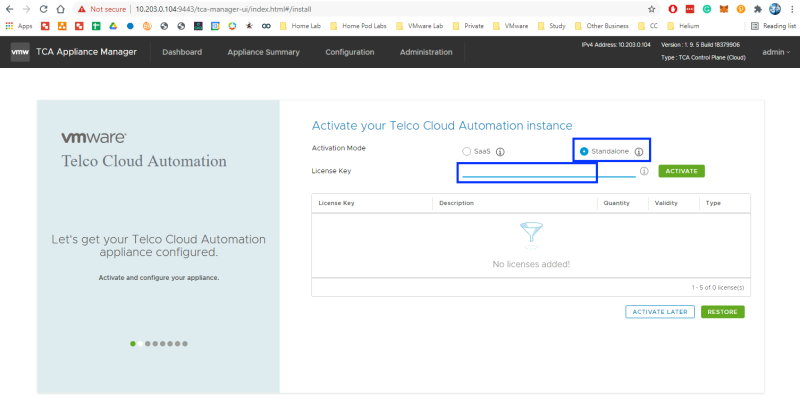
The license key is added as one of the first steps by doing the initial configuration using the VAMI GUI.
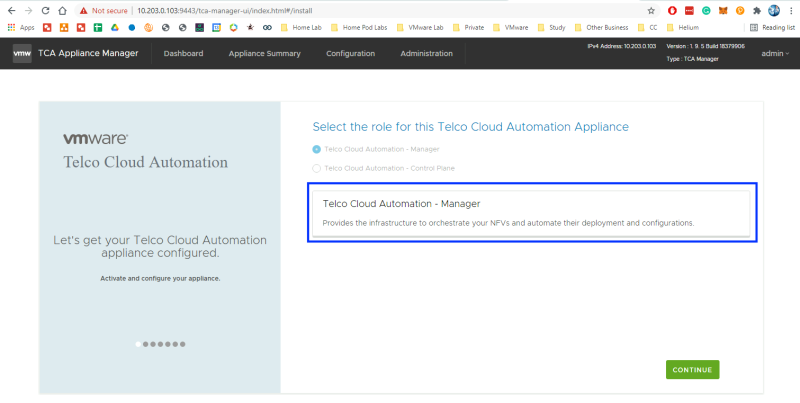
When you are logged in you will get a welcome screen and notice the word "Manager". This will tell you that the role you deployed is correct and you are configuring the correct TCA.
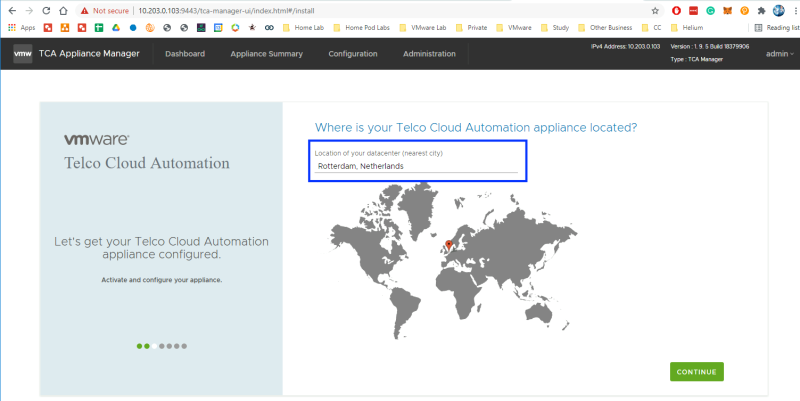
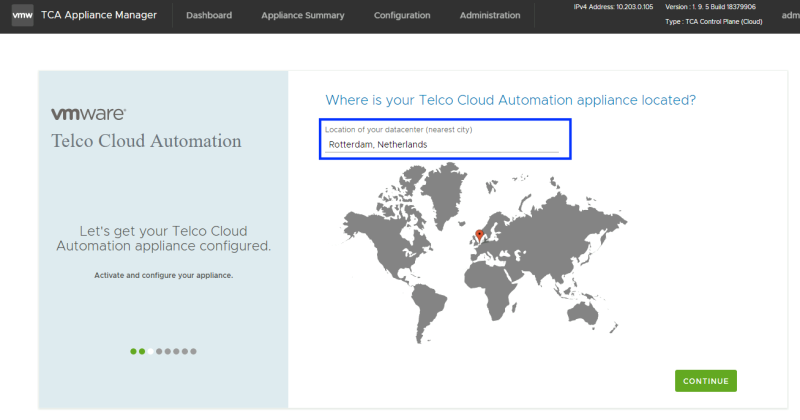
Specify your location of the TCA.
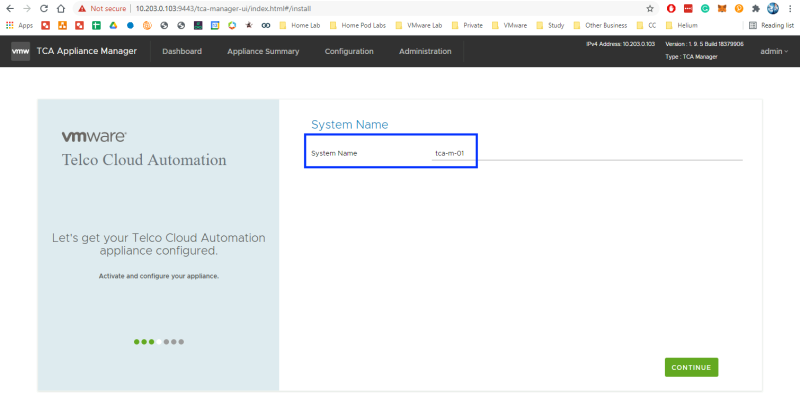
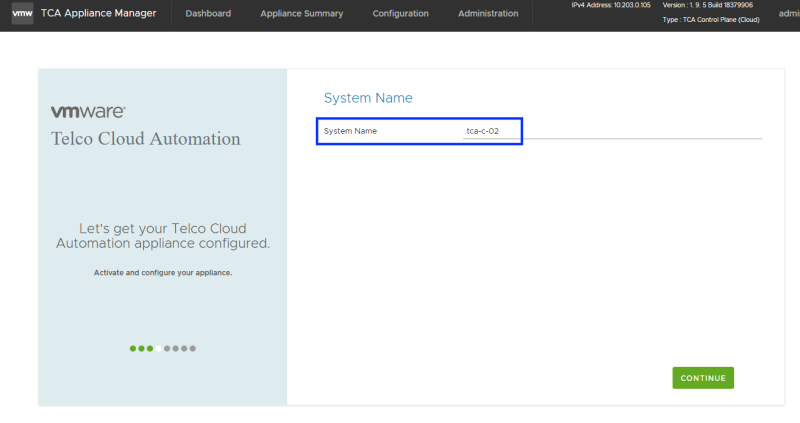
Specify the system name of the TCA.
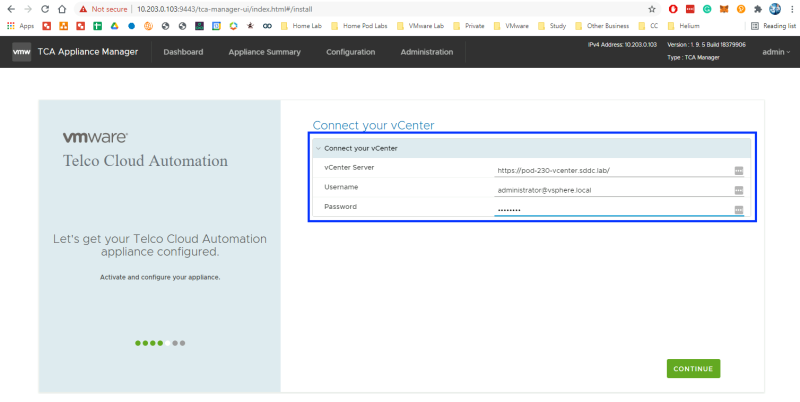
Connect to your vCenter Server.
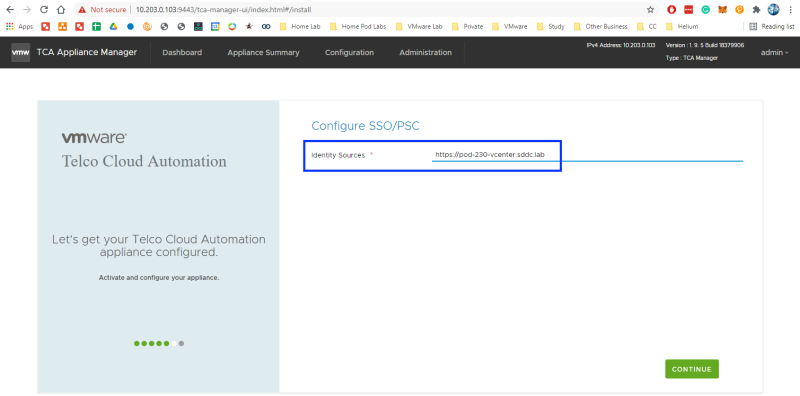
Configure SSO.
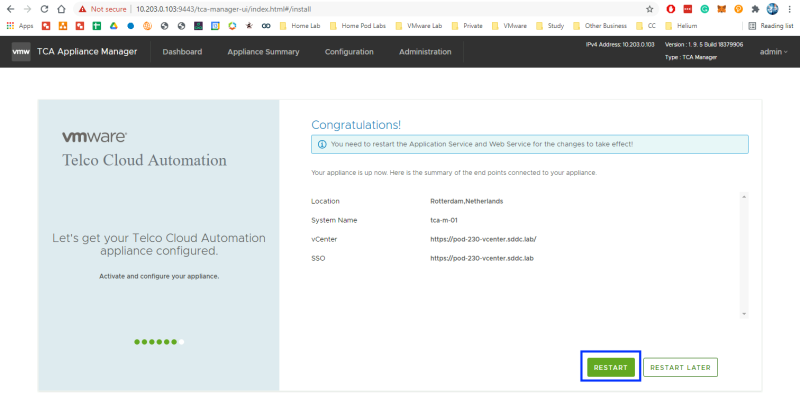
Restart the TCA to finish the initial configuration.
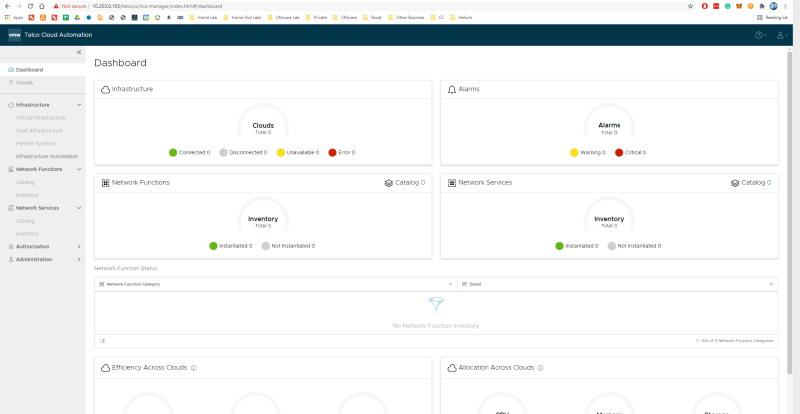
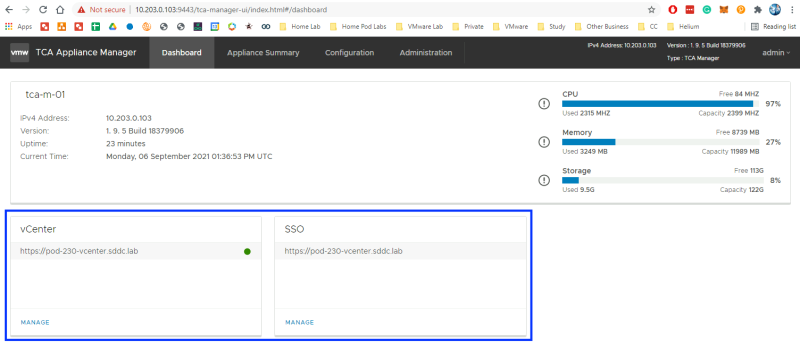
Once restarted the Dashboard of the TCA (Manager) should look like this.
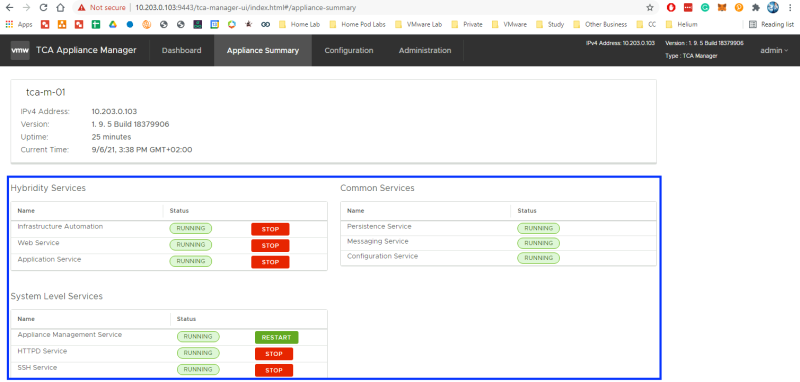
When you click on the "Appliance summary" tab you can view the running services.
STEP 7: Deploy a new Telco Cloud Automation Server (with the Control Plane Role)
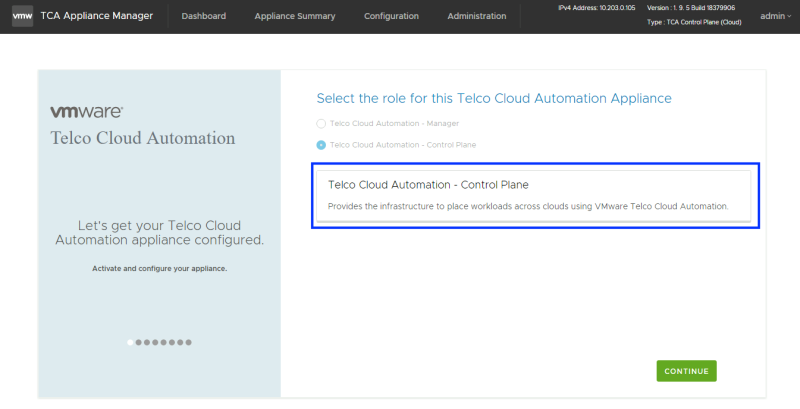
Now that the TCA Manager is deployed you follow the exact same steps for deployment, but this time you select the Control Plane Role.
The initial configuration of the TCA Control plane will be done in STEP 9.
Lets first "prepare" the VCD so it can be integrated with the TCA Control Plan in one go
STEP 8: Configure VMware Cloud Director (prepare the integration with (Telco Cloud Automation server)
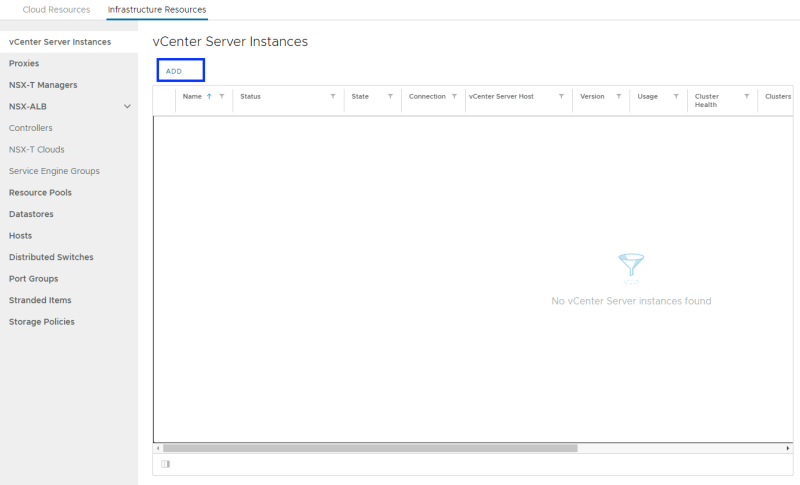
Add vCenter Server + NSX-T Manager
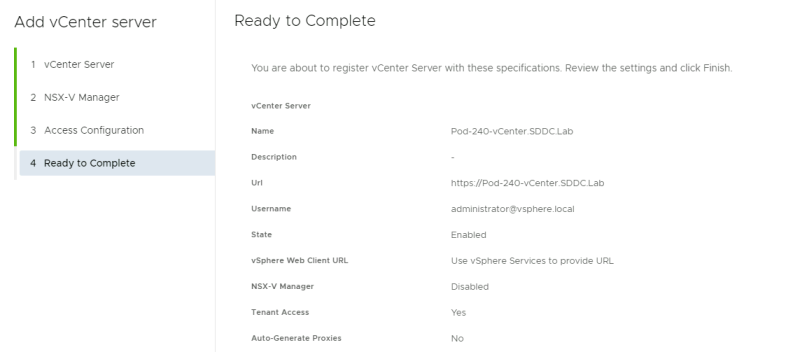
In order to provide compute resources to our VNF, you need to add a vCenter Server to VCD.
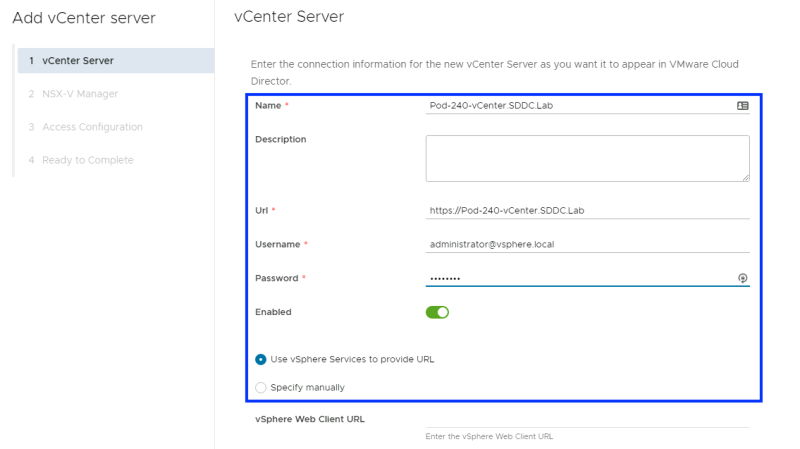
Specify all the details required to connect to the vCenter Server.
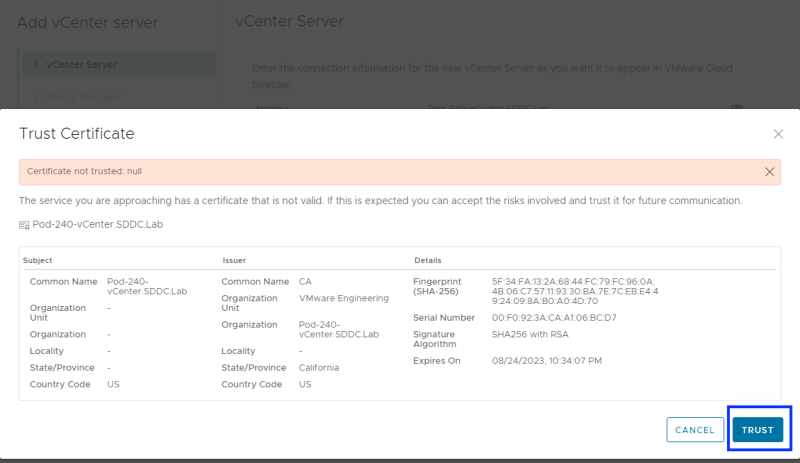
Trust the SSL certificate (as I am using self-signed certificates everywhere).
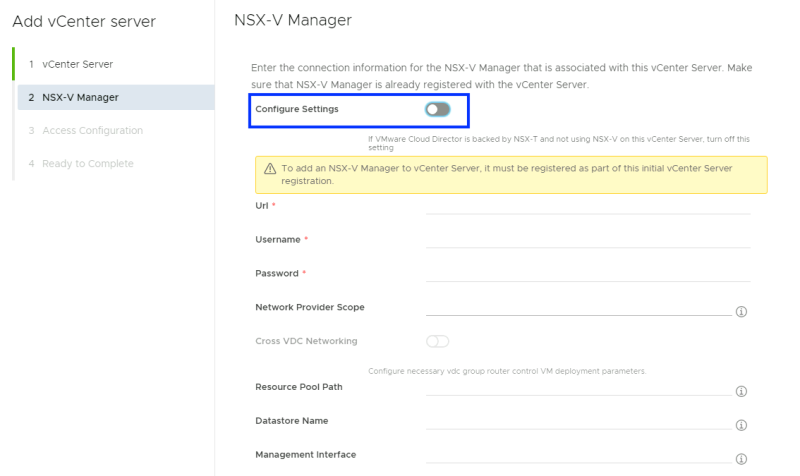
Skip the NSX-v integration part, as you are using NSX-T these days.
Configure the Access.
Finish the integration.
Verify if the vCenter Server is correctly integrated without any errors.
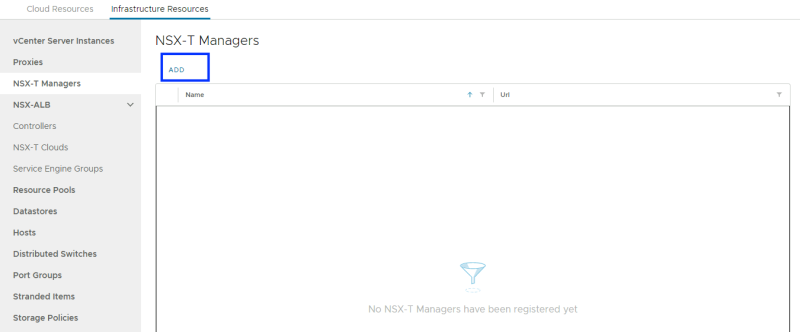
Now you need to integrate the NSX-T Manager.
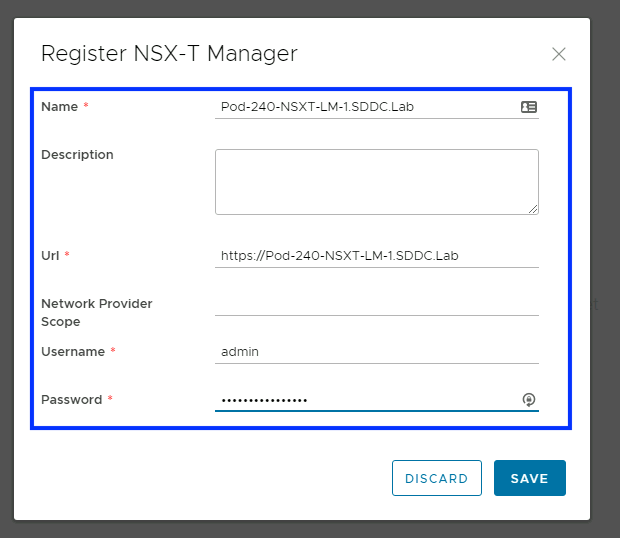
Specify all the details required to connect to the NSX-T Manager.
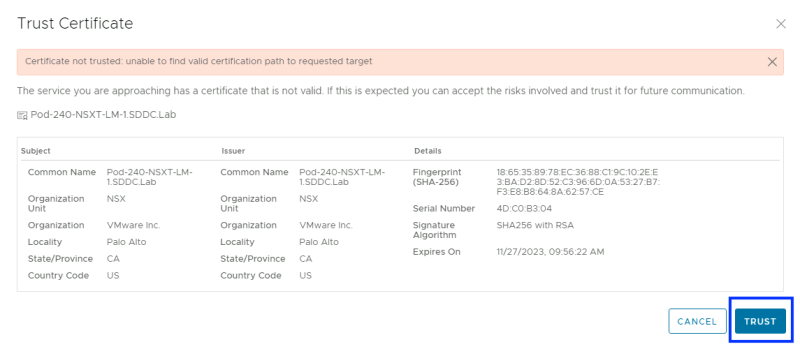
Trust the SSL certificate (as I am using self-signed certificates everywhere).
Verify if the NSX-T Manager is correctly integrated without any errors.
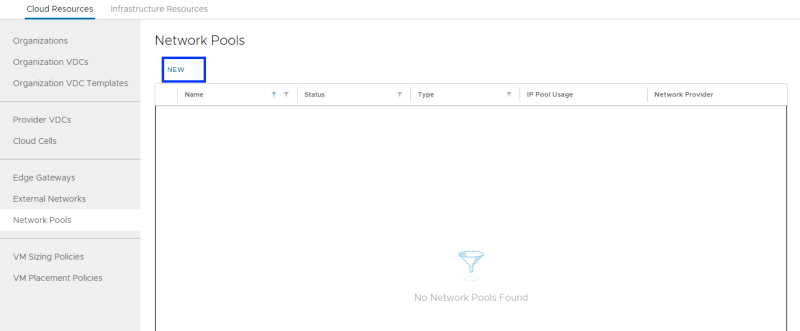
Create a Network Pool
Before you can create a Provider VDC you need to create a Network Pool.
Specify the name of the Network Pool.
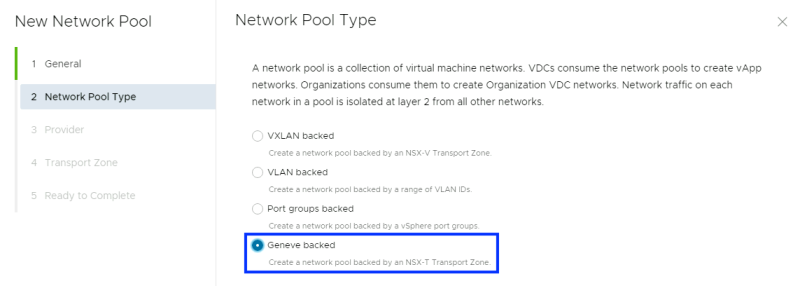
Specify a Network Pool type. I am using Geneve here as I am using NSX-T networks.
Select the NSX-T Manager.
Select the correct Transport Zone.
Complete the Network Pool configuration.
Verify if the Network Pool is correctly created without any errors.
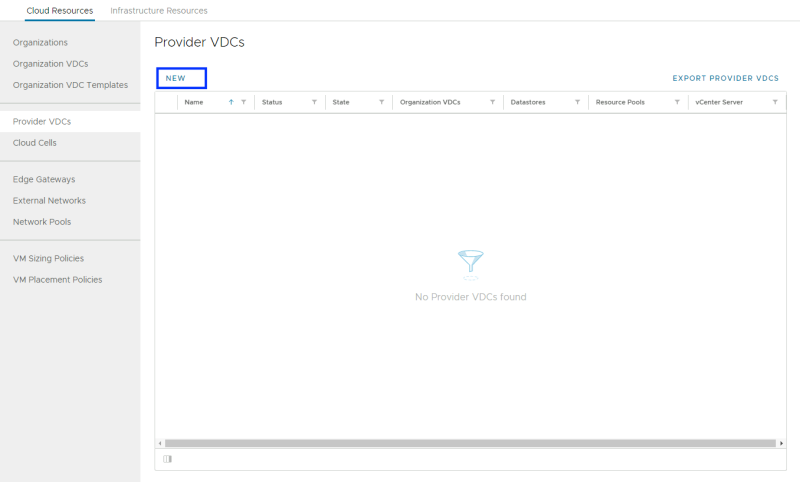
Create a Provider VDC
Now that the Network Pool is created it is time to create a Provider VDC.
Specify a name for the Provider VDC.
Select a vCenter Server where you want to consume the resource capacity for the VNFs.
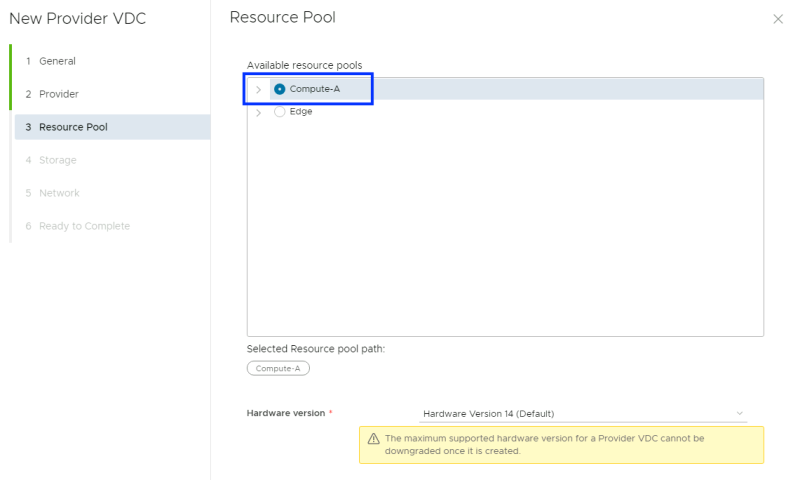
Select a Resource Pool (vSphere Cluster) where you want to consume the resource capacity for the VNFs.
Select the Storage (policies) where you want to consume the storage capacity for the VNFs.
Select the Network Pool where you want to consume the network capacity for the VNFs.
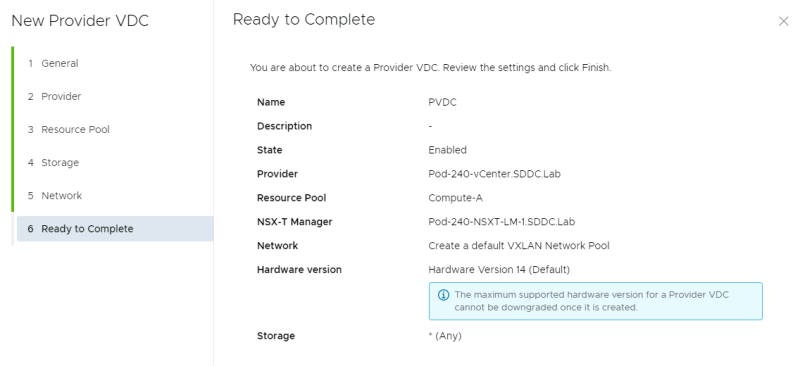
Complete the Provider VCD configuration.
Verify if the Provider VDC is correctly created without any errors.
Create a vCloud Director Organization
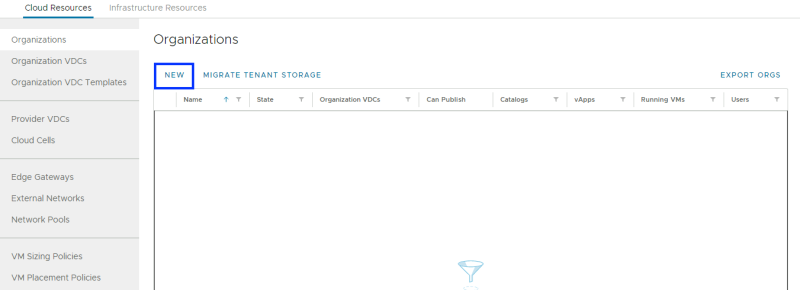
Now that the Provider VDC is completed you need to create a new Organization.
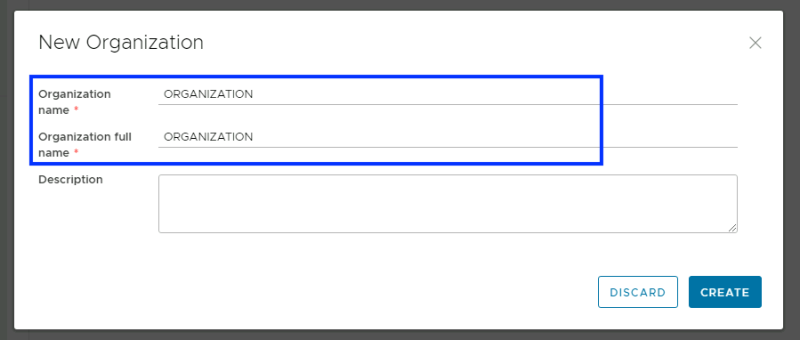
Specify the Organization name.
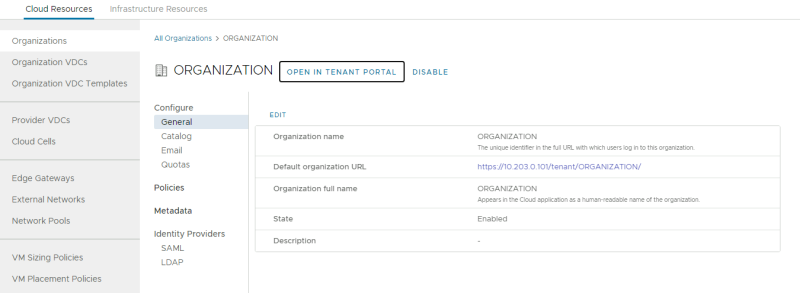
Verify if the Organization is correctly created without any errors.
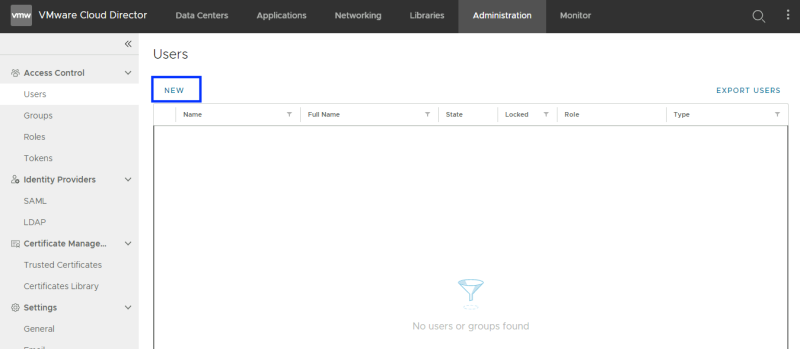
Click on the Organization name and "Open in Tenant Portal". This will bring you to the Organization Portal where you need to create a new tenant user with the "Organization Administrator" Role.
To do this select the "Administration" tab.
Create a new user and specify the password and Role as "Organization Administrator".
Verify if the User is correctly created without any errors.
Verify if the Organization has now one User.
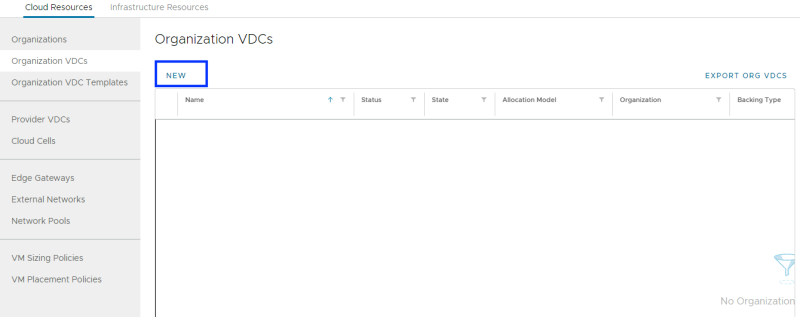
Create an Organization Virtual Data Center
Now that the user is created you need to create an Organization VDC.
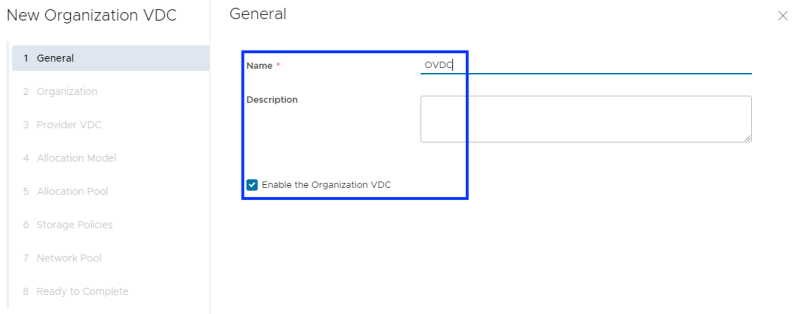
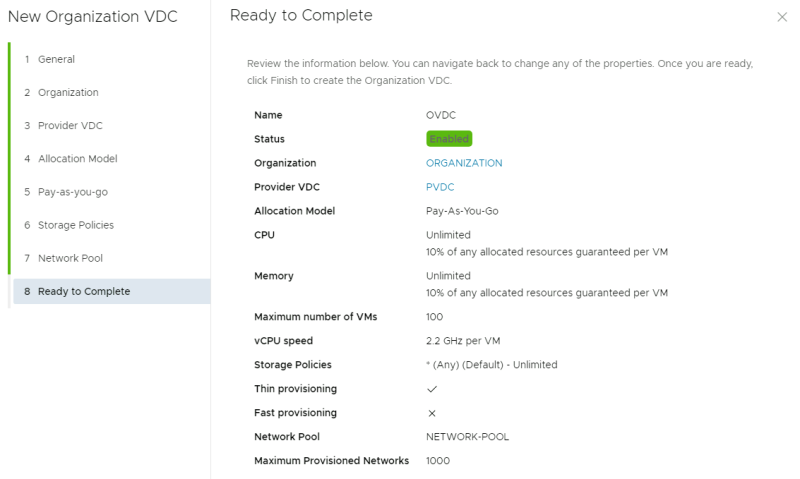
Specify a name for the new Organization VCD.
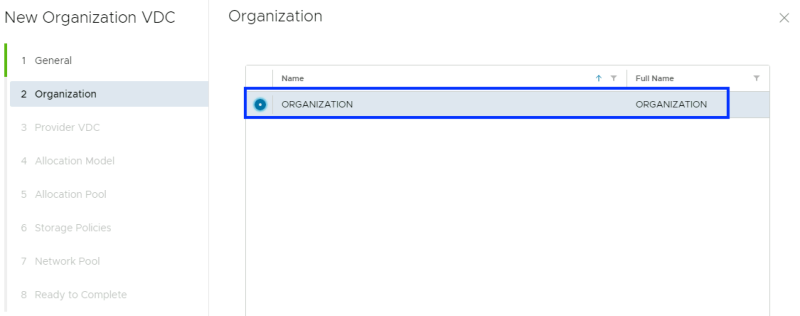
Select the newly created Organization.
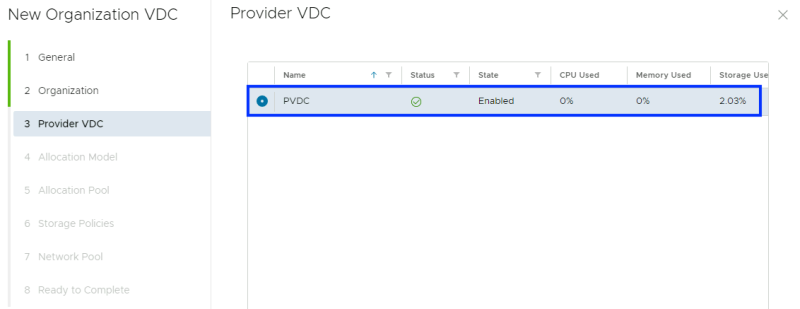
Select the newly created Provider VDC.
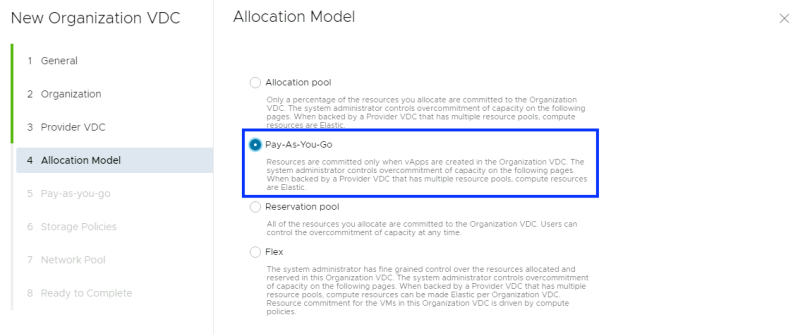
Select an Allocation Model. For simplicity reasons I have selected "Pay-As-You-Go".
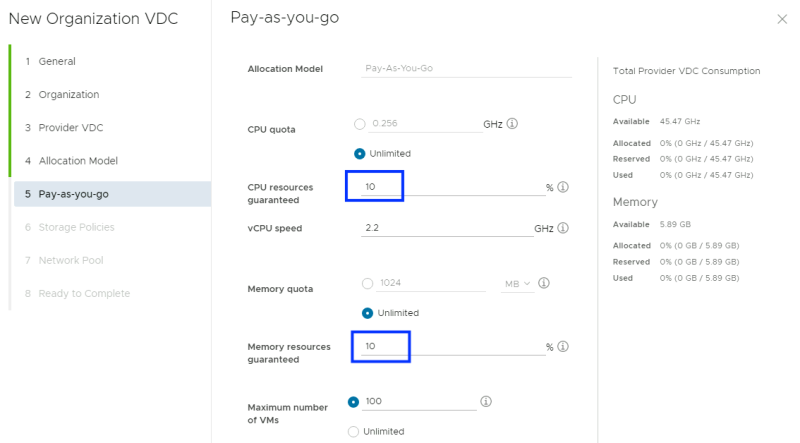
I have changed the defaults for "CPU resources guaranteed" from 20 to 10 and the same I have done for the Memory resources guaranteed as well. The rest of the settings are kept default. The reason why I have done this here is that I am using a Nested Lab and all resources are nested.
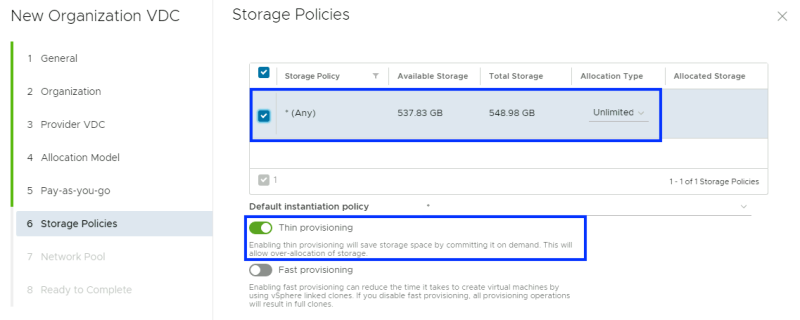
Select a storage policy and enable "Thin Provisioning".
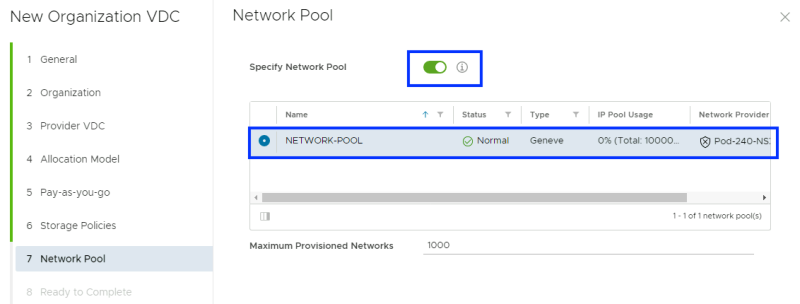
Select the newly created Network Pool.
Complete the Organization VCD configuration.
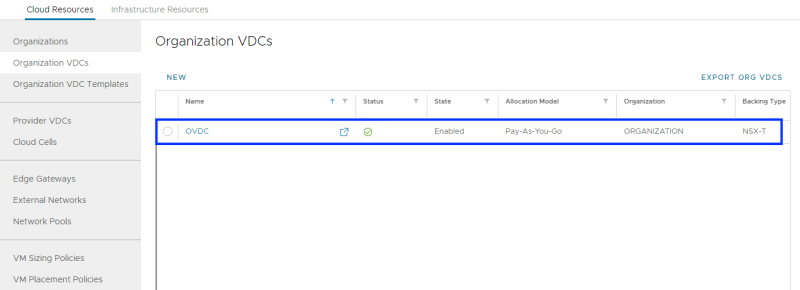
Verify if the Organization VDC is correctly created without any errors.
Click on the Organization VDC to specify an "existing" EXTERNAL network (after you have pre-created the external network in NSX-T)
Create an external network for this Organization VDC
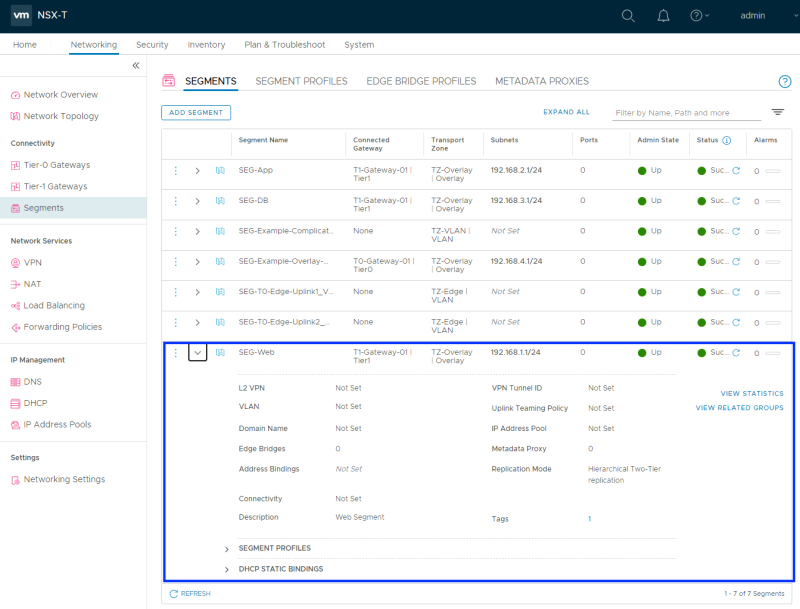
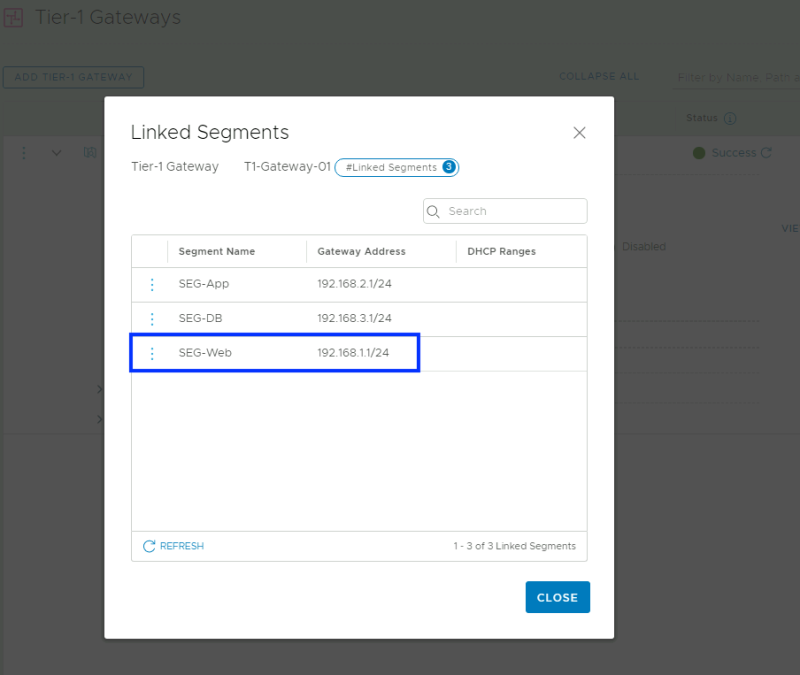
In order for the Organization VDC to route the VNF networks to the "outside world," you need to create an EXTERNAL network. I have already created this network and I am using the "SEG-Web" network for this.
This network is also linked to a Tier-1 Gateway.
The Tier-1 Gateway is also linked to a Tier-0 Gateway and routing for this network is configured correctly.
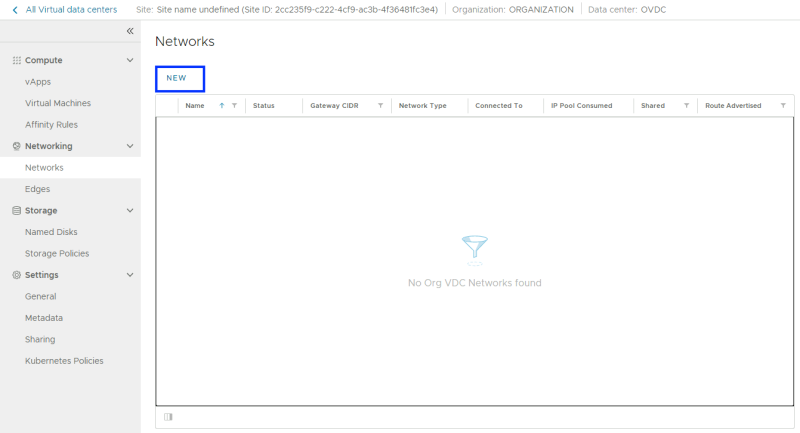
Once your EXTERNAL network is in place you can create a new network in the newly created Organization VDC by clicking on the "Networks" section.
Specify the Organizational VDC Scope where you want to use this network.
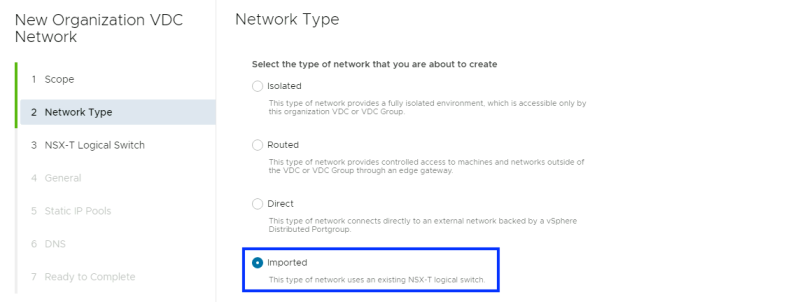
Specify the Network Type and select "Imported" as you are using an existing external network in this case.
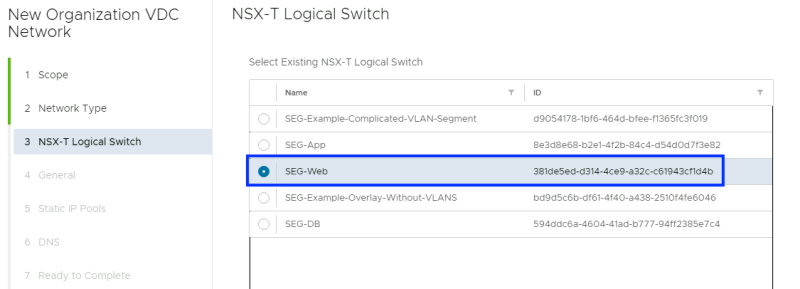
Select the existing NSX-T Logical Switch (Network Segment) that you want to use for the VNF external communication.
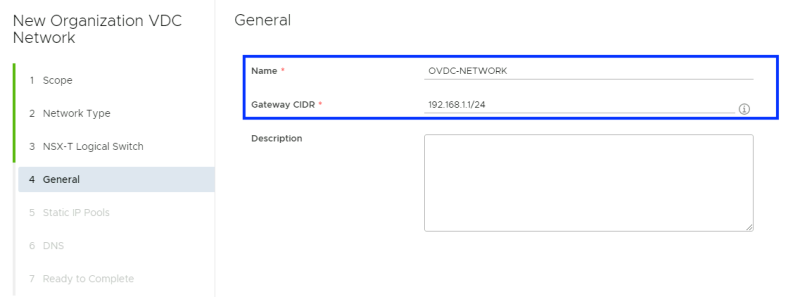
Specify a name for the network. The Gateway will be taken/detected automatically from NSX-T.
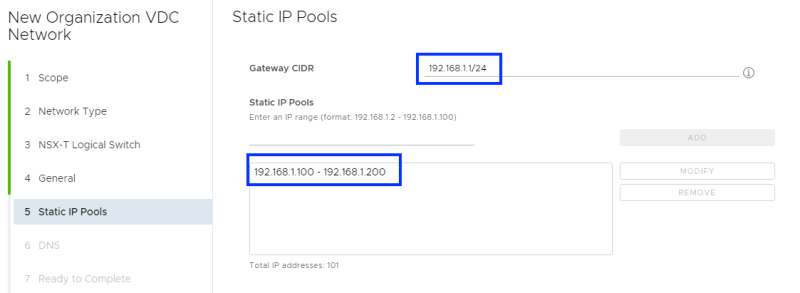
Specify a "static pool" of the external IP addresses you want to use.
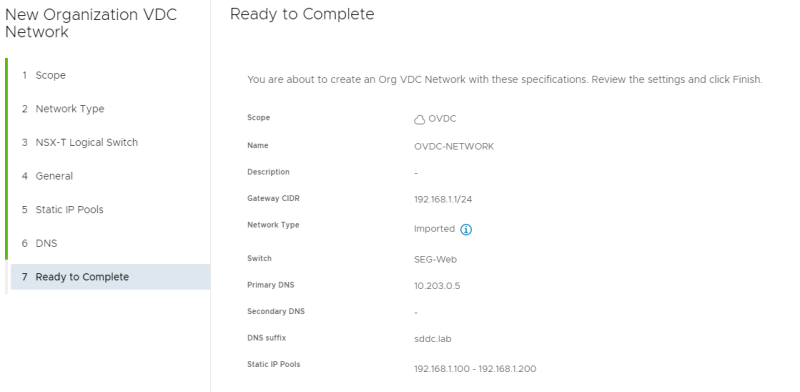
Specify the DNS settings.
Complete the Network configuration.
Verify if the Network is correctly created without any errors.
STEP 9: Integrate VMware Cloud Director with Telco Cloud Automation (Control Plane)
Now that the required configuration is all done on VDC it is time to integrate VCD with the TCA Contol Plane Appliance.
Create the new Virtual Infrastructure
You have deployed the Control Plane TCA already in STEP 7. Now it is time to configure it using the VAMI interface by logging in with the username "admin" and the password you specified during the OVA deployment.
When you are logged in you will get a welcome screen and notice the word "Control Plane". This will tell you that the role you deployed is correct and you are configuring the correct TCA.
The license key is added as one of the first steps by doing the initial configuration using the VAMI GUI.
Specify your location of the TCA.
Specify the system name of the TCA.
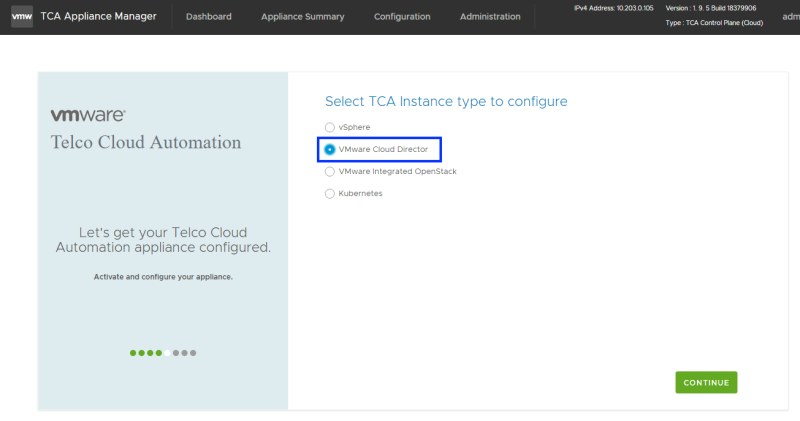
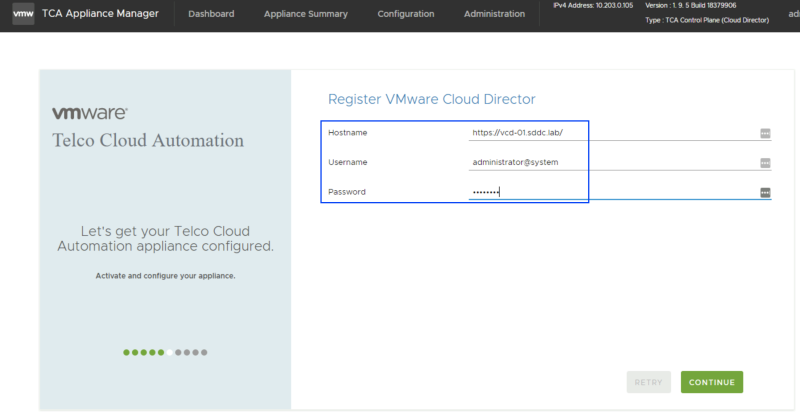
Now you get to configure an "Instance Type" and this is where you define what "Virtual Infra" you are using this Control TCA for. This article is about VMware Cloud Director (VCD) so I am selecting VMware Cloud Director here.
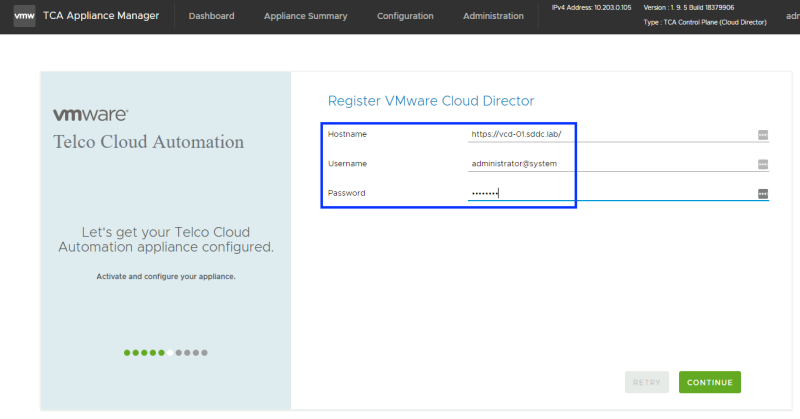
Specify the VCD hostname and login credentials of the admin user of VDC. In my case, this is "administrator@system".
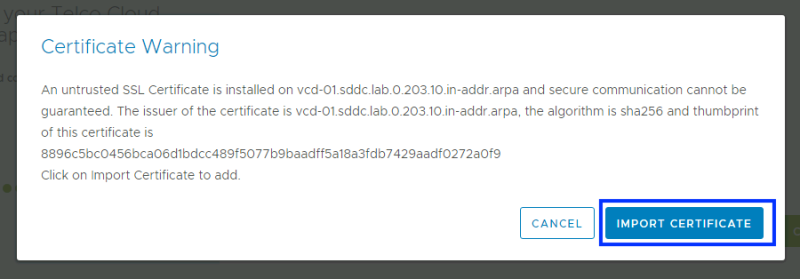
Trust the SSL certificate (as I am using self-signed certificates everywhere).
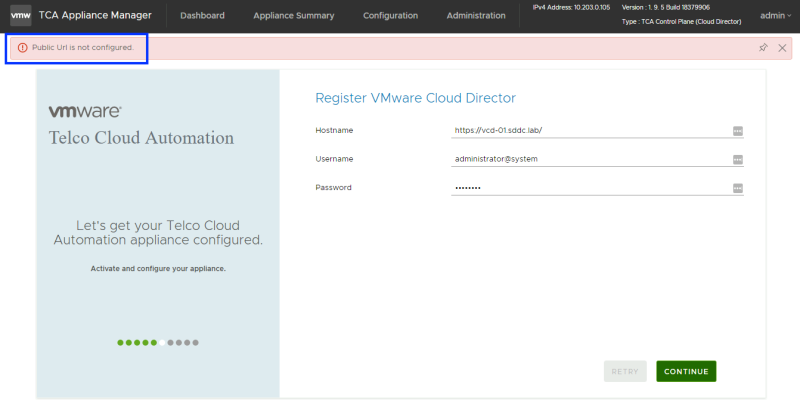
At this point, I got an error that the "Public URL is not configured.
This needs to be configured on the VCD side first.
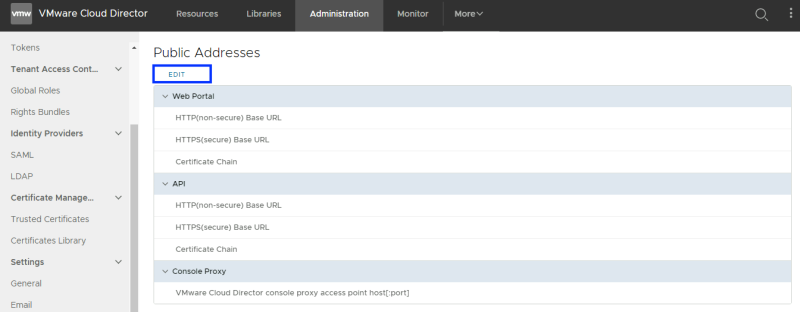
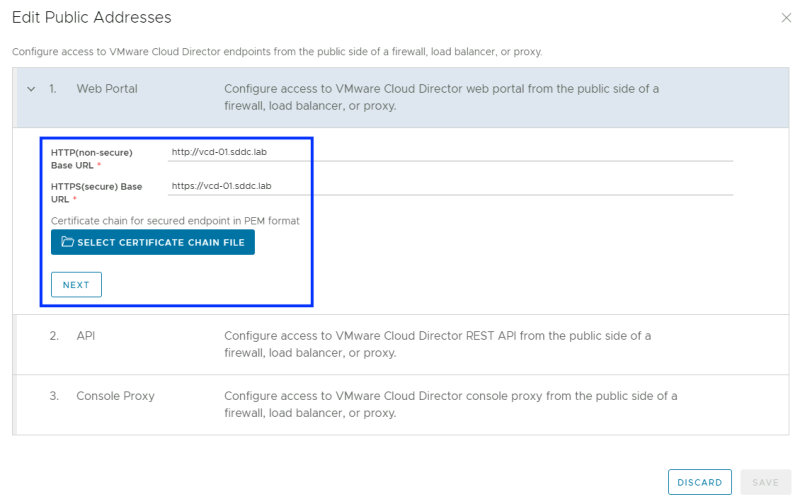
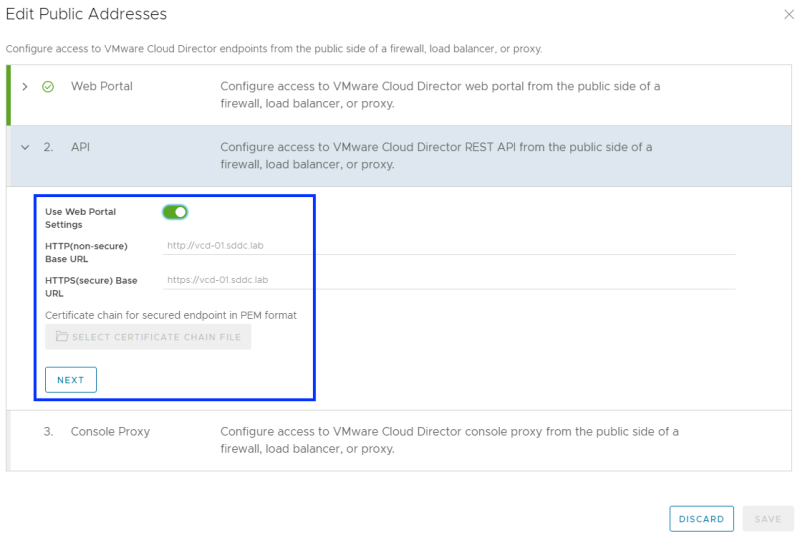
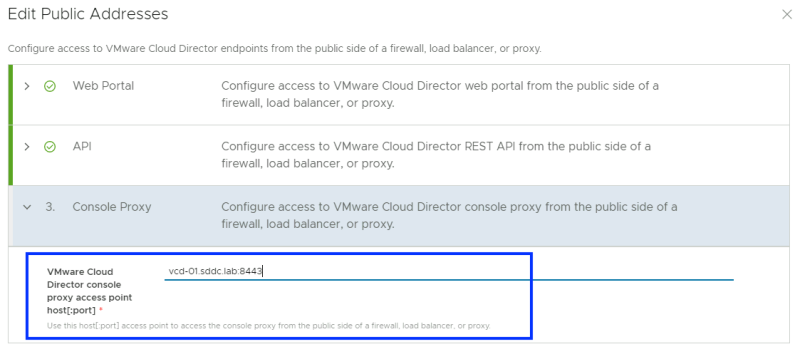
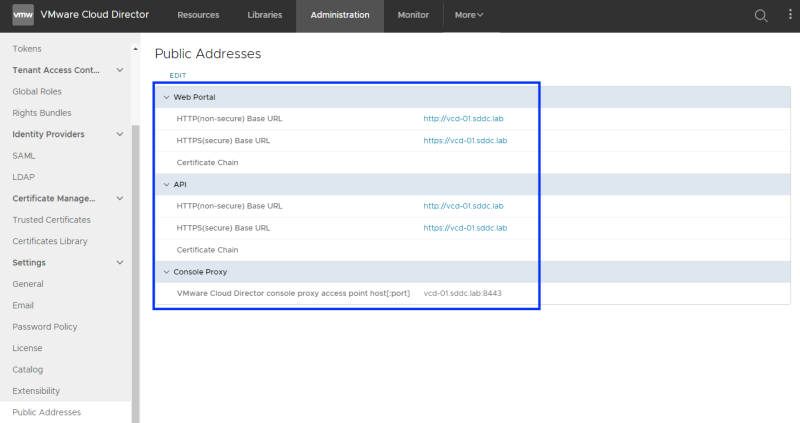
So I went back to VCD and clicked the "Administration" tab and selected "Public Address" settings and specified them by clicking edit.
Specify the Web Portal Public address.
Specify the API Public address.
Specify the Console Proxy Public address.
Verify if the Public Addresses are correctly configured without any errors.
Now let's continue the integration on the TCA Control Plane. Clicking continues should now work without any issues.
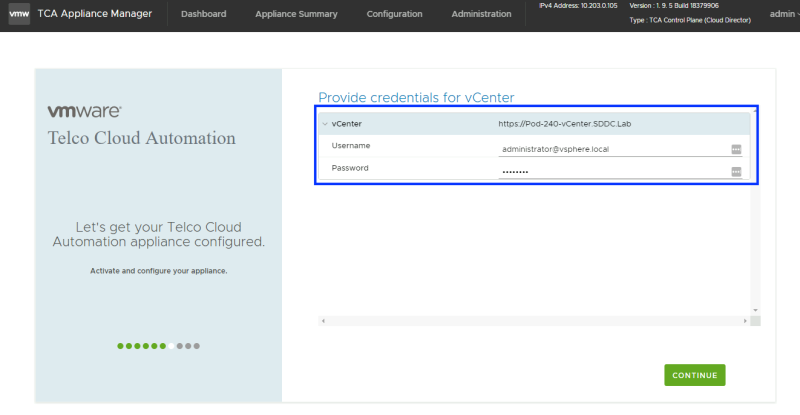
Specify the vCenter Server hostname and credentials.
Trust the SSL certificate (as I am using self-signed certificates everywhere).
Specify the NSX-T Manager hostname and credentials.
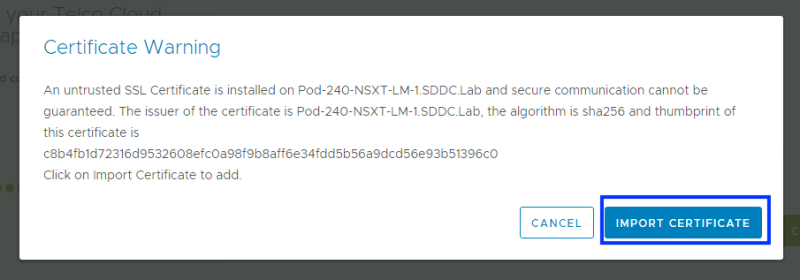
Trust the SSL certificate (as I am using self-signed certificates everywhere).
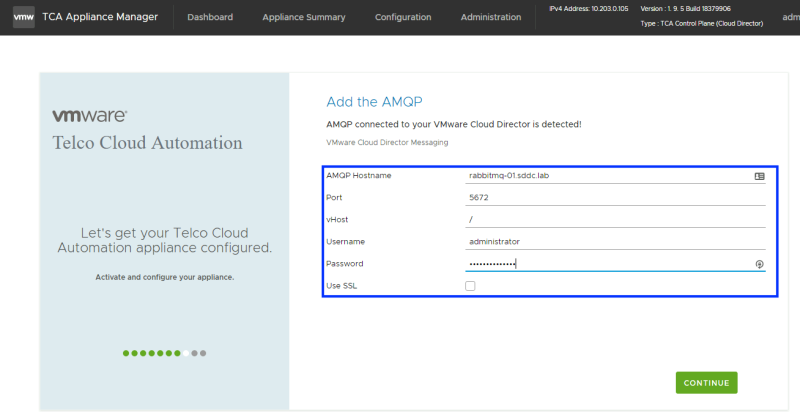
Specify the RabbitMQ (Deployed in STEP 4) hostname and credentials.
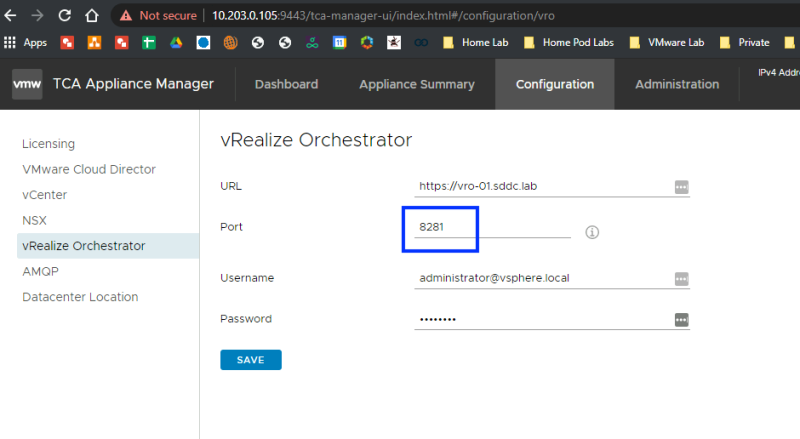
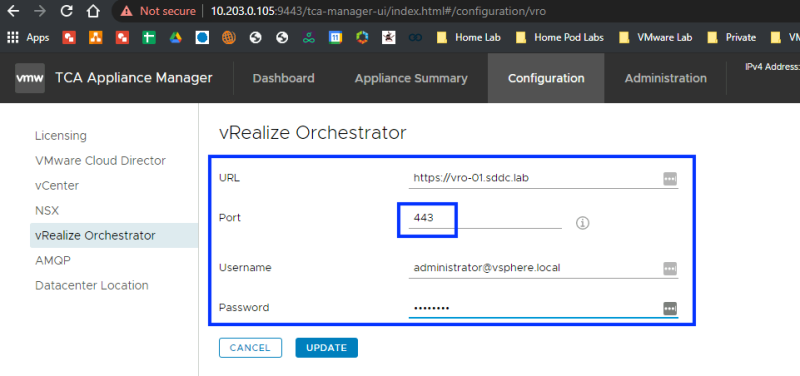
Specify the VRO((Deployed in STEP 2) hostname and credentials.
When using the "default port" 8281 I received the following error.
Unable to validate the configuration details for https://vro-01.sddc.lab:8281/vco/api/workflows
So I tried to use port 443, and this worked.
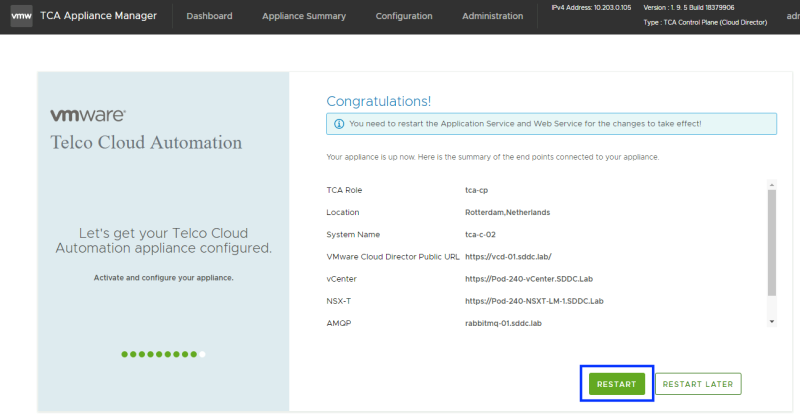
Restart the TCA to finish the initial configuration.
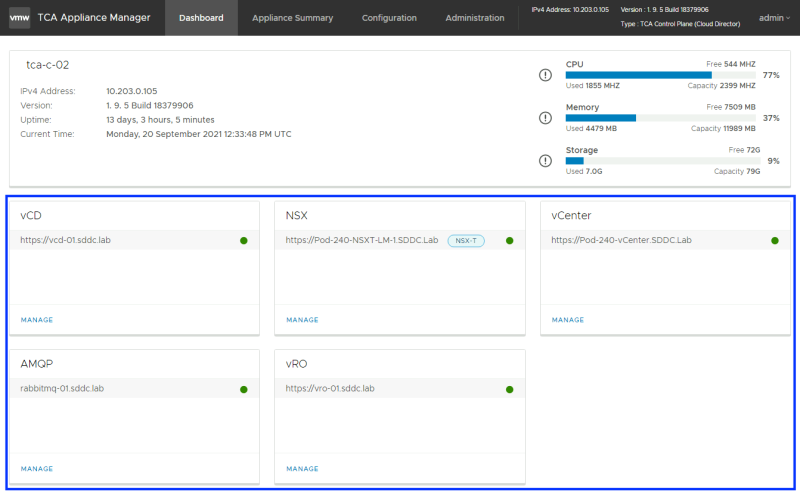
Once restarted the Dashboard of the TCA (Manager) should look like this.
STEP 10: Integrate Telco Cloud Automation (Control Plane) with Telco Cloud Automation (Manager)
Now that VCD is integrated with TCA Control Plane you need to integrate the TCP Control Plane with the TCA Manager.
Log in to the TCA Manager using the NON-VAMI interface using the "administrator@vsphere.local "username and the password belonging to that SSO account.
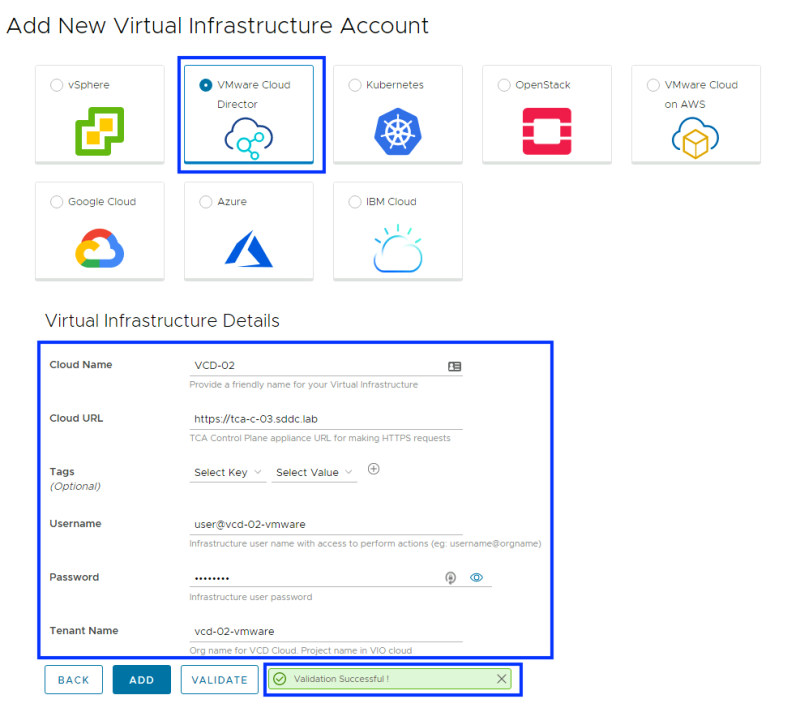
Go to "Virtual Infrastructure" and add a new Virtual Infrastructure by selecting "VMware Cloud Director".
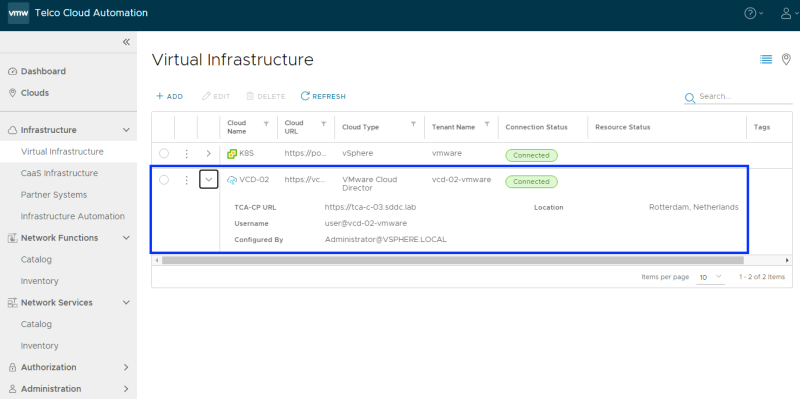
Verify if the Virtual Infrastructure is correctly configured without any errors.
STEP 11: Create Compute Profile
Before you can deploy our first VNF you first need to create a "Compute Profile".
Log in to the TCA Manager using the NON-VAMI interface using the "administrator@vsphere.local "username and the password belonging to that SSO account.
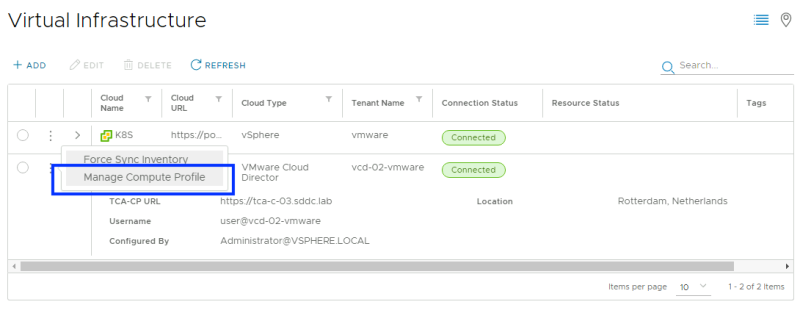
Go to "Virtual Infrastructure" and select Virtual Infrastructure.
Click on the three dots and select "Manage Compute Profile".
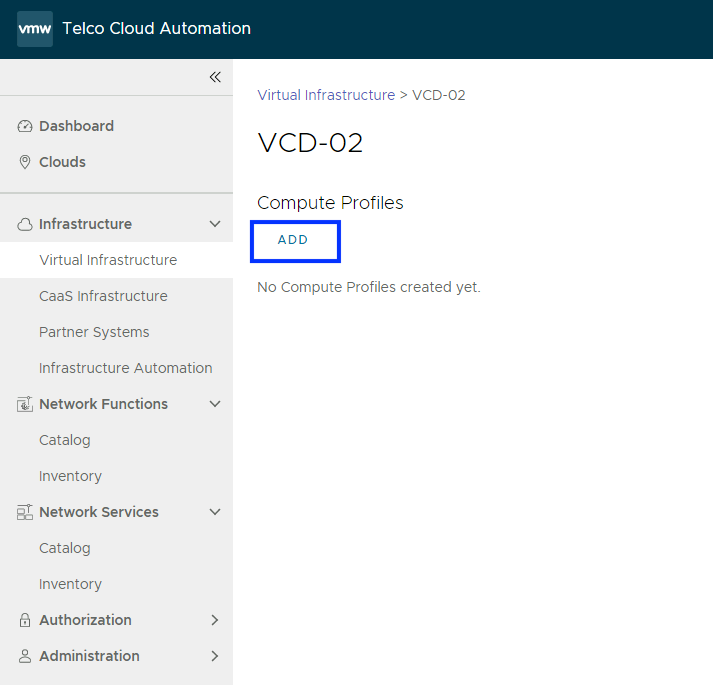
Add a Compute Profile.
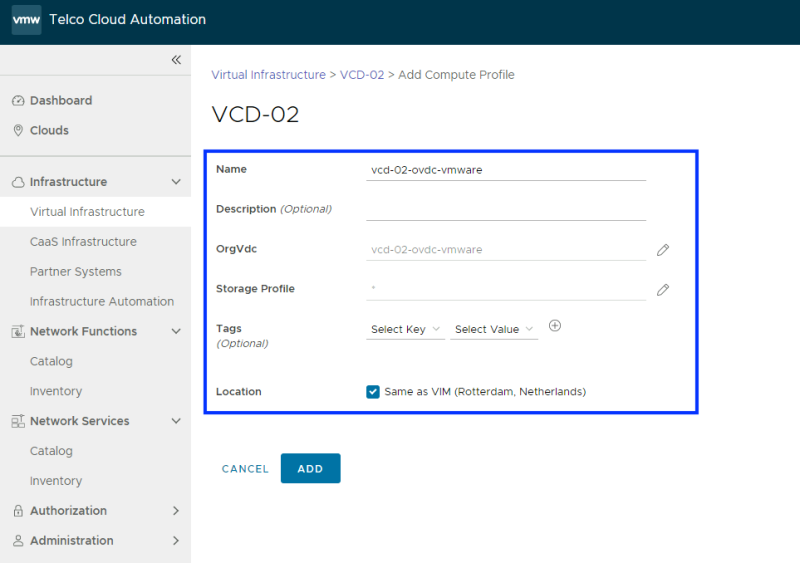
Specify a name, select the OrgVDC and select the storage Profile and click on "Add".
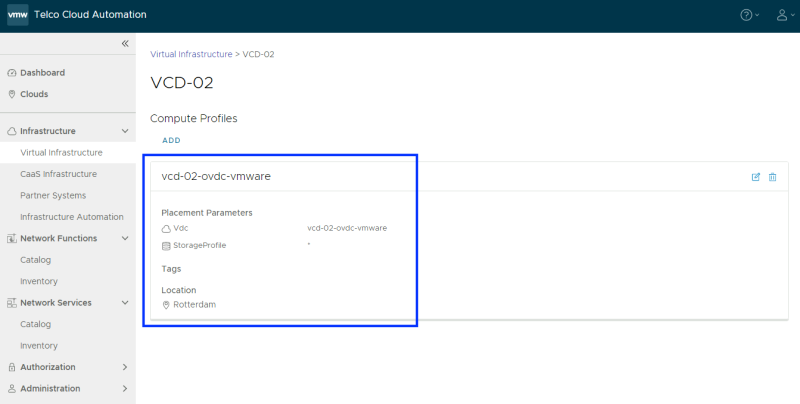
Verify if the Compute Profile is correctly created without any errors.
In this next article, I will show you how to deploy your first VNF using TCA.
