Using the OCI NAT Gateway to allow OCI Instances (connected to a private subnet) to access the internet: Difference between revisions
(Cleanup) |
|||
| Line 16: | Line 16: | ||
* STEP 06: Create a NAT Gateway and route the internet traffic to the NAT Gateway | * STEP 06: Create a NAT Gateway and route the internet traffic to the NAT Gateway | ||
= STEP 01 | = STEP 01 Create a new VCN = | ||
If there is already an existing VCN you can skip this step and continue with the next step. If not please continue with opening the hamburger menu. | If there is already an existing VCN you can skip this step and continue with the next step. If not please continue with opening the hamburger menu. | ||
| Line 47: | Line 47: | ||
[[File:using-oci-nat-gateway-207.png|800px]] | [[File:using-oci-nat-gateway-207.png|800px]] | ||
= STEP 02 | = STEP 02 Create a private subnet inside the VCN = | ||
# Review if the VCN is available. | # Review if the VCN is available. | ||
| Line 83: | Line 83: | ||
[[File:using-oci-nat-gateway-213.png|800px]] | [[File:using-oci-nat-gateway-213.png|800px]] | ||
= STEP 03 | = STEP 03 Create a new Instance = | ||
Select “Instances” from the Pined section. | Select “Instances” from the Pined section. | ||
| Line 138: | Line 138: | ||
[[File:using-oci-nat-gateway-224.png|800px]] | [[File:using-oci-nat-gateway-224.png|800px]] | ||
= STEP 04 | = STEP 04 Create a Private Network Definition so that I can log in to the Instance using Cloud Shell = | ||
Select “Cloud Shell”. | Select “Cloud Shell”. | ||
| Line 224: | Line 224: | ||
[[File:using-oci-nat-gateway-239.png|800px]] | [[File:using-oci-nat-gateway-239.png|800px]] | ||
= STEP 05 | = STEP 05 Verify Internet connectivity on the Instance = | ||
# To verify connectivity to the internet I will do a simple ping to Google’s DNS server. | # To verify connectivity to the internet I will do a simple ping to Google’s DNS server. | ||
| Line 238: | Line 238: | ||
[[File:using-oci-nat-gateway-241.png|800px]] | [[File:using-oci-nat-gateway-241.png|800px]] | ||
= STEP 06 | = STEP 06 Create a NAT Gateway and route the internet traffic to the NAT Gateway = | ||
Click on “Virtual Cloud Networking”. | Click on “Virtual Cloud Networking”. | ||
Revision as of 19:11, 8 March 2024
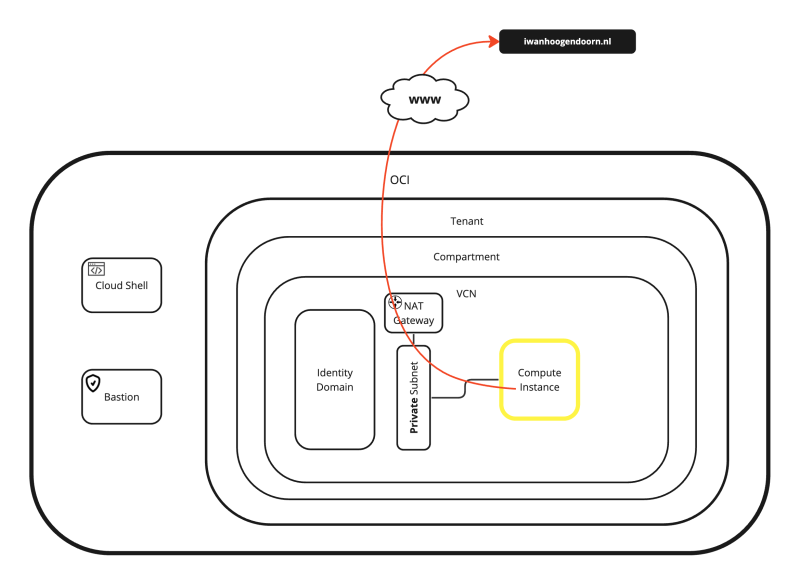
As you know by default RFC1918 addresses can not be routed to the internet and to reach the internet the PRIVATE RFC1918 address needs to be translated to a public IP address. Within OCI we can do this using a NAT Gateway inside the corresponding VCN.
This article will explain how internet access is provided from an Instance that is connected to a subnet using a PRIVATE (RFC1918) IPv4 address.
The Steps
- STEP 01: Create a new VCN
- STEP 02: Create a private subnet inside the VCN
- STEP 03: Create a new Instance
- STEP 04: Create a Private Network Definition (so that I can log in to the Instance using Cloud Shell)
- STEP 05: Verify Internet connectivity on the Instance
- STEP 06: Create a NAT Gateway and route the internet traffic to the NAT Gateway
STEP 01 Create a new VCN
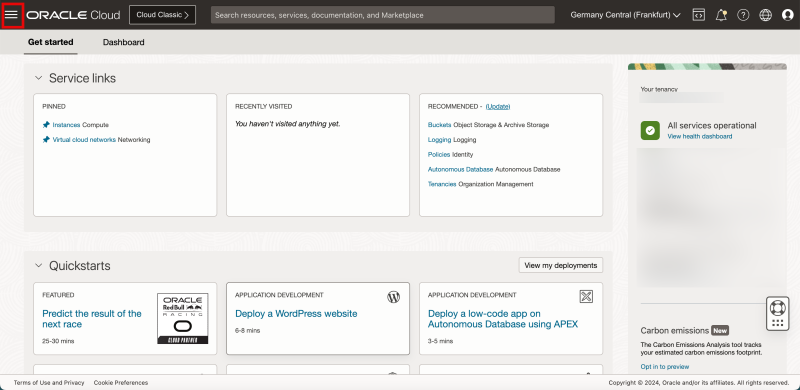
If there is already an existing VCN you can skip this step and continue with the next step. If not please continue with opening the hamburger menu.
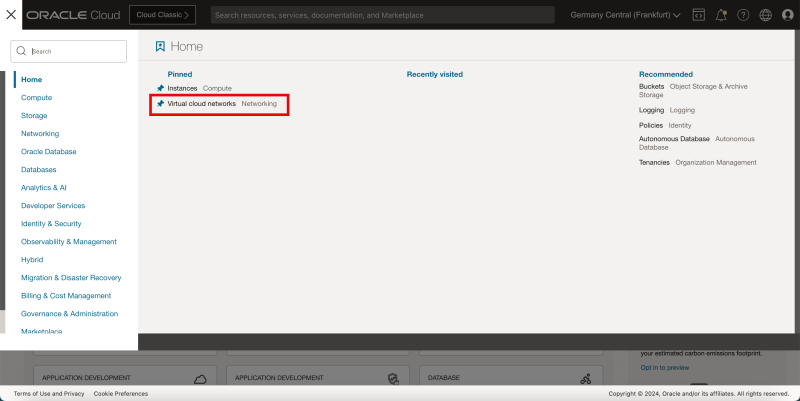
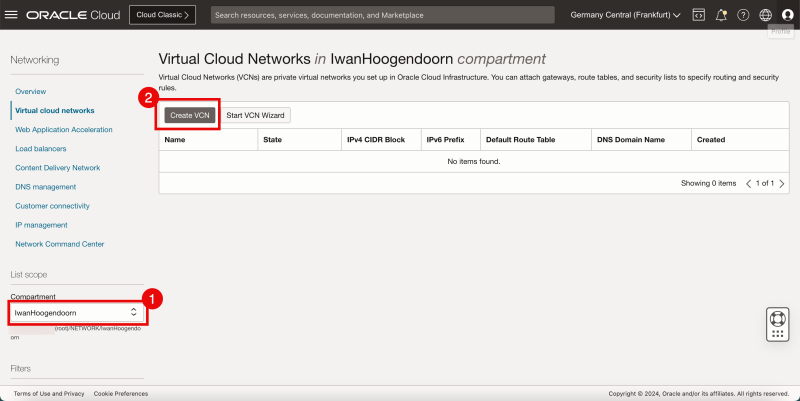
Click on “Virtual Cloud Networking”.
- Select the right compartment that you want to work in.
- If you have not set up the compartment just use the root compartment
- Click on “Create VCN”.
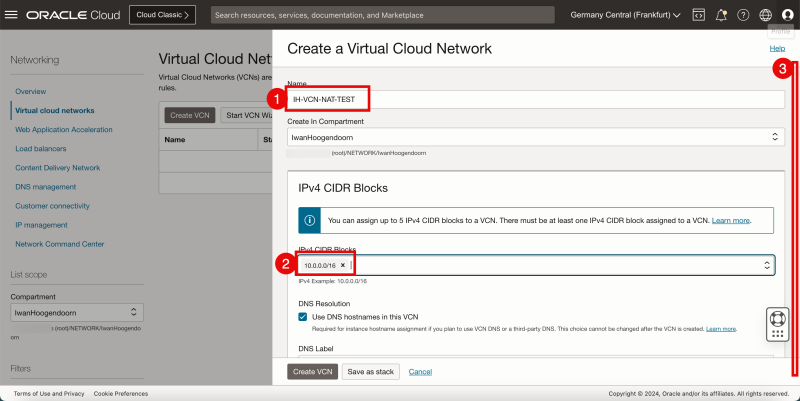
- Provide a VCN Name.
- Specify the IPv4 CIDR that I want to use inside this VCN.
- I make sure I use a /16 CIDR because my IPv4 Subnets (typically /24’s) will be carved out of this CIDR clock.
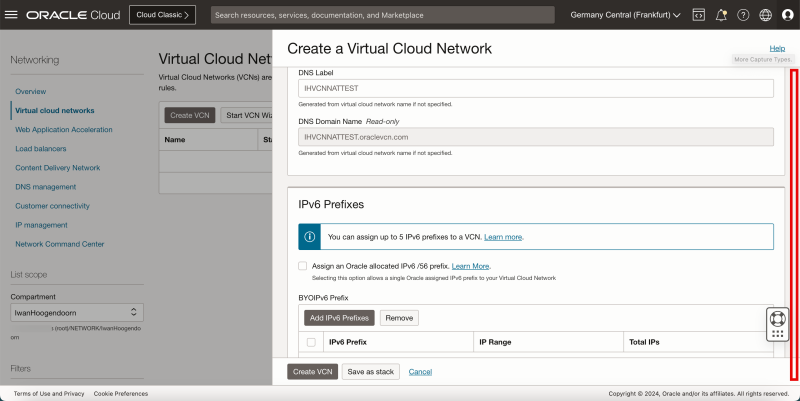
- Scroll Down.
Leave everything default and Scroll Down.
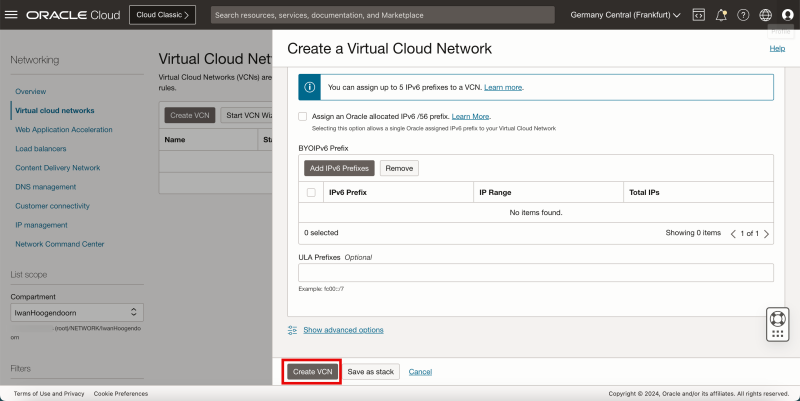
Click on “Create VCN”.
STEP 02 Create a private subnet inside the VCN
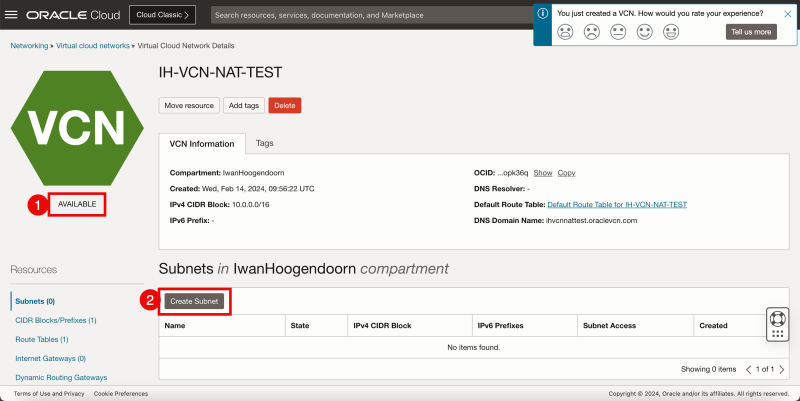
- Review if the VCN is available.
- Click on “Create Subnet”.
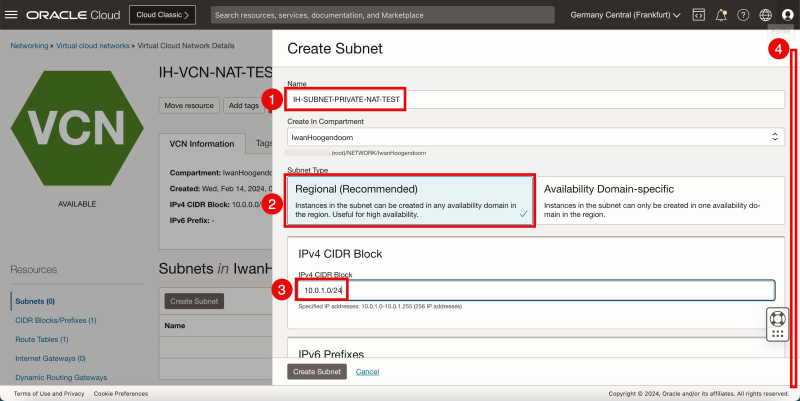
- Specify a Name for the new subnet.
- For the Subnet Type, I will select “Regional” for now.
- Specify the IPv4 subnet that I will carve out of the CIDR block I have assigned in the VCN.
- Make sure the new /24 CIDR block falls within the /16 determined in the VCN.
- Scroll down.
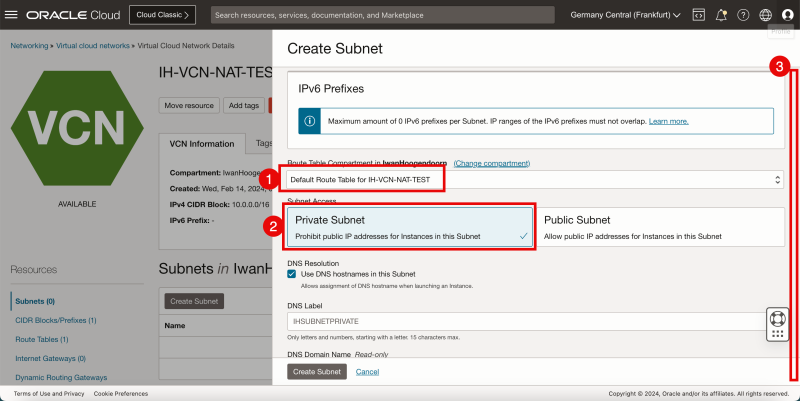
- Select the default route table for the VCN.
- Make the subnet Private, so that we get private (RFC1918) IP addresses.
- Scroll down.
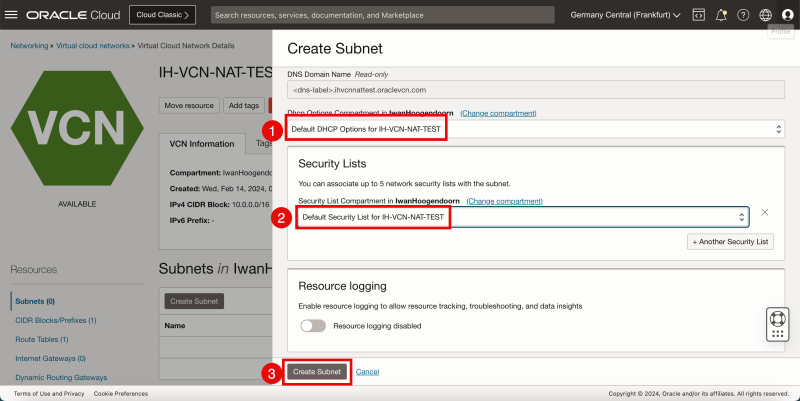
- Select the default DHCP options for the VCN.
- Select the default Security List for the VCN.
- Click on Create Subnet.
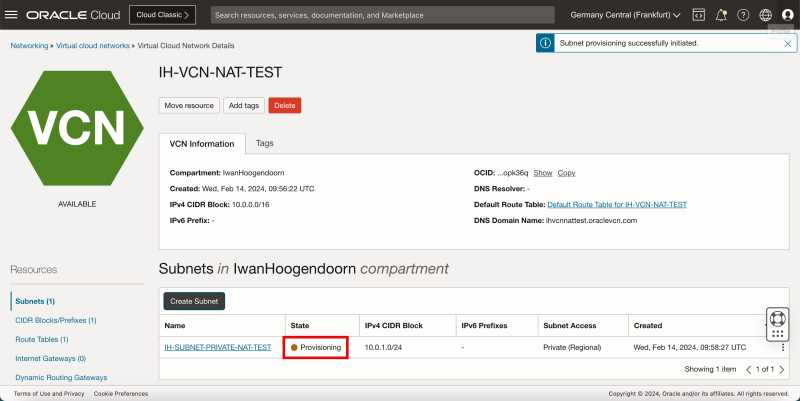
Notice that the state of the newly created subnet is “Provisioning”.
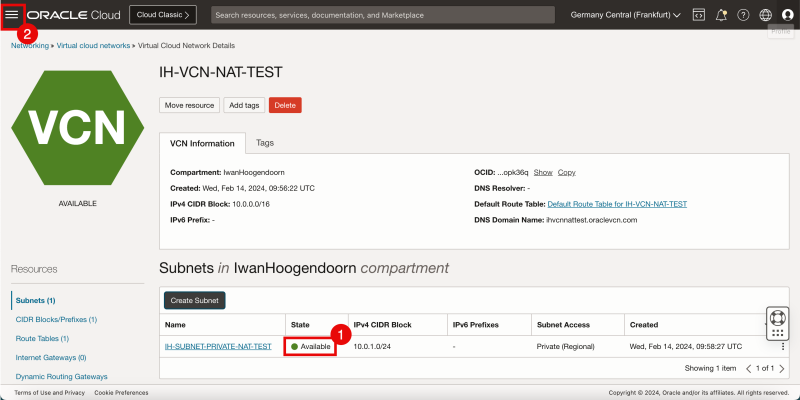
- Notice that the state of the newly created subnet is “Available”.
- Click on the hamburger menu in the top left corner.
STEP 03 Create a new Instance
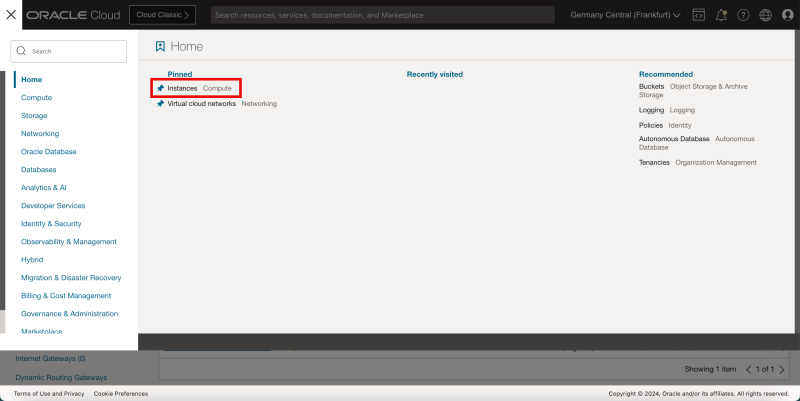
Select “Instances” from the Pined section.
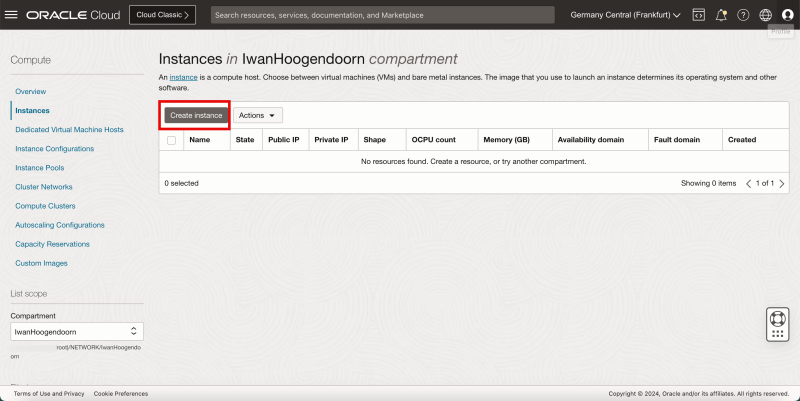
Click on “Create Instance”.
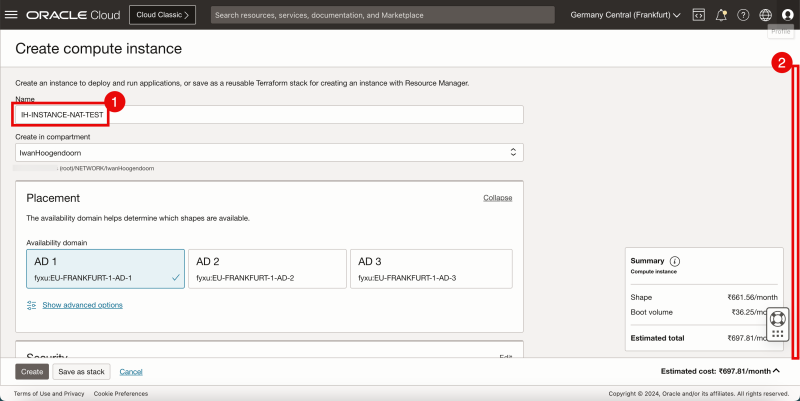
- Specify the Name for the instance.
- Scroll Down.
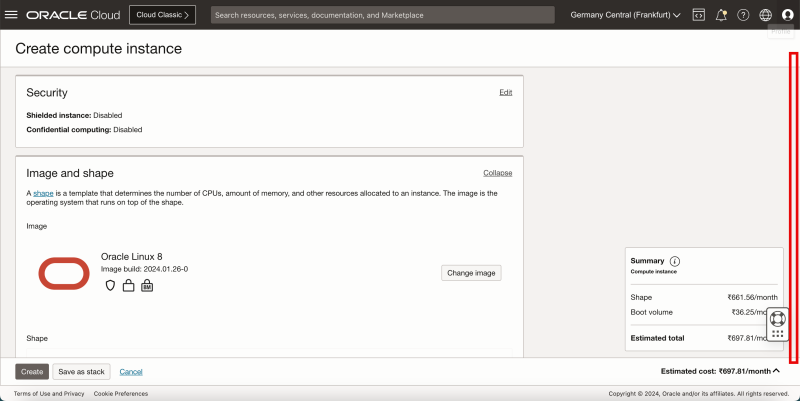
Leave everything default and Scroll Down.
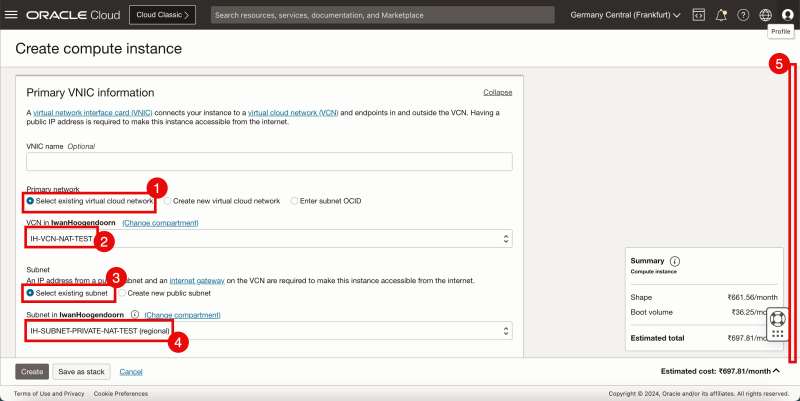
- For the Primary network select “Select existing virtual cloud network”.
- I selected the VCN that I have created earlier.
- For the subnet select “Select existing subnet”.
- I select the subnet that I have created earlier.
- Scroll Down.
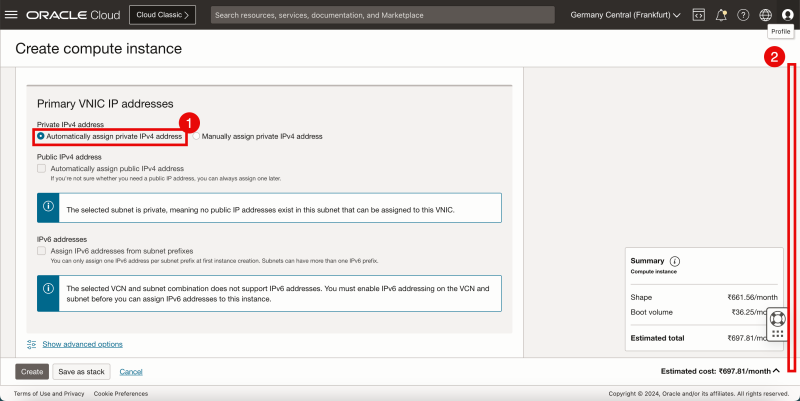
- For the Private IPv4 address select “Automatically assign private IPv4 address”. The box also needs to be checked.
- Scroll Down.
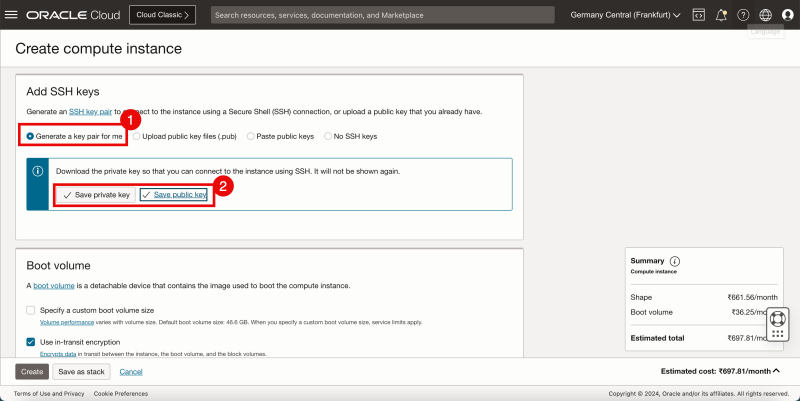
- In order the access and manage this Linux Instance you need to work with SSH Keys. For now, I will let OCI Generate a new SSH Key pair.
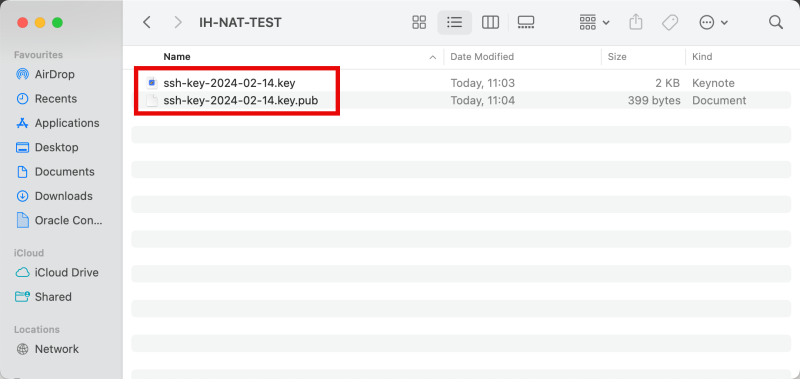
- Download the private and public keys on your local computer so I can use these to access and manage this Linux Instance (after creation).
Make sure you download the downloaded private and public keys are your local computer so I can use these to access and manage this Linux Instance (after creation).
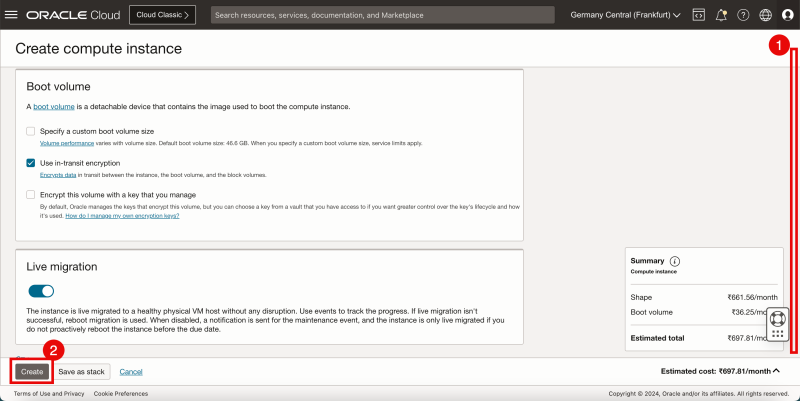
- Scroll Down.
- Click on “Create” to create the new Linux Instance.
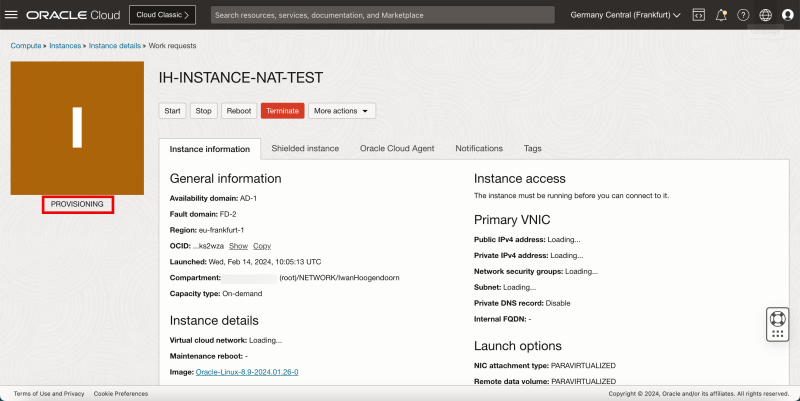
Within a few seconds, you will see that some information is populated that you will need to access the instance like the IP addresses and the username.
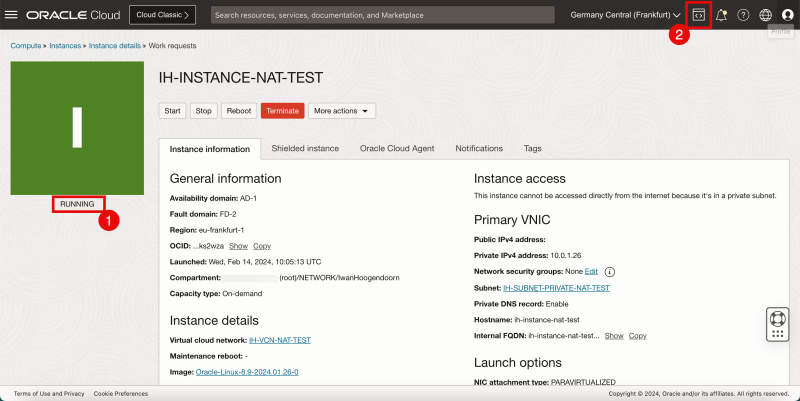
- Eventually the Instance status will be “RUNNING” and I can start logging in to the Instance perform some management tasks and start installing my applications.
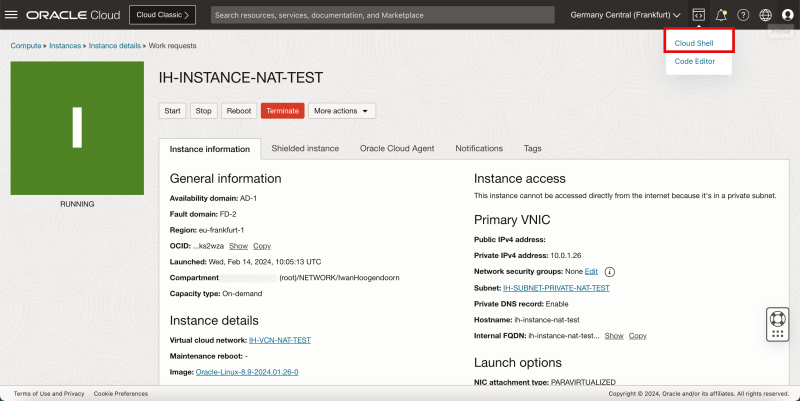
- In the upper right corner of the OCI console you can open Cloud Shell.
STEP 04 Create a Private Network Definition so that I can log in to the Instance using Cloud Shell
Select “Cloud Shell”.
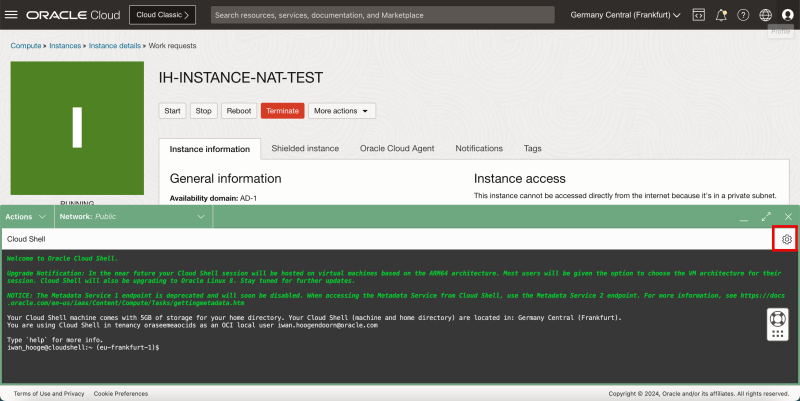
The Cloud Shell does not contain the private key.
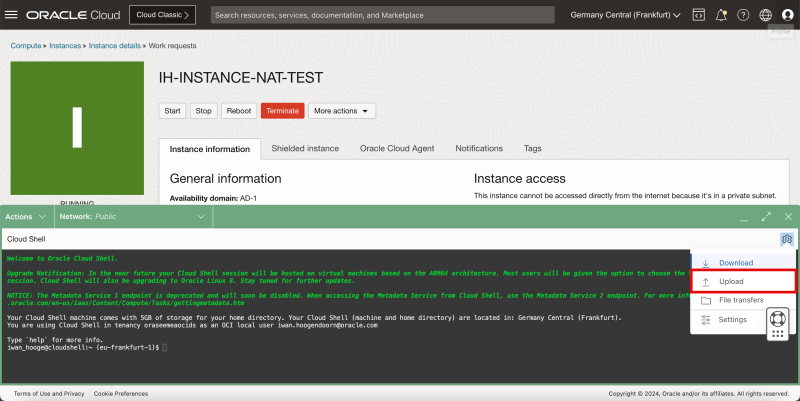
To upload the private key click on the wheel in the right upper corner.
Select “Upload”.
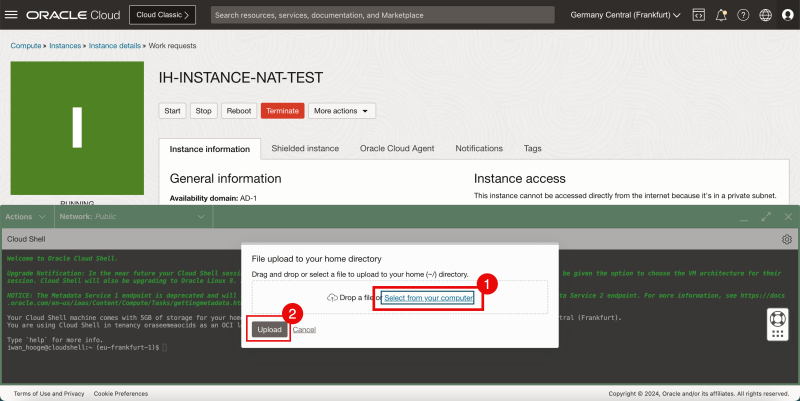
- Select “Select from your computer”.
- Click on “Upload”.
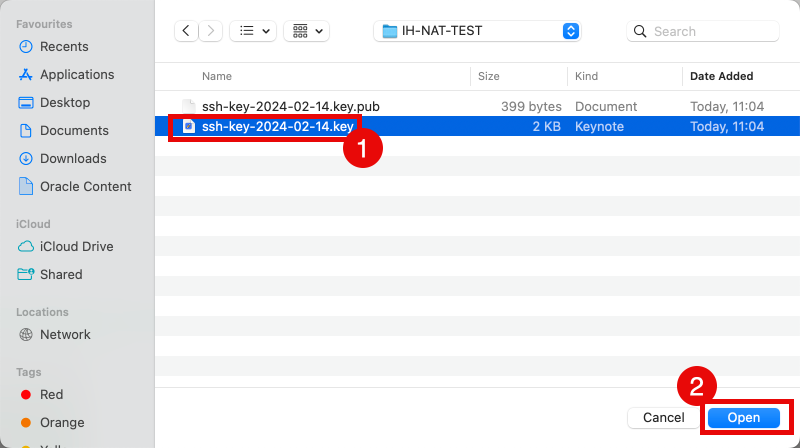
- Select the private key from your local computer.
- Click “Open”.
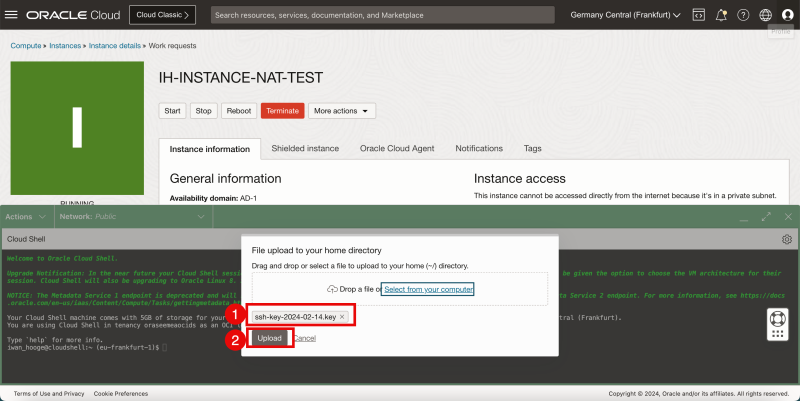
- Review is the key that you selected is listed.
- Click on “Upload”.
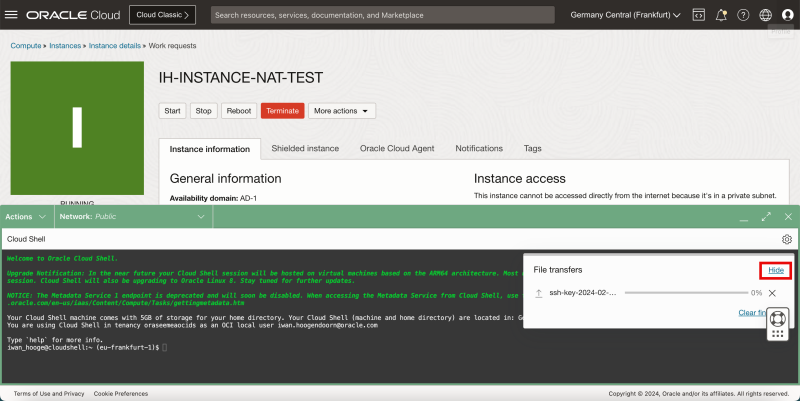
- Click on “Hide”.
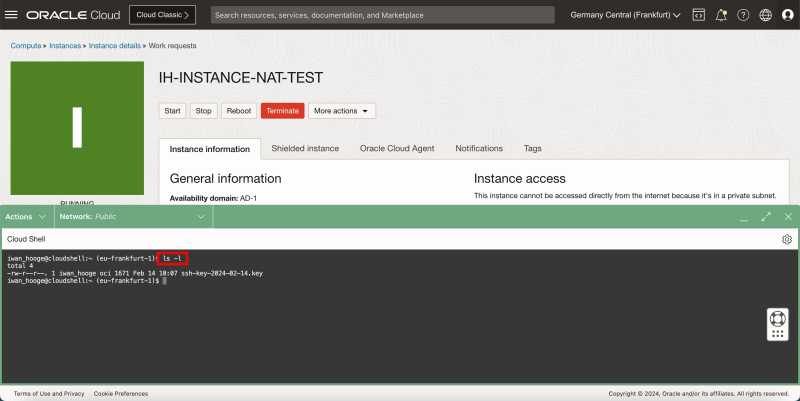
Issue the ls-l command and verify if you can see the private key.
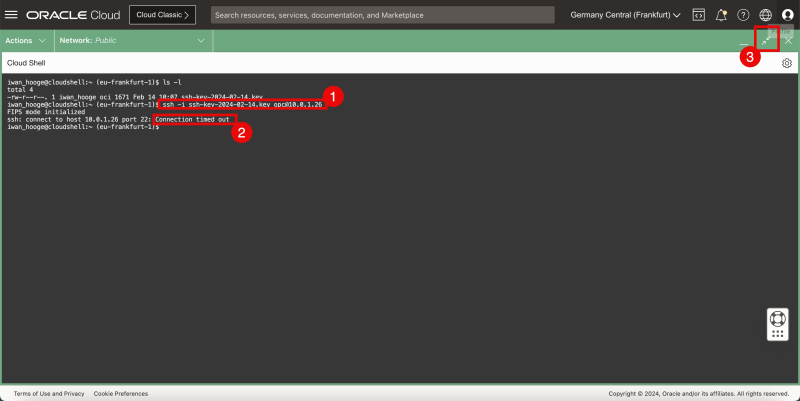
- Connect to the instance using the SSH command where you specify the private key.
- Notice that the connection is timing out.
To connect to your Linux Instance using the PRIVATE IP address the Cloud Shell must get access to the same subnet as where the Linux Instance is connected to.
We can do this by “plugging” the Cloud Shell into the same VCN + Subnet where the Linux Instance also resides.
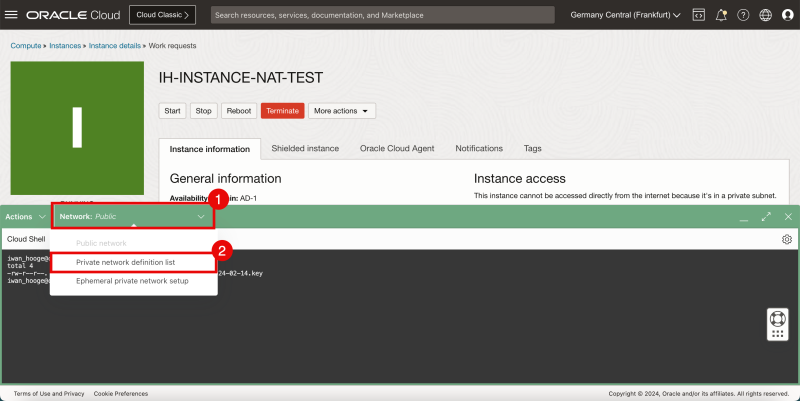
By default the network is set to “Public” but I am going to change this by creating a new Private Network (on the fly).
- Click on “Network”,
- Select “Private network definition list”.
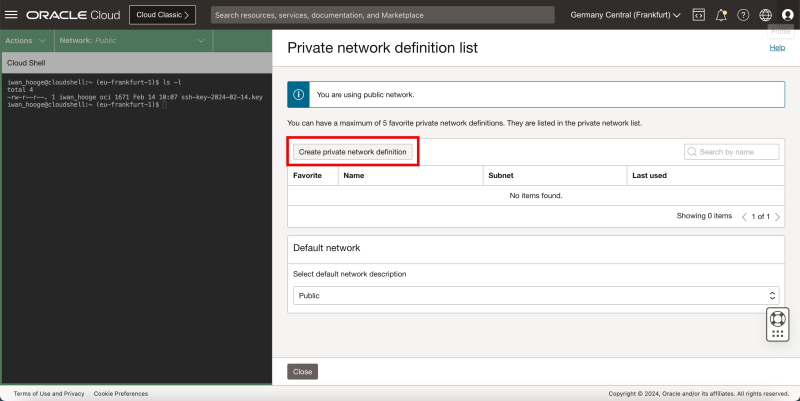
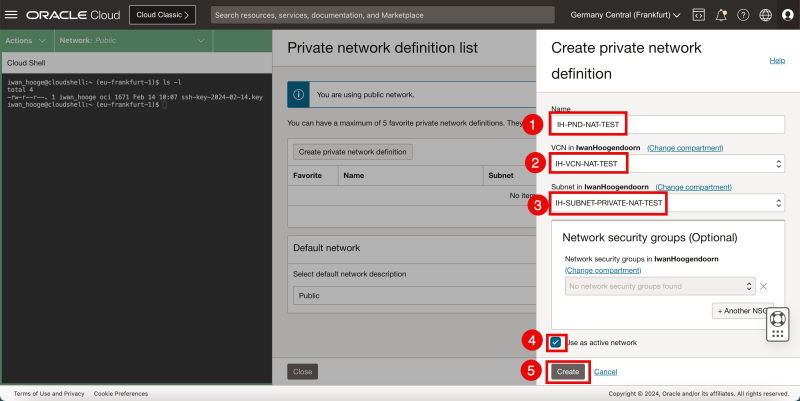
Click on “Create private network definition”.
- Type in a name.
- Select the corresponding VCN (where the Linux Instance resides).
- Select the subnet (where the Linux Instance resides).
- Check the box” Use active network” to activate the private network right away.
- Click on “Create”.
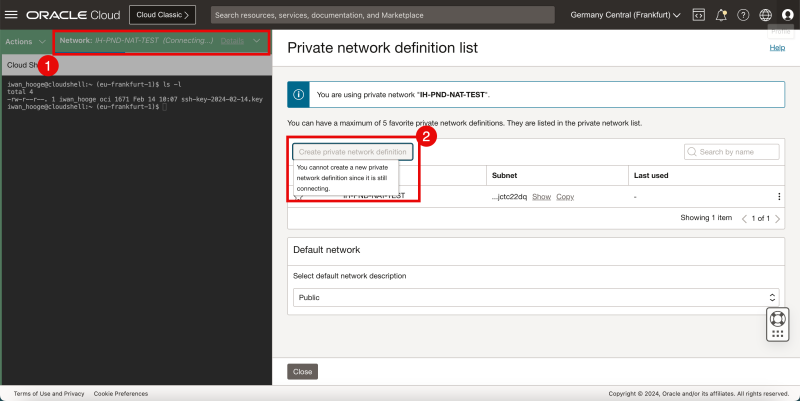
- Notice that the status of the network will change to the newly created Private network with “Connecting”. This will take a few seconds to complete, so be patient”.
- Also notice the message that it is not possible to create a Private Network Definition” when the Cloud Shell is connecting to a new network.
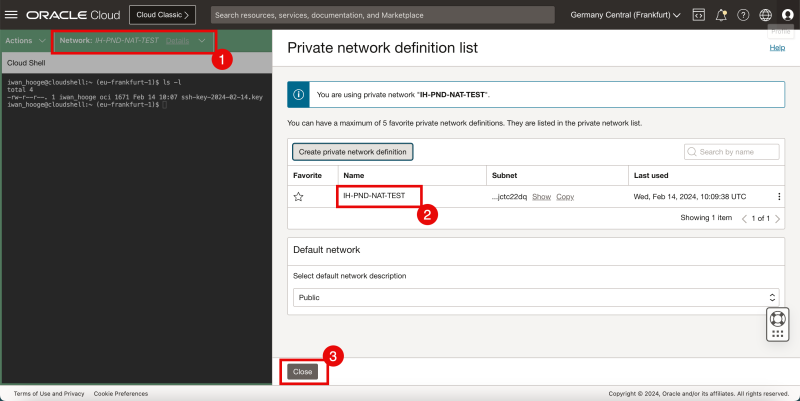
- Eventually the Private Network is connected.
- Notice that the Private Network is also listed.
- Click on “Close” to close the Private network definition list.
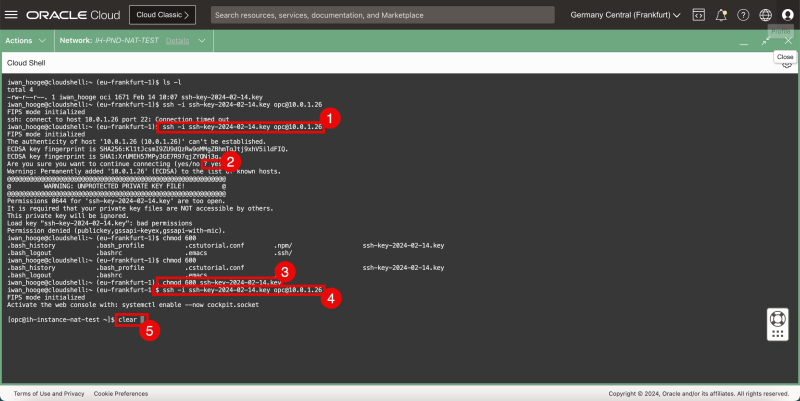
- Connect to the instance using the SSH command where you specify the private key.
- Type “yes”
- Restrict the permissions of the private key and make sure the access is restricted before it can be used.
- Connect to the instance using the SSH command where you specify the private key.
- Type “clear” to clean up the terminal.
STEP 05 Verify Internet connectivity on the Instance
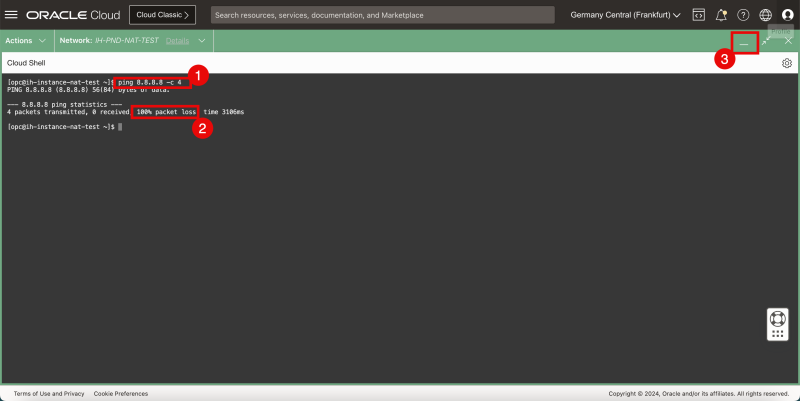
- To verify connectivity to the internet I will do a simple ping to Google’s DNS server.
- Notice that ping is not working and I have a 100% packet loss.
- Click on the minimize button of the Cloud Shell Terminal.
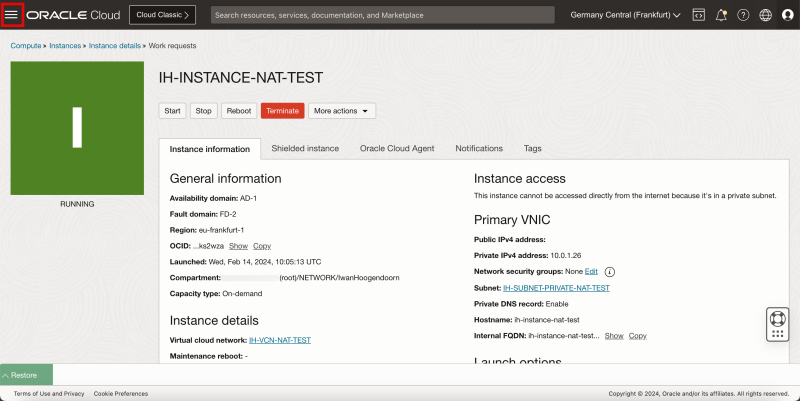
In need to create a NAT Gateway.
- Click on the hamburger menu in the top left corner.
STEP 06 Create a NAT Gateway and route the internet traffic to the NAT Gateway
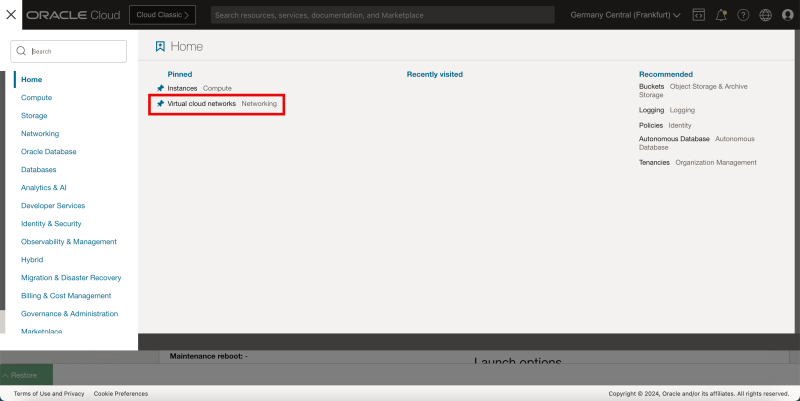
Click on “Virtual Cloud Networking”.
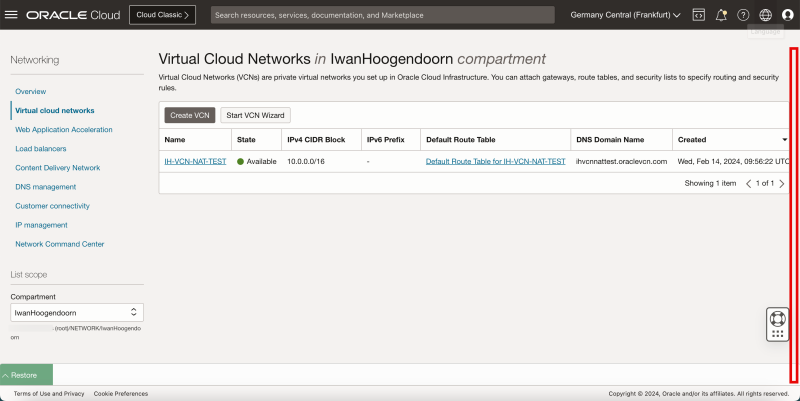
Scroll down.
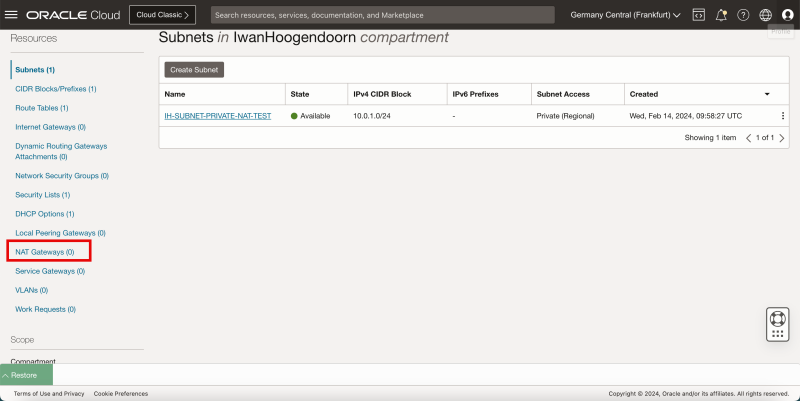
Notice that there are no NAT Gateways available.
Click on “NAT Gateways”.
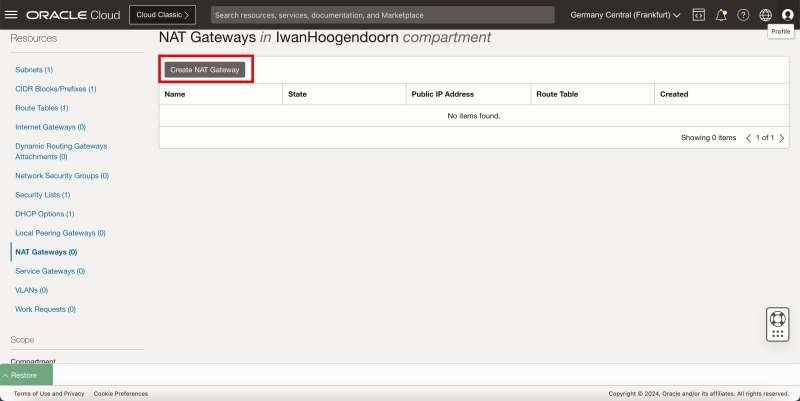
Click on “Create NAT Gateway”.
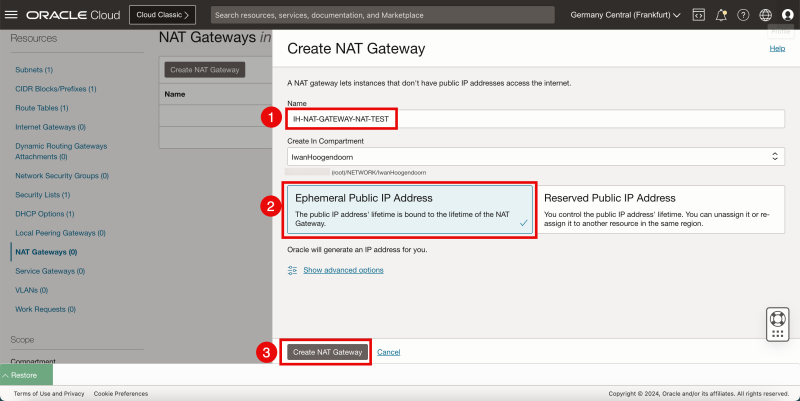
- Specify a name for the new NAT Gateway.
- Select “Ephemeral Public IP address”.
- Click on “Create NAT Gateway”.
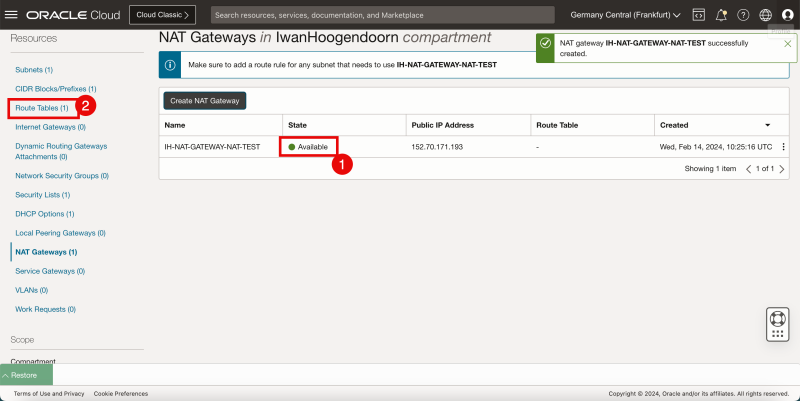
- Notice that the status of the NAT Gateway is “Available”.
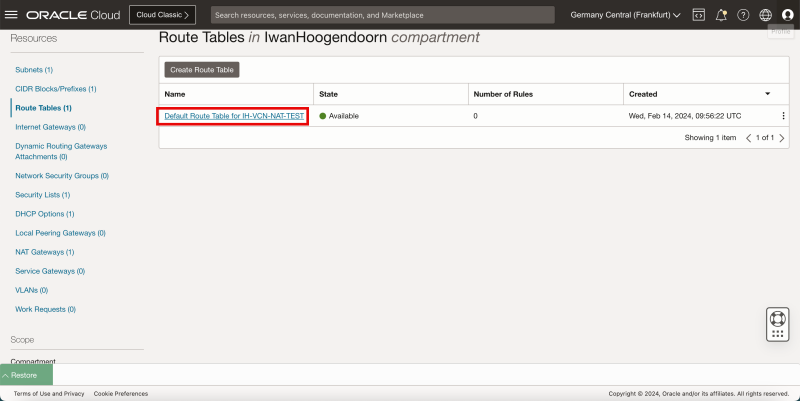
- Click on “Route Tables”.
To route the traffic from the private subnet to the NAT Gateway so that the internet is reachable a static route need to be created.
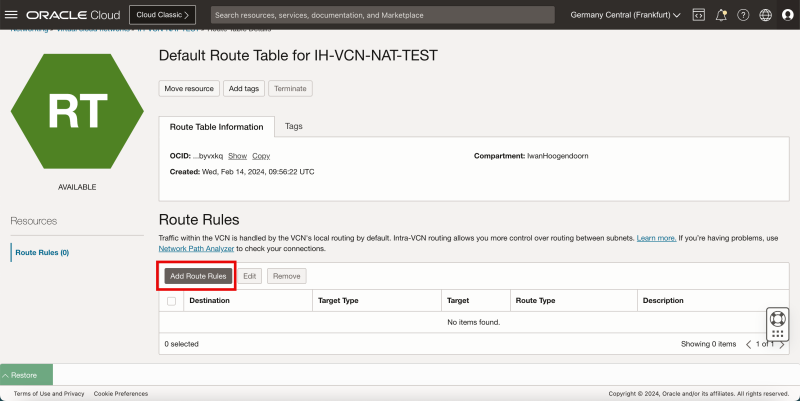
Click on the “Default” Route table.
Click on “Add Route Rules”.
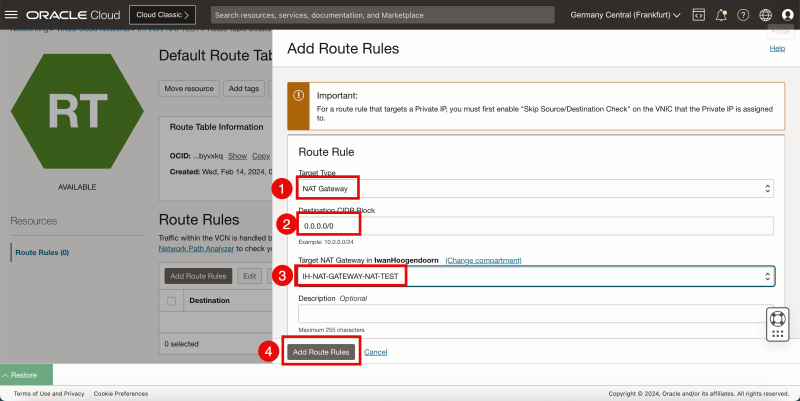
- Select the Target Type to be a “NAT Gateway.
- Specify the destination to be 0.0.0.0/0 (all network traffic).
- Select the Target NAT Gateway that was just created.
- Click on “Add Route Rules”.
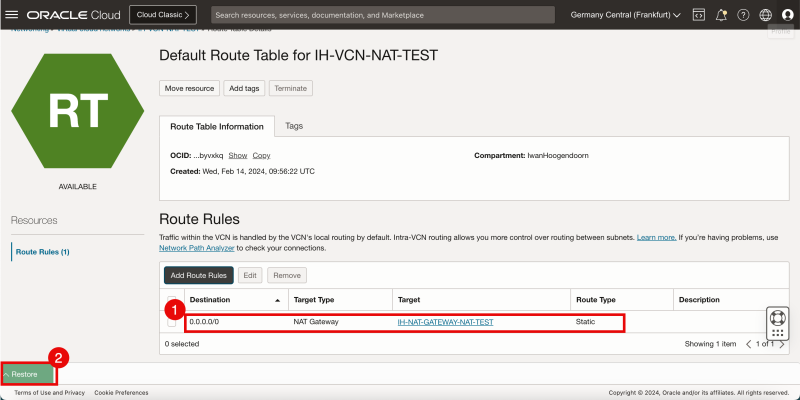
- Notice that the new route rule has been created.
- Restore the Cloud Shell Terminal.
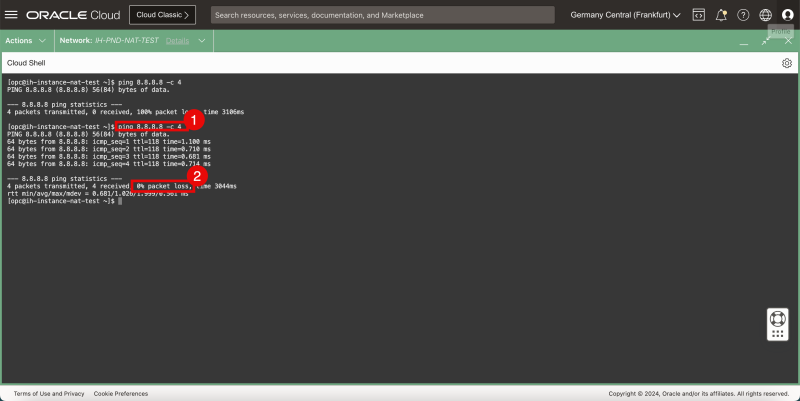
- To verify connectivity to the internet I will do a simple ping to Google’s DNS server.
- Notice that ping is working and I have a 0% packet loss.
I can now access the internet with an Instance that is connected to a Private Subnet with a RFC1981 IPv4 address.
Conclusion
In this article, I have created a new Compute Instance that I have connected to a Private subnet. By default an Instance connected to a Private subnet is not able to reach the internet. I have created a NAT Gateway and routed all traffic to that NAT gateway so that Compute Instance was able to reach the internet.
