Use Terraform to Deploy an Kubernetes Cluster using OKE
Deploying Kubernetes with Terraform on Oracle Kubernetes Engine (OKE) offers a streamlined and scalable approach to managing containerized applications in the cloud. OKE, Oracle Cloud's managed Kubernetes service, simplifies the deployment, management, and scaling of Kubernetes clusters.
By using Terraform, an infrastructure-as-code tool, you can automate the provisioning and configuration of OKE clusters, ensuring consistency and efficiency. This combination allows for repeatable deployments, infrastructure versioning, and easy updates, making it ideal for cloud-native and DevOps-focused teams looking to leverage Oracle's powerful cloud ecosystem.
In this tutorial we are going to deploy a very specific Kubernetes architecture on Oracle Kubernetes Engine (OKE) using Terraform.
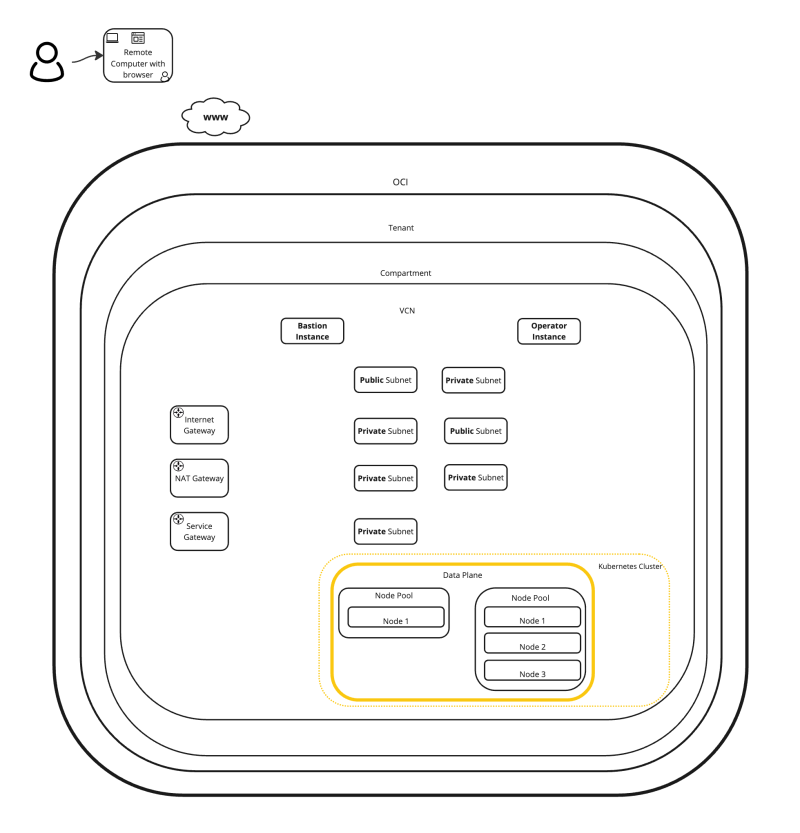
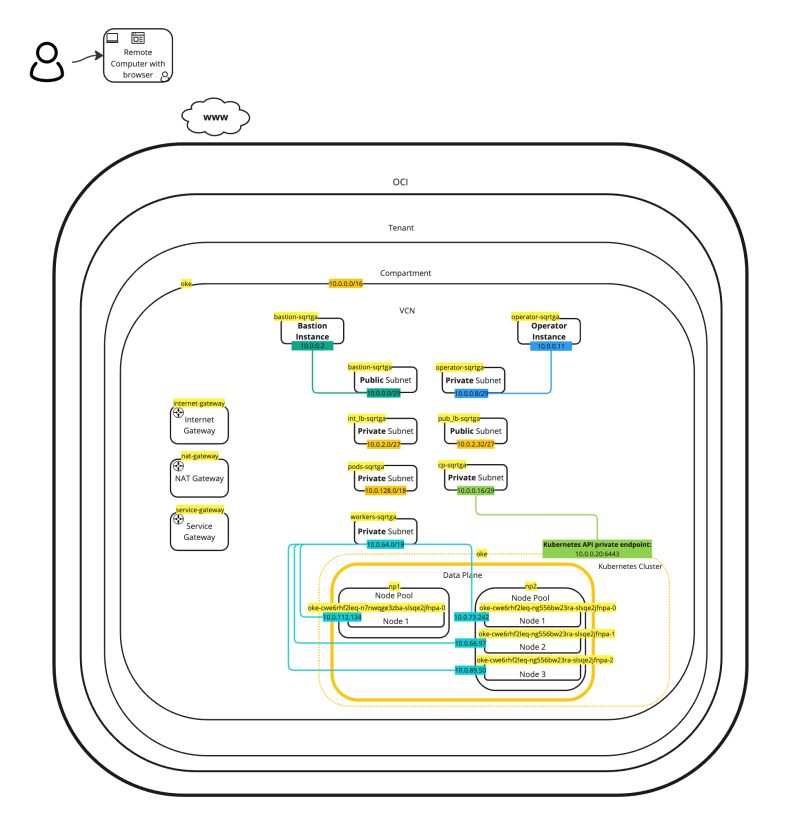
The figure below illustrates what we are going to deploy:
- Internet Gateway
- NAT Gateway
- Service Gateway
- 7 x Subnets (Private and Public)
- 2 x Node Pools
- 4 x Worker Nodes (Instances)
- Bastion (Instance)
- Operator (Instance)
Prerequisites
Before you can start deploying objects on OCI using Terraform you first need to prepare your environment for authenticating and running Terraform scripts.
These steps are already described in [Task 2 of this article]. Perform these steps/task before you continue with this article.
The Steps
In this article perform the following steps/tasks:
- [ ] STEP 01: Clone the repository with the Terraform scripts
- [ ] STEP 02: Run
terraform applyand create 1 OKE cluster with the necessary resources (VCN, subnets, etc,) - [ ] STEP 03: Use the bastion and operator to check if your connectivity is working
- [ ] STEP 04: Delete (destroy) the OKE cluster using Terraform
STEP 01 - Clone the repository with the Terraform scripts
The Terraform OCI OKE repository that we are using for this tutorial can be found [here].
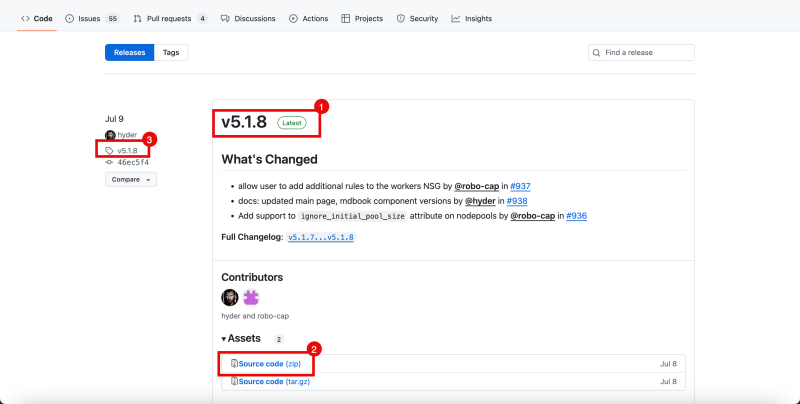
- At the time of writing this article the latest version is 5.1.8.
- You can either download the full zip file with the full repository or clone the repo using git.
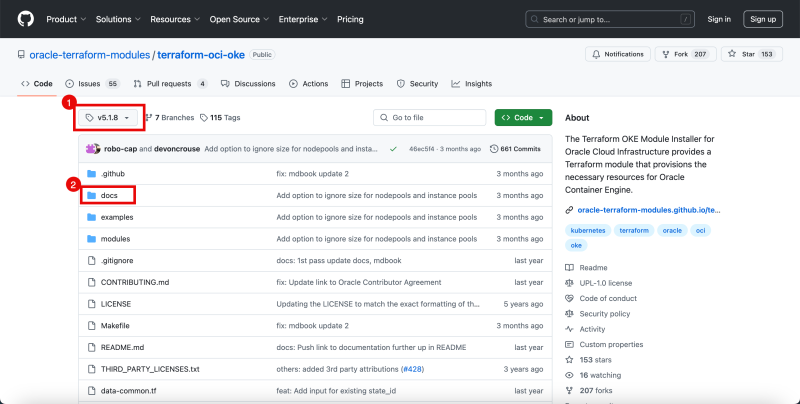
- Click on the version to go into this 5.1.8 branch.
- Notice that you are in the 5.1.8 branch.
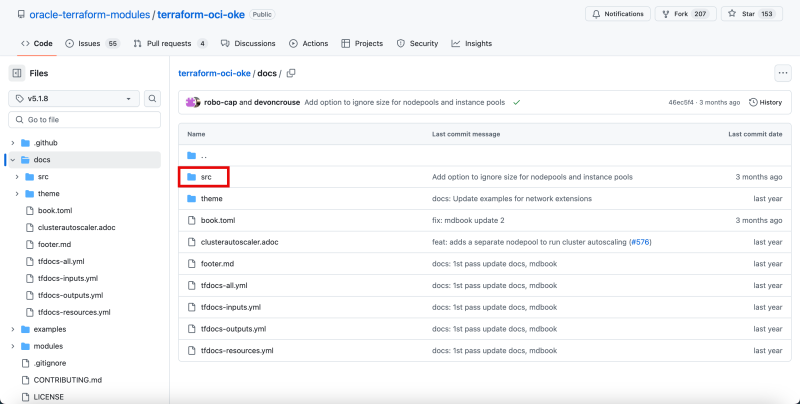
- Click on the docs folder.
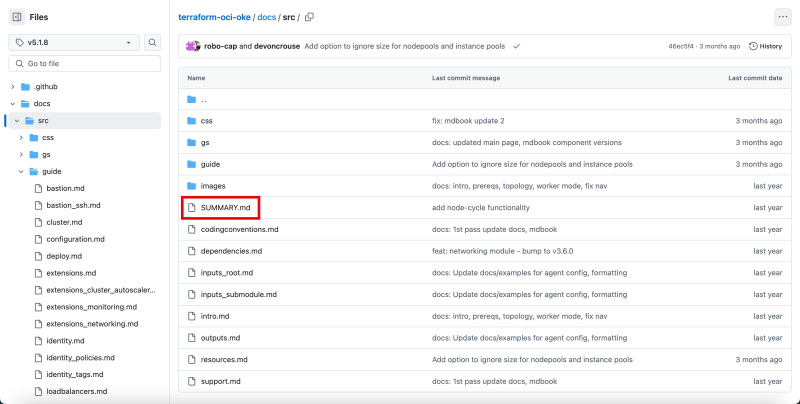
Click on the src folder.
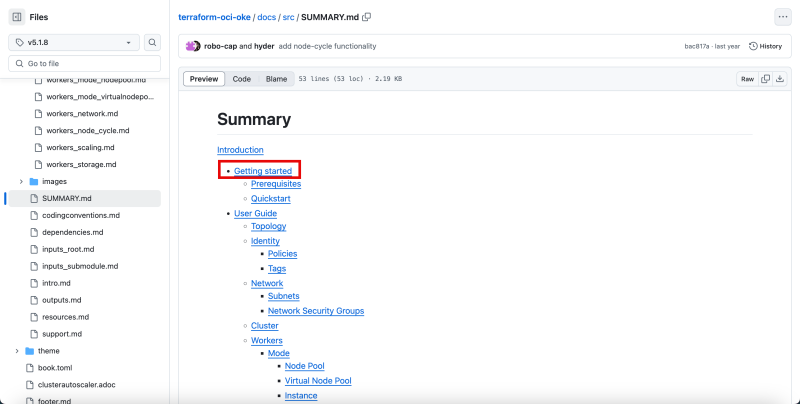
Click on the Summary.MD file.
In the full Table of Contents of all the documentation click on on Getting Started.
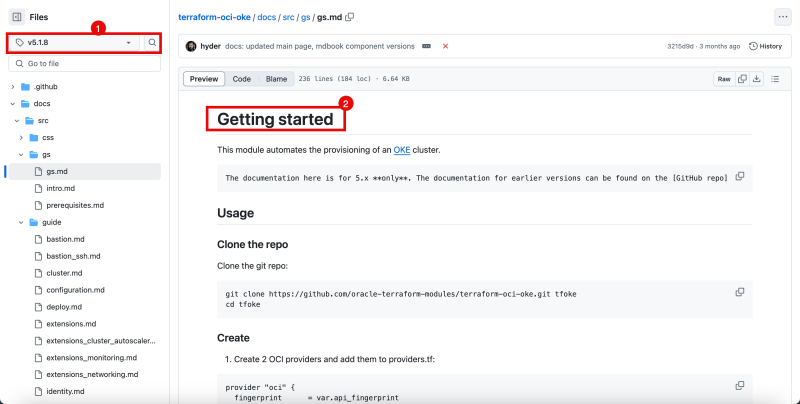
- Notice that you are still in the 5.1.8 branch (other branches may contain different types of documentation steps depending on the code version).
- Notice you are on the getting started page, and this page will do exactly what the title says.
Below you will see my outputs of how I used the Getting Started page to create this tutorial.
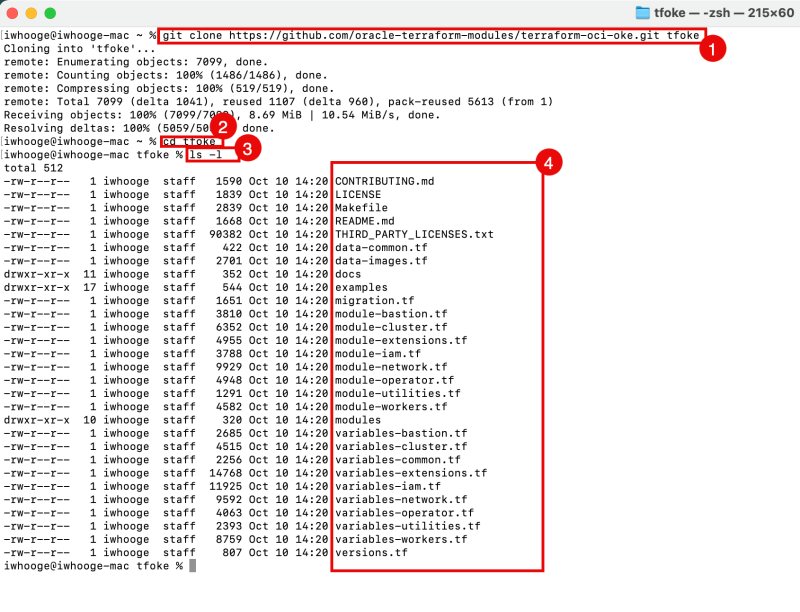
- Use the git clone command to clone the repository.
- Issue the command to change the folder into to repository folder.
- Issue the command to list the content of the folder.
- Notice all the files of the full repository.
iwhooge@iwhooge-mac ~ % git clone https://github.com/oracle-terraform-modules/terraform-oci-oke.git tfoke
Create a providers.tf file inside this directory with the following content:
providers.tf
provider "oci" {
  fingerprint      = var.api_fingerprint
  private_key_path = var.api_private_key_path
  region           = var.region
  tenancy_ocid     = var.tenancy_id
  user_ocid        = var.user_id
}

provider "oci" {
  fingerprint      = var.api_fingerprint
  private_key_path = var.api_private_key_path
  region           = var.home_region
  tenancy_ocid     = var.tenancy_id
  user_ocid        = var.user_id
  alias            = "home"
}
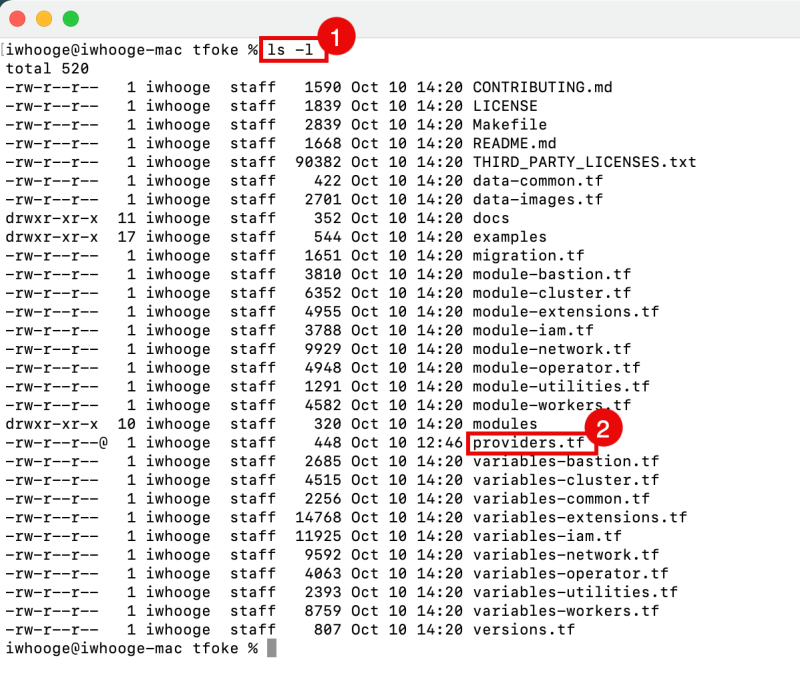
- Issue the command to list the content of the folder.
- Notice the providers.tf file we just created.
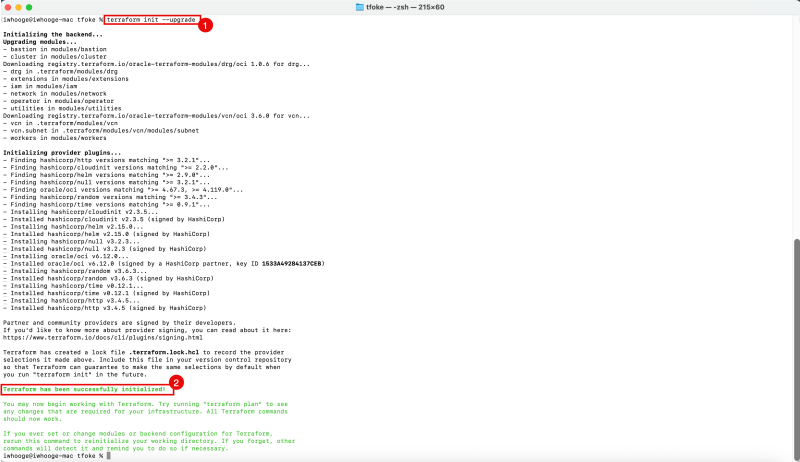
- Issue the following command to initialize Terraform and upgrade the required modules.
- Notice the message that Terraform has been successfully Initialized.
iwhooge@iwhooge-mac tfoke % terraform init --upgrade
Make sure you have the following information available, to create the terraform.tfvars file. This information can be retrieved by following the steps defined in the prerequisites section([Task 2 of this article]).
| Tenancy OCID | ocid1.tenancy.oc1..aaaaaaaaXXX |
|---|---|
| User OCID | ocid1.user.oc1..aaaaaaaaXXX |
| Fingerprint | 30:XXX |
| Region | me-abudhabi-1 |
| Private Key Path | ~/.oci/4-4-2023-rsa-key.pem |
| Compartment OCID | ocid1.compartment.oc1..aaaaaaaaXXX |
Now we need to create the terraform.tfvars file inside this directory with the following content:
terraform.tfvars
= Identity and access parameters =
api_fingerprint      = "30:XXX"
api_private_key_path = "~/.oci/4-4-2023-rsa-key.pem"

home_region = "me-abudhabi-1"
region      = "me-abudhabi-1"
tenancy_id  = "ocid1.tenancy.oc1..aaaaaaaaXXX"
user_id     = "ocid1.user.oc1..aaaaaaaaXXX"

= general oci parameters =
compartment_id = "ocid1.compartment.oc1..aaaaaaaaXXX"
timezone       = "Australia/Sydney"

= ssh keys =
ssh_private_key_path = "~/.ssh/id_rsa"
ssh_public_key_path  = "~/.ssh/id_rsa.pub"

= networking =
create_vcn               = true
assign_dns               = true
lockdown_default_seclist = true
vcn_cidrs                = ["10.0.0.0/16"]
vcn_dns_label            = "oke"
vcn_name                 = "oke"

= Subnets =
subnets = {
  bastion  = { newbits = 13, netnum = 0, dns_label = "bastion", create="always" }
  operator = { newbits = 13, netnum = 1, dns_label = "operator", create="always" }
  cp       = { newbits = 13, netnum = 2, dns_label = "cp", create="always" }
  int_lb   = { newbits = 11, netnum = 16, dns_label = "ilb", create="always" }
  pub_lb   = { newbits = 11, netnum = 17, dns_label = "plb", create="always" }
  workers  = { newbits = 2, netnum = 1, dns_label = "workers", create="always" }
  pods     = { newbits = 2, netnum = 2, dns_label = "pods", create="always" }
}

= bastion =
create_bastion           = true
bastion_allowed_cidrs    = ["0.0.0.0/0"]
bastion_user             = "opc"

= operator =
create_operator                = true
operator_install_k9s           = true


= iam =
create_iam_operator_policy   = "always"
create_iam_resources         = true

create_iam_tag_namespace = false // true/*false
create_iam_defined_tags  = false // true/*false
tag_namespace            = "oke"
use_defined_tags         = false // true/*false

= cluster =
create_cluster     = true
cluster_name       = "oke"
cni_type           = "flannel"
kubernetes_version = "v1.29.1"
pods_cidr          = "10.244.0.0/16"
services_cidr      = "10.96.0.0/16"

= Worker pool defaults =
worker_pool_size = 0
worker_pool_mode = "node-pool"

= Worker defaults =
await_node_readiness     = "none"

worker_pools = {
  np1 = {
    shape              = "VM.Standard.E4.Flex",
    ocpus              = 2,
    memory             = 32,
    size               = 1,
    boot_volume_size   = 50,
    kubernetes_version = "v1.29.1"
  }
  np2 = {
     shape            = "VM.Standard.E4.Flex",
     ocpus            = 2,
     memory           = 32,
     size             = 3,
     boot_volume_size = 150,
     kubernetes_version = "v1.30.1"
  }
}

= Security =
allow_node_port_access       = false
allow_worker_internet_access = true
allow_worker_ssh_access      = true
control_plane_allowed_cidrs  = ["0.0.0.0/0"]
control_plane_is_public      = false
load_balancers               = "both"
preferred_load_balancer      = "public"
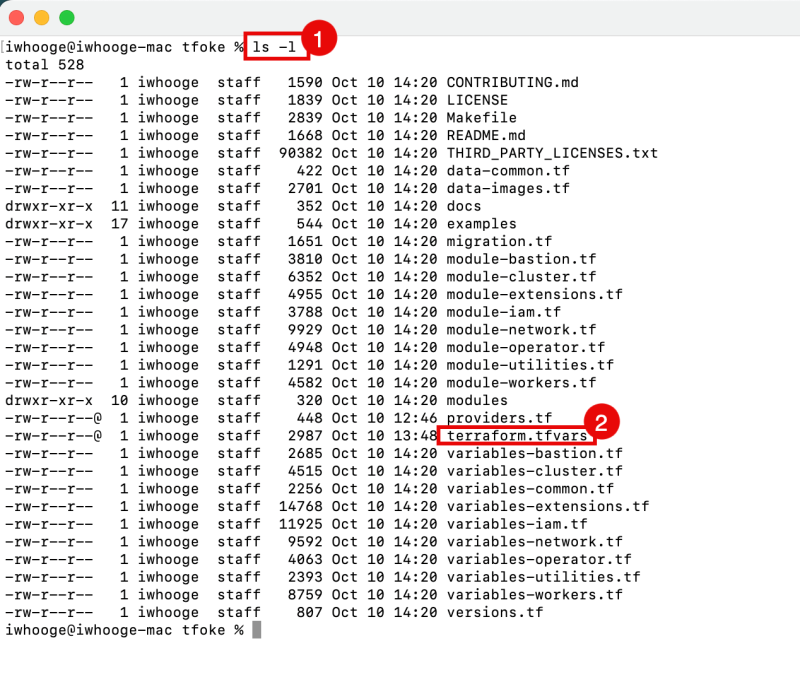
- Issue the command to list the content of the folder.
- Notice the terraform.tfvars file we just created.
STEP 02 - Run terraform apply and create 1 OKE cluster with the necessary resources VCN- subnets-etc
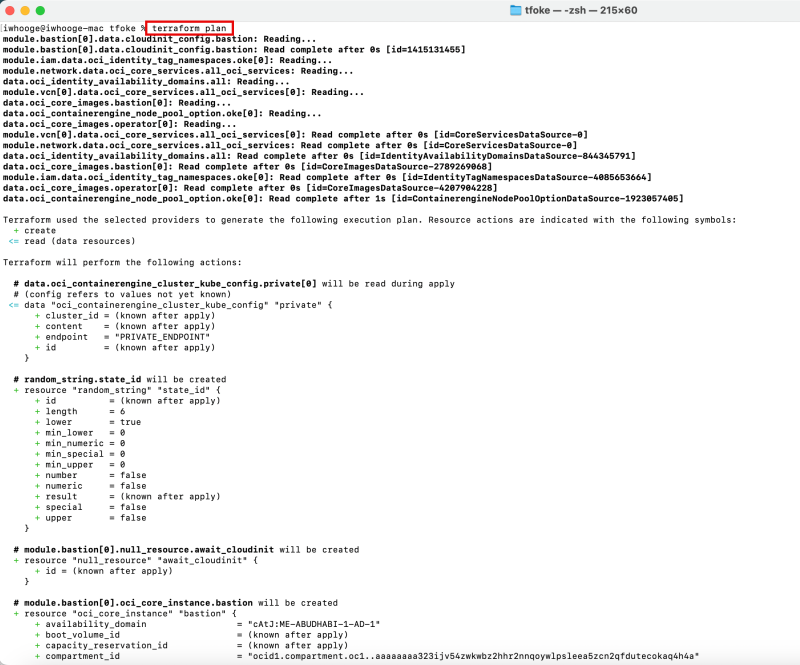
Issue the following command to plan the Kubernetes Cluster deployment on OKE using Terraform.
iwhooge@iwhooge-mac tfoke % terraform plan
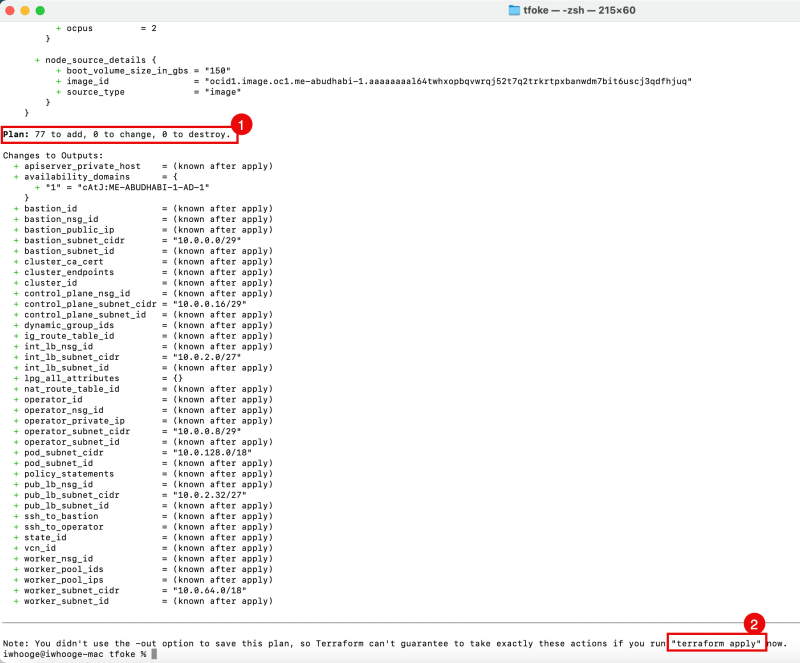
- Notice that this Terraform code will deploy 77 Objects.
- Notice the command to run next is the "terraform apply" command.
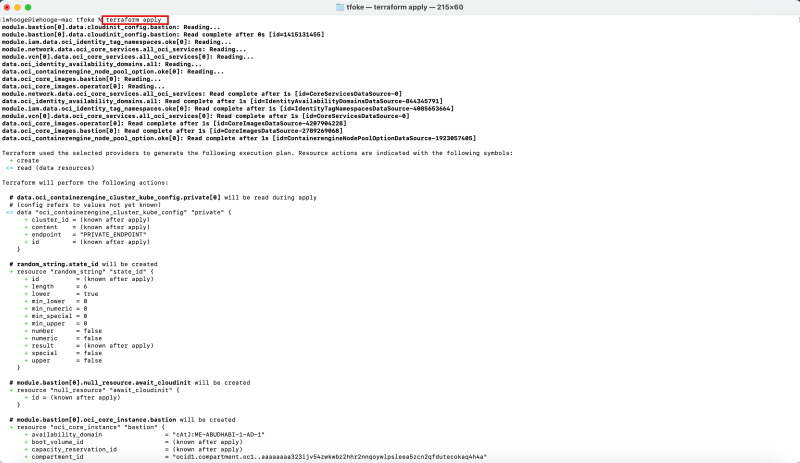
Issue the following command to apply the Kubernetes Cluster deployment on OKE using Terraform.
iwhooge@iwhooge-mac tfoke % terraform apply
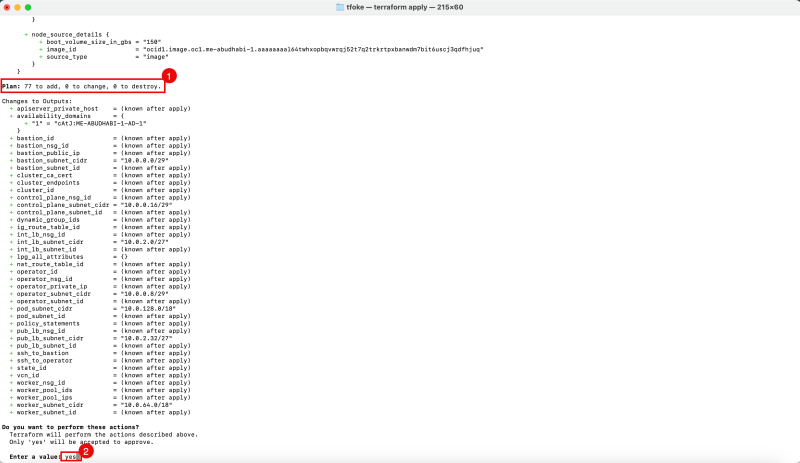
- Notice that this Terraform code will deploy 77 Objects.
- Confirm with "yes" to continue the deployment.
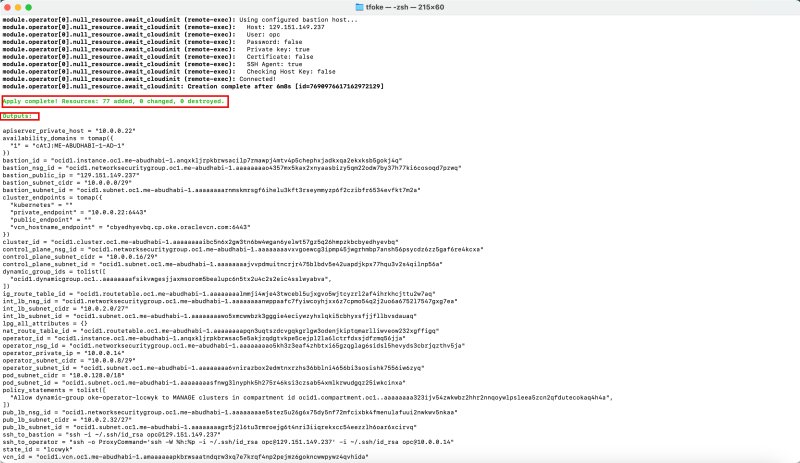
When the deployment is finished you will see a message that the Apply is completed.
Notice the output that has been provided with useful information that you might need for your reference.
'''Outputs:'''

apiserver_private_host = "10.0.0.22"

availability_domains = tomap({

  "1" = "cAtJ:ME-ABUDHABI-1-AD-1"

})

bastion_id = "ocid1.instance.oc1.me-abudhabi-1.anqxkljrpkbrwsacilp7rmawpj4mtv4p5chephxjadkxqa2ekxksb5gokj4q"

bastion_nsg_id = "ocid1.networksecuritygroup.oc1.me-abudhabi-1.aaaaaaaao4357mx5kax2xnyaasbizy5qm22odw7by37h77ki6cosoqd7pzwq"

bastion_public_ip = "129.151.149.237"

bastion_subnet_cidr = "10.0.0.0/29"

bastion_subnet_id = "ocid1.subnet.oc1.me-abudhabi-1.aaaaaaaarnmskmrsgf6ihelu3kft3rseymmyzp6f2czibfr6534evfkt7m2a"

cluster_endpoints = tomap({

  "kubernetes" = ""

  "private_endpoint" = "10.0.0.22:6443"

  "public_endpoint" = ""

  "vcn_hostname_endpoint" = "cbyedhyevbq.cp.oke.oraclevcn.com:6443"

})

cluster_id = "ocid1.cluster.oc1.me-abudhabi-1.aaaaaaaaibc5n6x2gw3tn6bw4wgan6yelwt57gz5q26hmpzkbcbyedhyevbq"

control_plane_nsg_id = "ocid1.networksecuritygroup.oc1.me-abudhabi-1.aaaaaaaavxvgoewcg3ipmp45jwgrhmbp7ansh56psycdz6zz5gaf6re4kcxa"

control_plane_subnet_cidr = "10.0.0.16/29"

control_plane_subnet_id = "ocid1.subnet.oc1.me-abudhabi-1.aaaaaaaajvvpdmuitncrjr475blbdv5e42uapdjkpx77hqu3v2s4qilnp56a"

dynamic_group_ids = tolist([

  "ocid1.dynamicgroup.oc1..aaaaaaaafsikvwgesjjaxmsorom5bealupc6n5tx2u4c2s2eic4sslwyabva",

])

ig_route_table_id = "ocid1.routetable.oc1.me-abudhabi-1.aaaaaaaalmmji4wje43twcebl5ujxgvo5wjtcyzrl2af4ihrkhcjttu2w7aq"

int_lb_nsg_id = "ocid1.networksecuritygroup.oc1.me-abudhabi-1.aaaaaaaanwppaafc7fyiwcoyhjxx6z7cpmo54q2j2uo6a6752l7547gxg7ea"

int_lb_subnet_cidr = "10.0.2.0/27"

int_lb_subnet_id = "ocid1.subnet.oc1.me-abudhabi-1.aaaaaaaawo5xmcwwbzk3gggie4eciywzyhxlqki5cbhyxsfjjfllbvsdauaq"

lpg_all_attributes = {}

nat_route_table_id = "ocid1.routetable.oc1.me-abudhabi-1.aaaaaaaapqn3uqtszdcvgqkgrlgw3odenjkiptqmarlliwveow232xgffigq"

operator_id = "ocid1.instance.oc1.me-abudhabi-1.anqxkljrpkbrwsac5e5akjzqdgtvkpe5cejpl2la6lctrfdxsjdfzmq56jja"

operator_nsg_id = "ocid1.networksecuritygroup.oc1.me-abudhabi-1.aaaaaaaao5kh3z3eaf4zhbtxi65gzqglag6sidsl5hevyds3cbrjqzthv5ja"

operator_private_ip = "10.0.0.14"

operator_subnet_cidr = "10.0.0.8/29"

operator_subnet_id = "ocid1.subnet.oc1.me-abudhabi-1.aaaaaaaa6vnirazbox2edmtnxrzhs36bblni4656bi3sosishk7556iw6zyq"

pod_subnet_cidr = "10.0.128.0/18"

pod_subnet_id = "ocid1.subnet.oc1.me-abudhabi-1.aaaaaaaasfnwg3lnyphk5h275r46ksi3czsab54xmlkrwudgqz25iwkcinxa"

policy_statements = tolist([

  "Allow dynamic-group oke-operator-lccwyk to MANAGE clusters in compartment id ocid1.compartment.oc1..aaaaaaaa323ijv54zwkwbz2hhr2nnqoywlpsleea5zcn2qfdutecokaq4h4a",

])

pub_lb_nsg_id = "ocid1.networksecuritygroup.oc1.me-abudhabi-1.aaaaaaaae5stez5u26g6x75dy5nf72mfcixbk4fmenulafuui2nwkwv5nkaa"

pub_lb_subnet_cidr = "10.0.2.32/27"

pub_lb_subnet_id = "ocid1.subnet.oc1.me-abudhabi-1.aaaaaaaagr5j2l6tu3rmroejg6t4nri3iiqrekxcc54eezzlh6oar6xcirvq"

ssh_to_bastion = "ssh -i ~/.ssh/id_rsa opc@129.xxx.xxx.xxx"

ssh_to_operator = "ssh -o ProxyCommand='ssh -W %h:%p -i ~/.ssh/id_rsa opc@129.xxx.xxx.xxx' -i ~/.ssh/id_rsa opc@10.0.0.14"

state_id = "lccwyk"

vcn_id = "ocid1.vcn.oc1.me-abudhabi-1.amaaaaaapkbrwsaatndqrw3xq7e7krqf4np2pejmz6gokncwwpywz4qvhida"

worker_nsg_id = "ocid1.networksecuritygroup.oc1.me-abudhabi-1.aaaaaaaazbpfavygiv4xy3khfi7cxunidt5s7u56smnahcvpxxjvsm6jqtja"

worker_pool_ids = {

  "np1" = "ocid1.nodepool.oc1.me-abudhabi-1.aaaaaaaauo57ekyoiiaif25gq7uwrpkmjs3nrw4ynurbq7apsnygeam7t2wa"

  "np2" = "ocid1.nodepool.oc1.me-abudhabi-1.aaaaaaaa7423cp6zyntxwxokol3kmd2julcu6v4n4vbocea3wnayv2xq6nyq"

}

worker_pool_ips = {

  "np1" = {

    "ocid1.instance.oc1.me-abudhabi-1.anqxkljrpkbrwsac3t3smjsyxjgen4zqjpbqeut4vm2dlhp6663igu7cznla" = "10.0.90.37"

  }

  "np2" = {

    "ocid1.instance.oc1.me-abudhabi-1.anqxkljrpkbrwsac2eayropnzgazryrkzavoykal3lxg2dxpiykrq4r5pbga" = "10.0.125.238"

    "ocid1.instance.oc1.me-abudhabi-1.anqxkljrpkbrwsace4aup47ukjcedfnmzljmetx3467xdyoa2hdxbsyiitva" = "10.0.92.136"

    "ocid1.instance.oc1.me-abudhabi-1.anqxkljrpkbrwsacojjri4b7qsaxo7hwbdc4q7z3dp6fv37narf75ejv7a2a" = "10.0.111.157"

  }

}

worker_subnet_cidr = "10.0.64.0/18"

worker_subnet_id = "ocid1.subnet.oc1.me-abudhabi-1.aaaaaaaarrnazbrmwbiyl3ljmdxhgm4kpmk7wzce3a5ihavsv3wtgmiucnsa"

iwhooge@iwhooge-mac tfoke %
Inside the OCI Console
Now we can crosscheck our Terraform deployment by navigating to the OCI Console.
The OKE Cluster
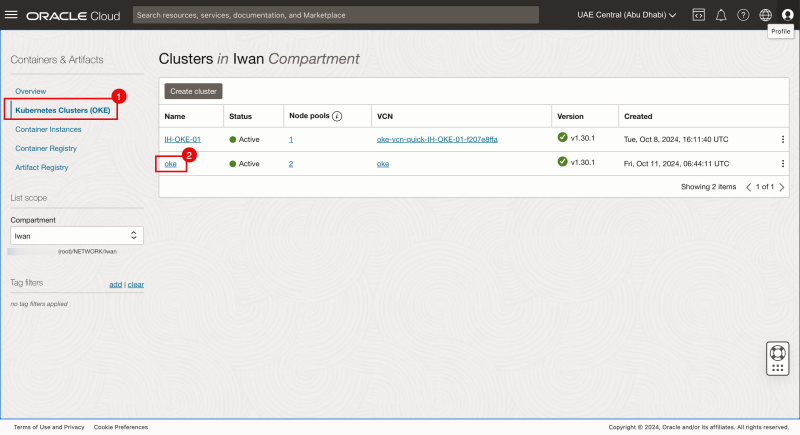
- Navigate to Developer Services > Kubernetes Clusters (OKE).
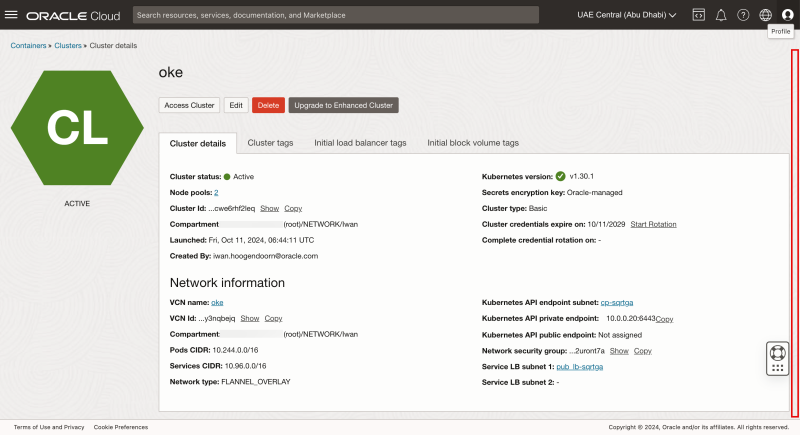
- Review that the oke Kubernetes cluster is created here. Click on the cluster.
Scroll down.
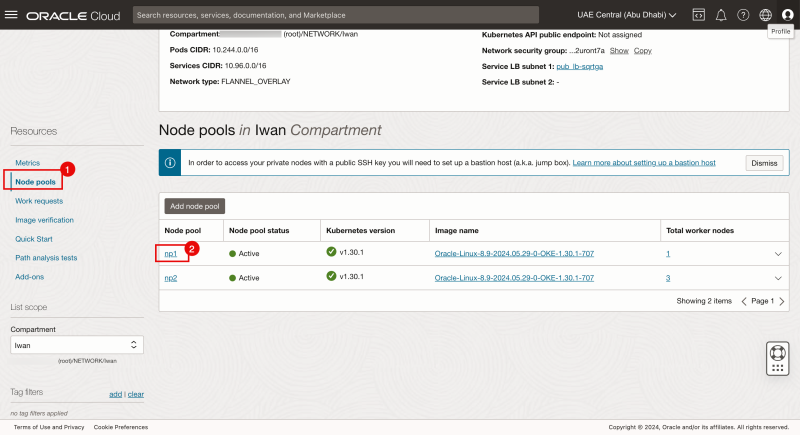
- Click on the node pools.
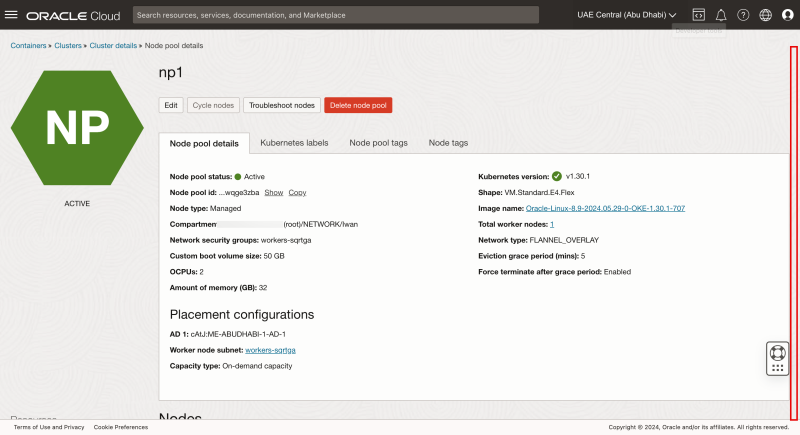
- Click on the np1 node pool
Scroll down.
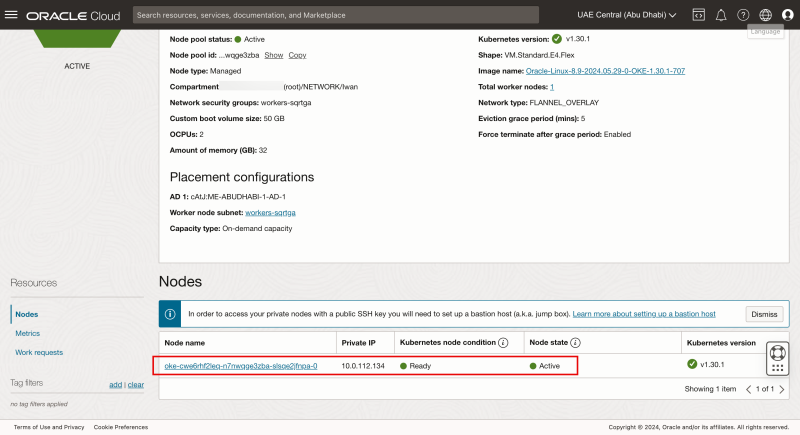
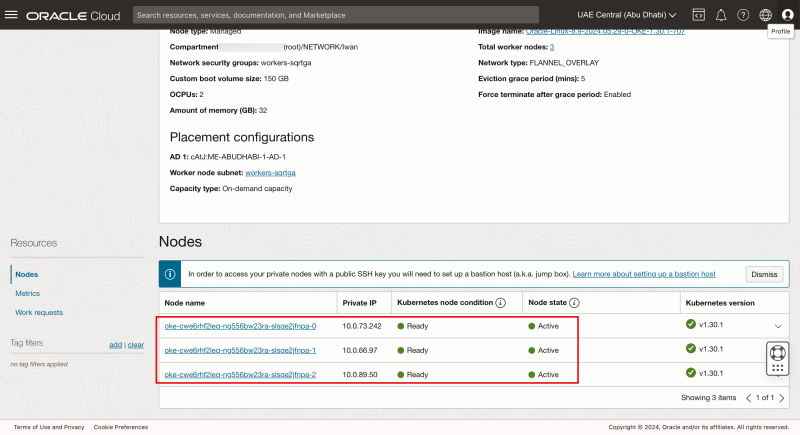
Notice there is one worker node in node pool np1.
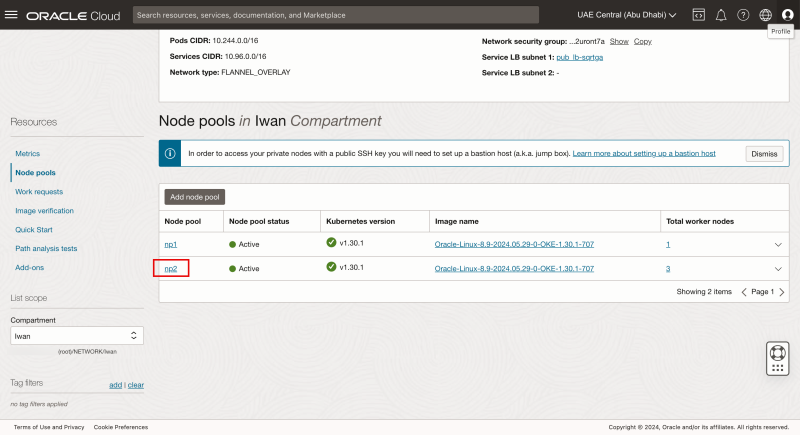
- Go back to the Node Pools.
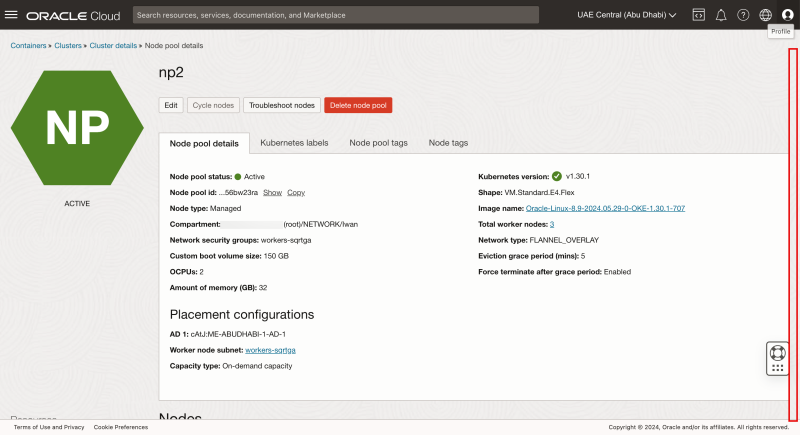
- Click on the np2 node pool
Scroll down.
Notice there are three worker nodes in node pool np2.
The Instances
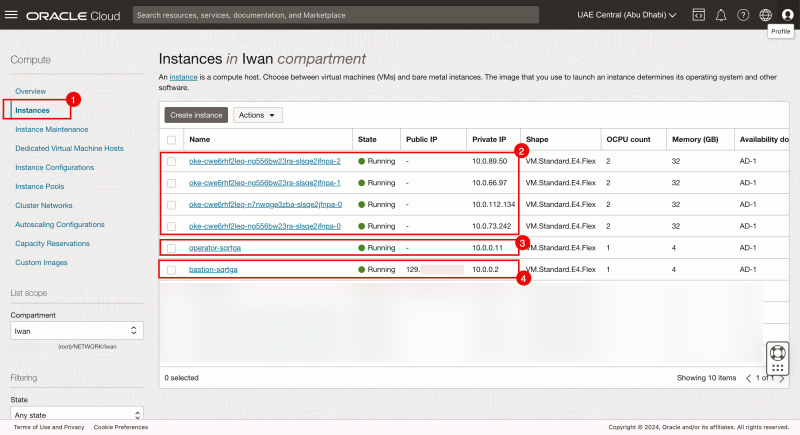
- Navigate to Compute > Instances.
- Review that the bastion host, an operator and the four worker nodes belonging to the oke Kubernetes cluster.
The VCN
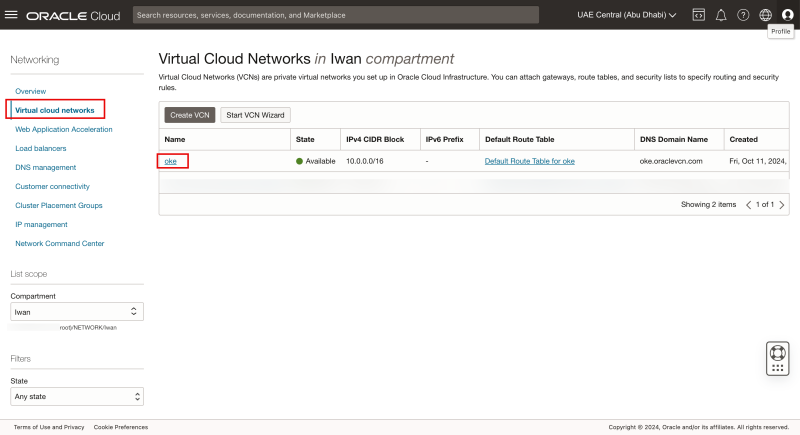
- Navigate to Networking > VCN.
- Review that the oke VCN is created here. Click on the VCN.
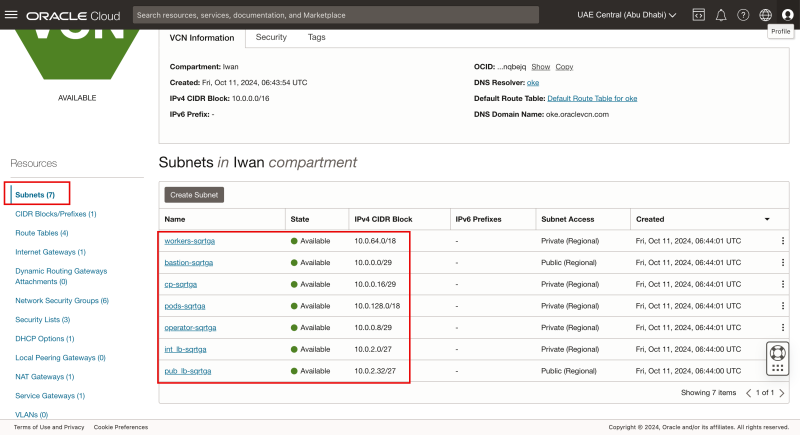
- Make sure you are in the Subnets section.
- Notice all the seven created subnets, belonging to the OKE Kubernetes cluster.
The picture below shows a detailed picture of what has been created with the Terraform script.
STEP 03 - Use the bastion and operator to check if your connectivity is working
In the output provided when the Terraform deployment has been completed, you will find some commands to connect to your Kubernetes environment.
This command will connect you only to the bastion host.
ssh_to_bastion = "ssh -i ~/.ssh/id_rsa opc@129.xxx.xxx.xxx"
This command will connect you to the Kubernetes Operator through the Bastion host.
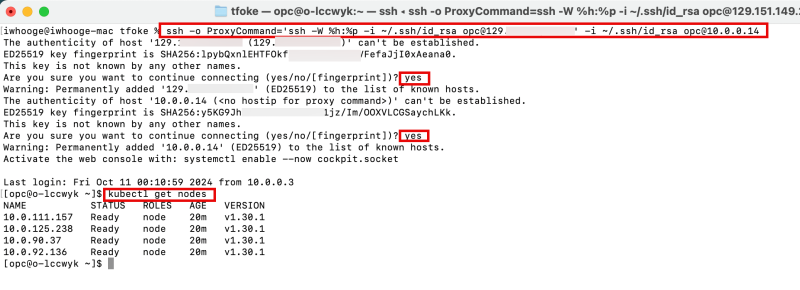
ssh_to_operator = "ssh -o ProxyCommand='ssh -W %h:%p -i ~/.ssh/id_rsa opc@129.xxx.xxx.xxx' -i ~/.ssh/id_rsa opc@10.0.0.14"
- As we will manage the Kubernetes Cluster from the Operator we will use the last command.
- Type "yes" twice.
- Issue the kubectl get nodes command to get the Kubernetes Workernodes.
To make your life easier (in terms of SSH connections), you can add some additional commands in your ~/.ssh/config file.
Add this to ~/.ssh/config
Host bastion47
    HostName 129.xxx.xxx.xxx
    user opc
    IdentityFile ~/.ssh/id_rsa
    UserKnownHostsFile /dev/null
    StrictHostKeyChecking=no
    TCPKeepAlive=yes
    ServerAliveInterval=50

Host operator47
    HostName 10.0.0.14
    user opc
    IdentityFile ~/.ssh/id_rsa
    ProxyJump bastion47
    UserKnownHostsFile /dev/null
    StrictHostKeyChecking=no
    TCPKeepAlive=yes
    ServerAliveInterval=50
When you have added the above content to the ~/.ssh/config file you will be able to use simple names in the SSH commands.
iwhooge@iwhooge-mac tfoke % ssh operator47
STEP 04 - Delete-destroy the OKE cluster using Terraform
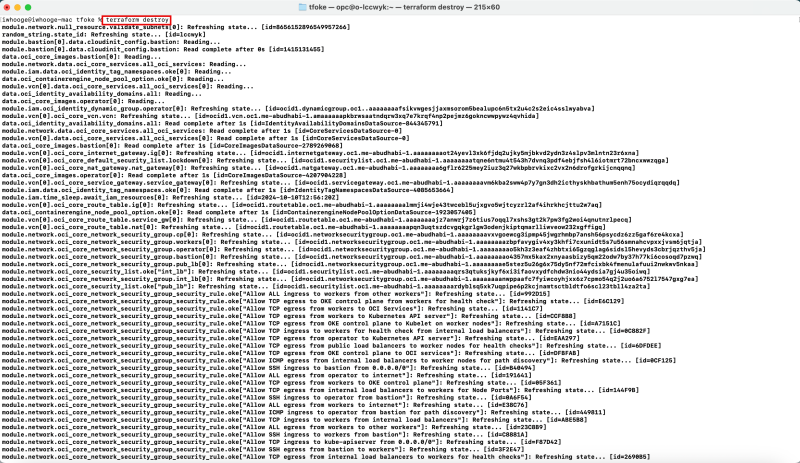
When you no longer need the Kubernetes Cluster in OKE, simply issue the destroy command.
iwhooge@iwhooge-mac tfoke % terraform destroy
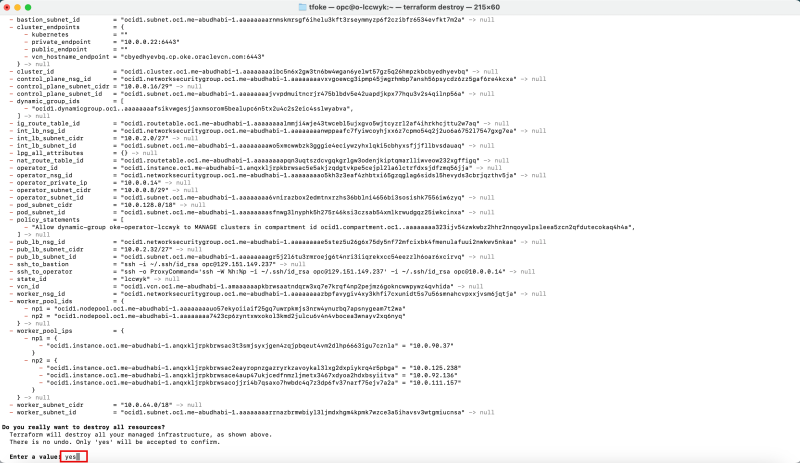
- Confirm with "yes" to continue the destruction.
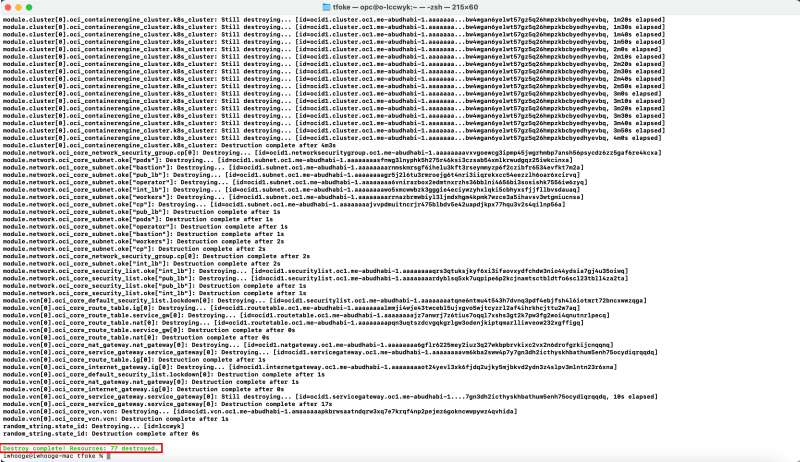
When the destroy is finished you will see a message that the Destroy is completed.
Conclusion
In conclusion, deploying Kubernetes on Oracle Kubernetes Engine (OKE) using Terraform provides an efficient, automated, and scalable solution for managing containerized applications in the cloud.
By leveraging Terraform’s infrastructure-as-code capabilities, you ensure that your OKE clusters are deployed consistently and can be easily maintained or updated over time.
This integration streamlines the process, allowing for better version control, automated scaling, and a repeatable infrastructure setup.
Whether you're managing a single cluster or scaling across environments, this approach empowers teams to manage their Kubernetes workloads with reliability and ease in Oracle Cloud.
