Lab: NSX Manager deployment (Single site)
Lab: NSX Manager deployment (Single site)
In this lab I am working with the following software and versions:
| Software | Version | Filename |
|---|---|---|
| VMware vCenter Server Appliance | 7.00U3G | VMware-VCSA-all-7.0.3-20150588.iso |
| VMware ESXi Server | 7.00U3F | VMware-VMvisor-Installer-7.0U3f-20036589.x86_64.iso |
| VMware NSX | 4.0.0.1 | nsx-unified-appliance-4.0.0.1.0.20159694.ova |
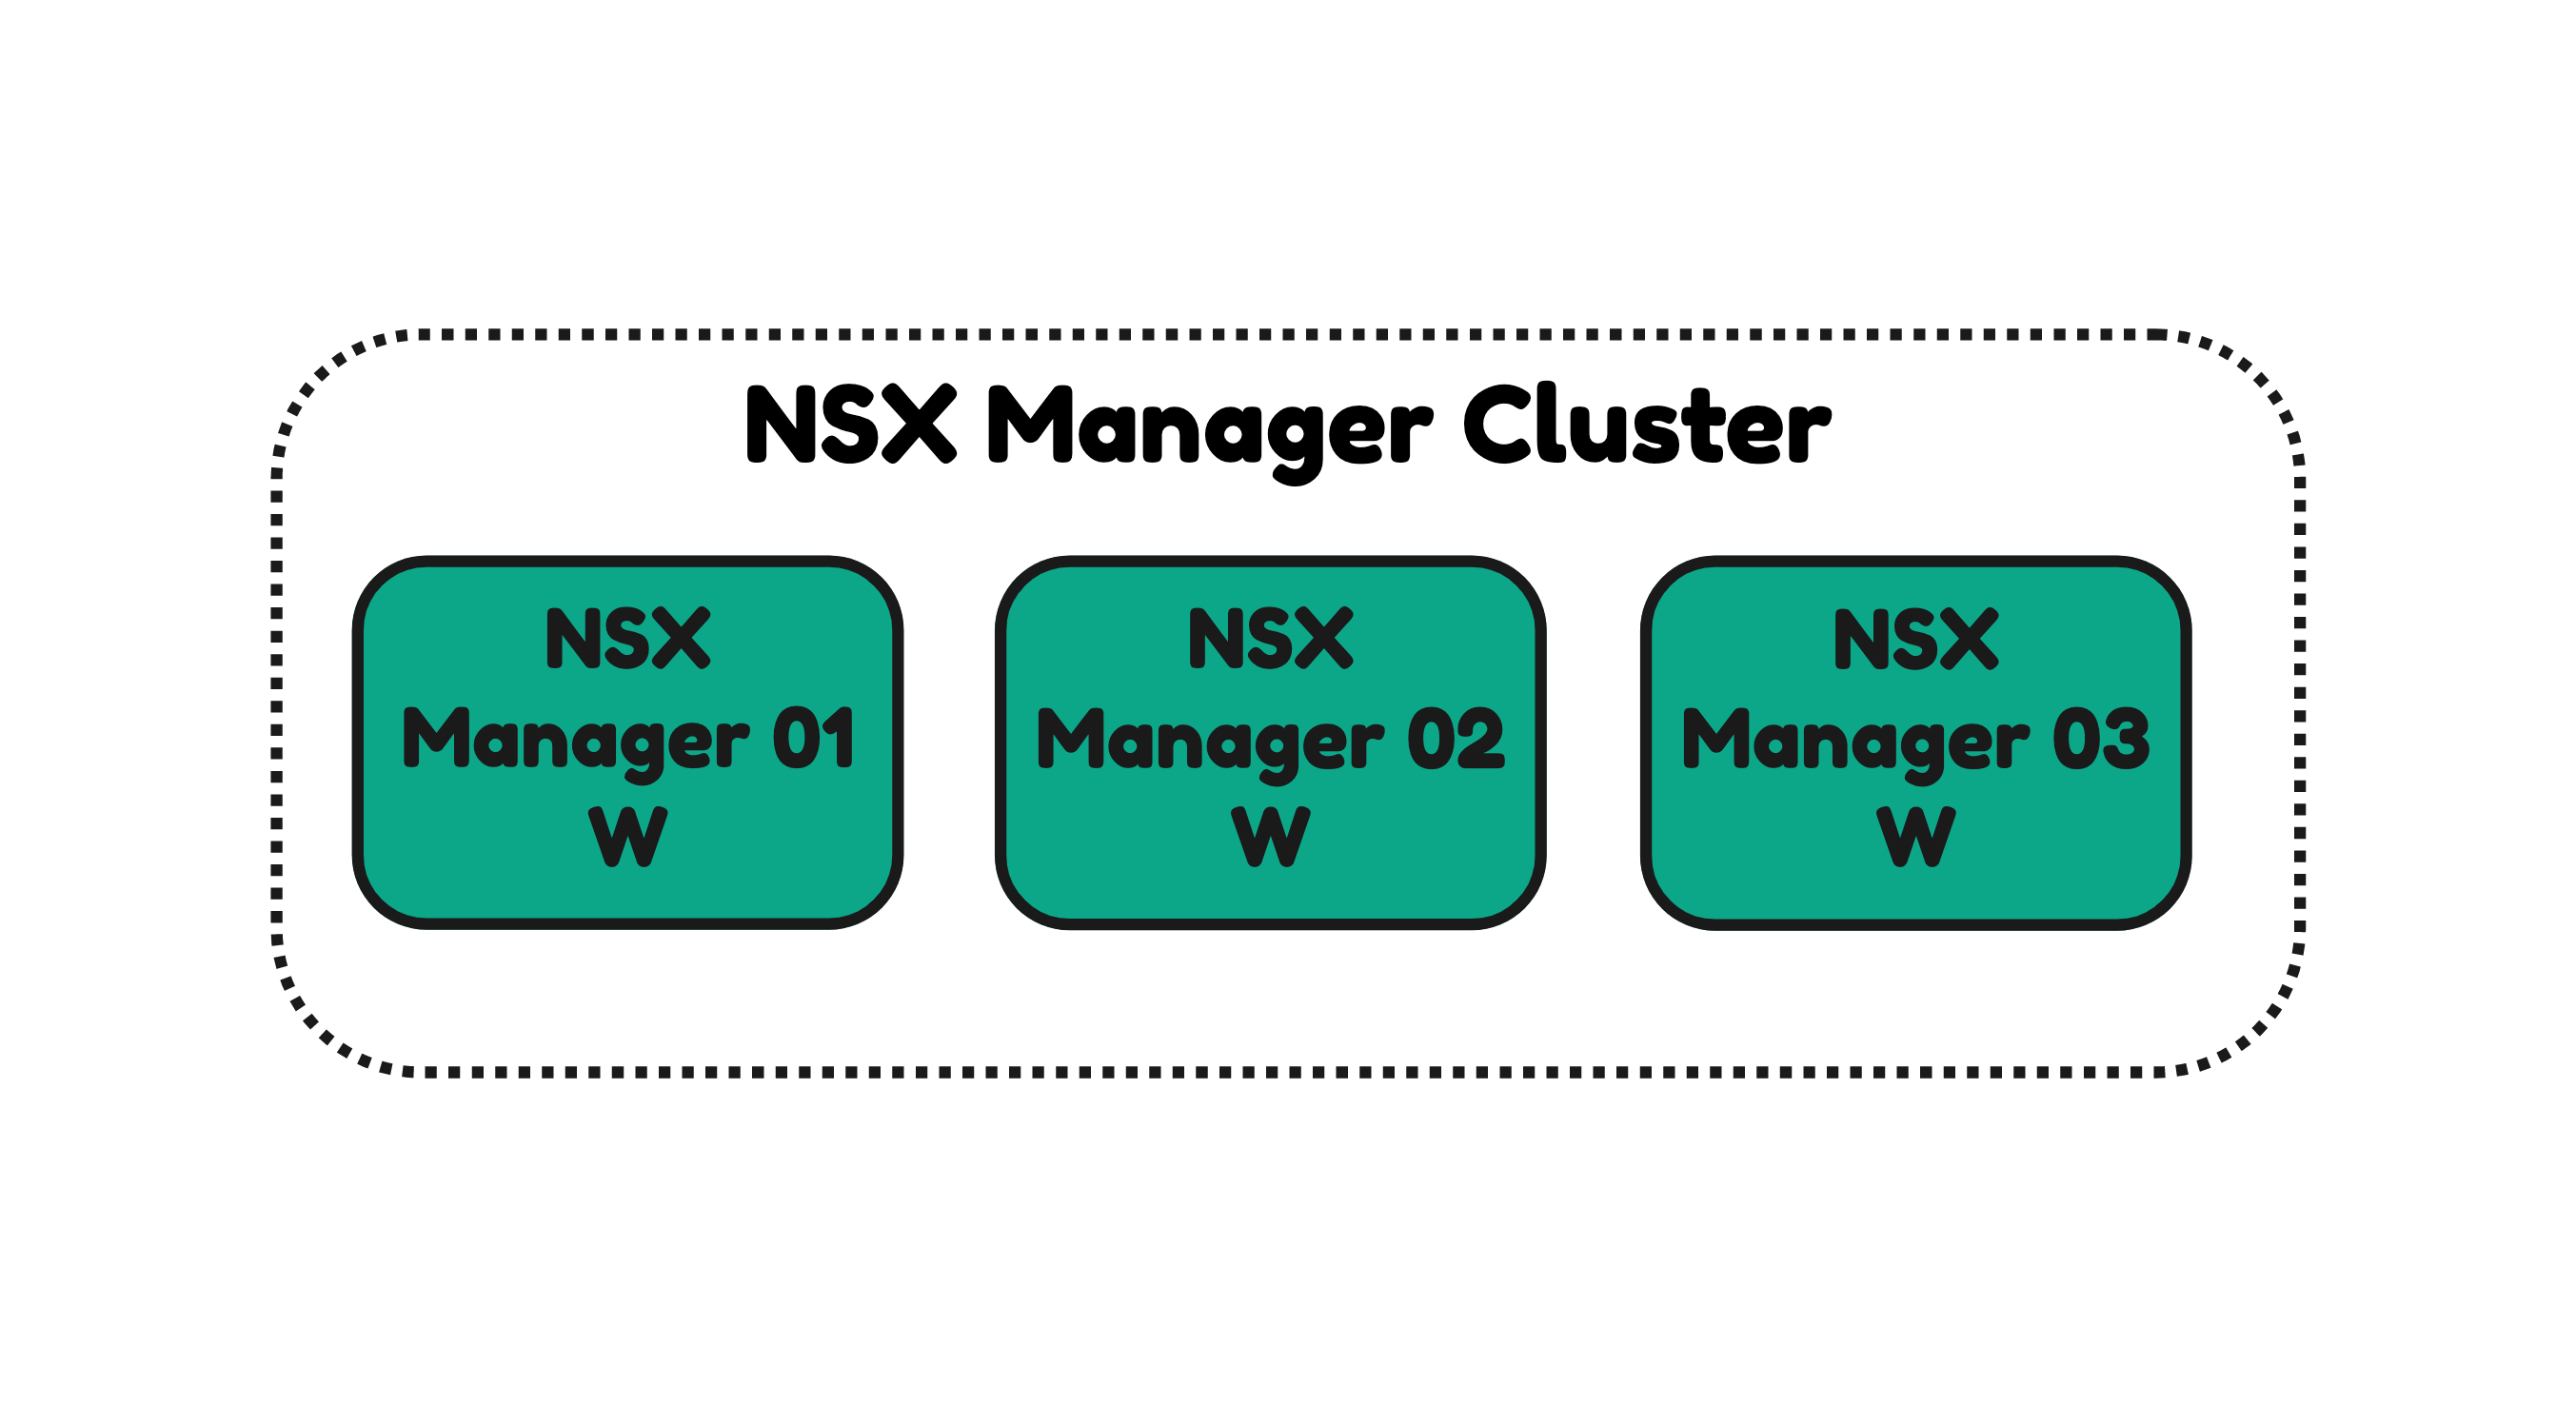
- Deploy three NSX Manager Nodes and make sure they operate in a cluster.
- Do not use any external load balancers.
- Add a valid license to NSX.
The Steps
- STEP 0: Make sure a DNS server Lab:Install and configure a DNS Server using BIND and an vSphere SDDC infrastructure Lab:Install and configure a (nested) vSphere SDDC is deployed
- STEP 1: Deploy the first NSX Manager
- STEP 2: Add the NSX License
- STEP 3: Add a Compute Manager
- STEP 4: Deploy the second and third NSX Manager to form an NSX Manager Cluster
- STEP 5: Configure the NSX VIP IP Address
STEP 1» Deploy the first NSX Manager
The NSX Manager can be deployed using the vCenter Server or an ESXi host. I will describe both.
For the deployment the following configuration parameters are required:
| Parameter Name | Input |
|---|---|
| vSphere Cluster | Management |
| VM Name | Pod-120-NSXT-LM-1 |
| Storage | Management_vSAN |
| Network (Port Group) | Management |
| System Root User Password | VMware1!VMware1! |
| CLI "admin" User Password | VMware1!VMware1! |
| CLI "audit" User Password | VMware1!VMware1! |
| Hostname | Pod-120-NSXT-LM-1 |
| Rolename | NSX Manager |
| Management Network IPv4 Address | 10.203.120.12 |
| Management Network Netmask | 255.255.255.0 |
| Default IPv4 Gateway | 10.203.120.1 |
| DNS Server list | 10.203.0.5 |
| Domain Search List | sddc.lab |
| NTP Server List | 10.203.0.5 |
| Enable SSH | yes |
| Allow root SSH logins | yes |
Deploying the first NSX Manager using vCenter Server
Let’s start with the vCenter Server.
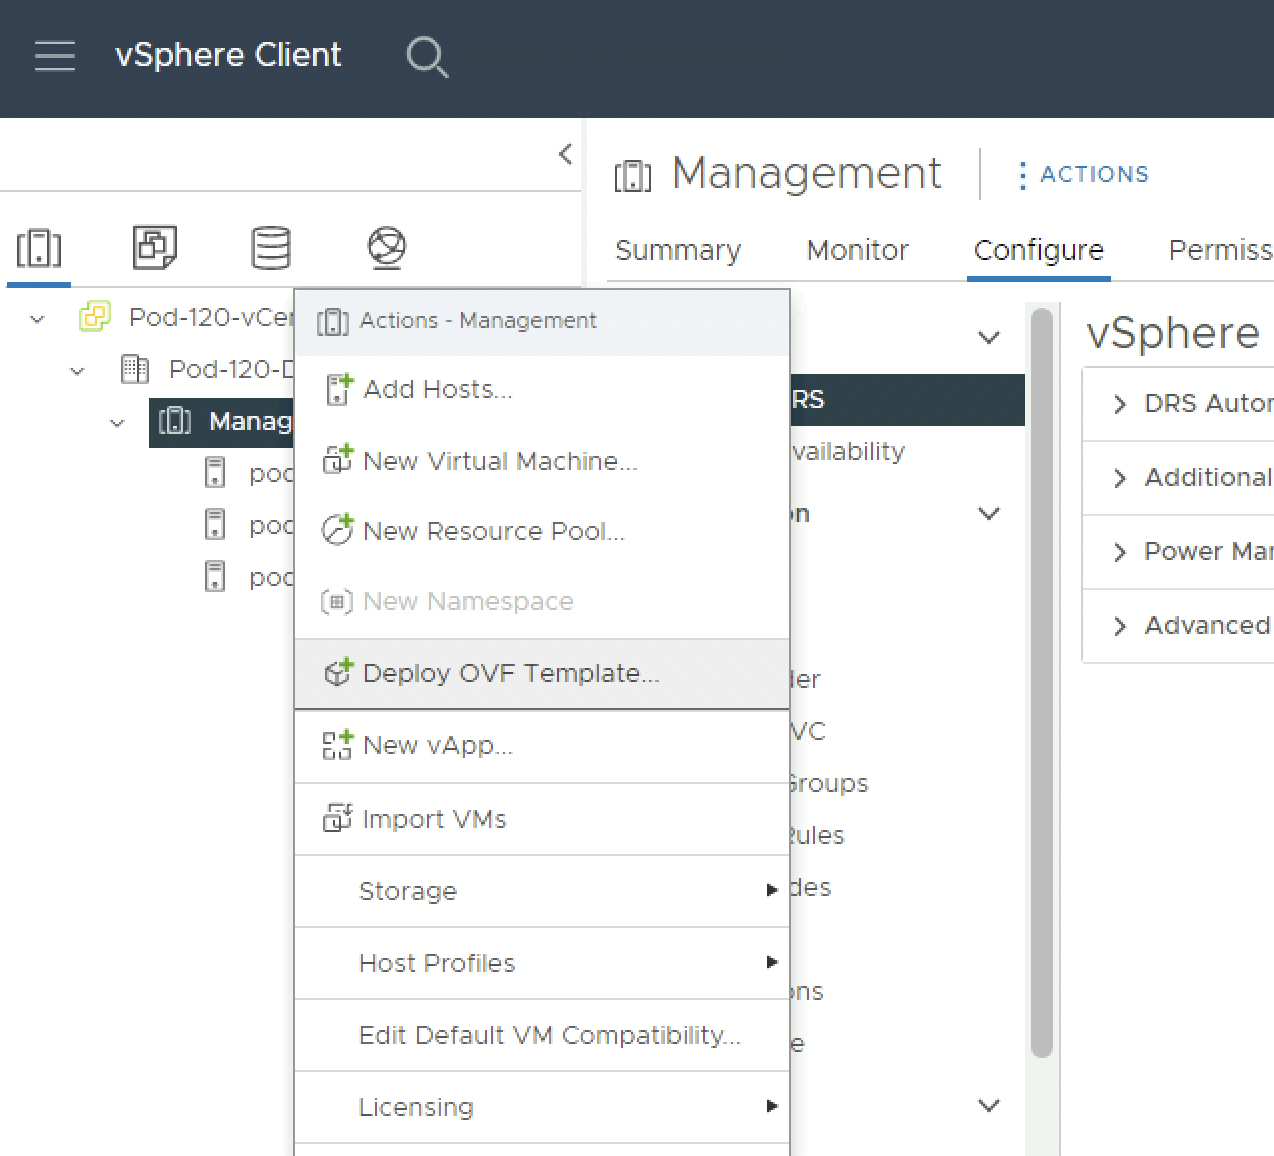
Right-click the vSphere cluster where I want to deploy the NSX Manager to and select “Deploy OVF Template”.
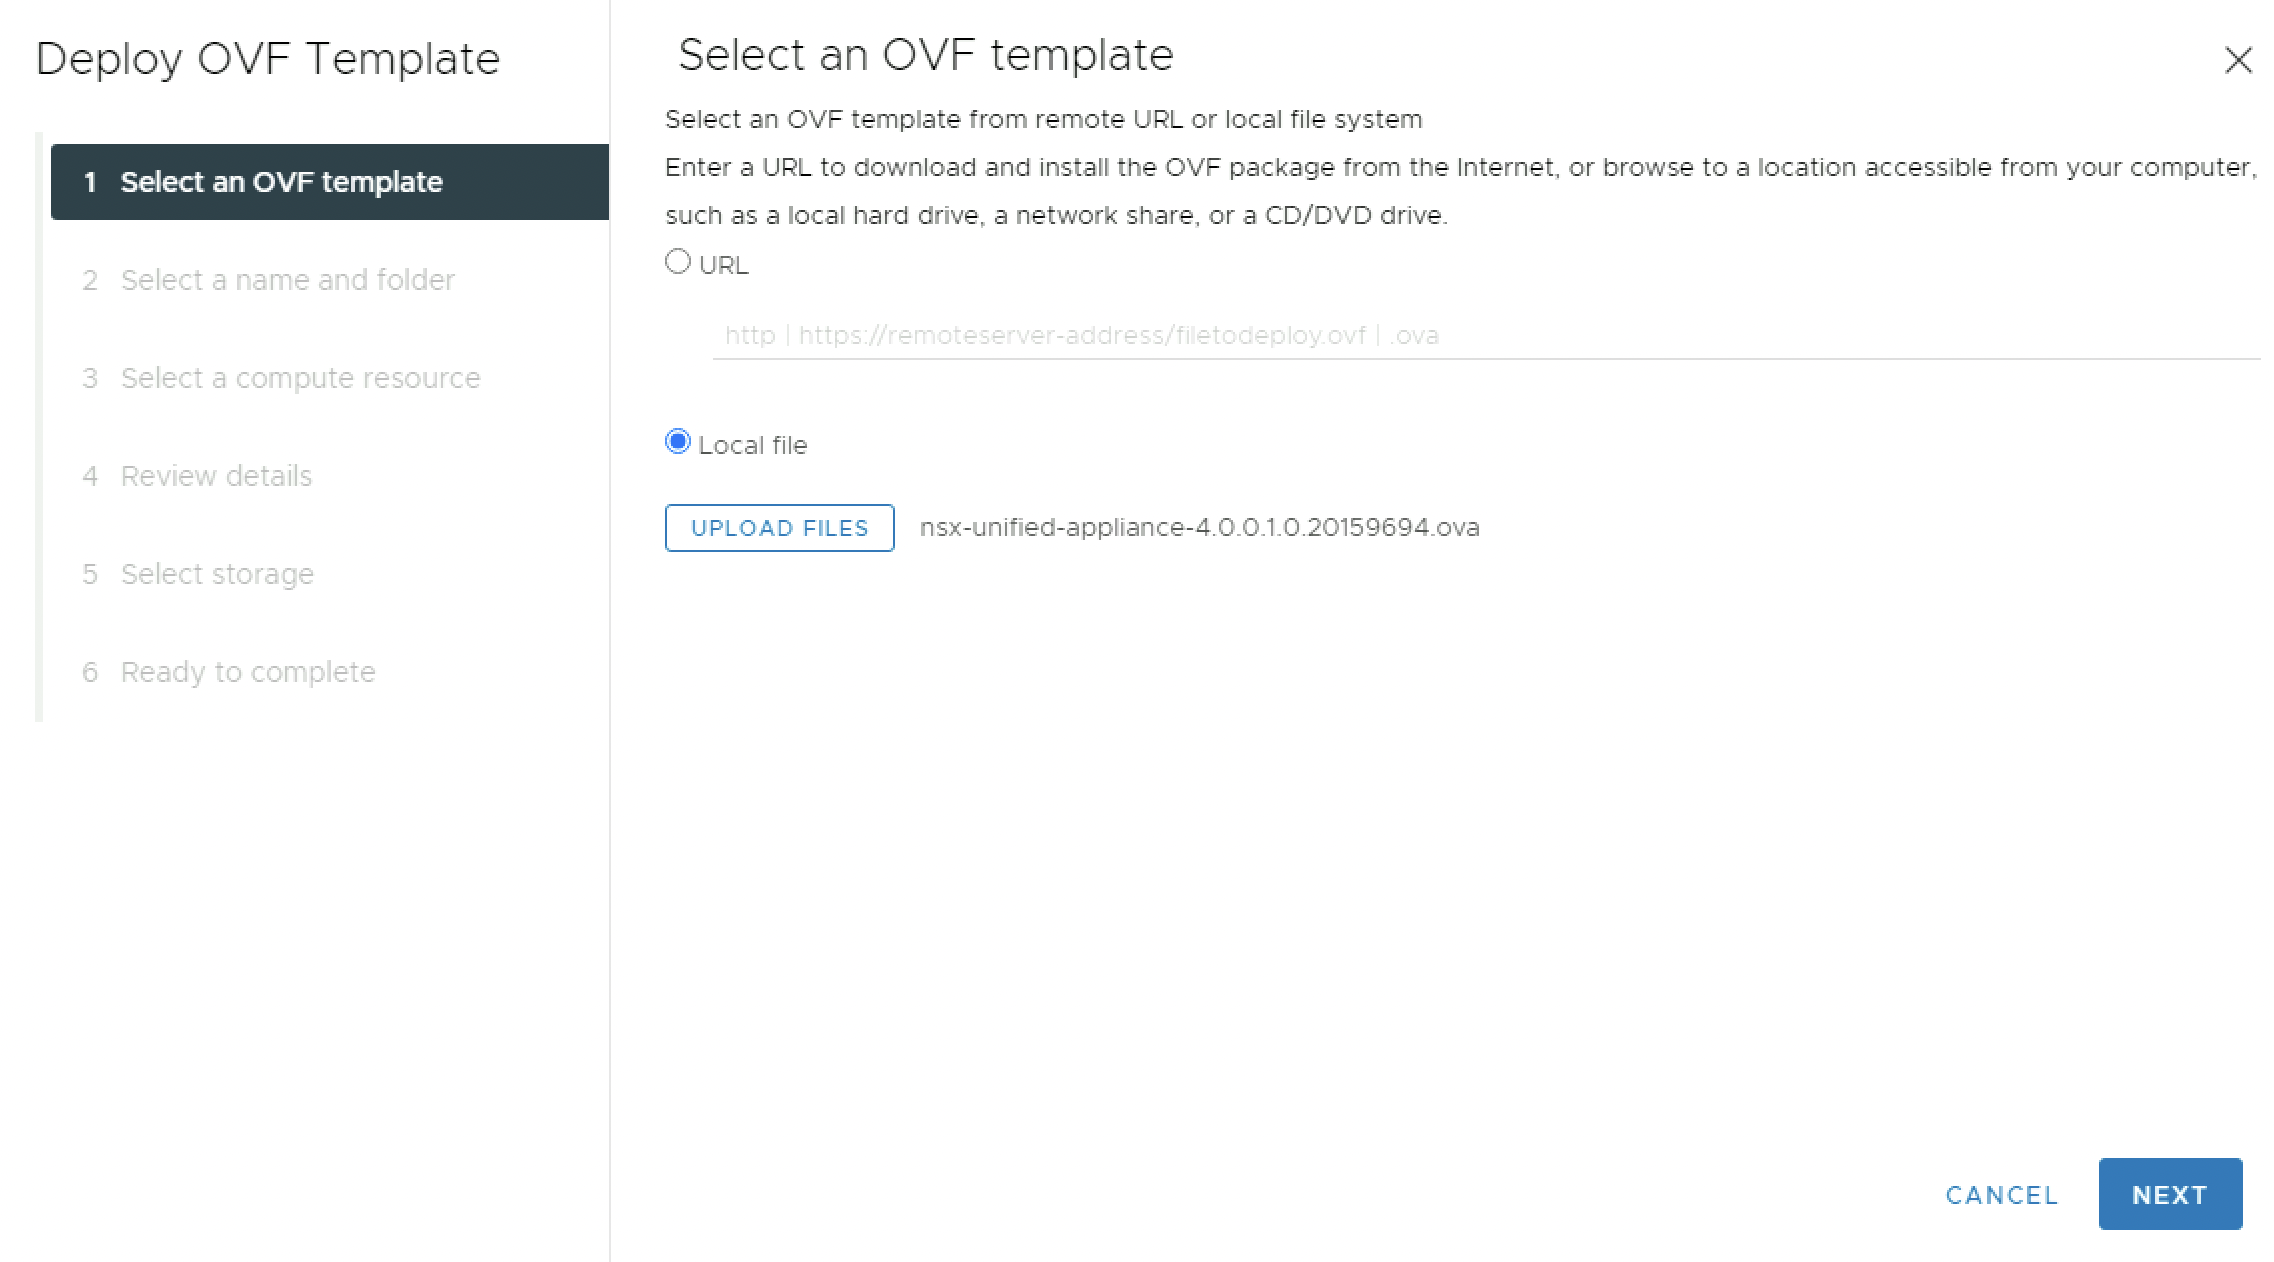
Select “Local File” and select the NSX OVA file that I downloaded from the VMware website.
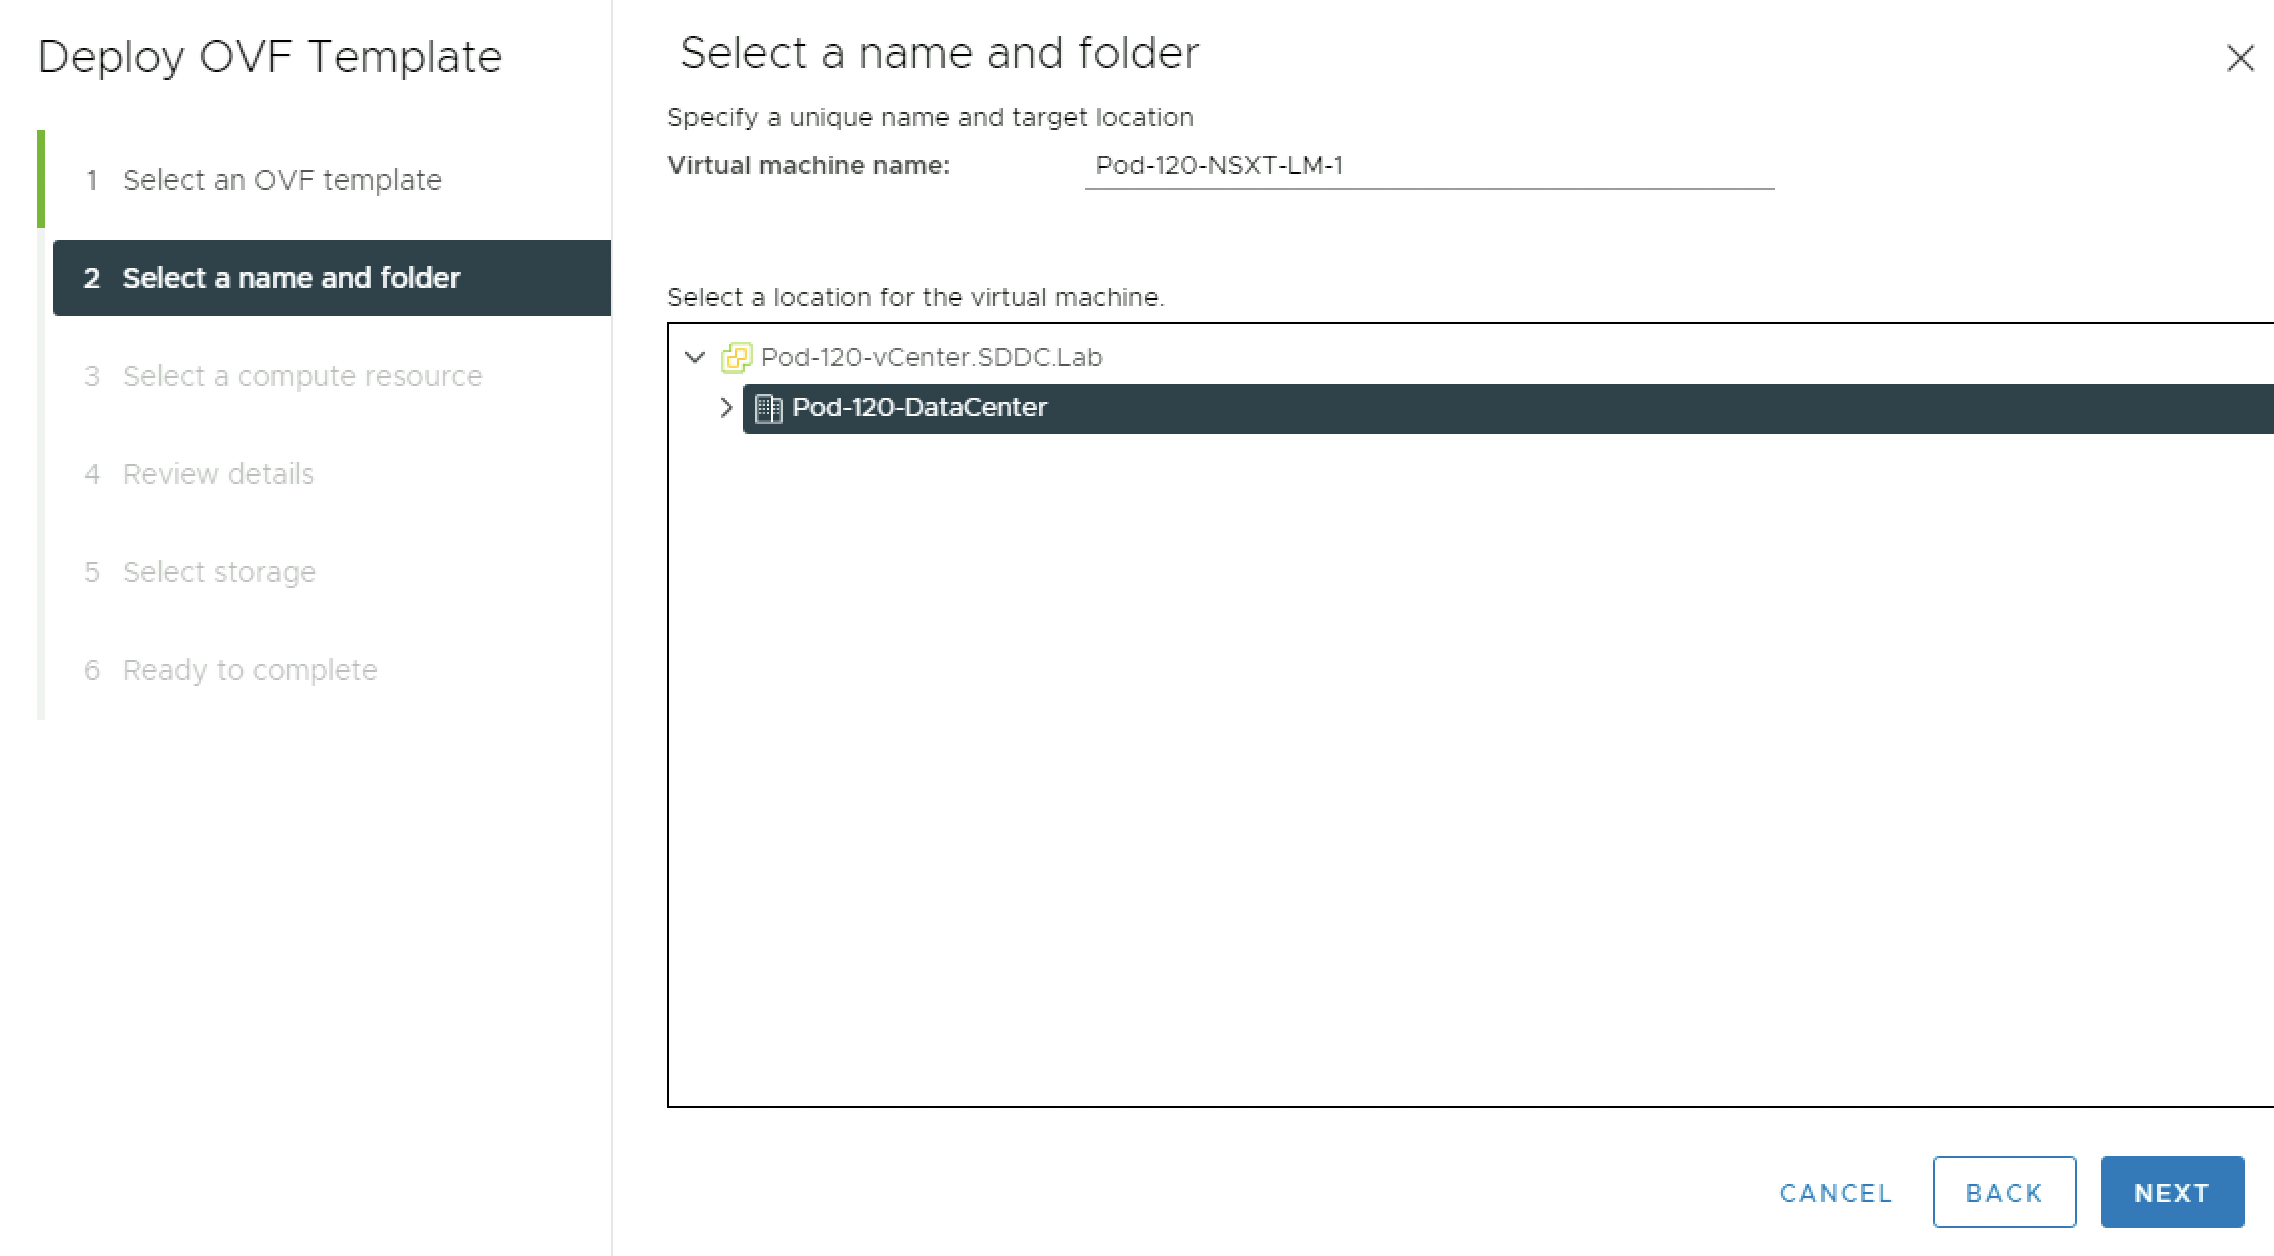
Specify a Virtual Machine Name.
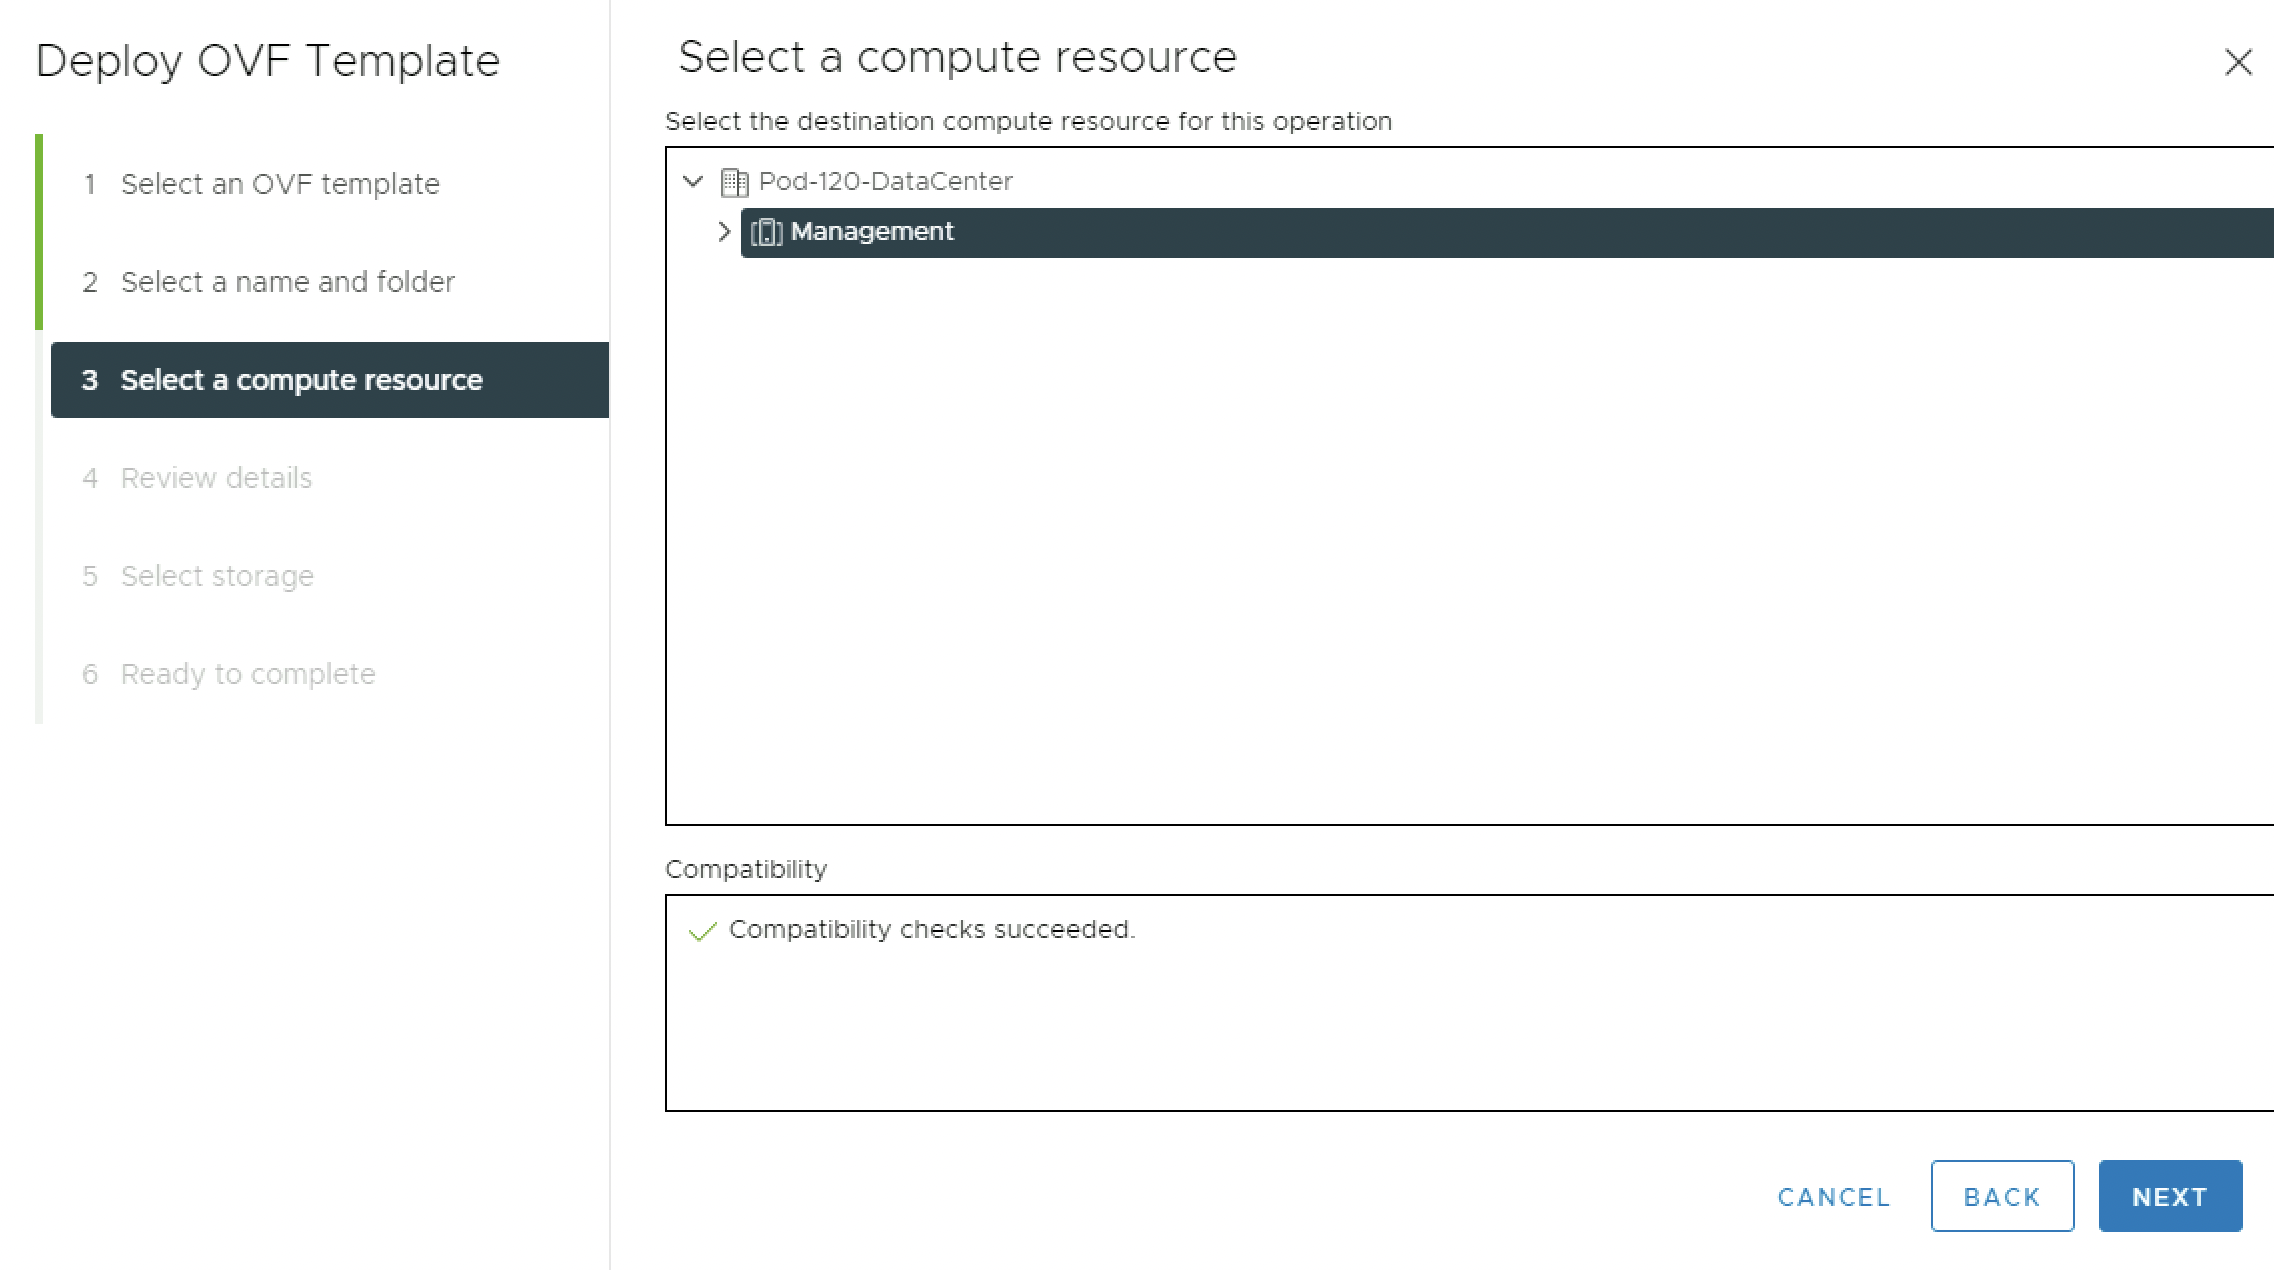
Specify the compute resource.
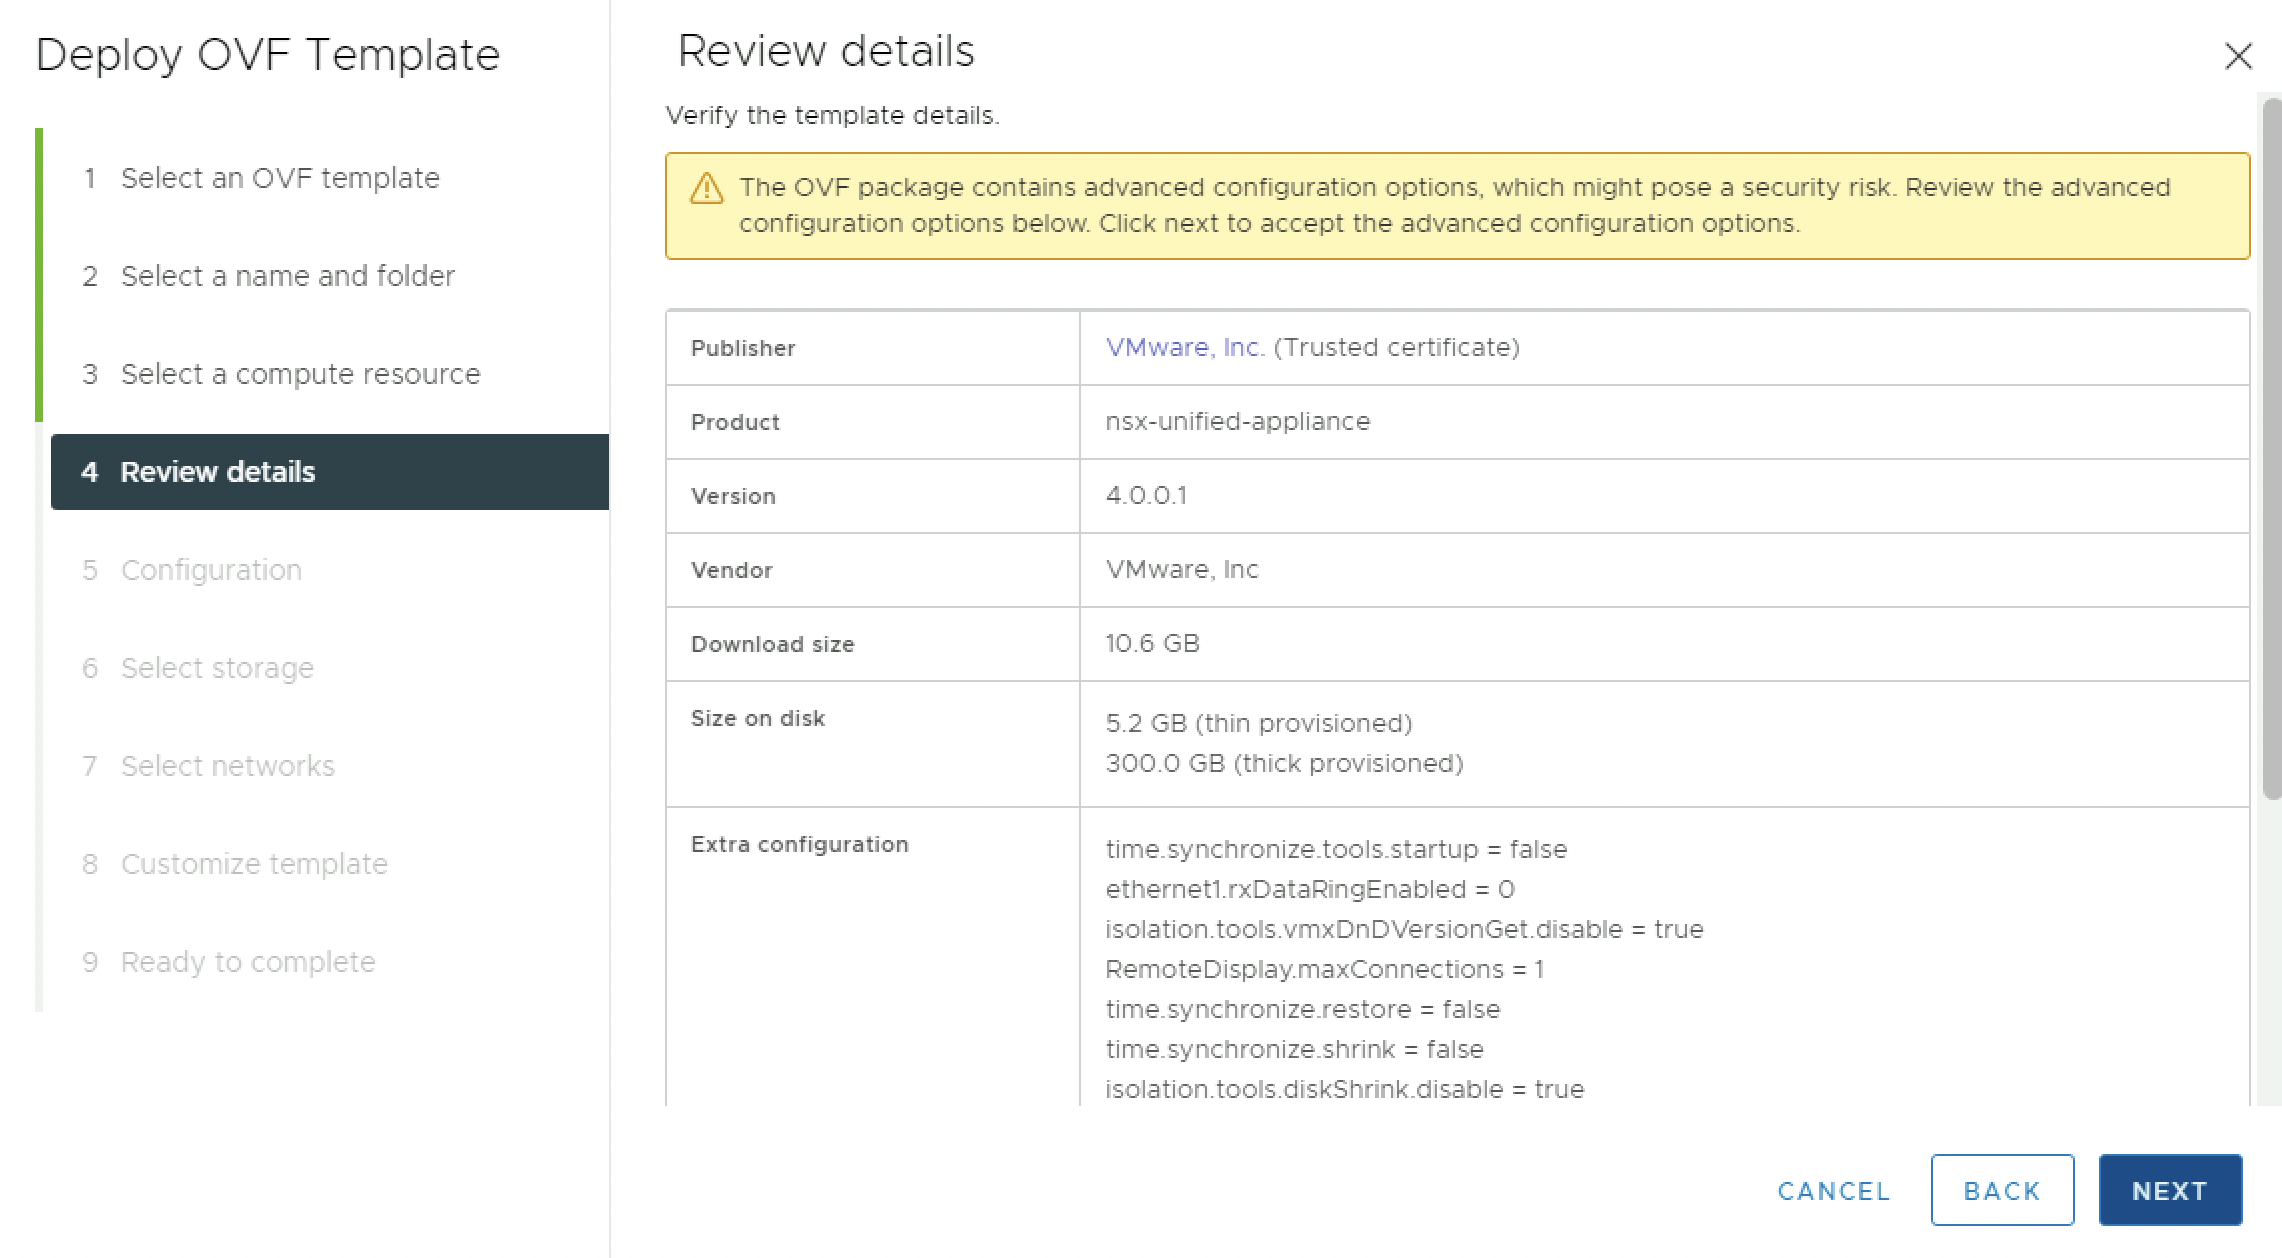
Review the details.
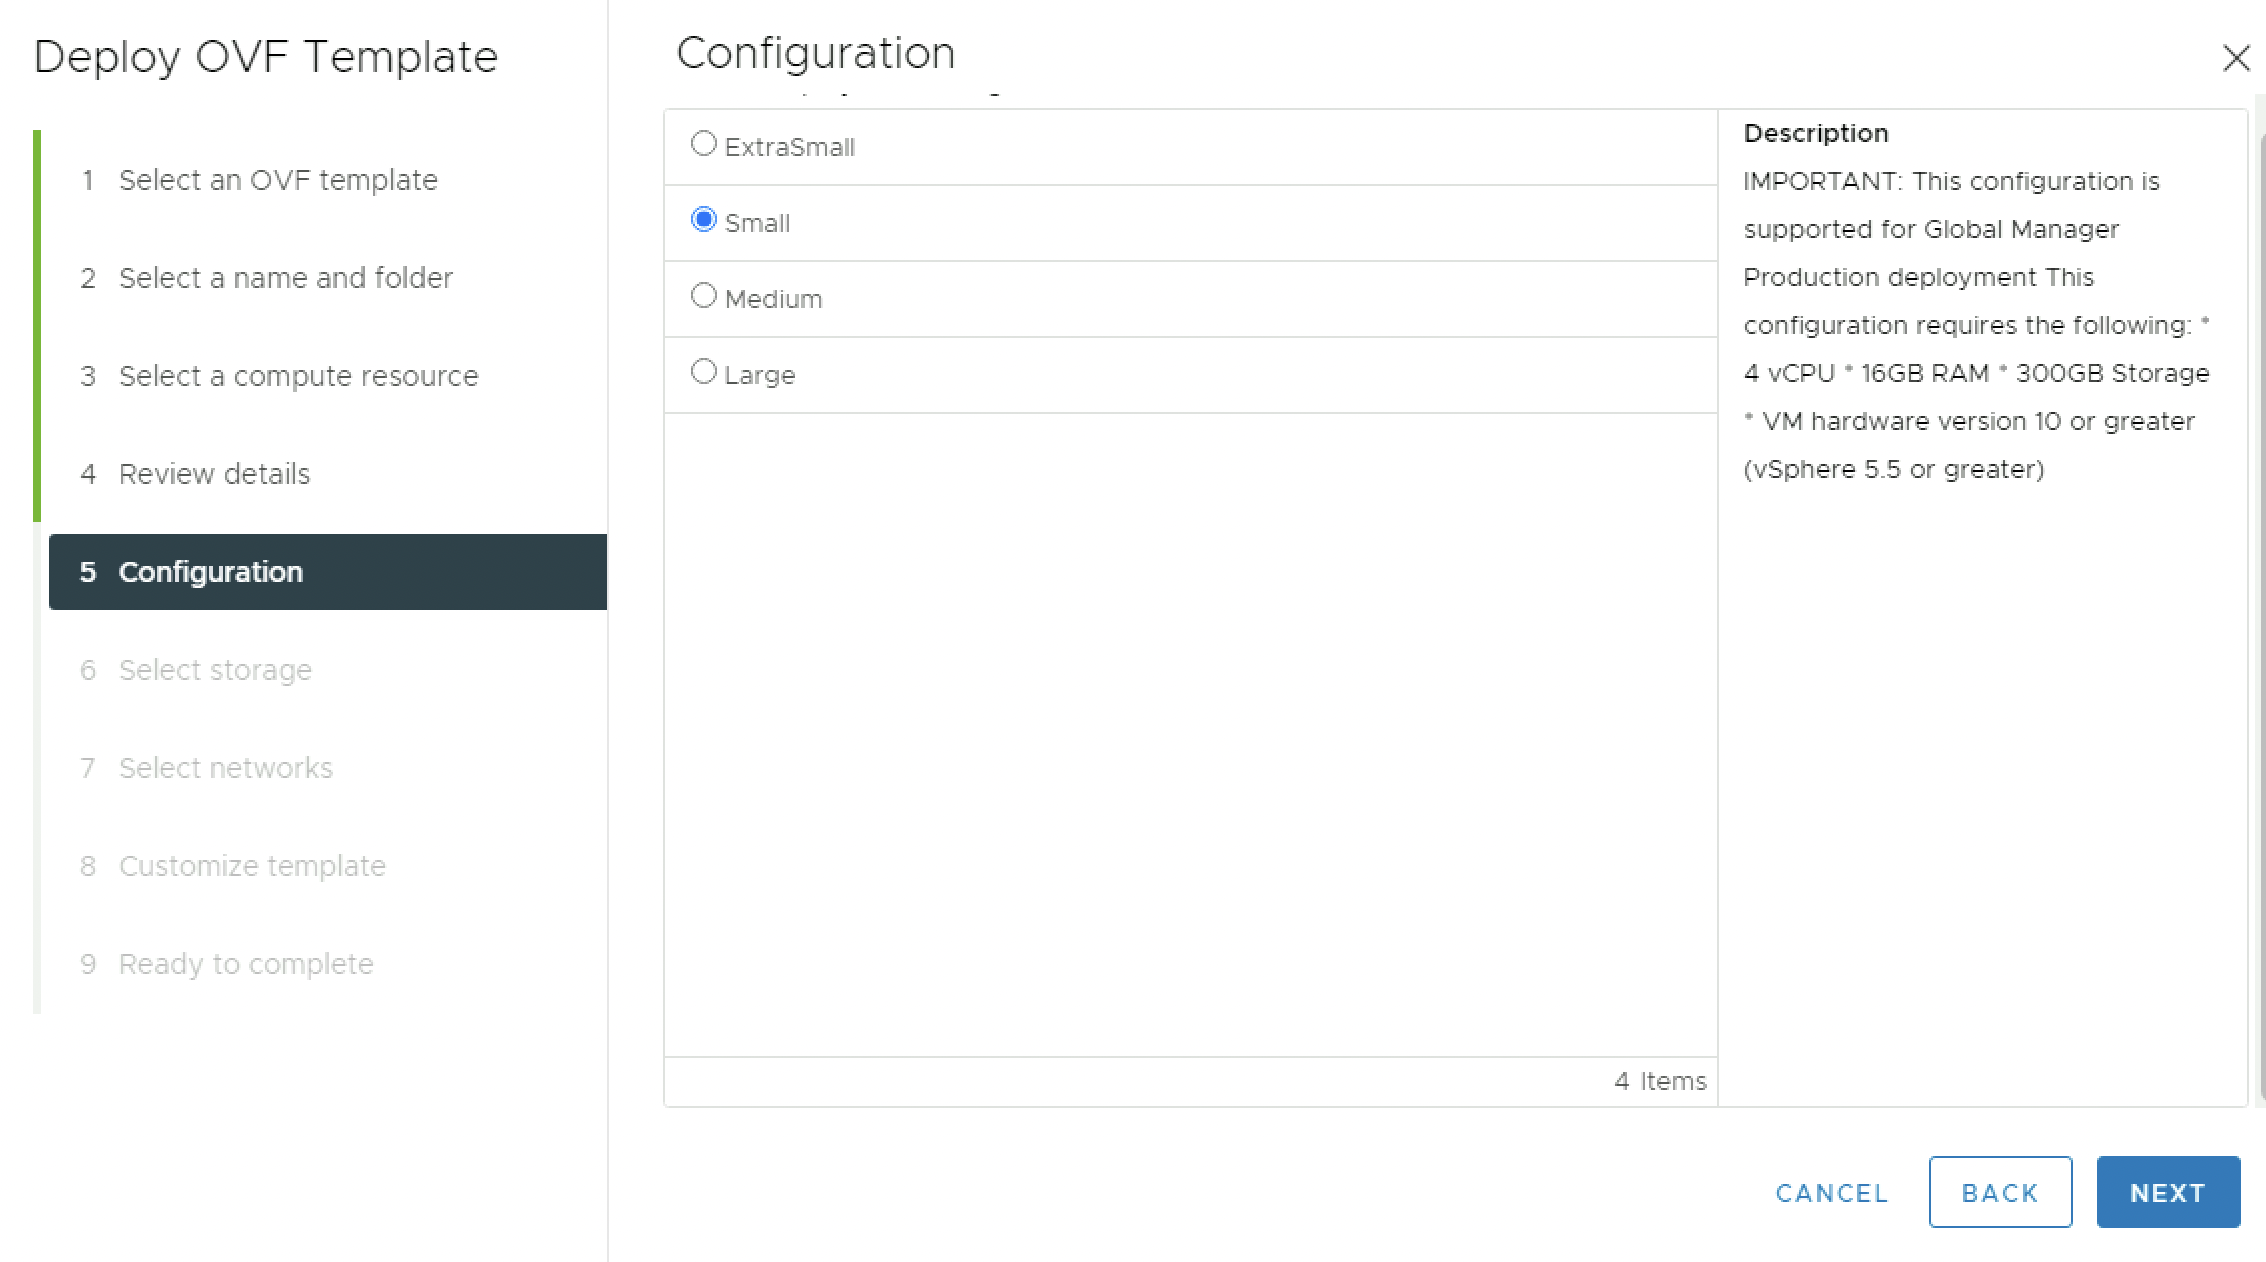
Specify a deployment size.
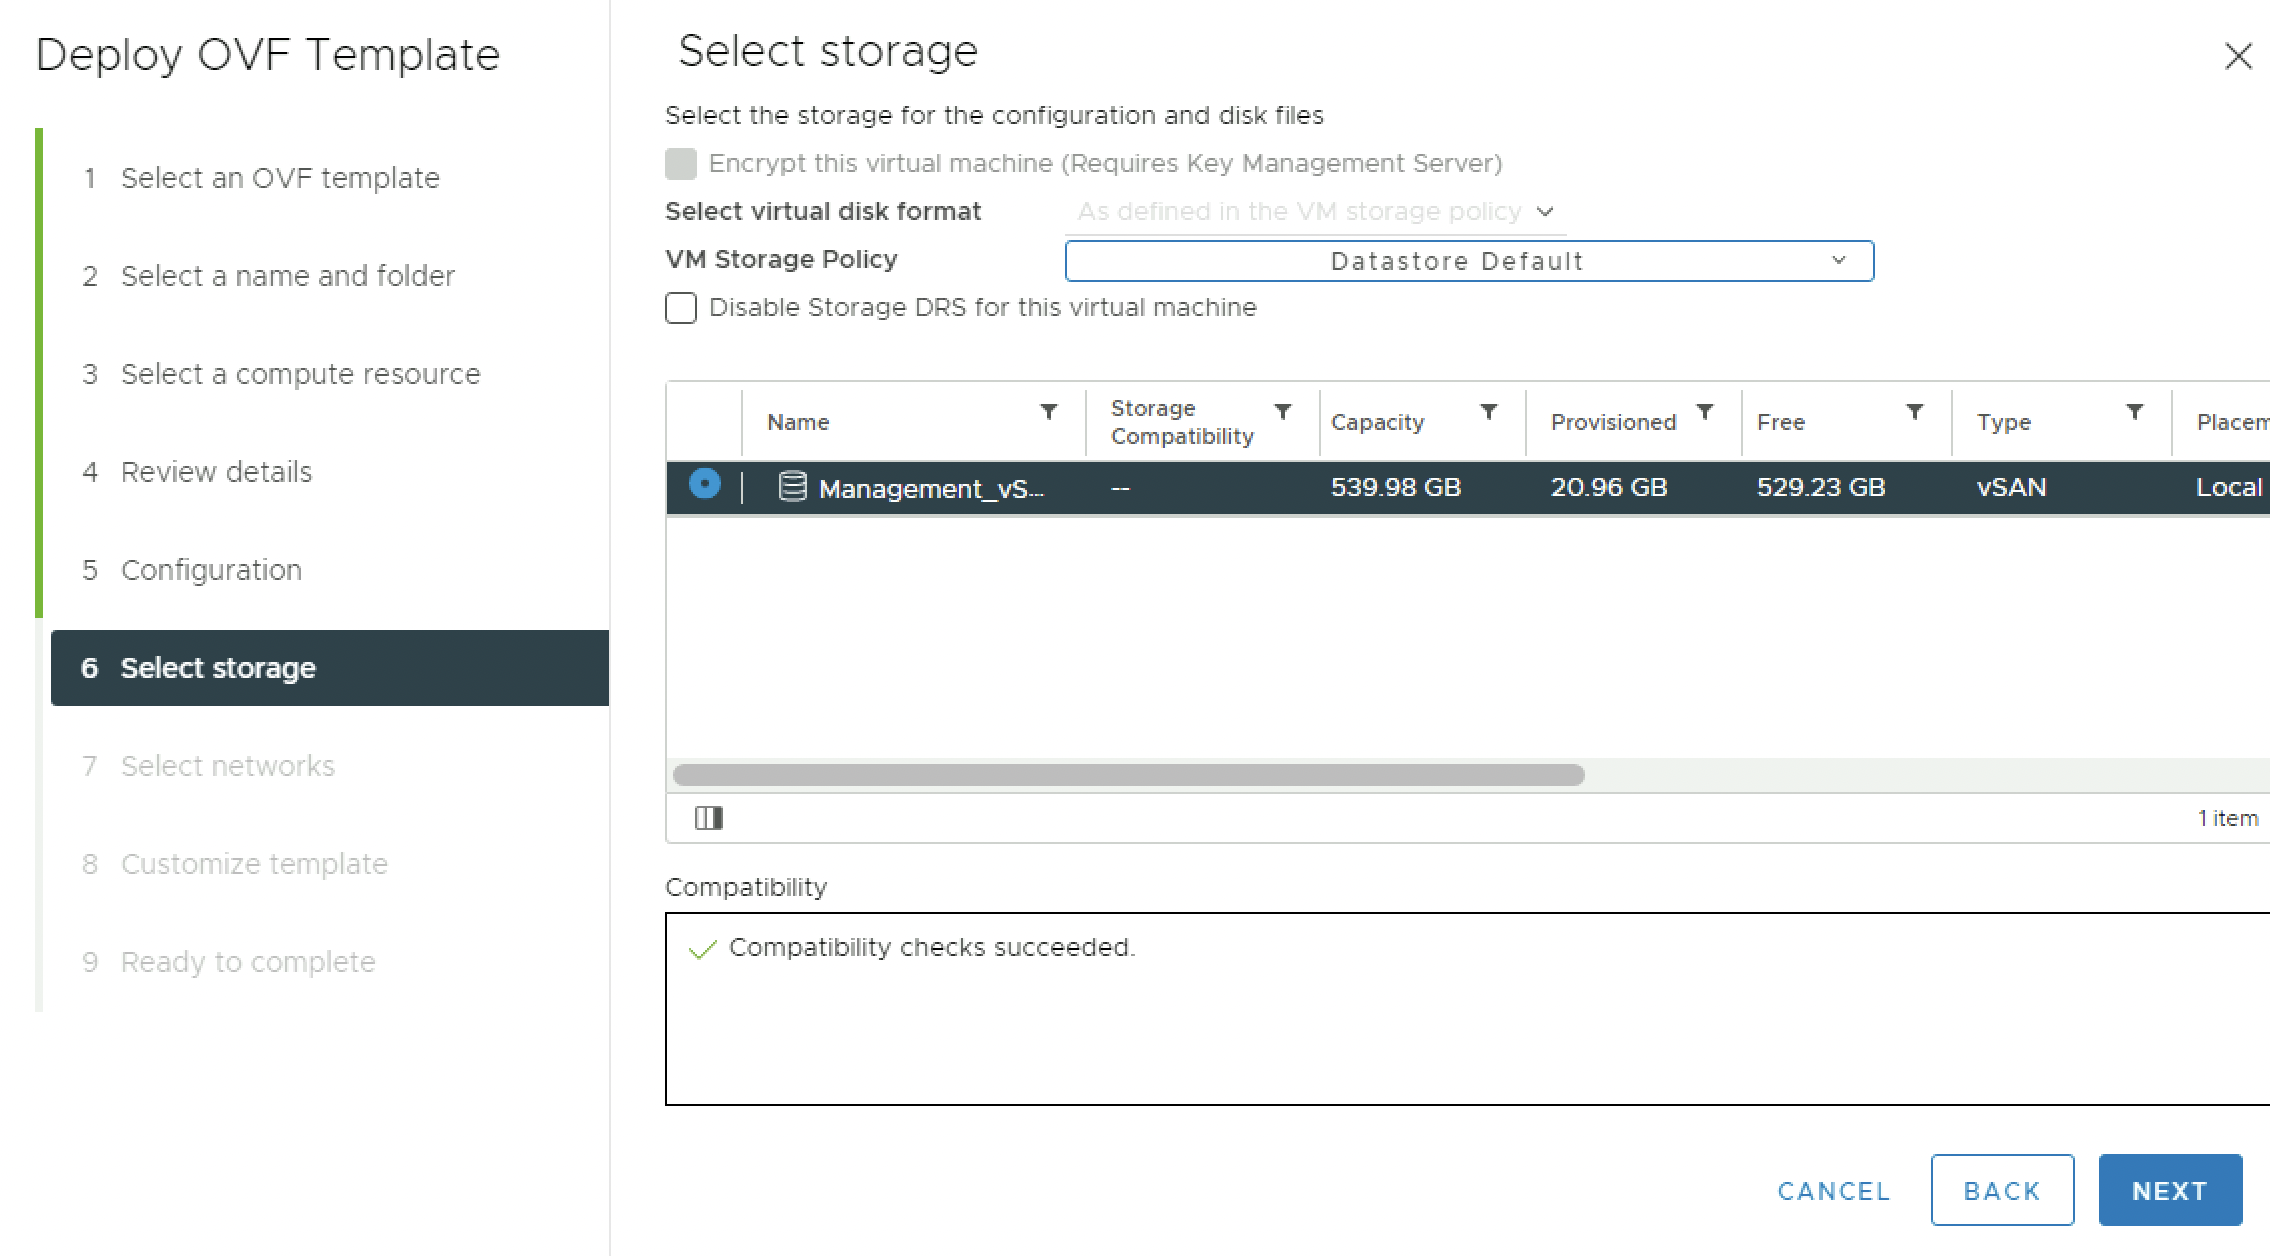
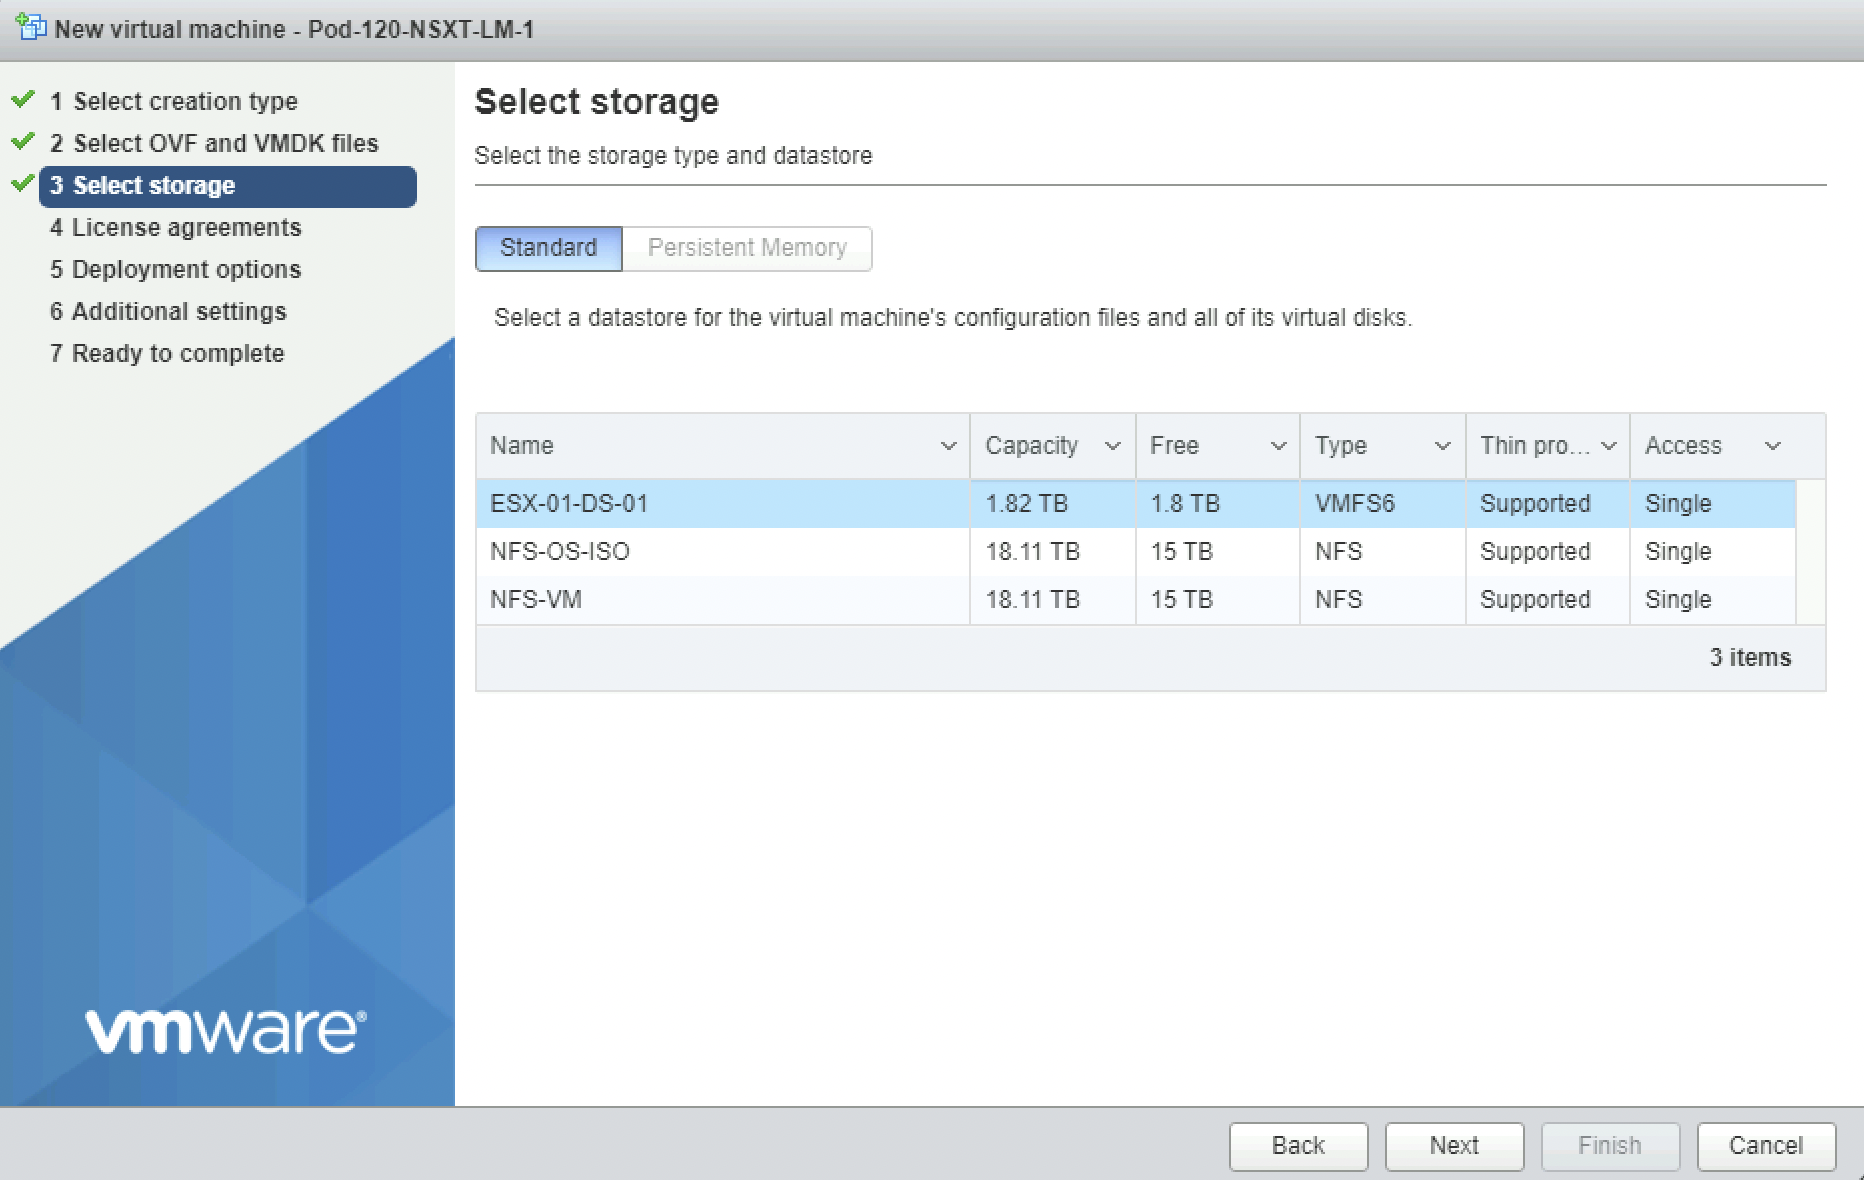
Specify the storage.
Specify the network.
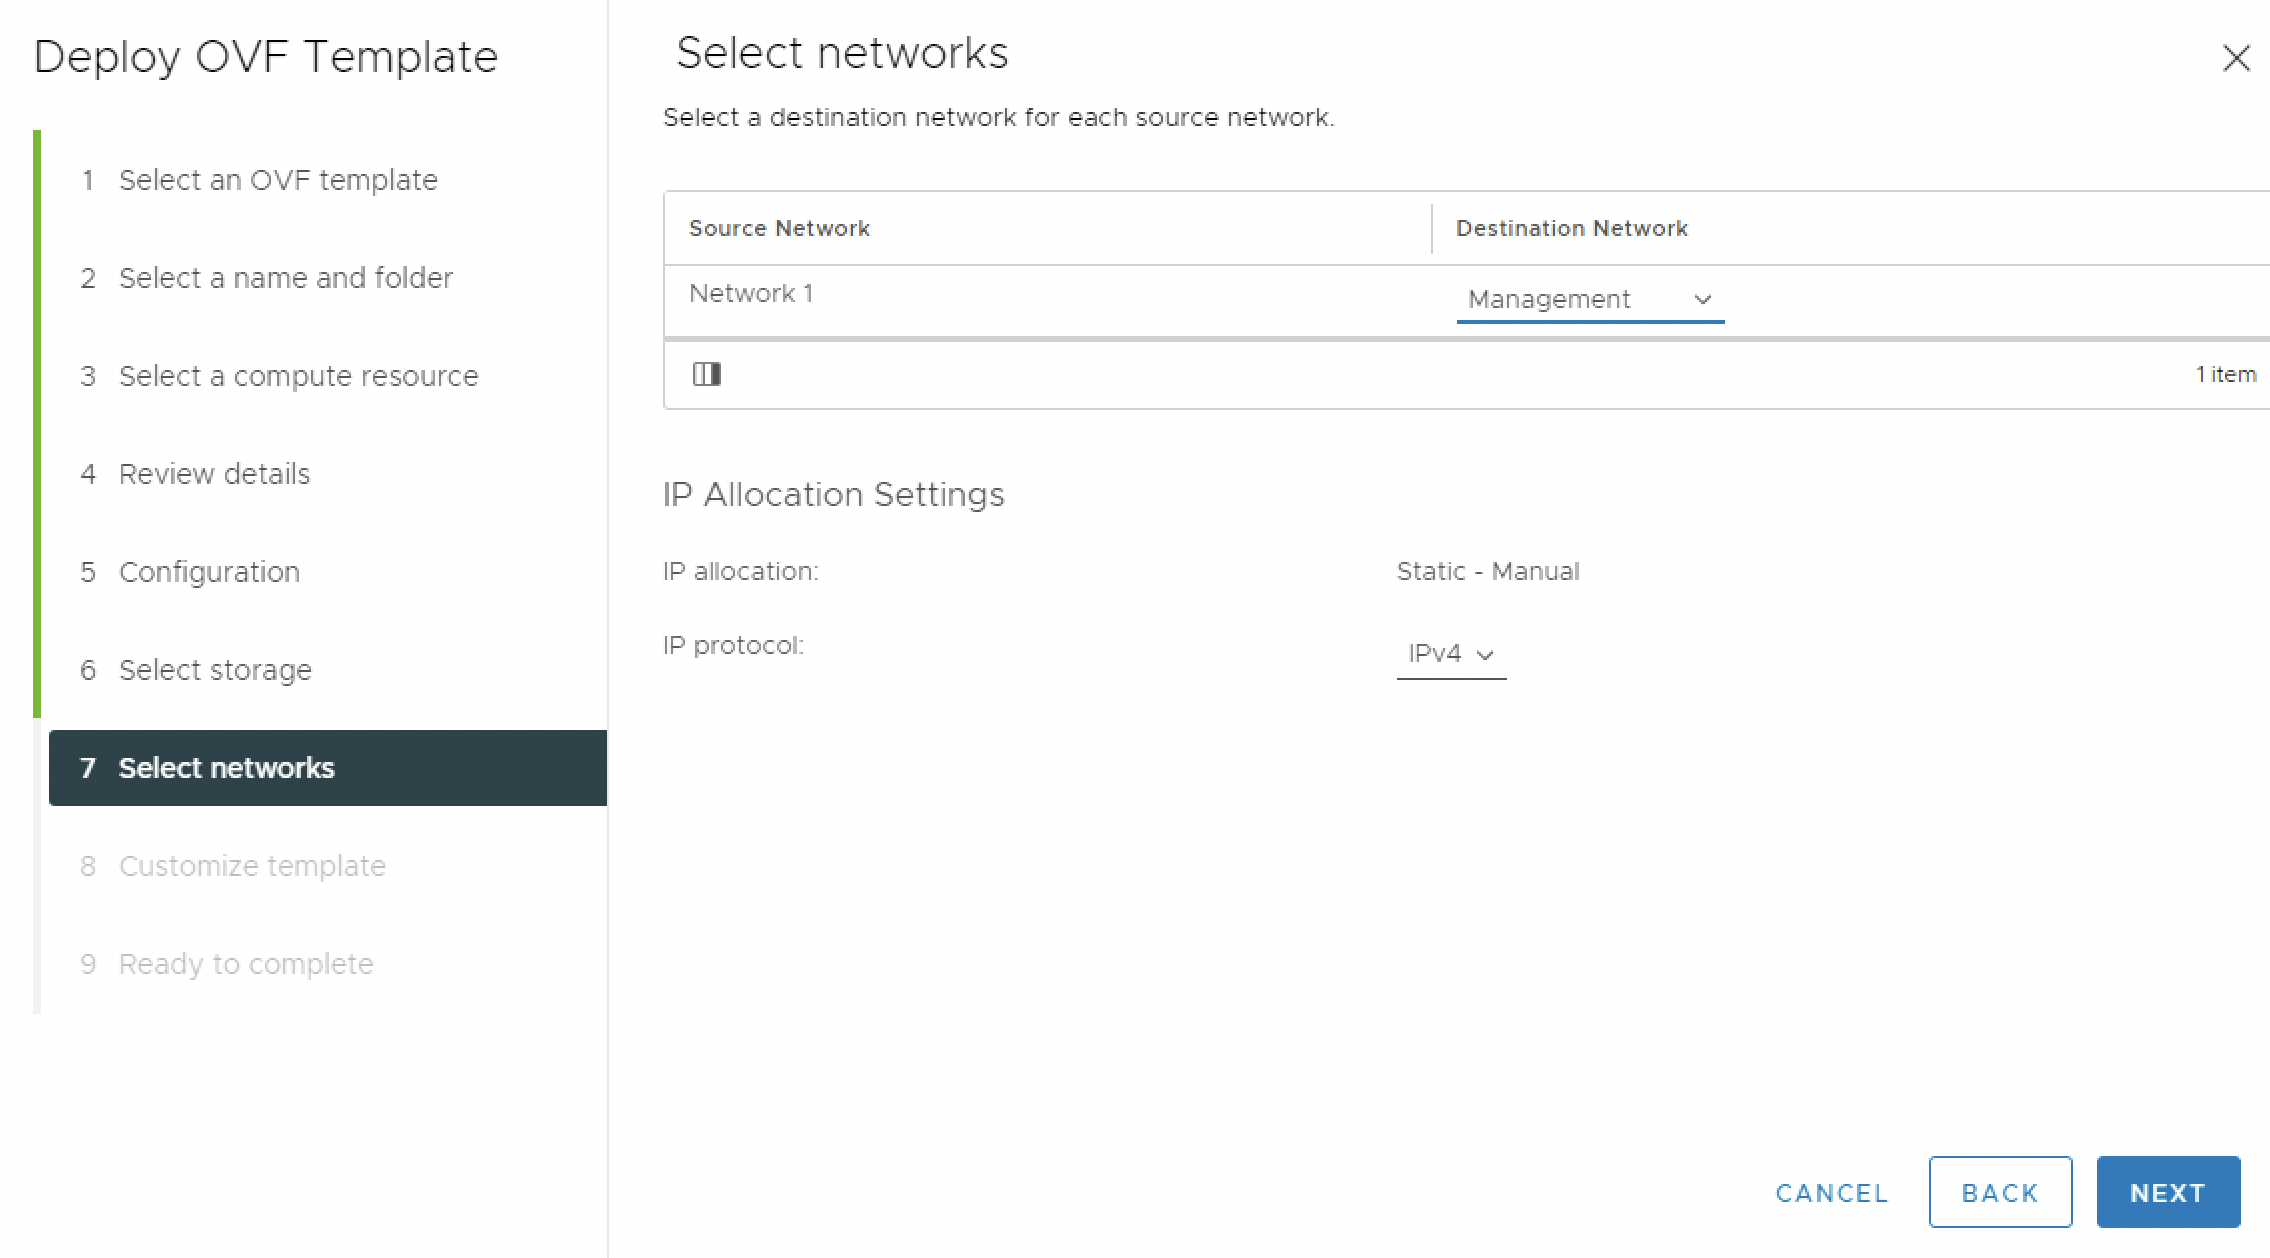
Specify the parameters as per this table.
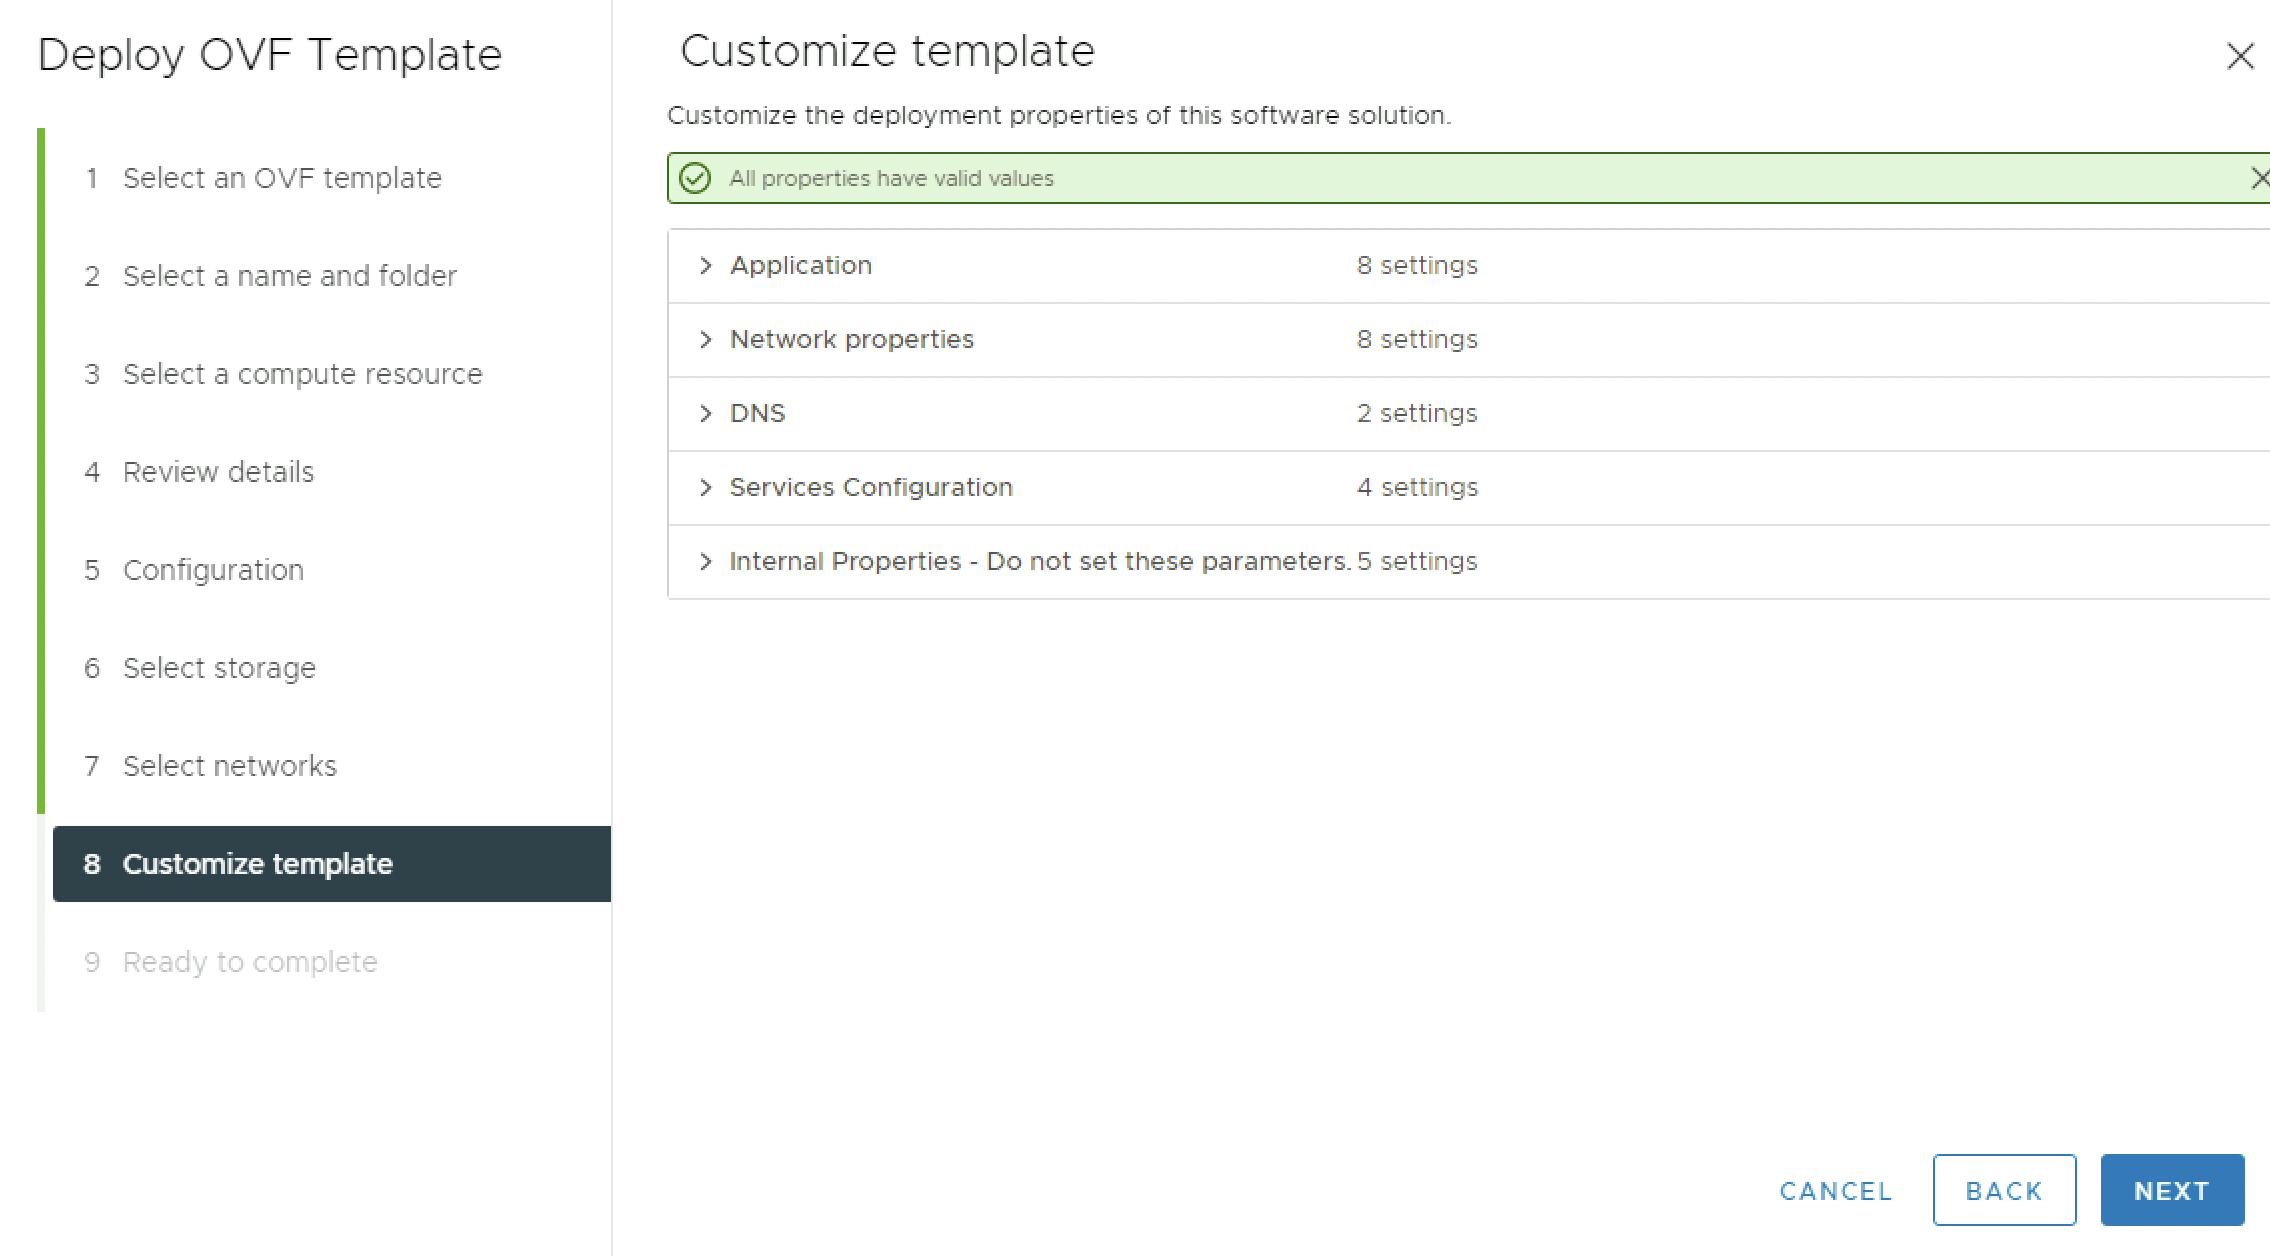
⚠️ In the customise template section there are some parameters that are not used for this deployment, I can just leave those blank and only use the parameters I specified above as these are required for a successful deployment.
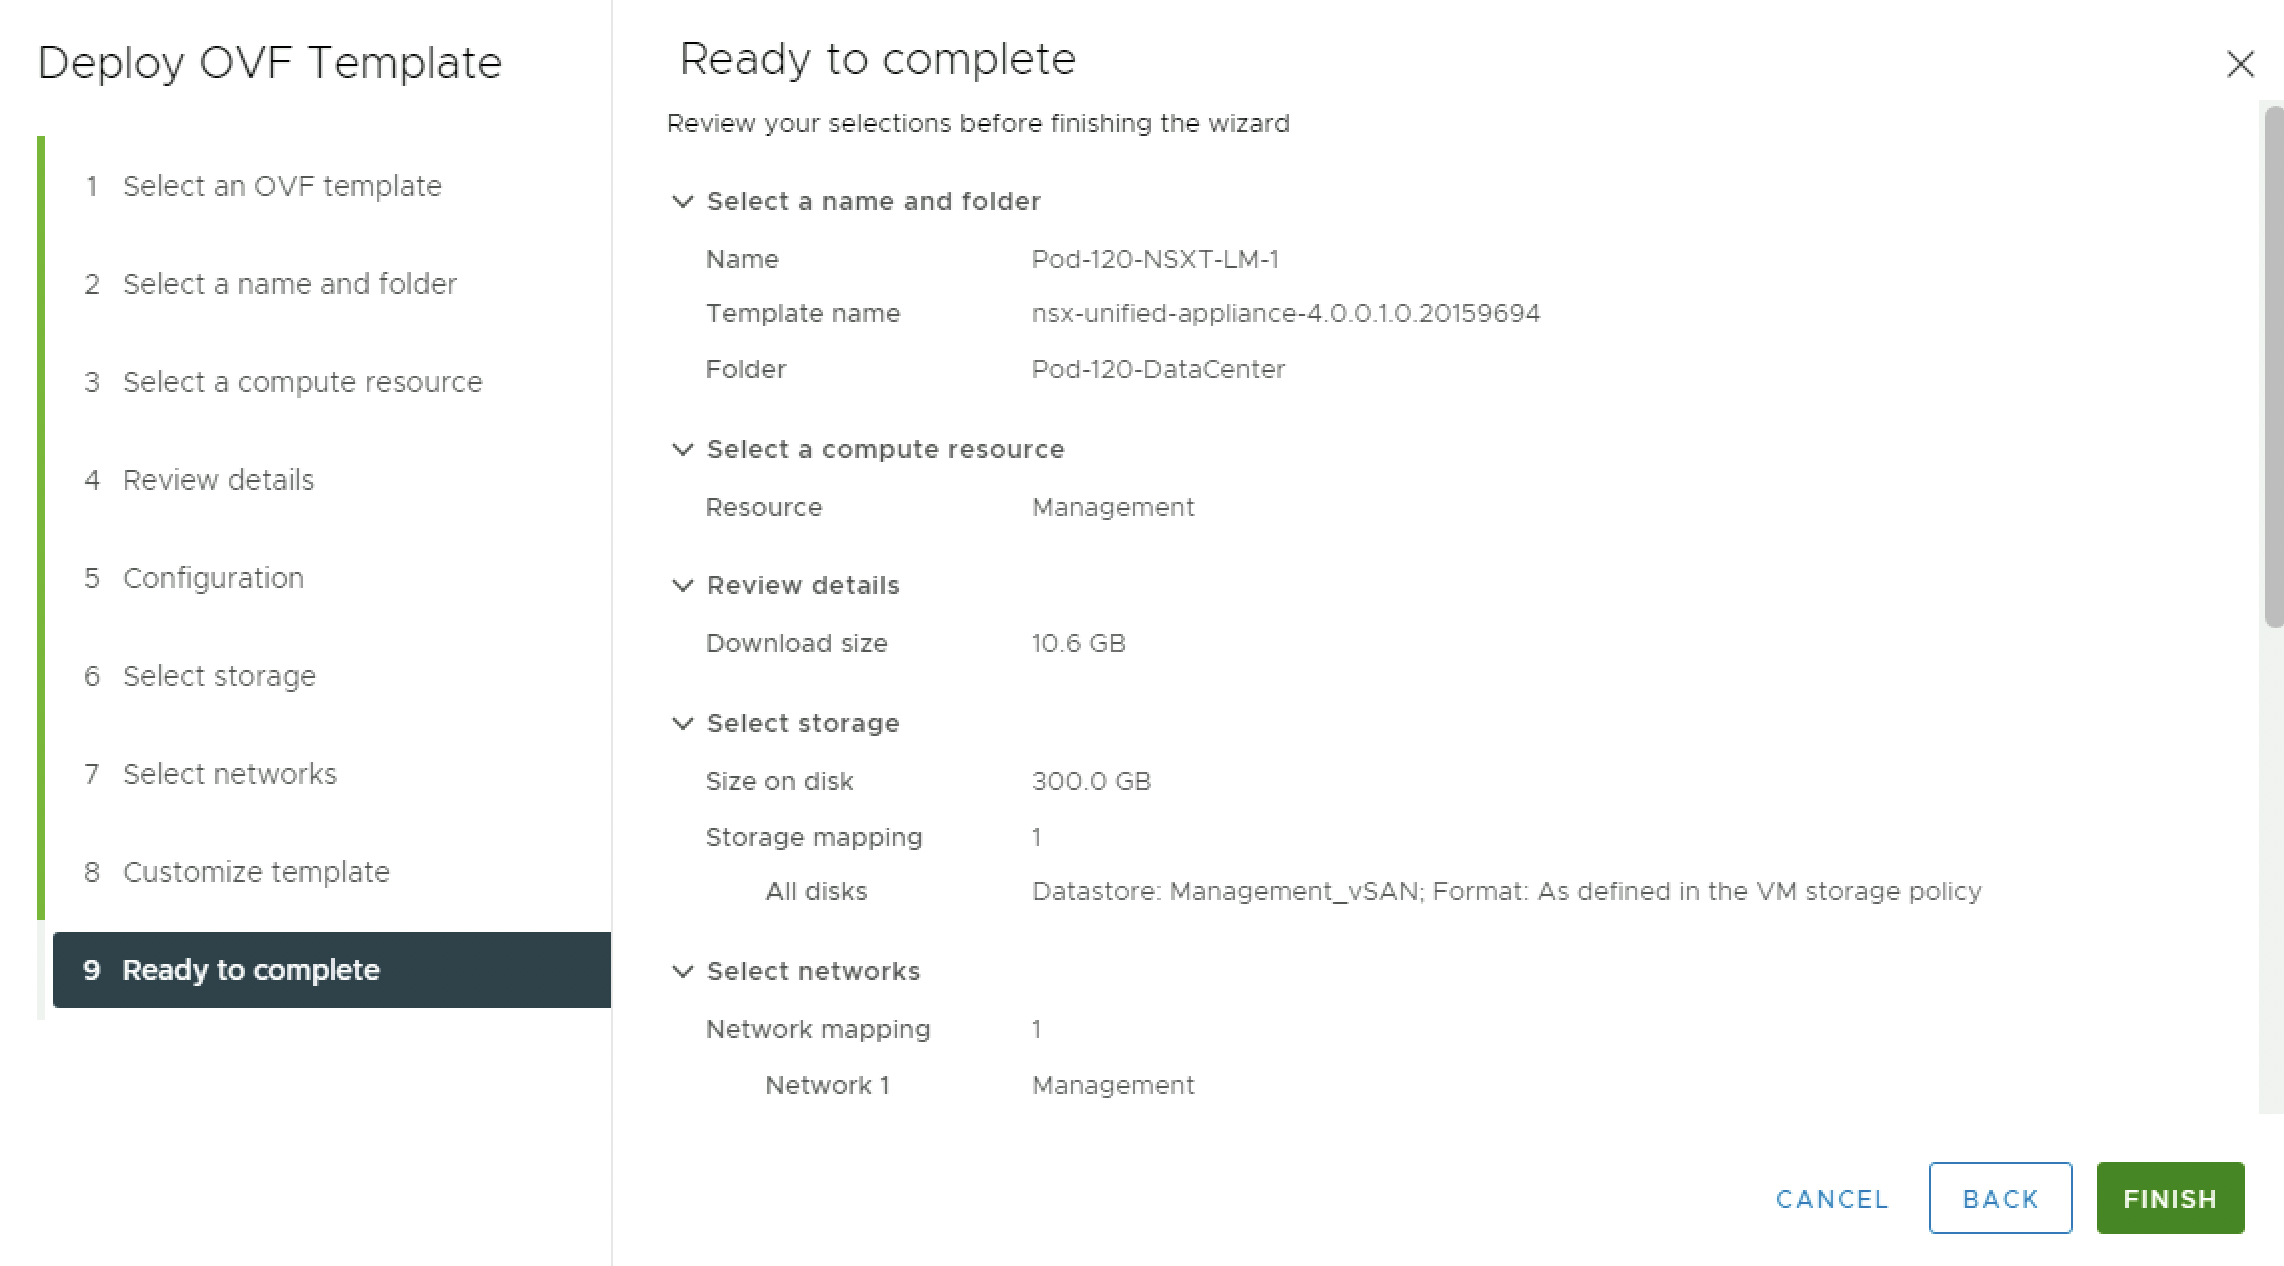
Review the details and click on “Finish” to start the deployment.
In the “Recent Tasks” section in the vCenter Server I can track the deployment status.

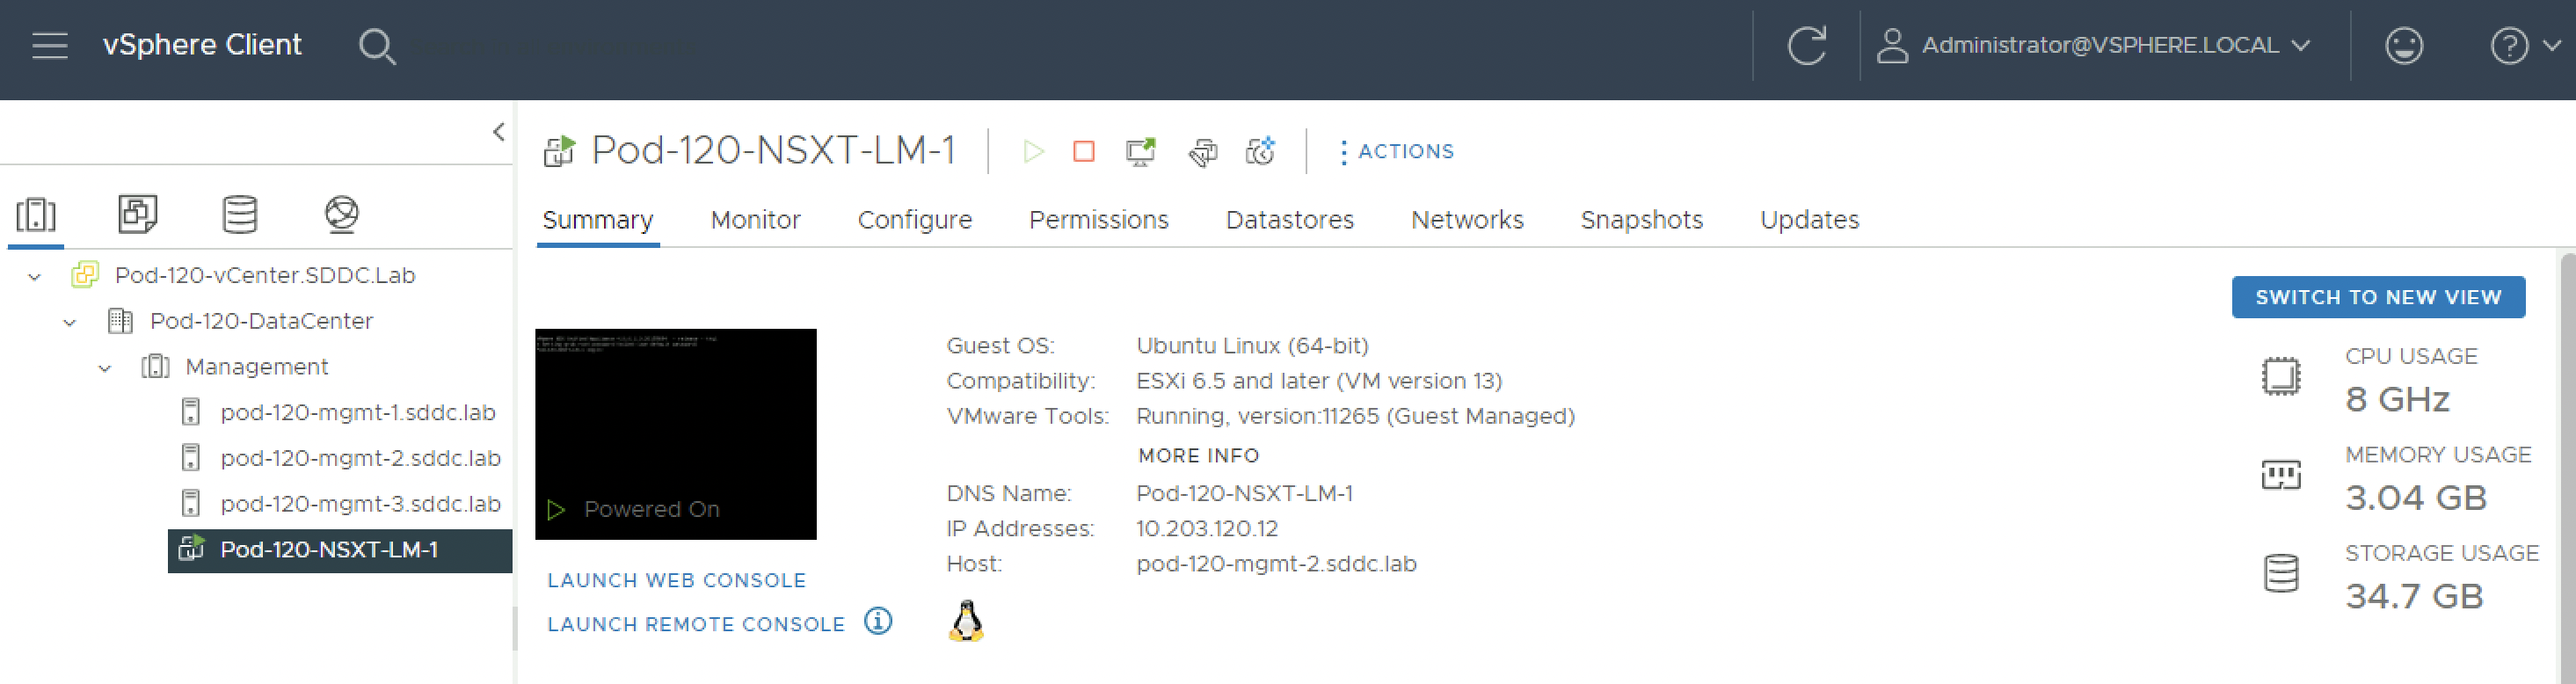
When the deployment is finished I need to turn on the NSX Manager VM by right-clicking on the VM and select Power → Power On.
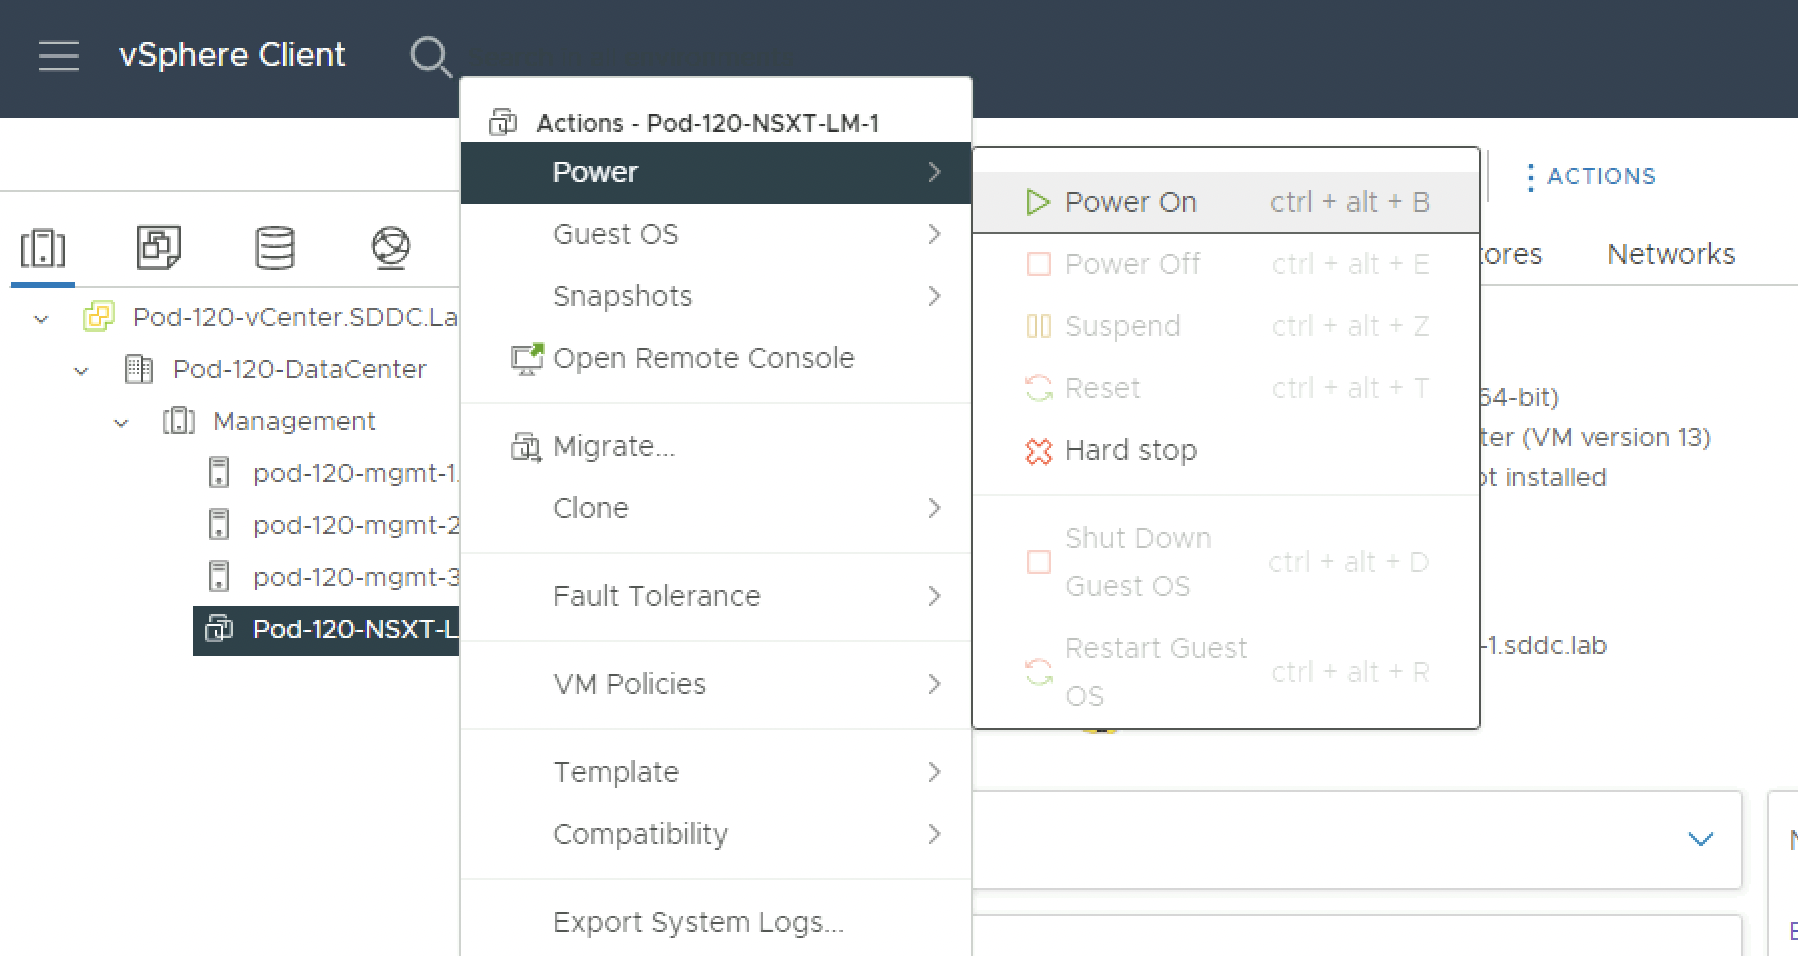
The NSX Manager VM is now powered on.
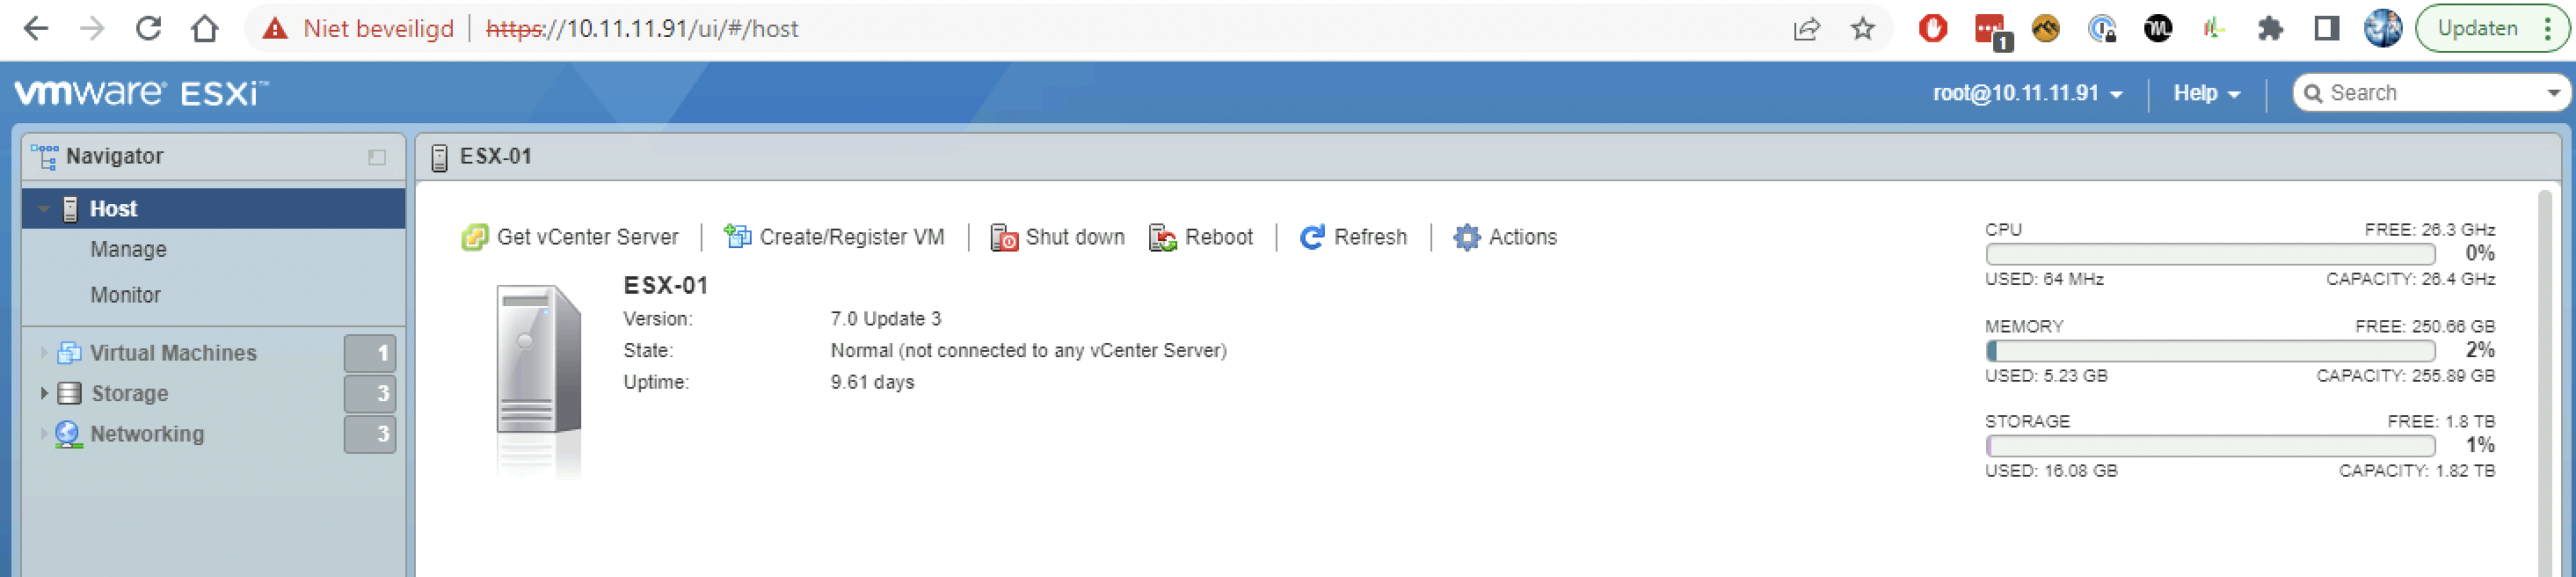
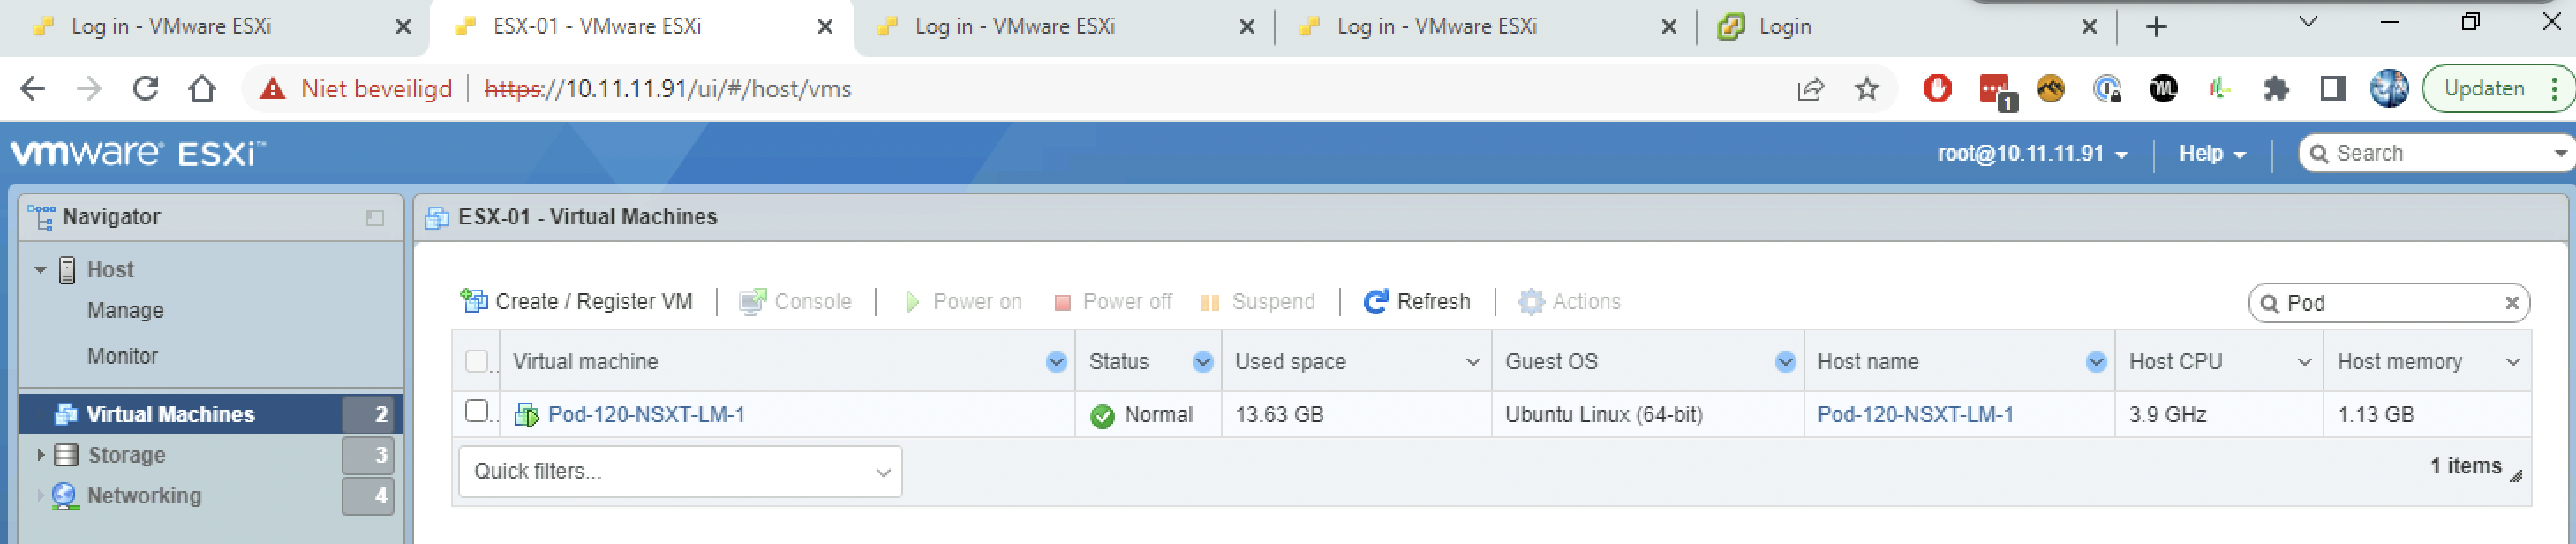
Deploying the first NSX Manager using ESXi Server
Another way to deploy the fist NSX Manager Node is to do the deployment on an ESXi host. Click on “Create/Register VM”
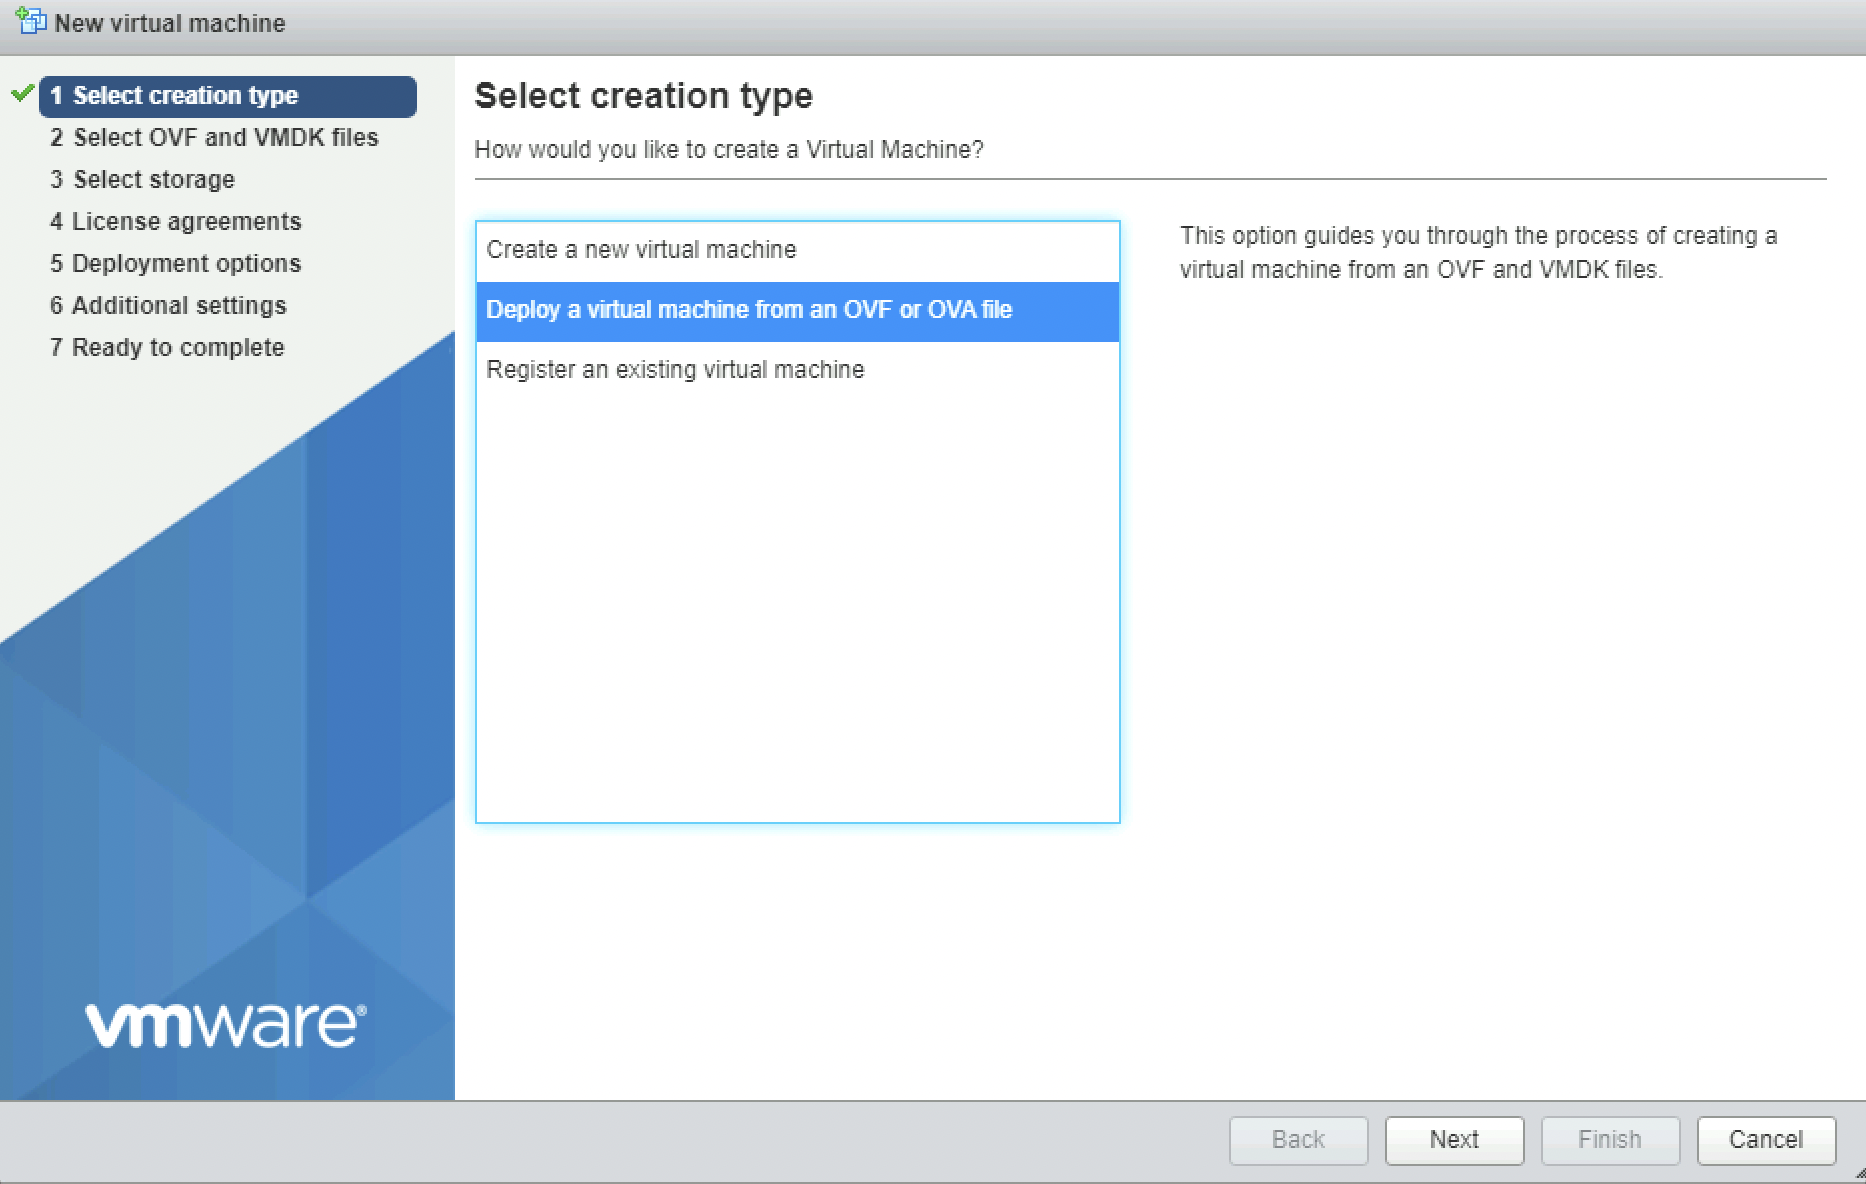
Select “Deploy a virtual machine from an OVF file”.
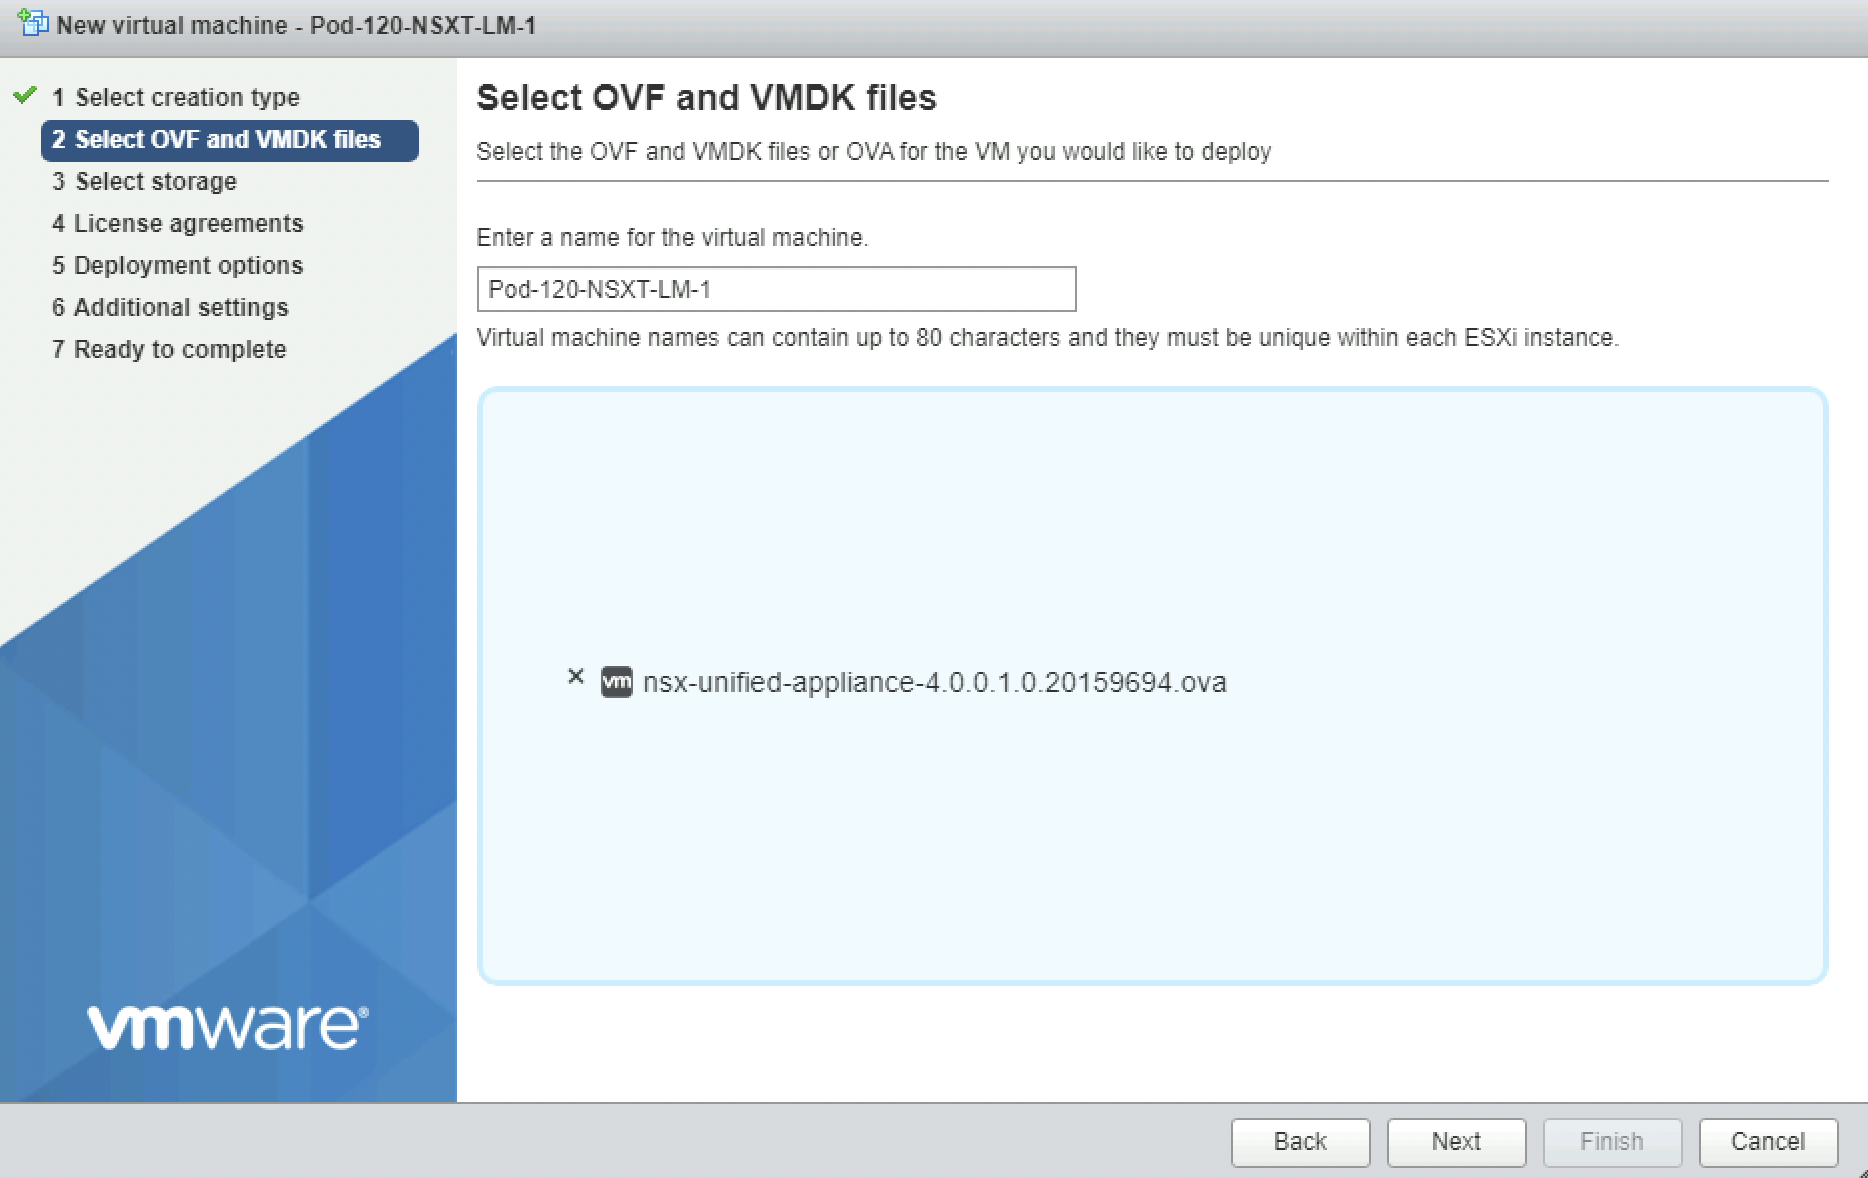
Specify a Virtual Machine Name and select the NSX OVA file that I downloaded from the VMware website.
Specify the storage.
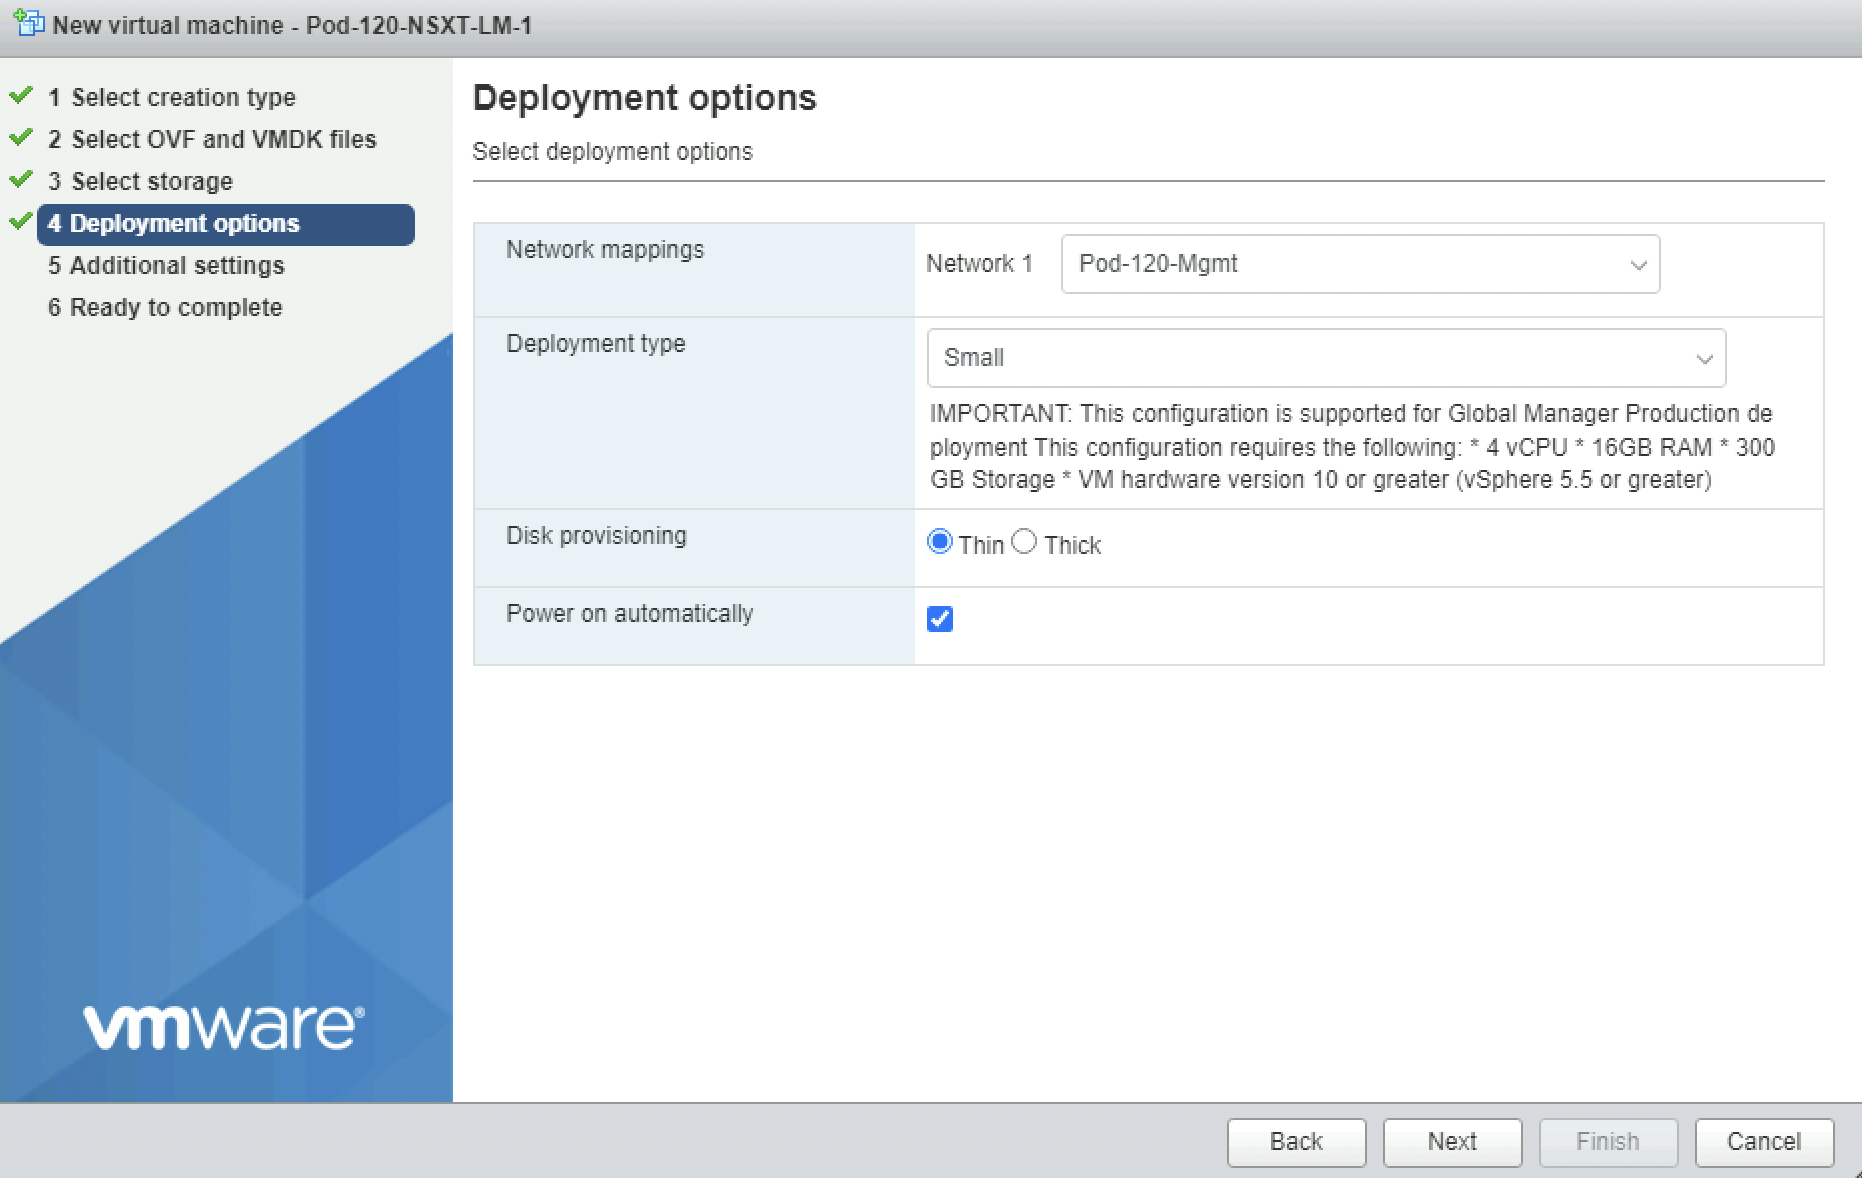
Specify the network and specify a deployment size. Make sure the VM is powered on automatically.
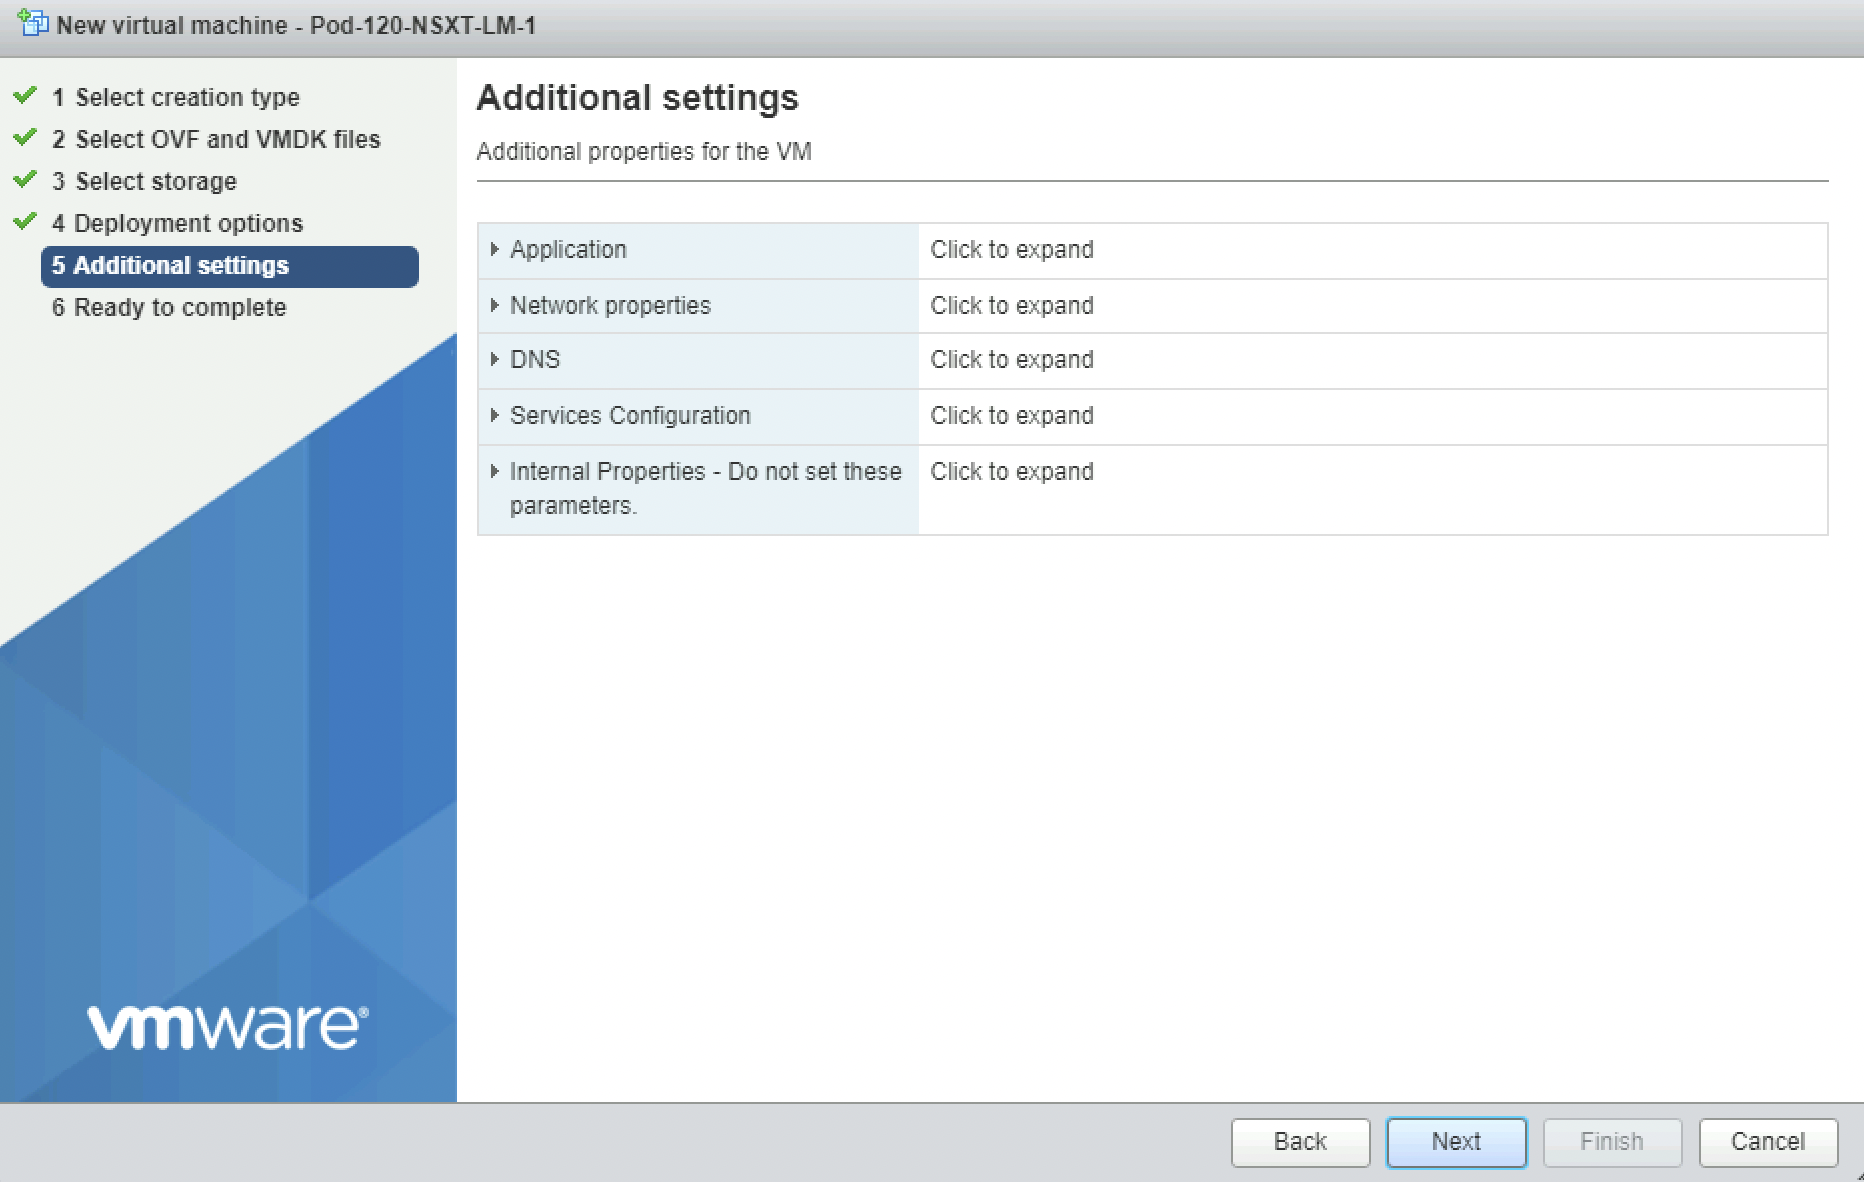
Specify the parameters as per this table:
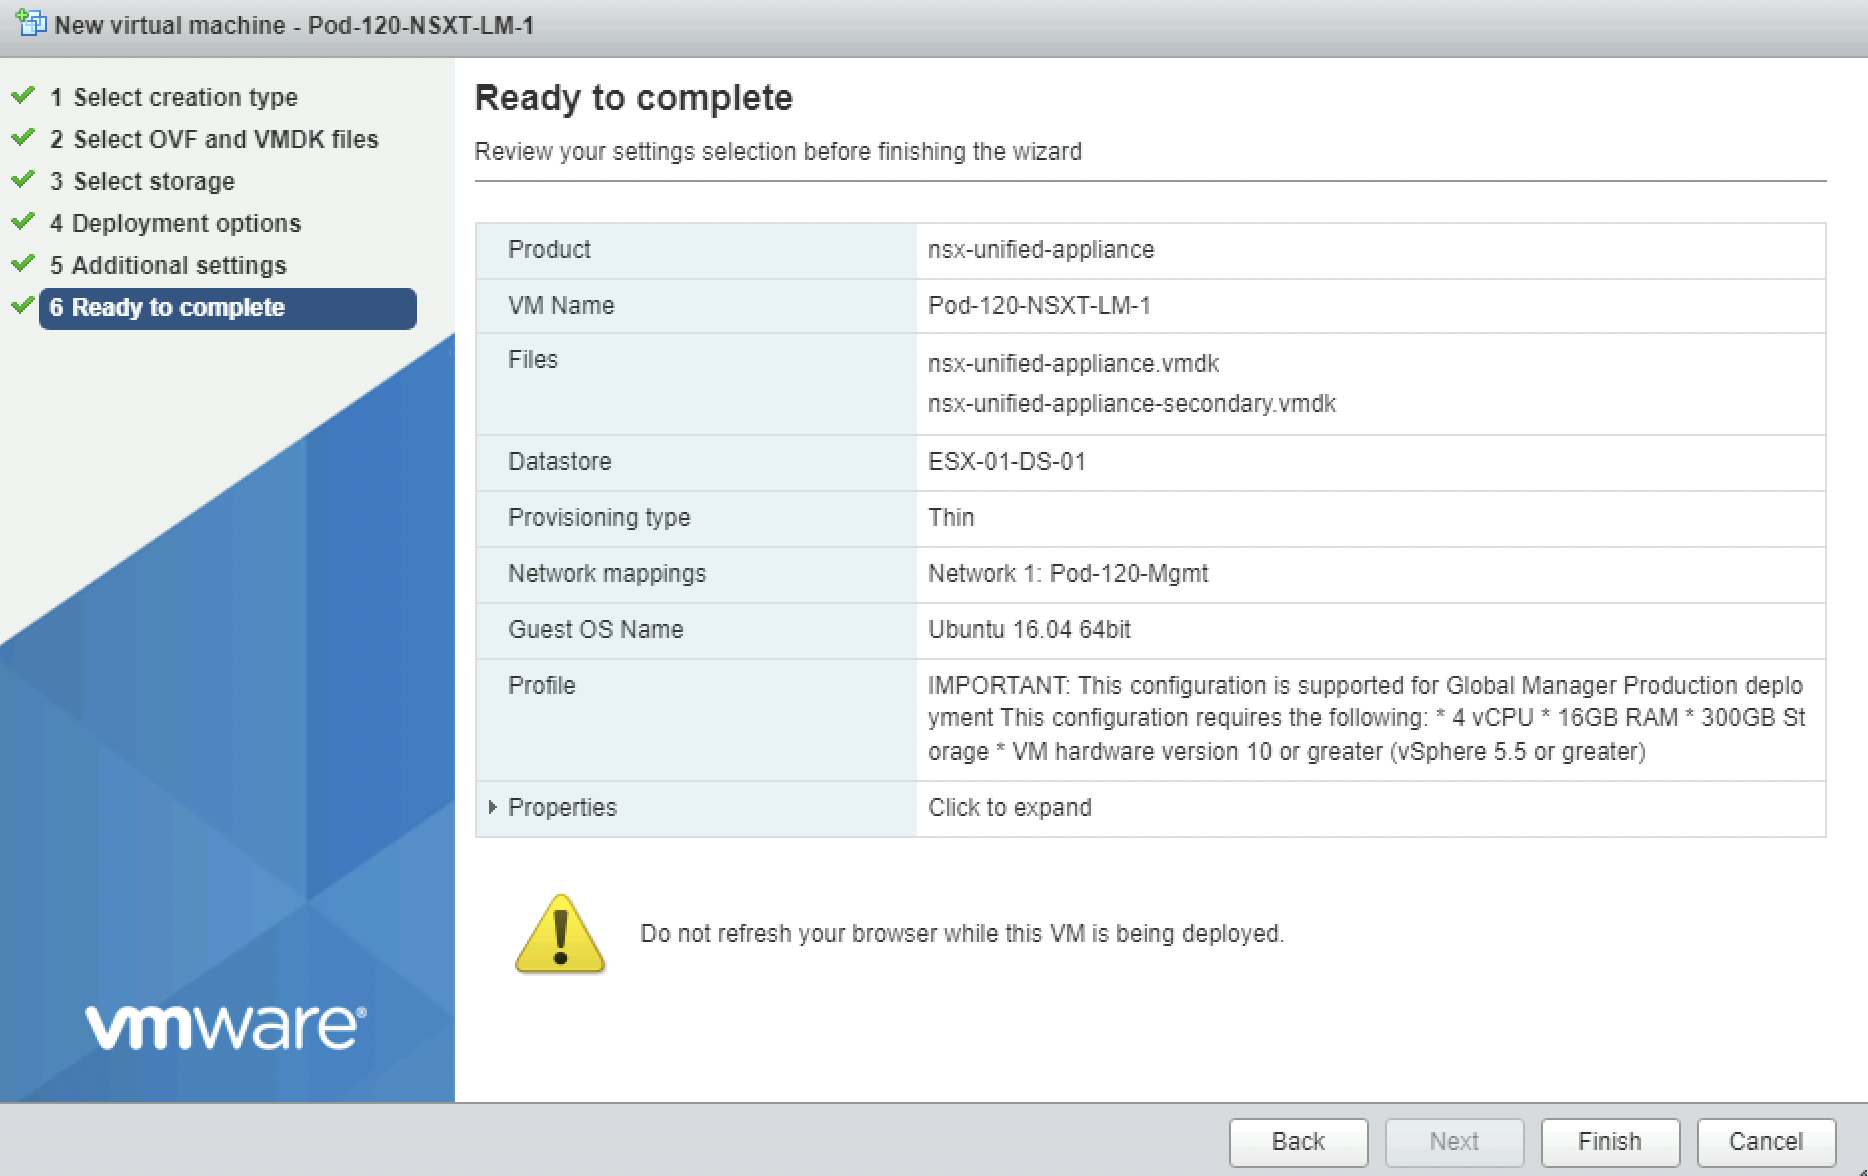
Review the details and click on “Finish” to start the deployment.
In the “Recent Tasks” section in the ESXi Server I can track the deployment status.

Verify if the VM is powered on.
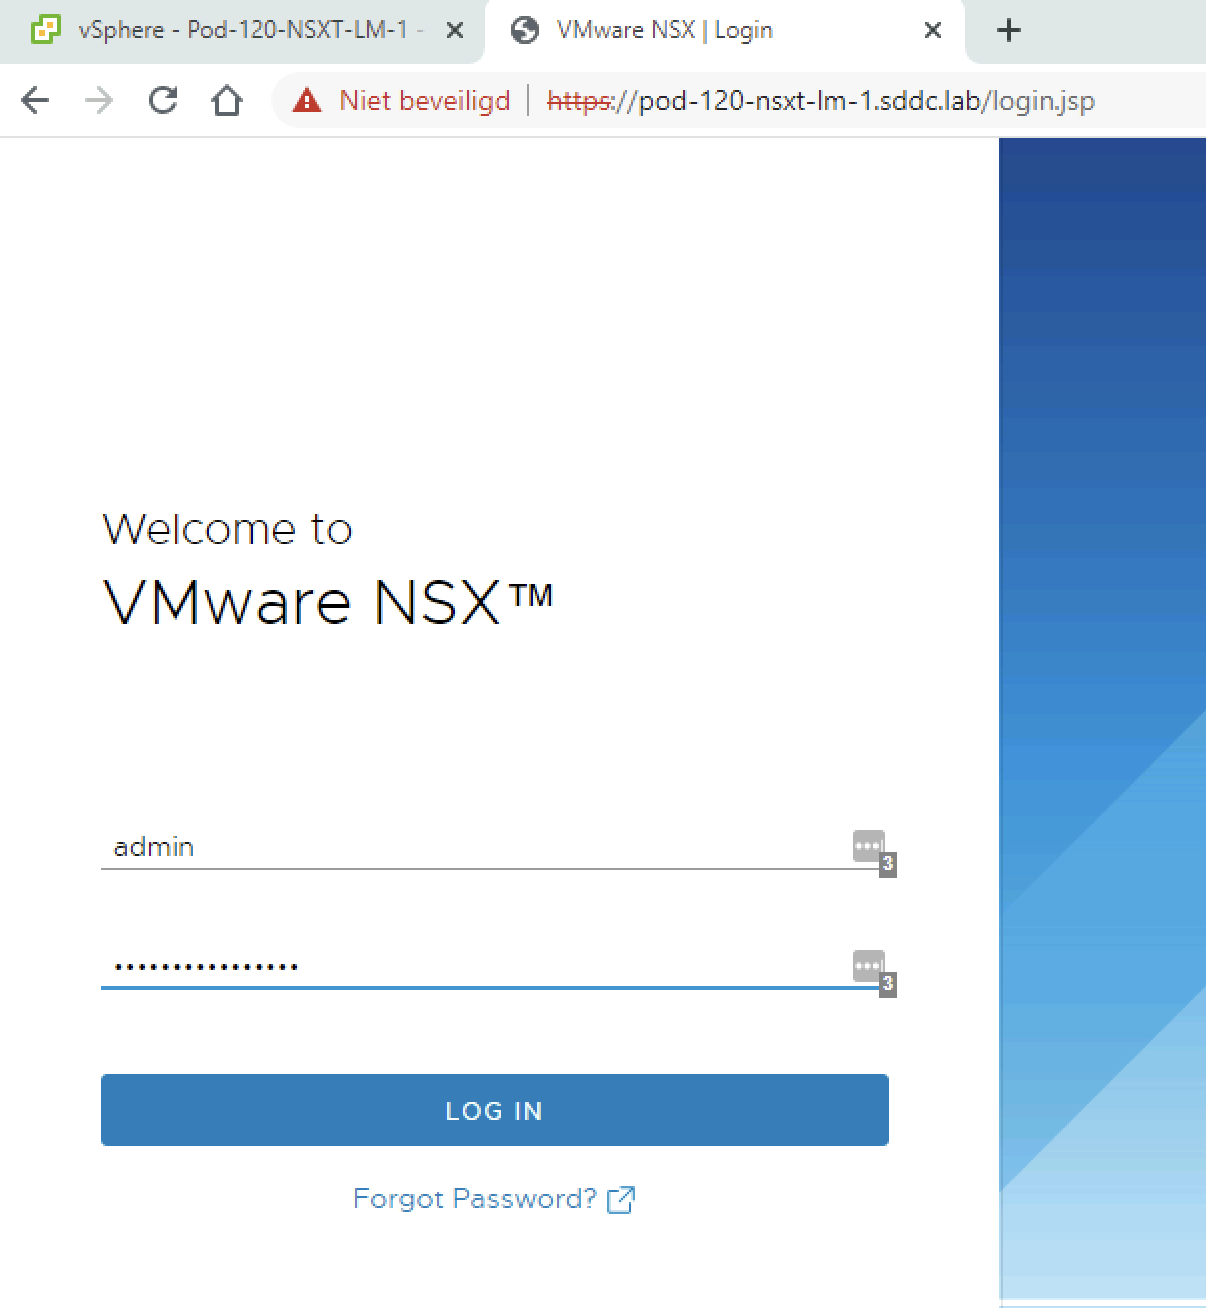
Log in for the first time
Now that the first NSX Manager Node is deployed I can log in to the GUI.
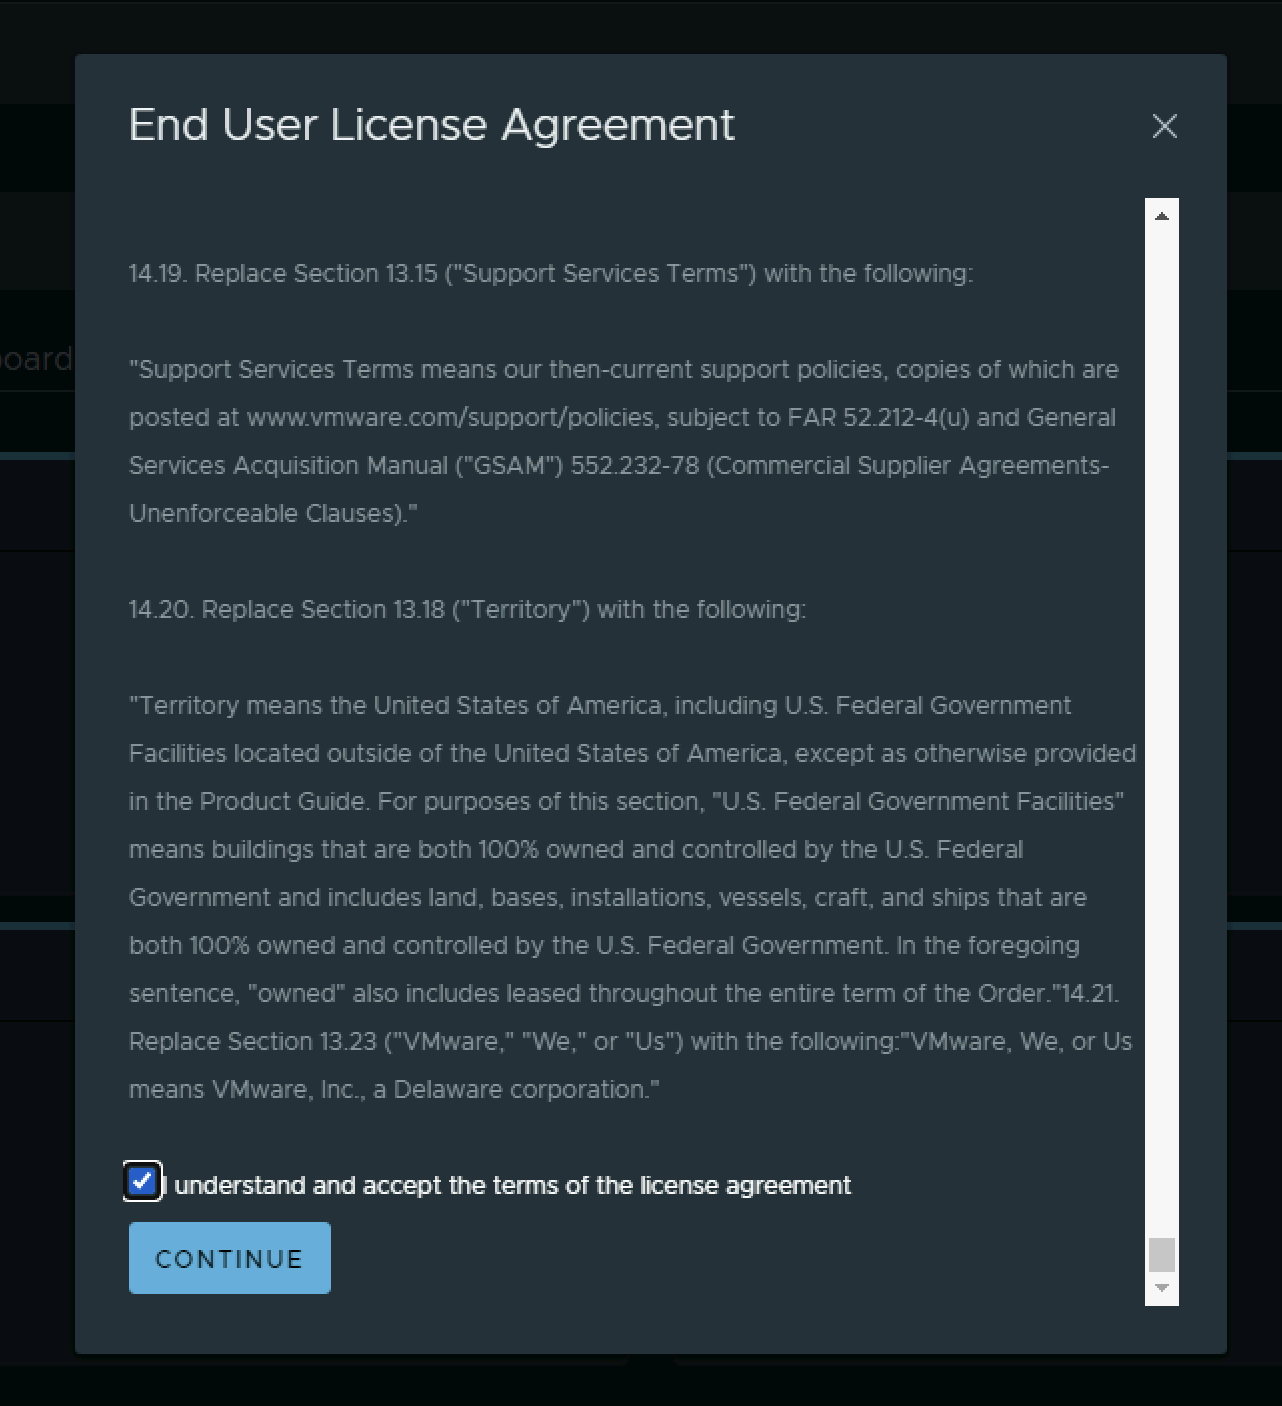
Accept the End User Licence Agreement.
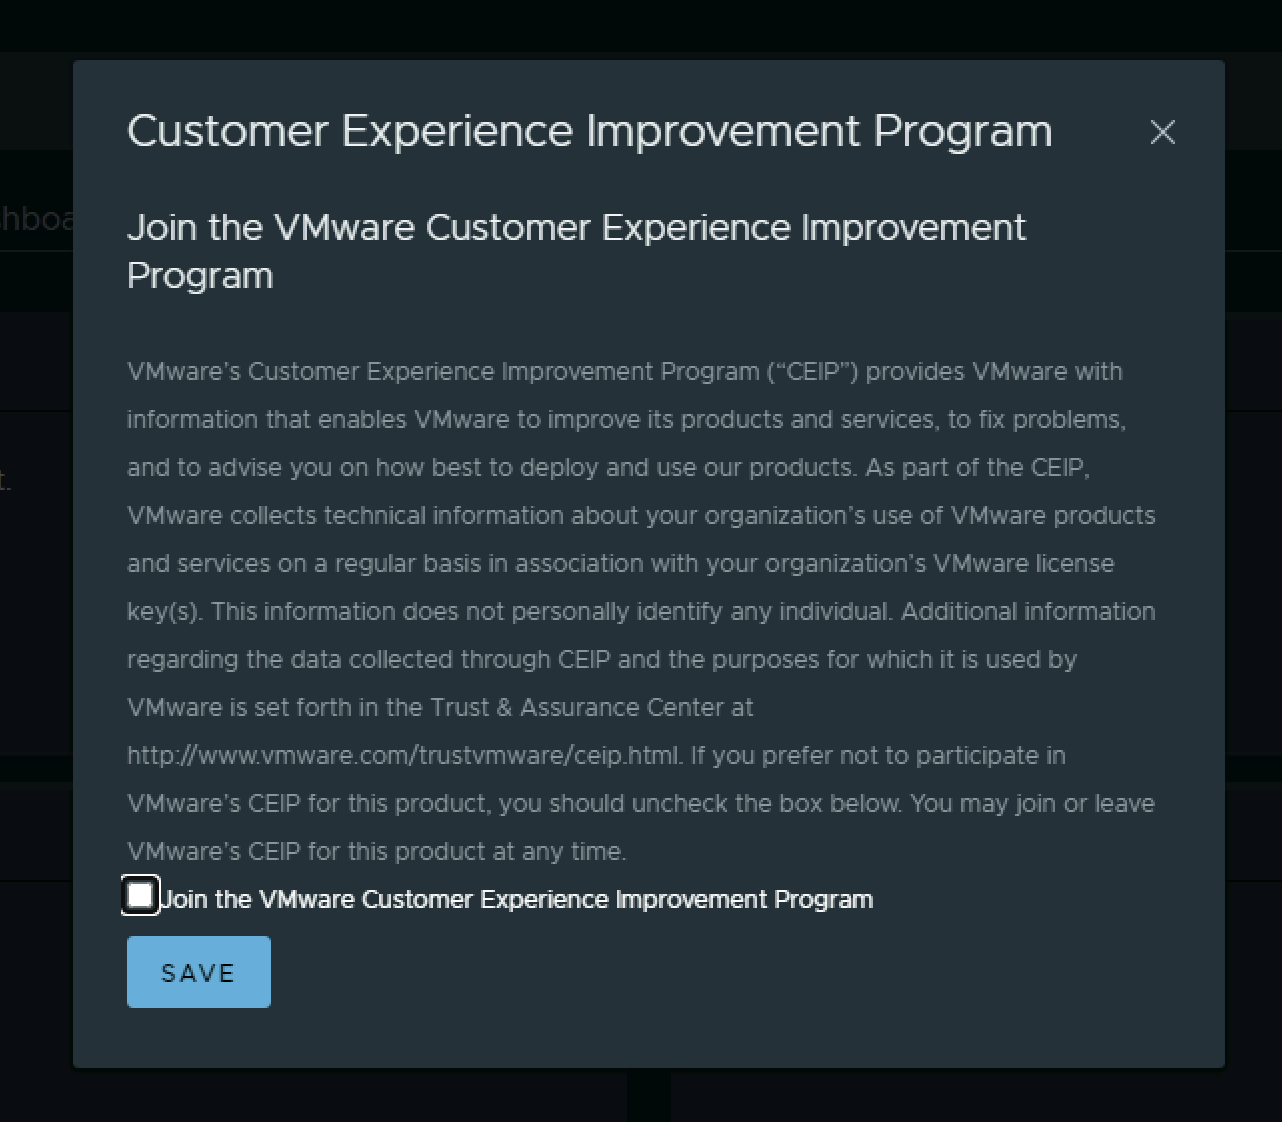
Specify if I want to join the “Customer Experience Improvement Program”.
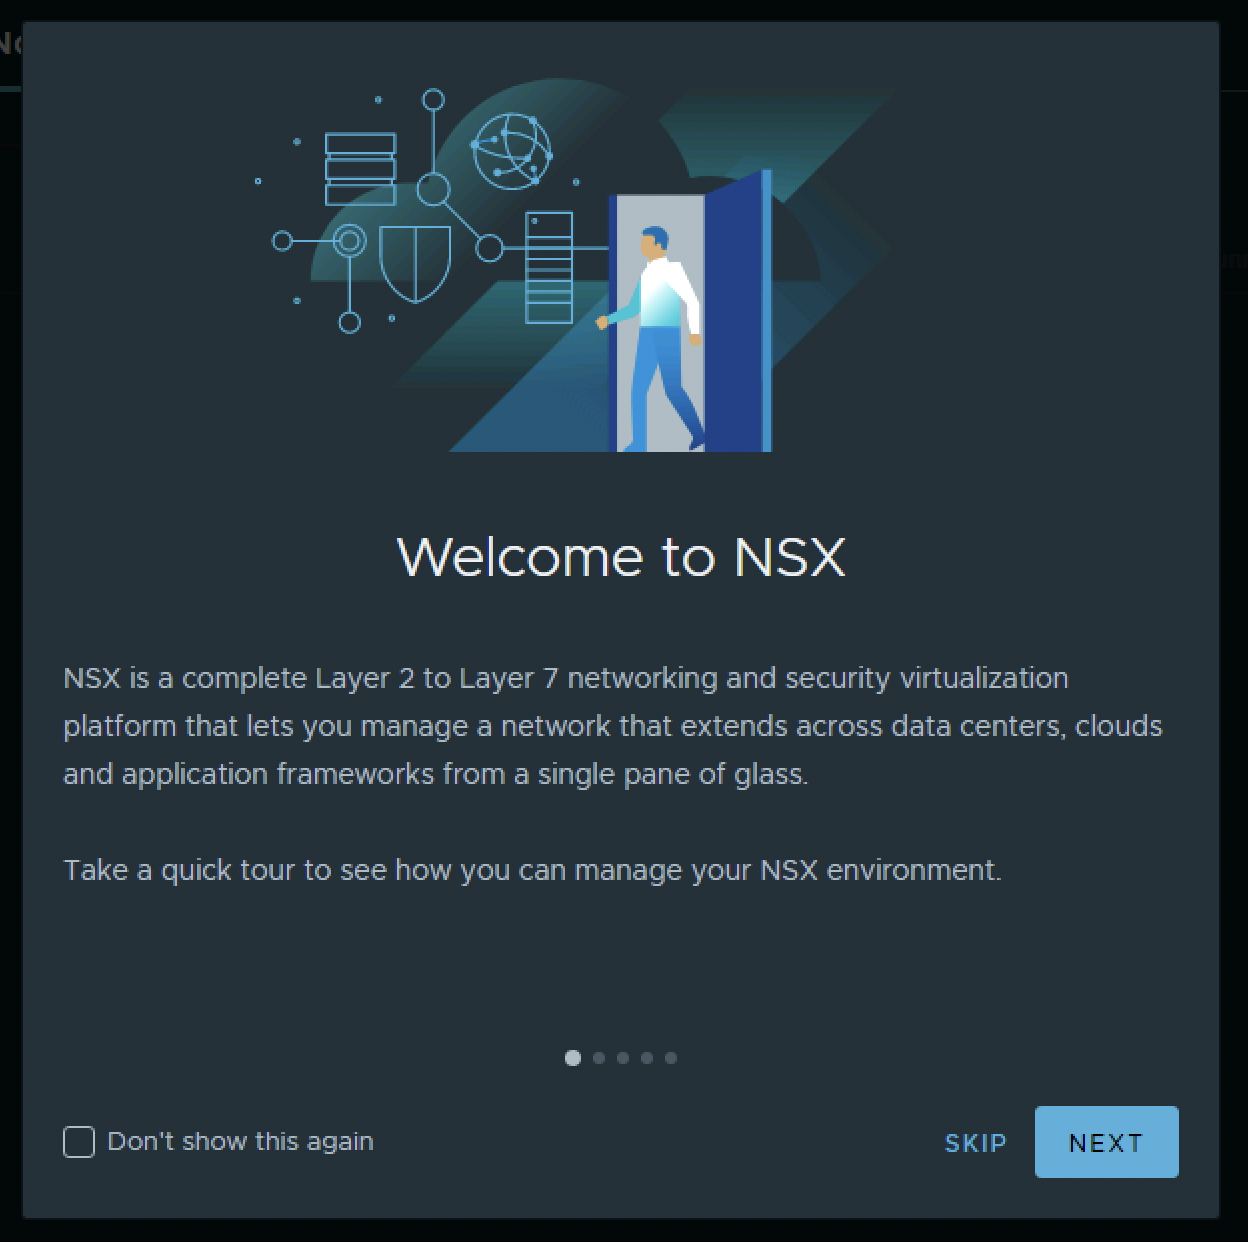
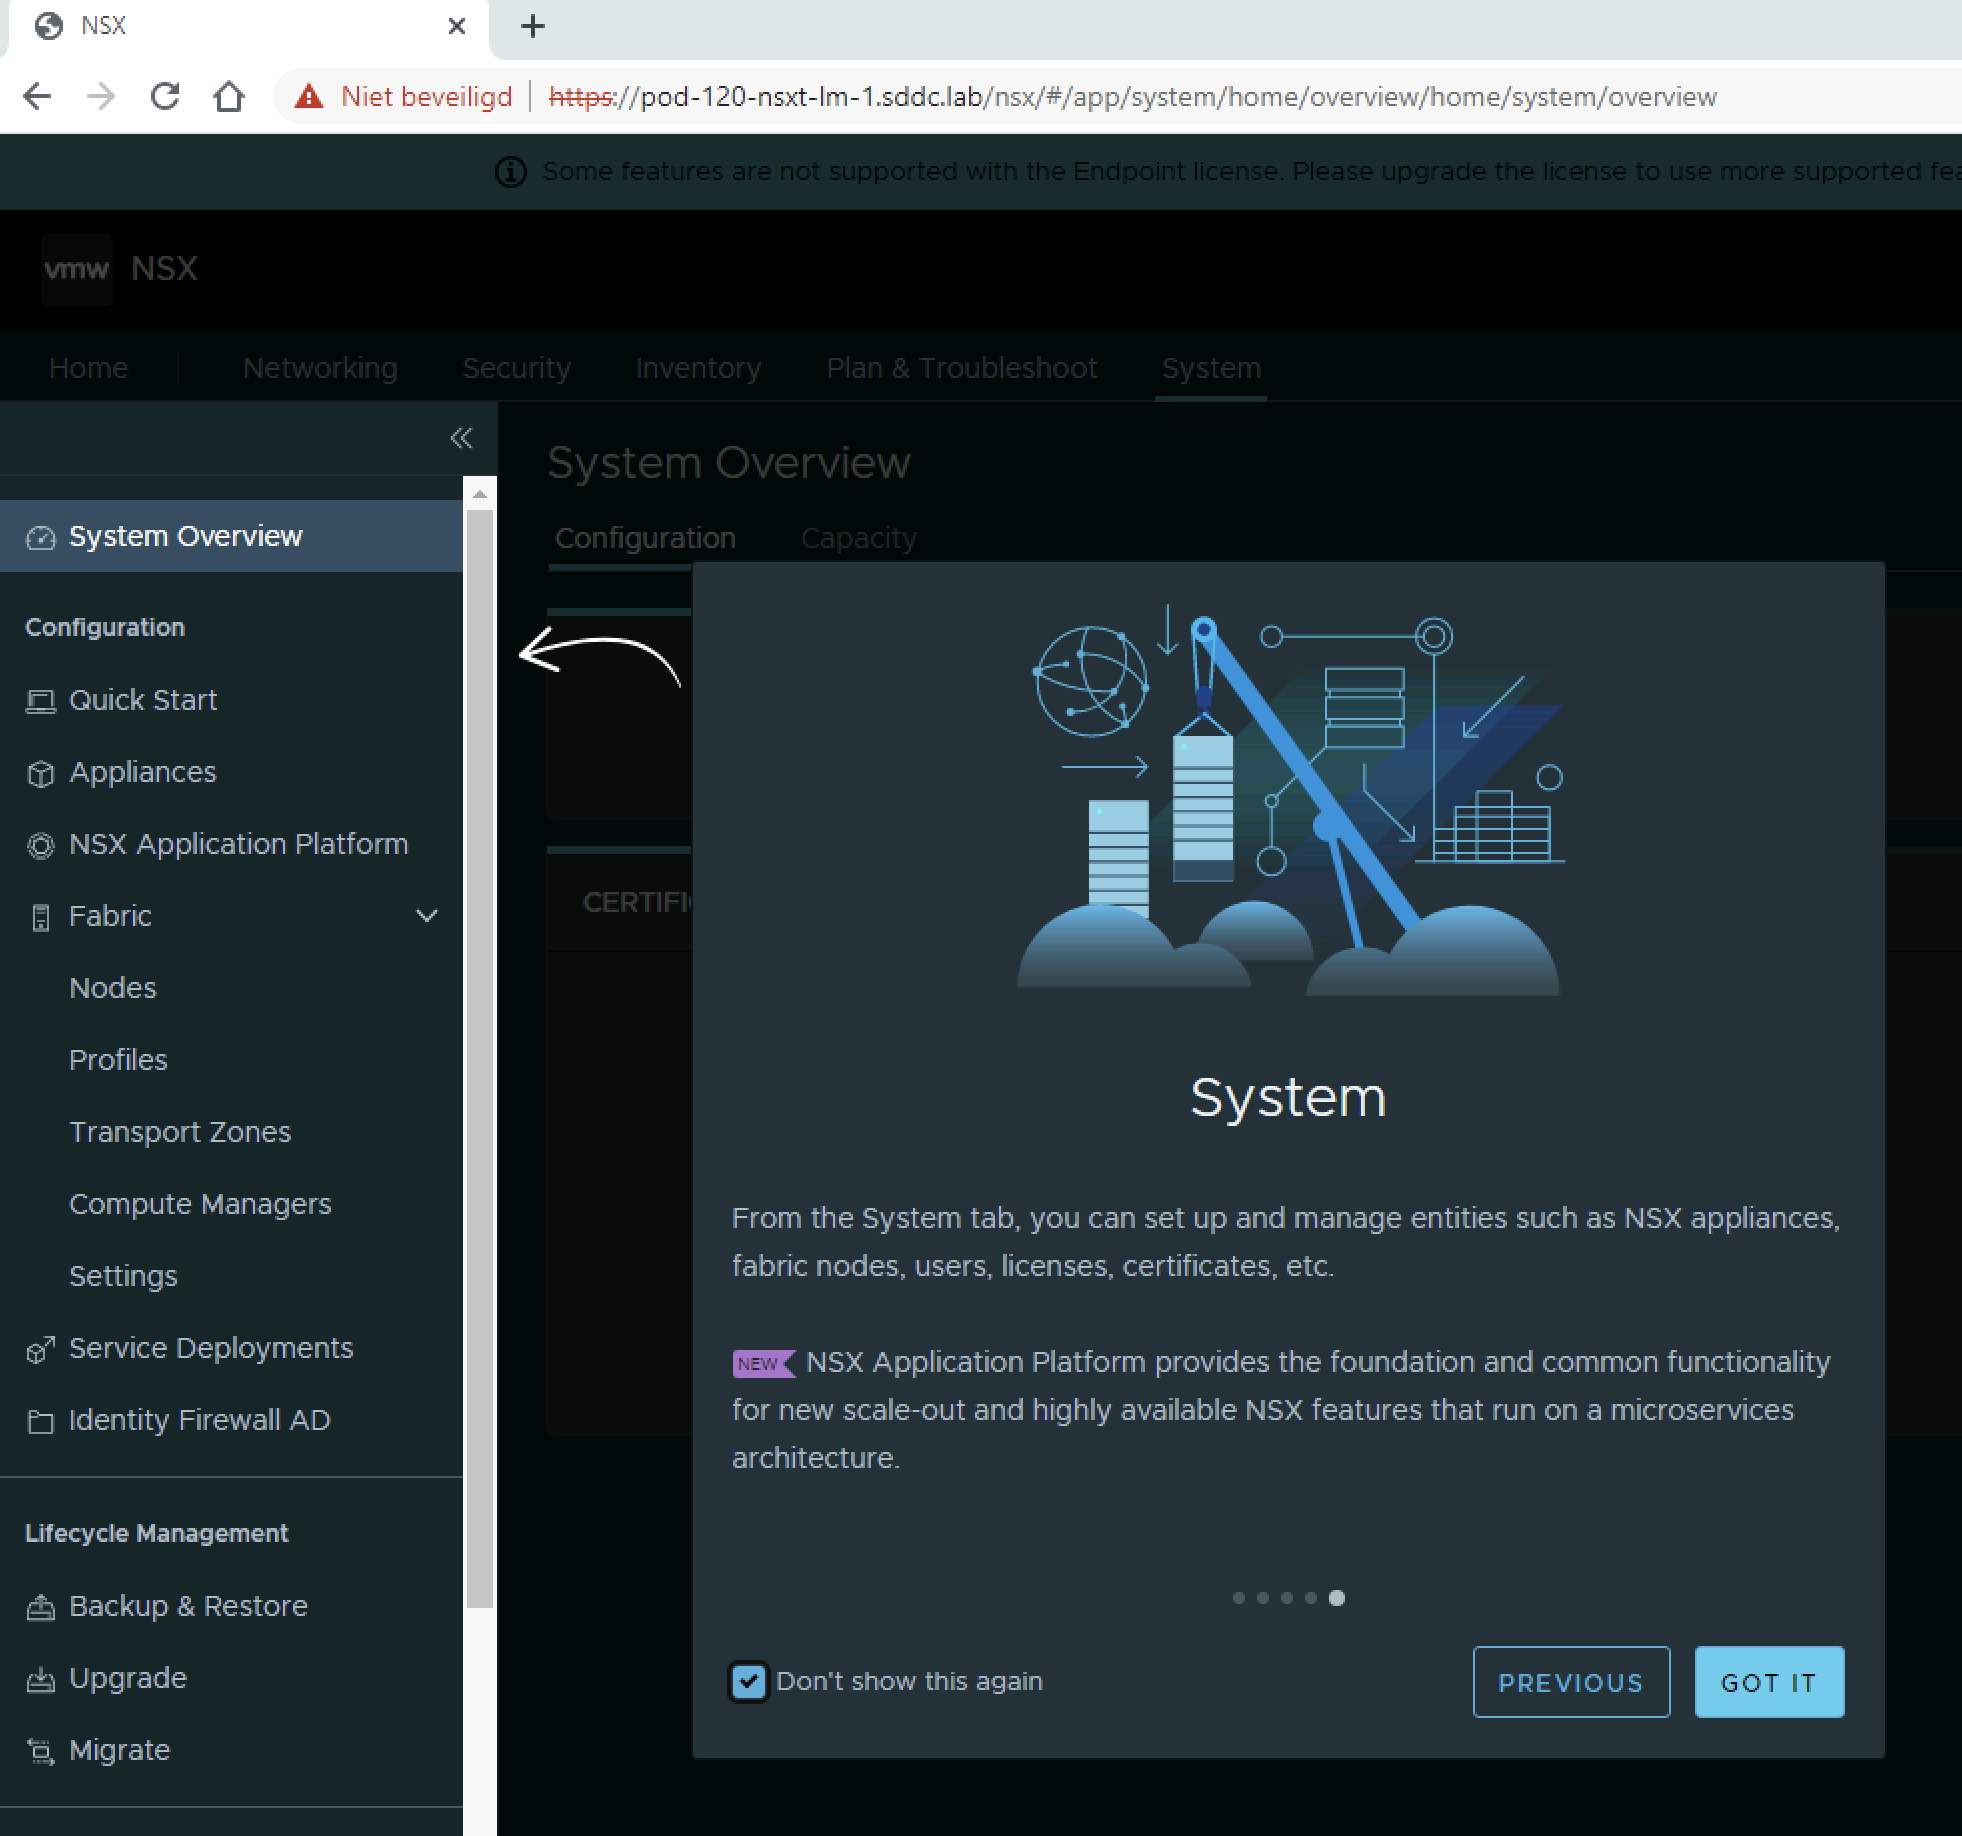
NSX 4.0.0.1 has a “Welcome wizard” to point out where I can find what. Click on “Next”.
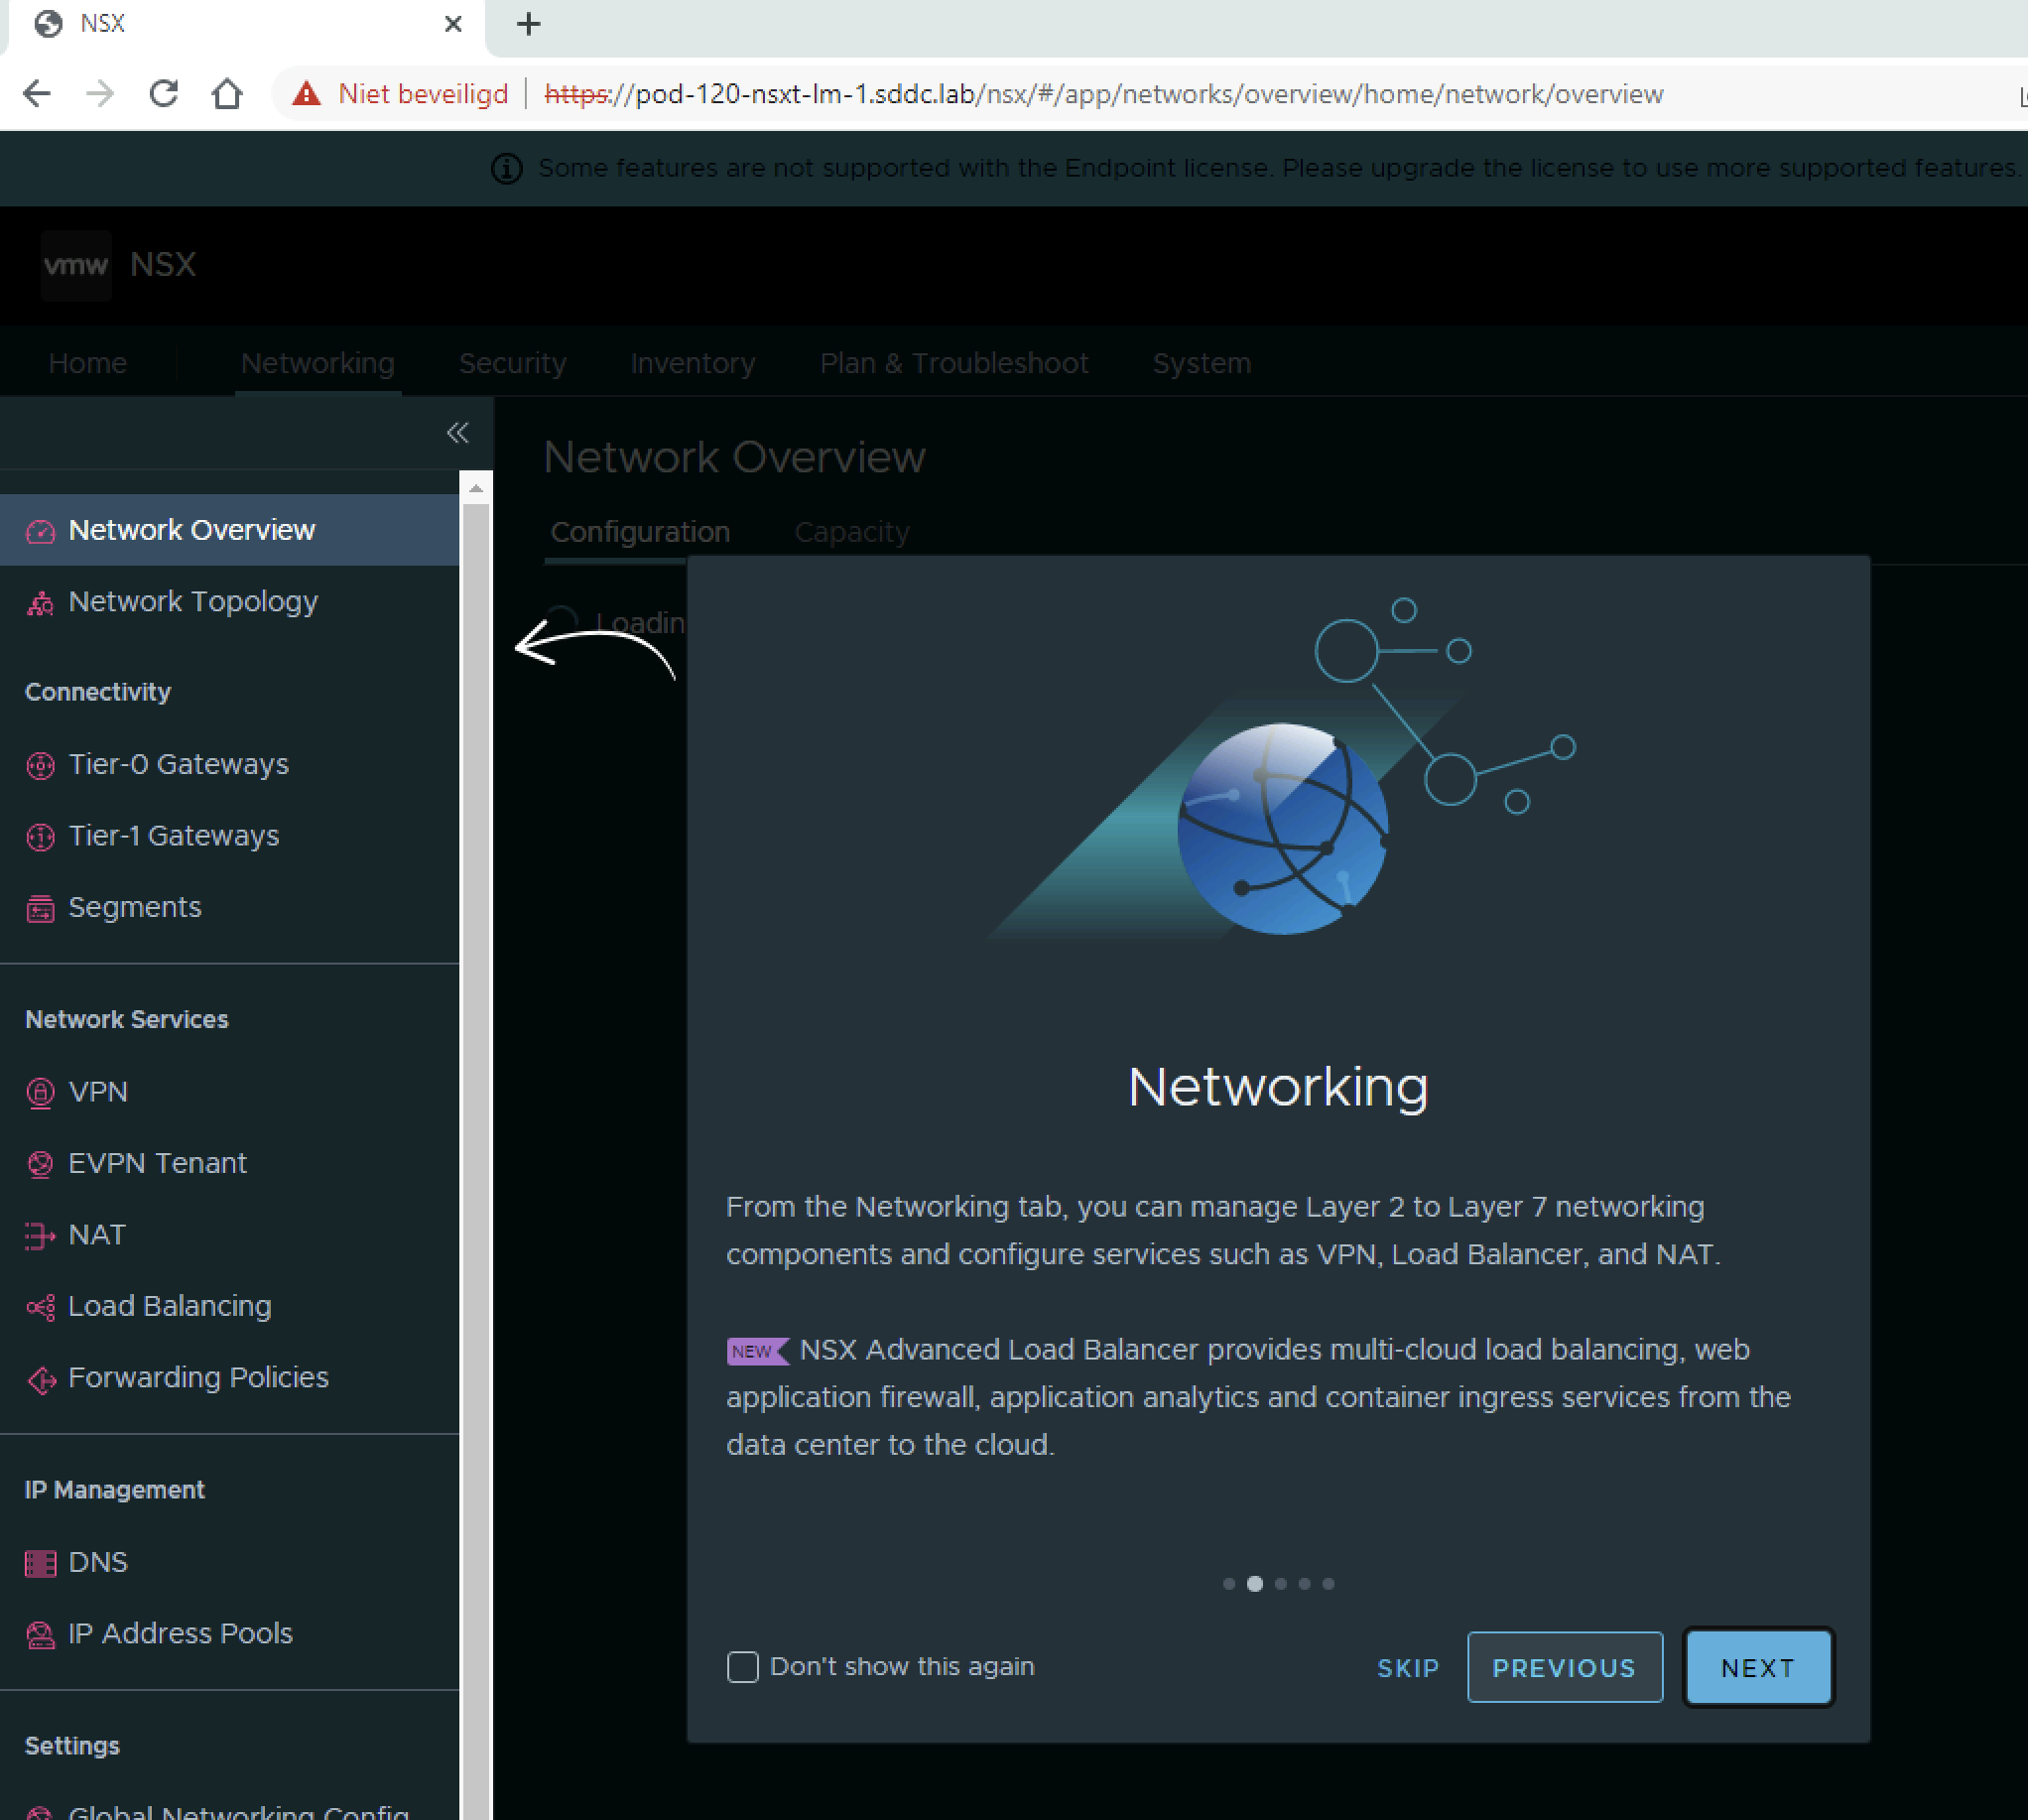
The wizard point out “Networking”.
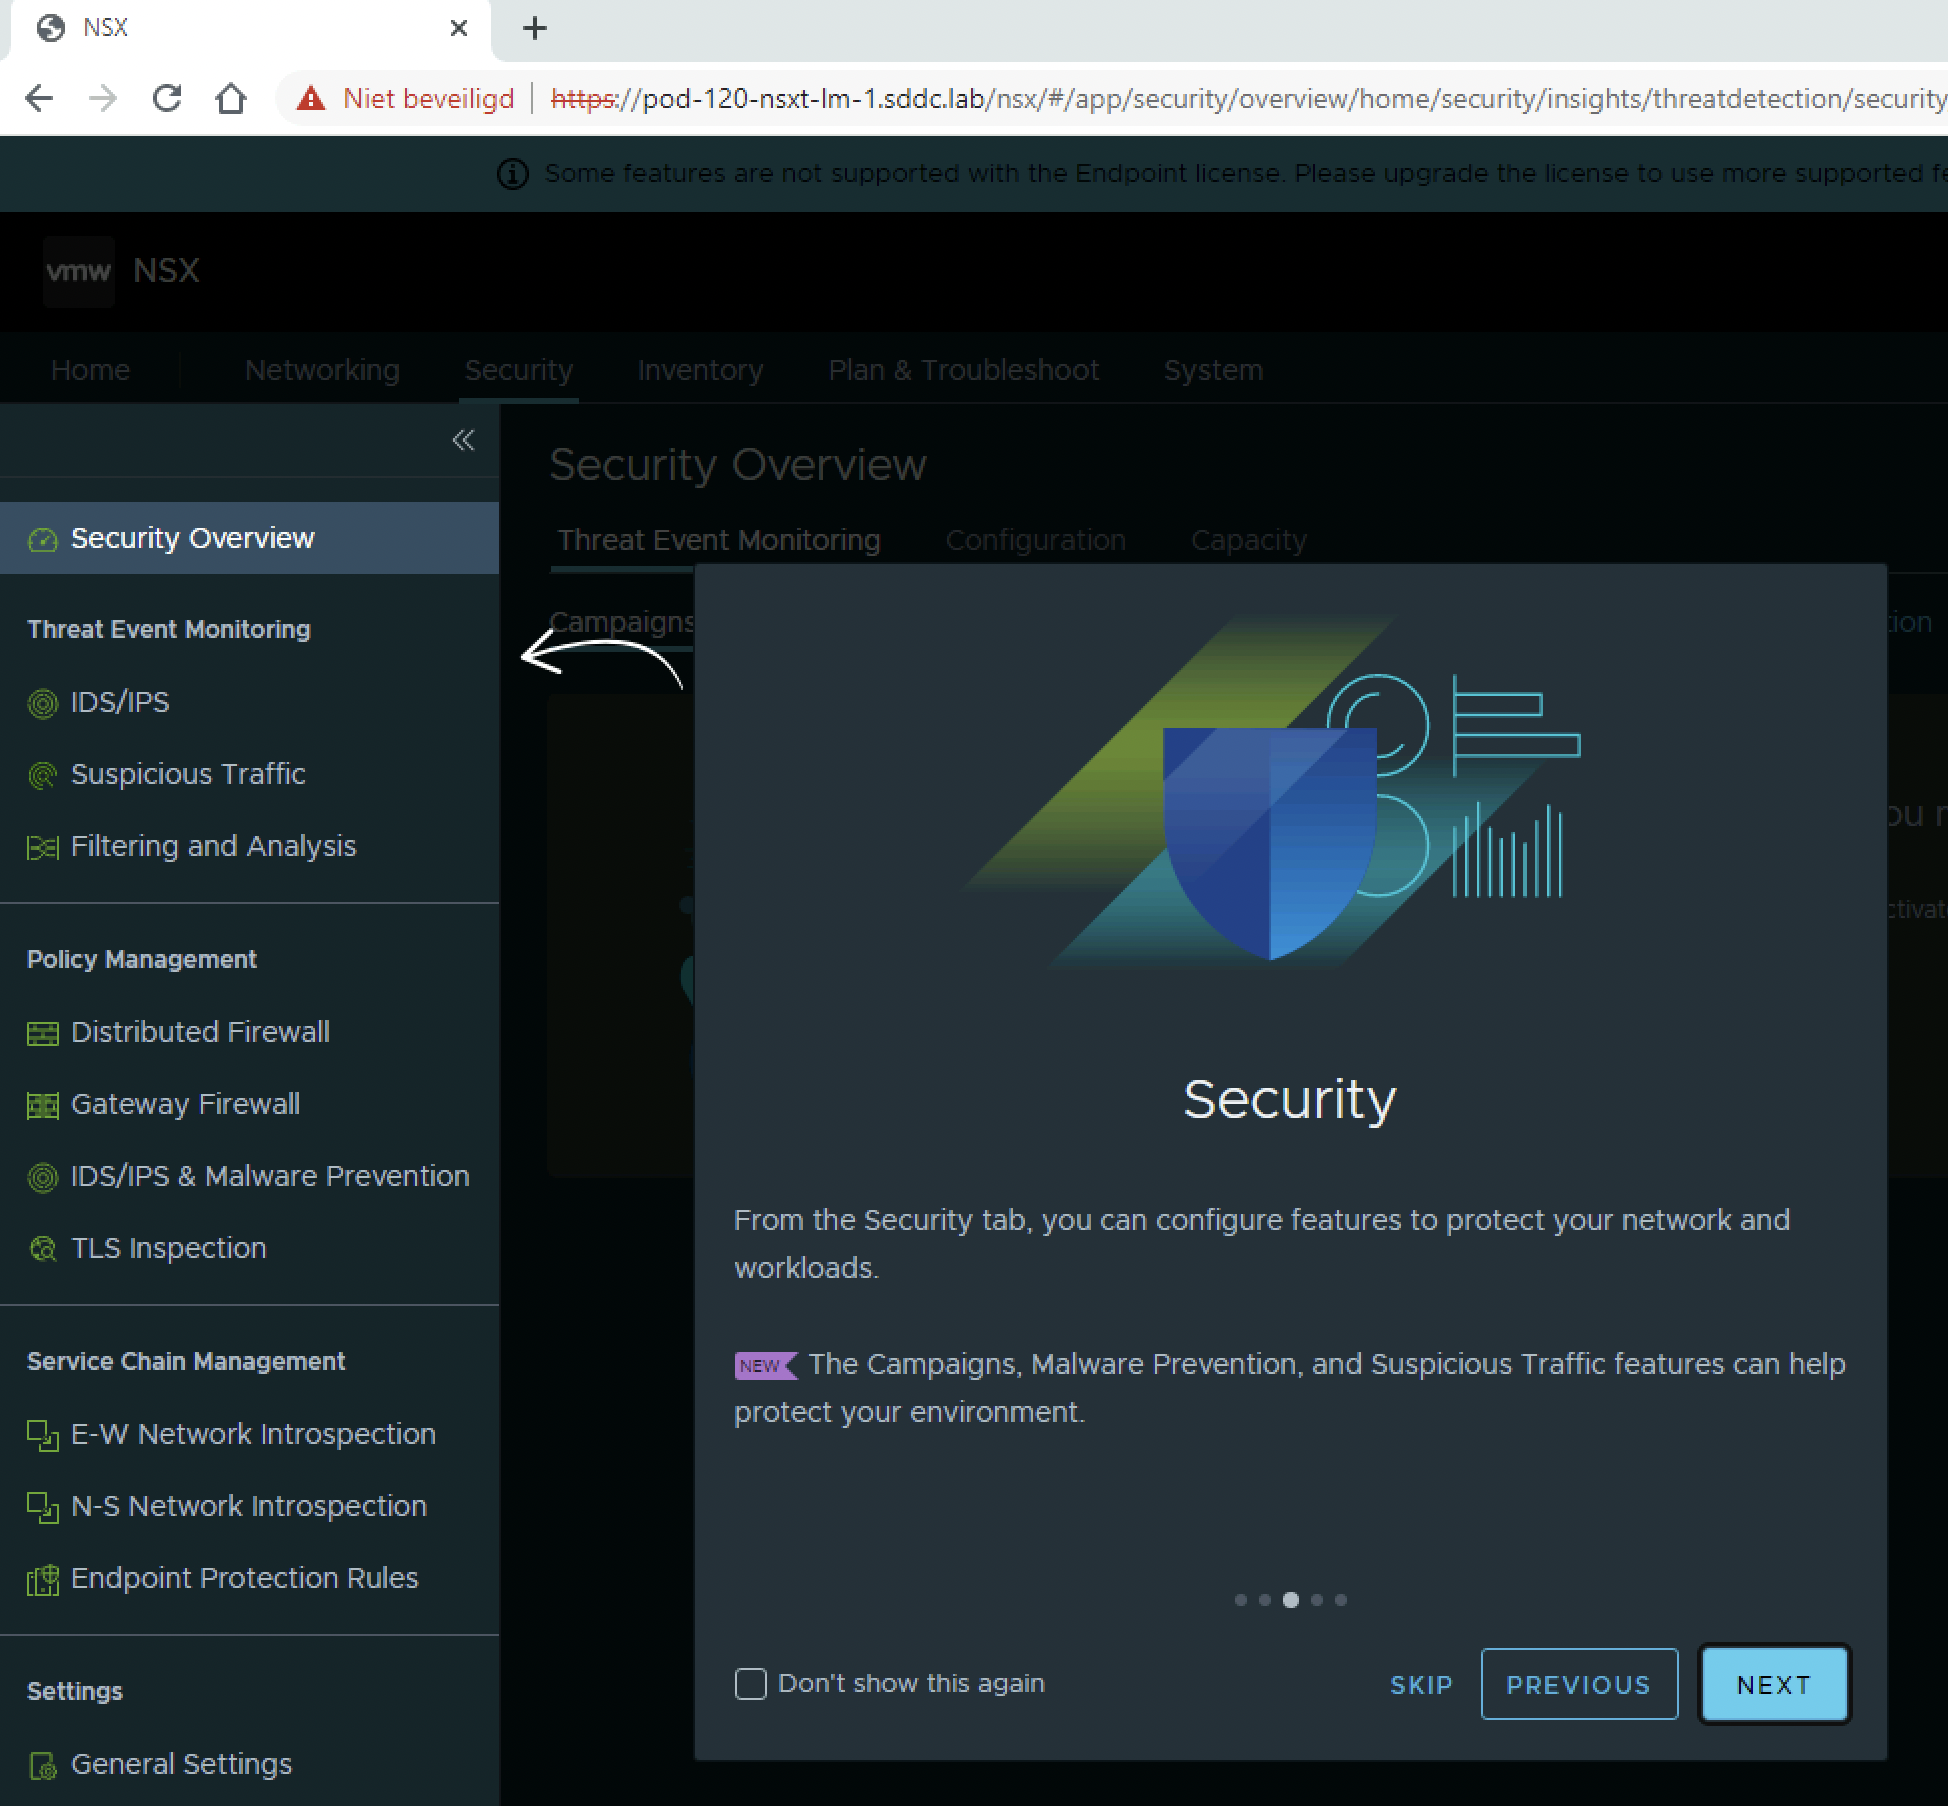
The wizard point out “Security”.
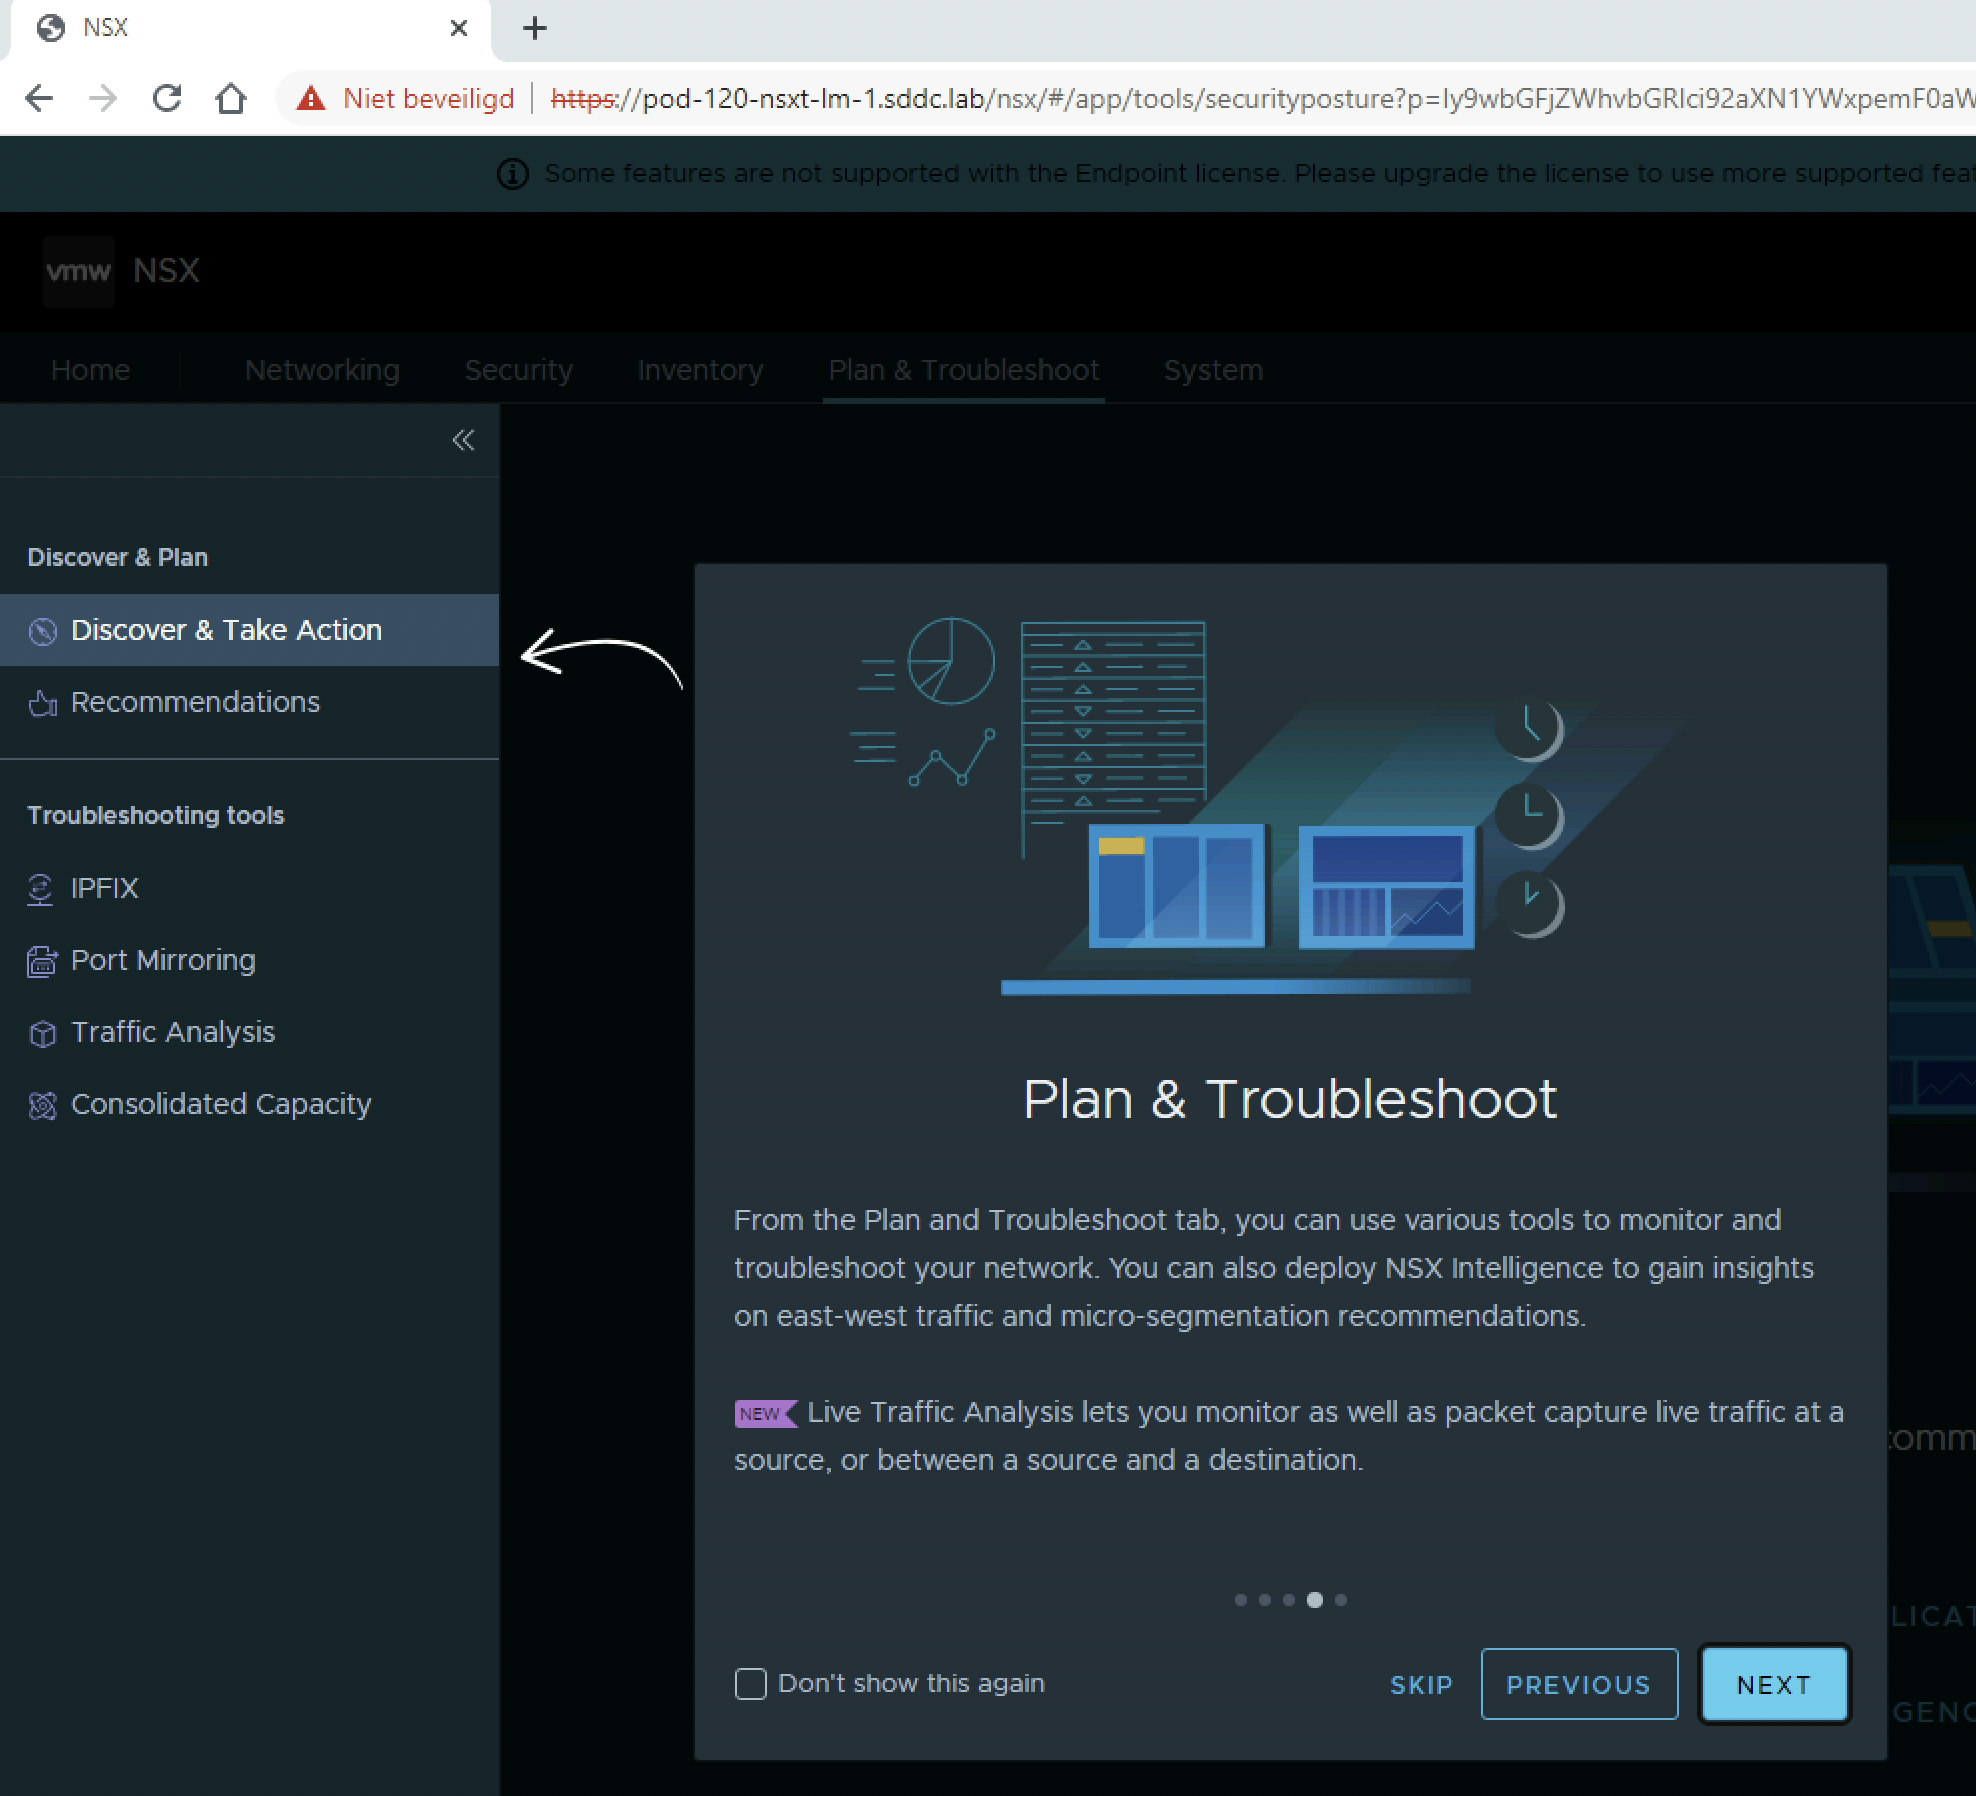
The wizard point out “Plan & Troubleshoot”.
The wizard point out “System”. Click the box “Don’t show this again” and “Got it”.
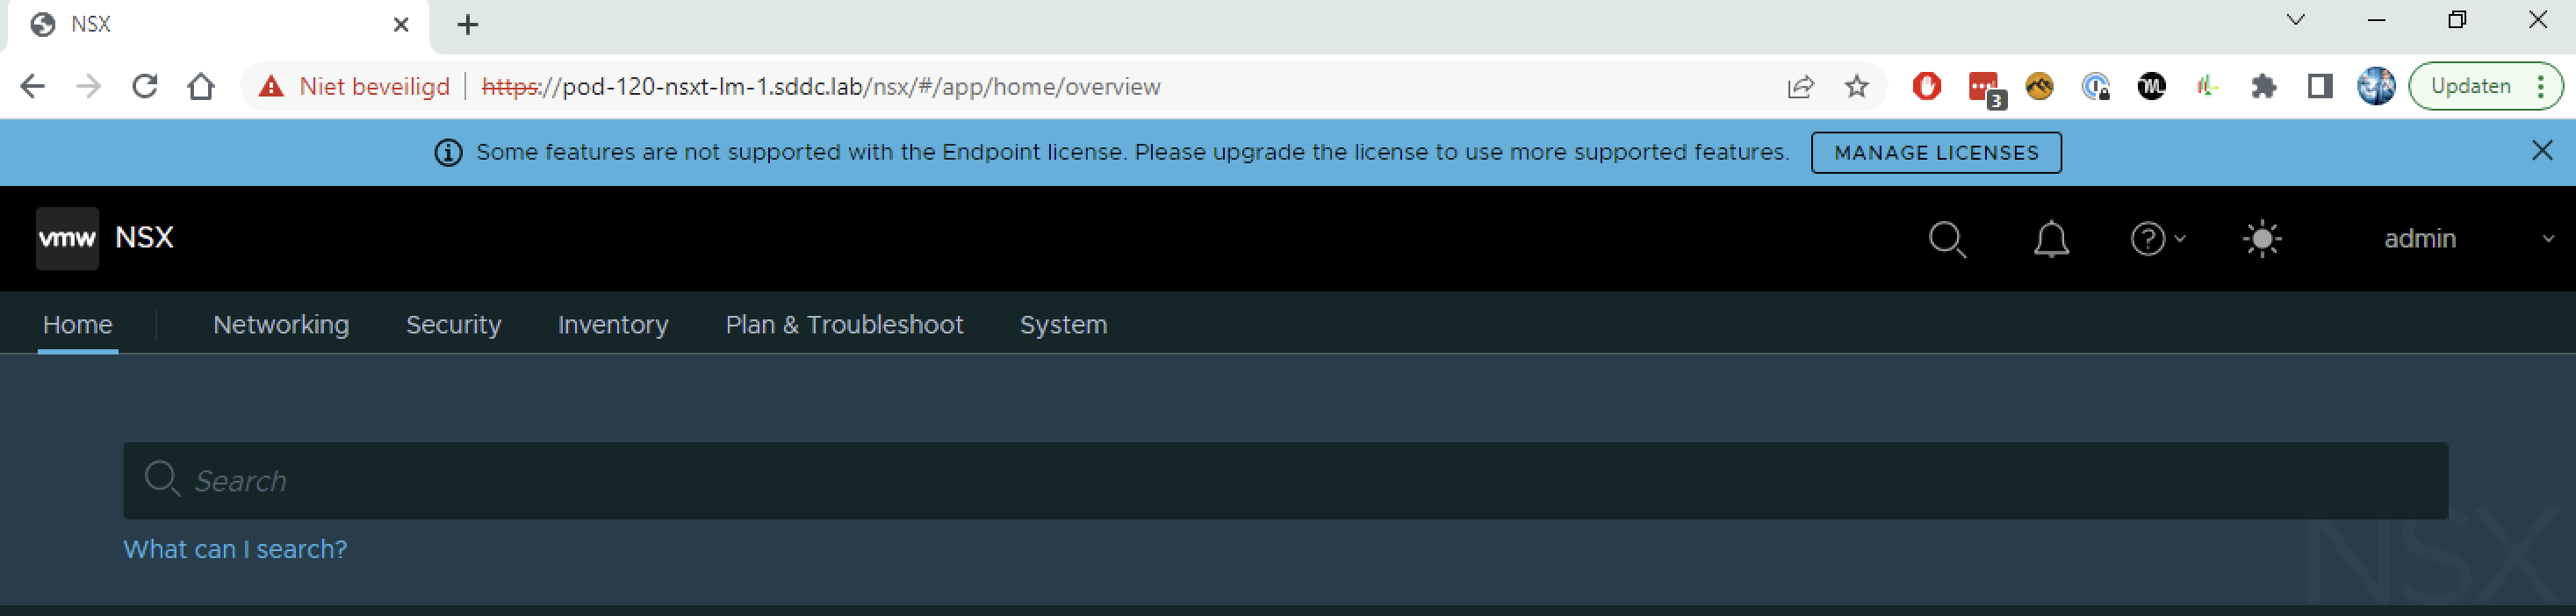
Now that the first NSX Manager Node is deployed and I am logged in I will see a blue bar at the top to inform that a license needs to be added.
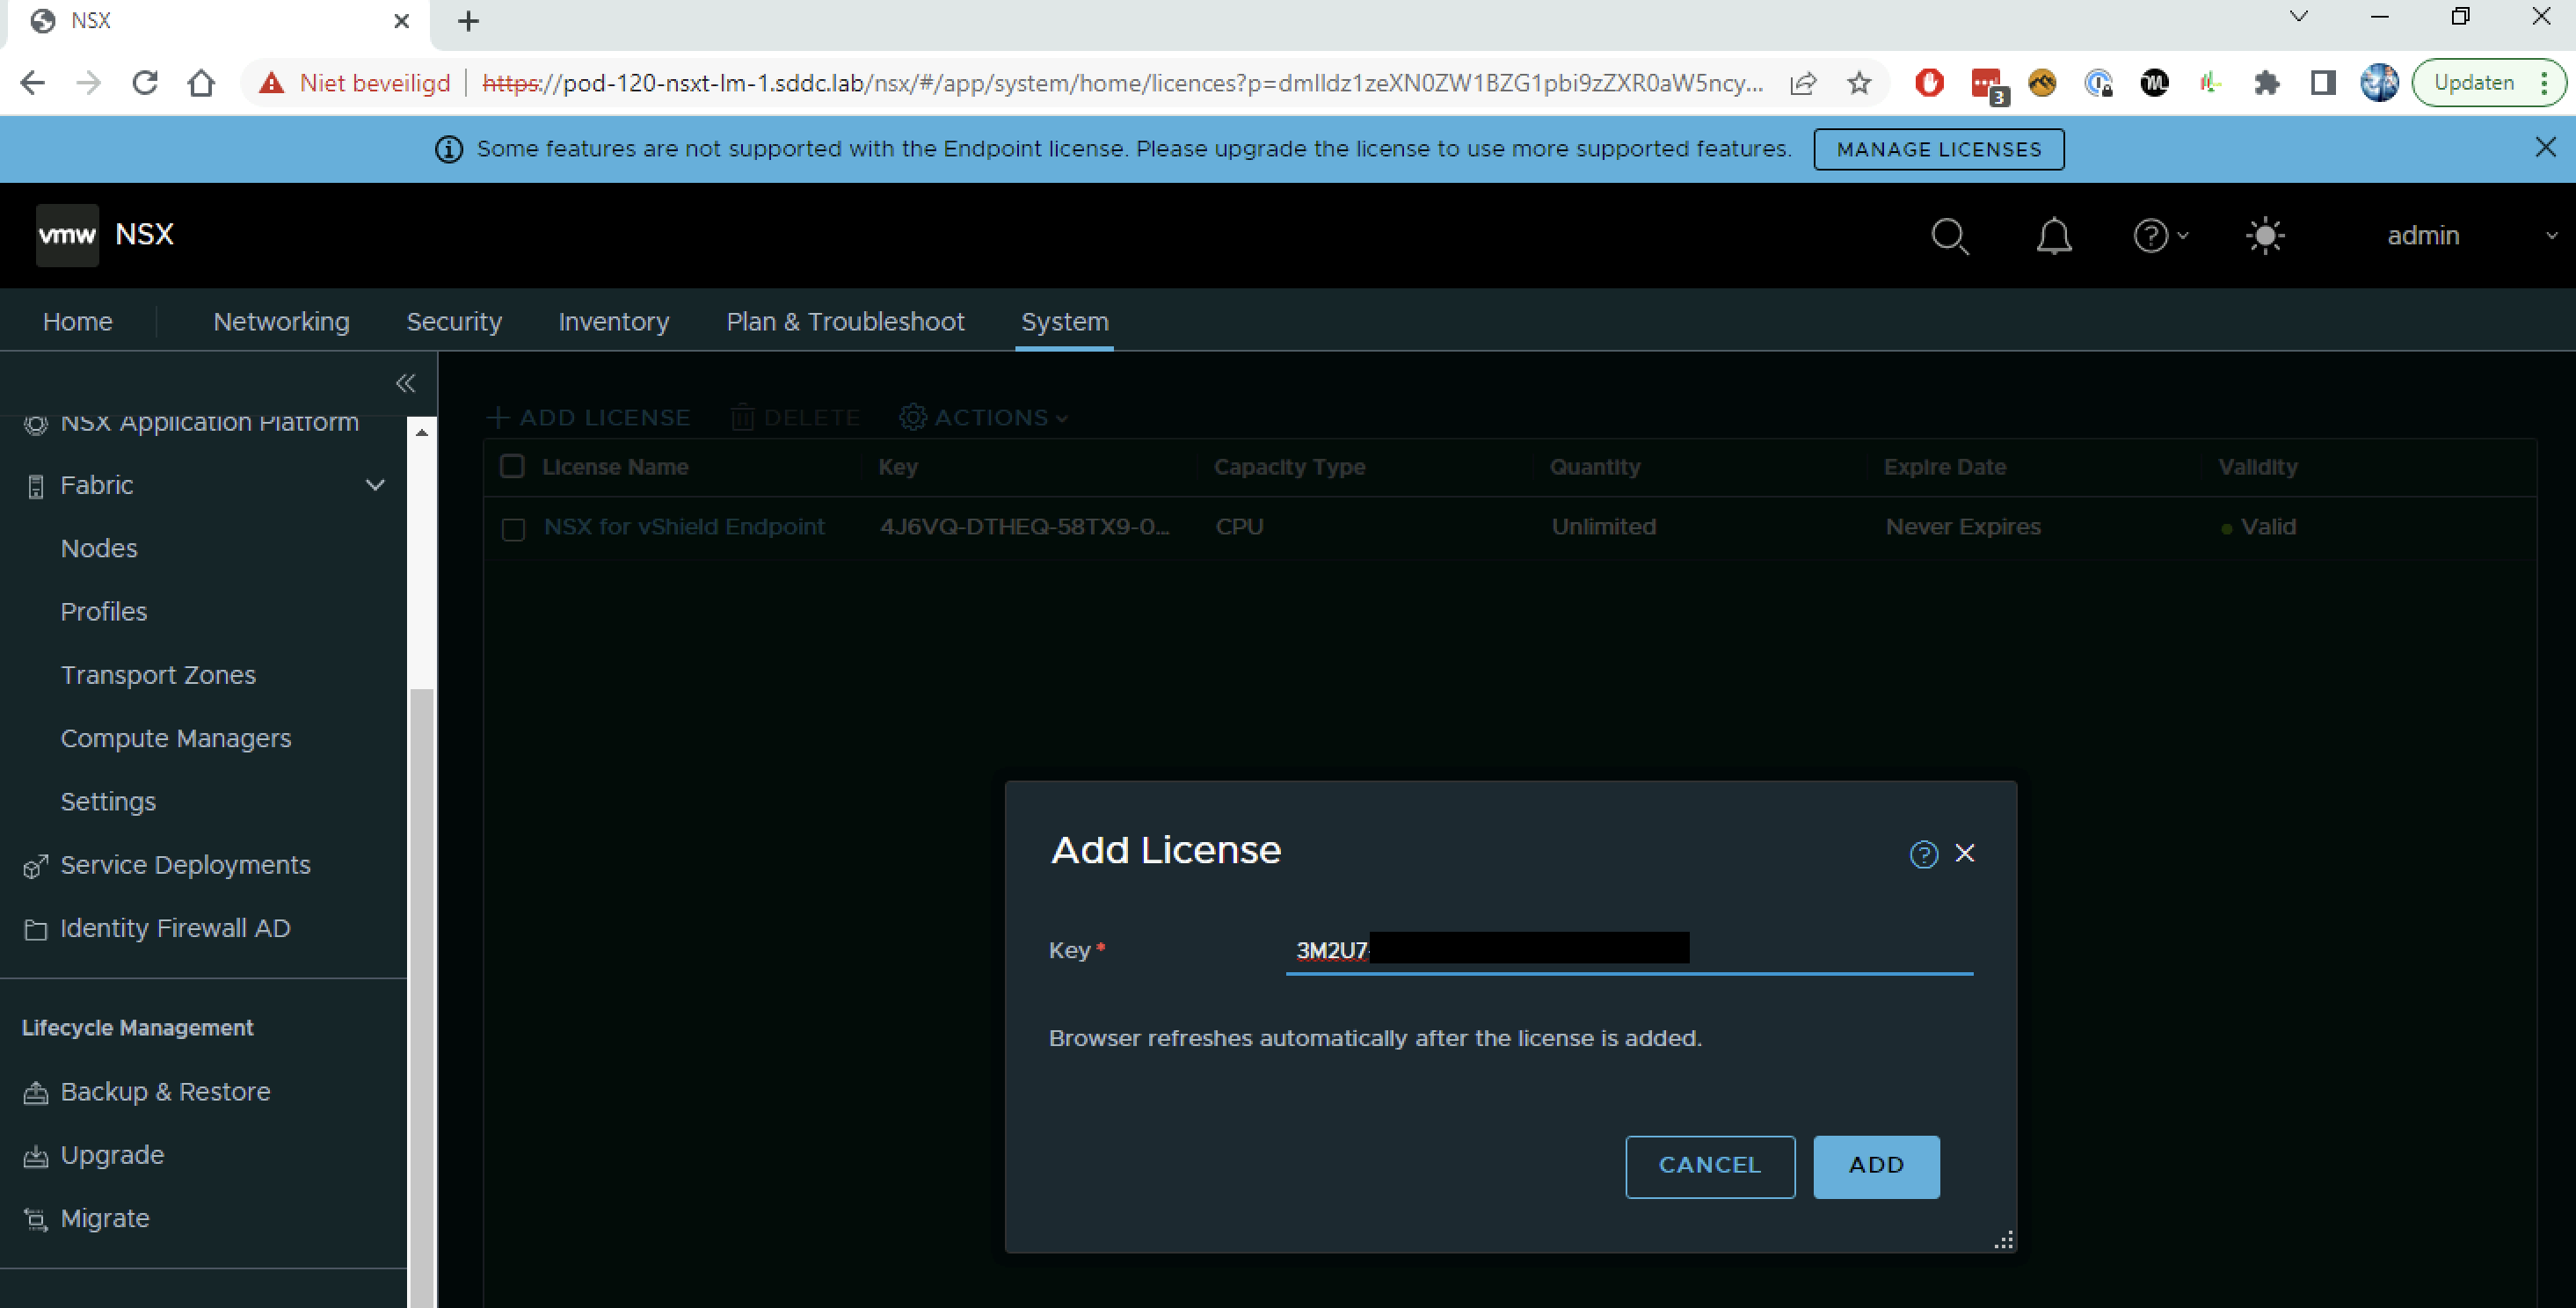
STEP 2» Add the NSX License
| Product | License key |
|---|---|
| VMware NSX | 3M2U7-XXXXX-XXXXX-XXXXX-XXXXX
|
I can either click on the “Manage Licences” button in the blue top bar.
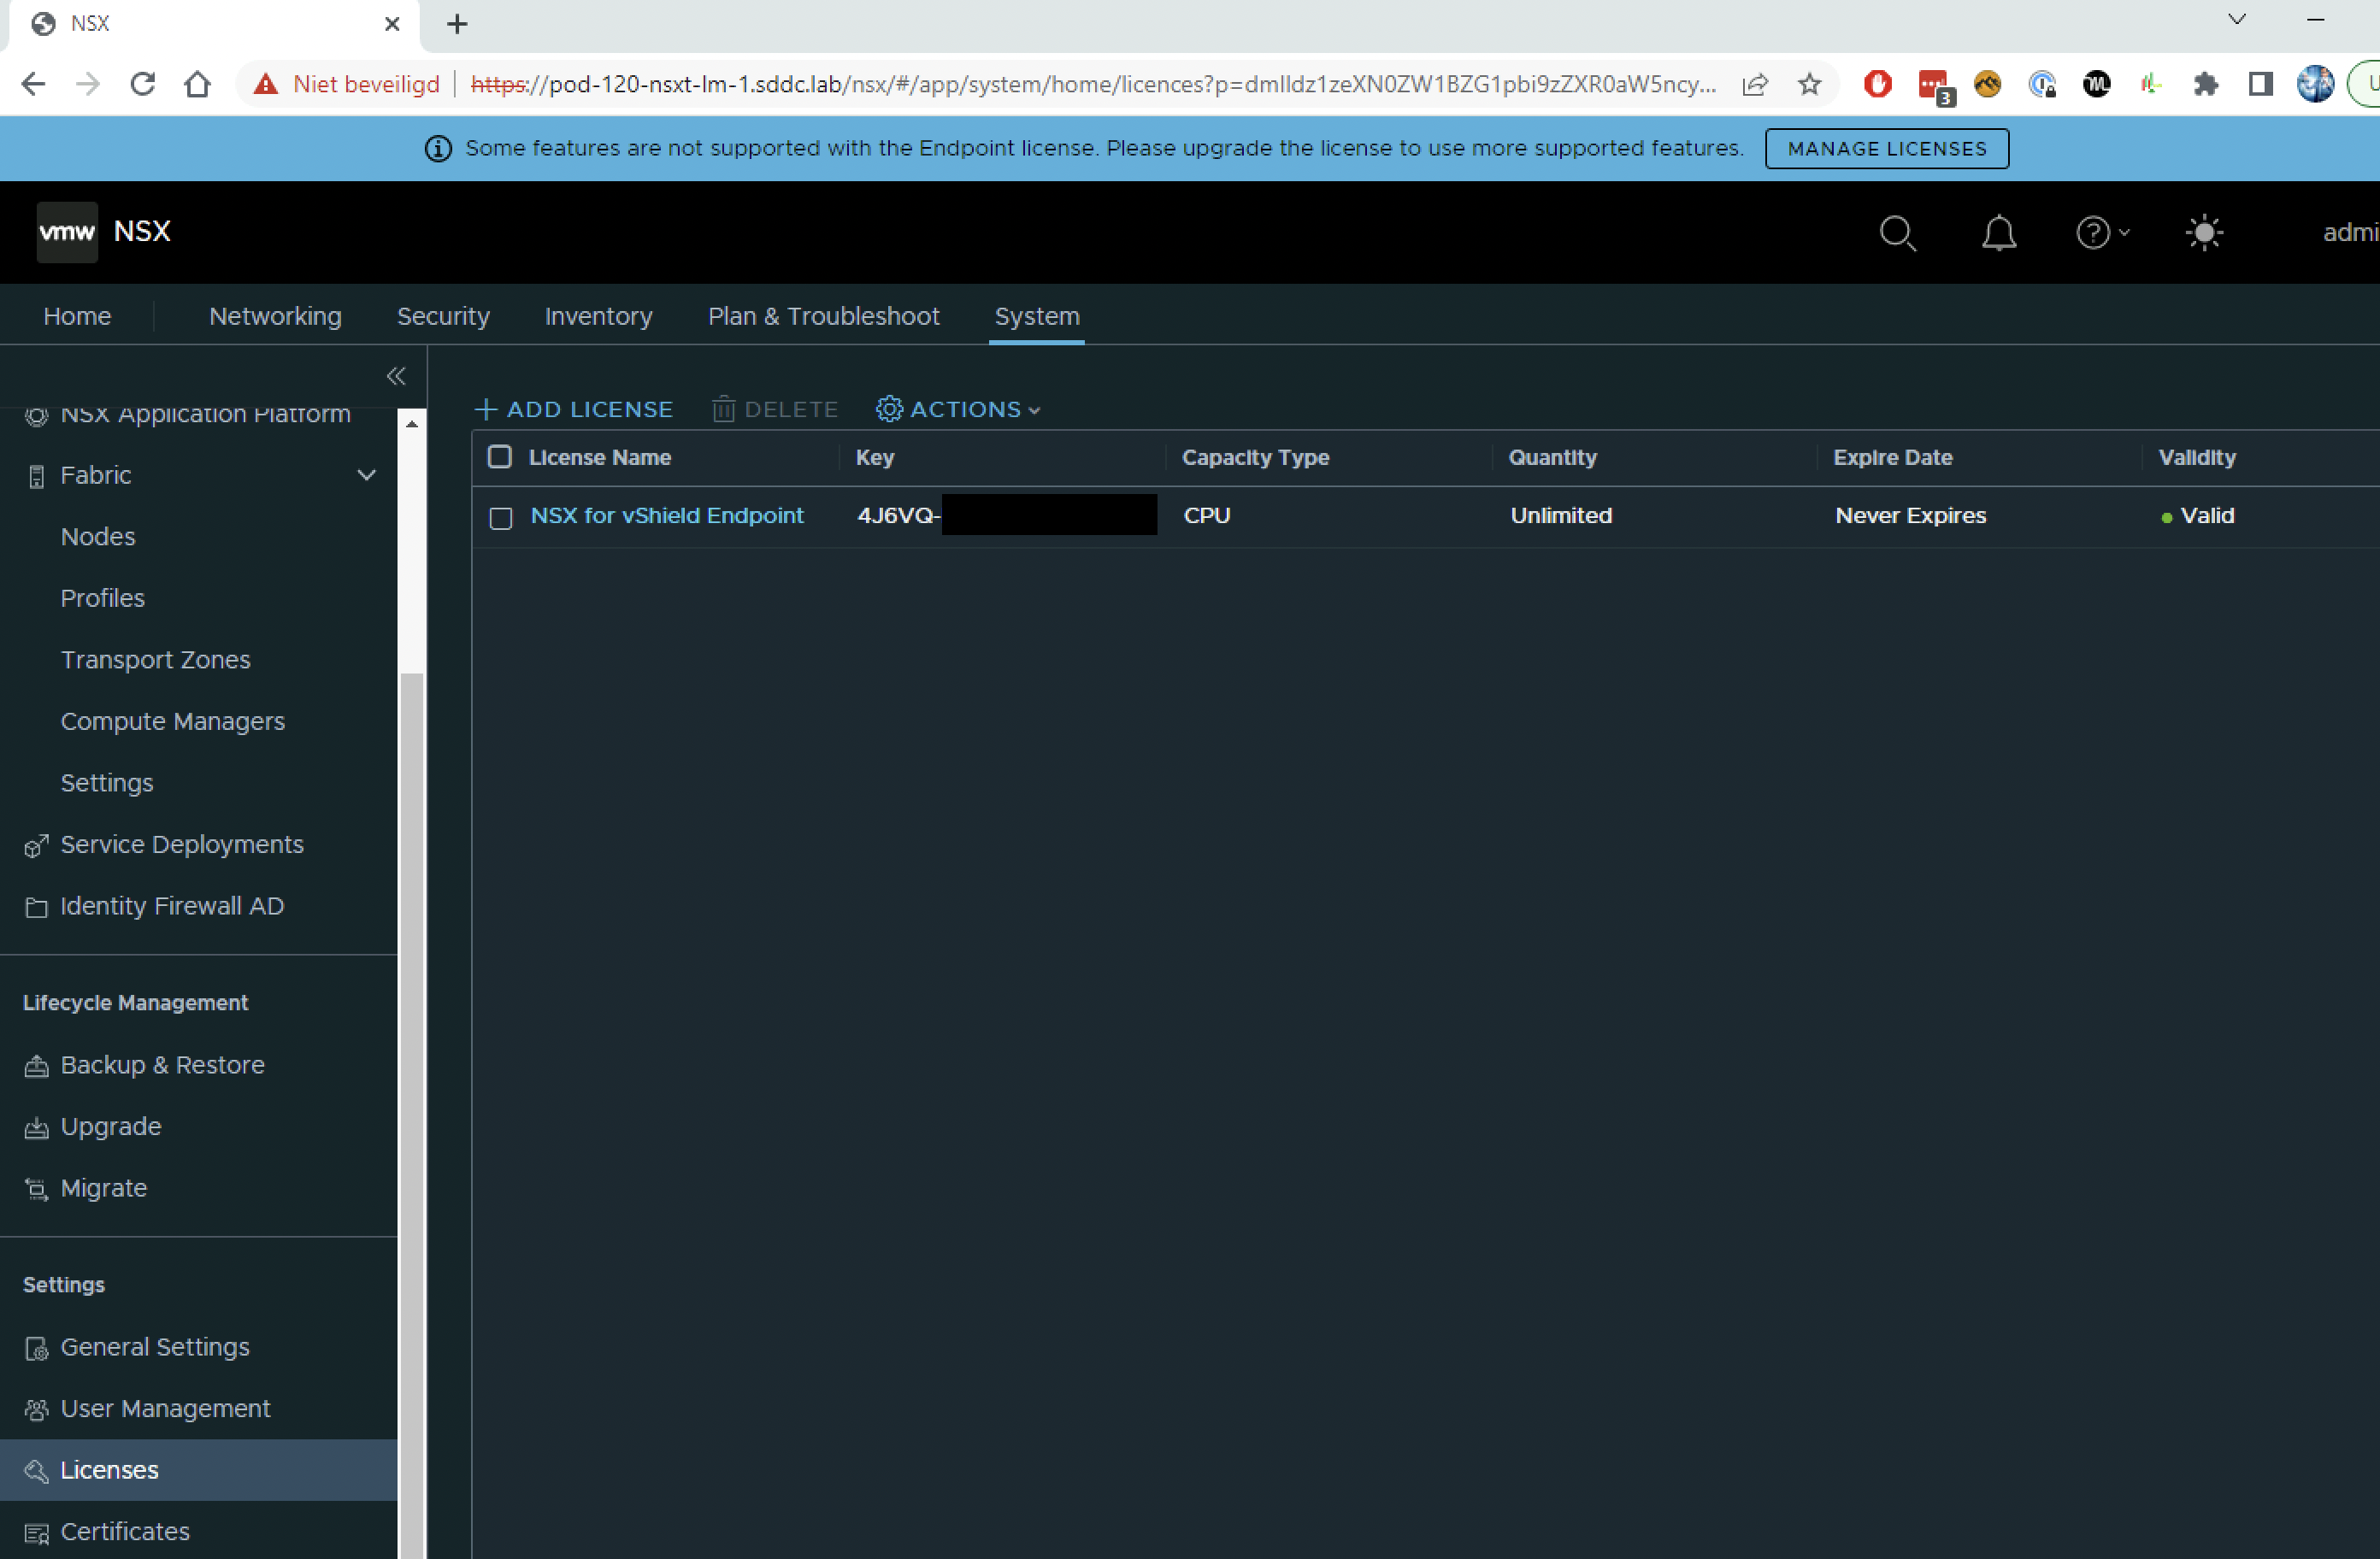
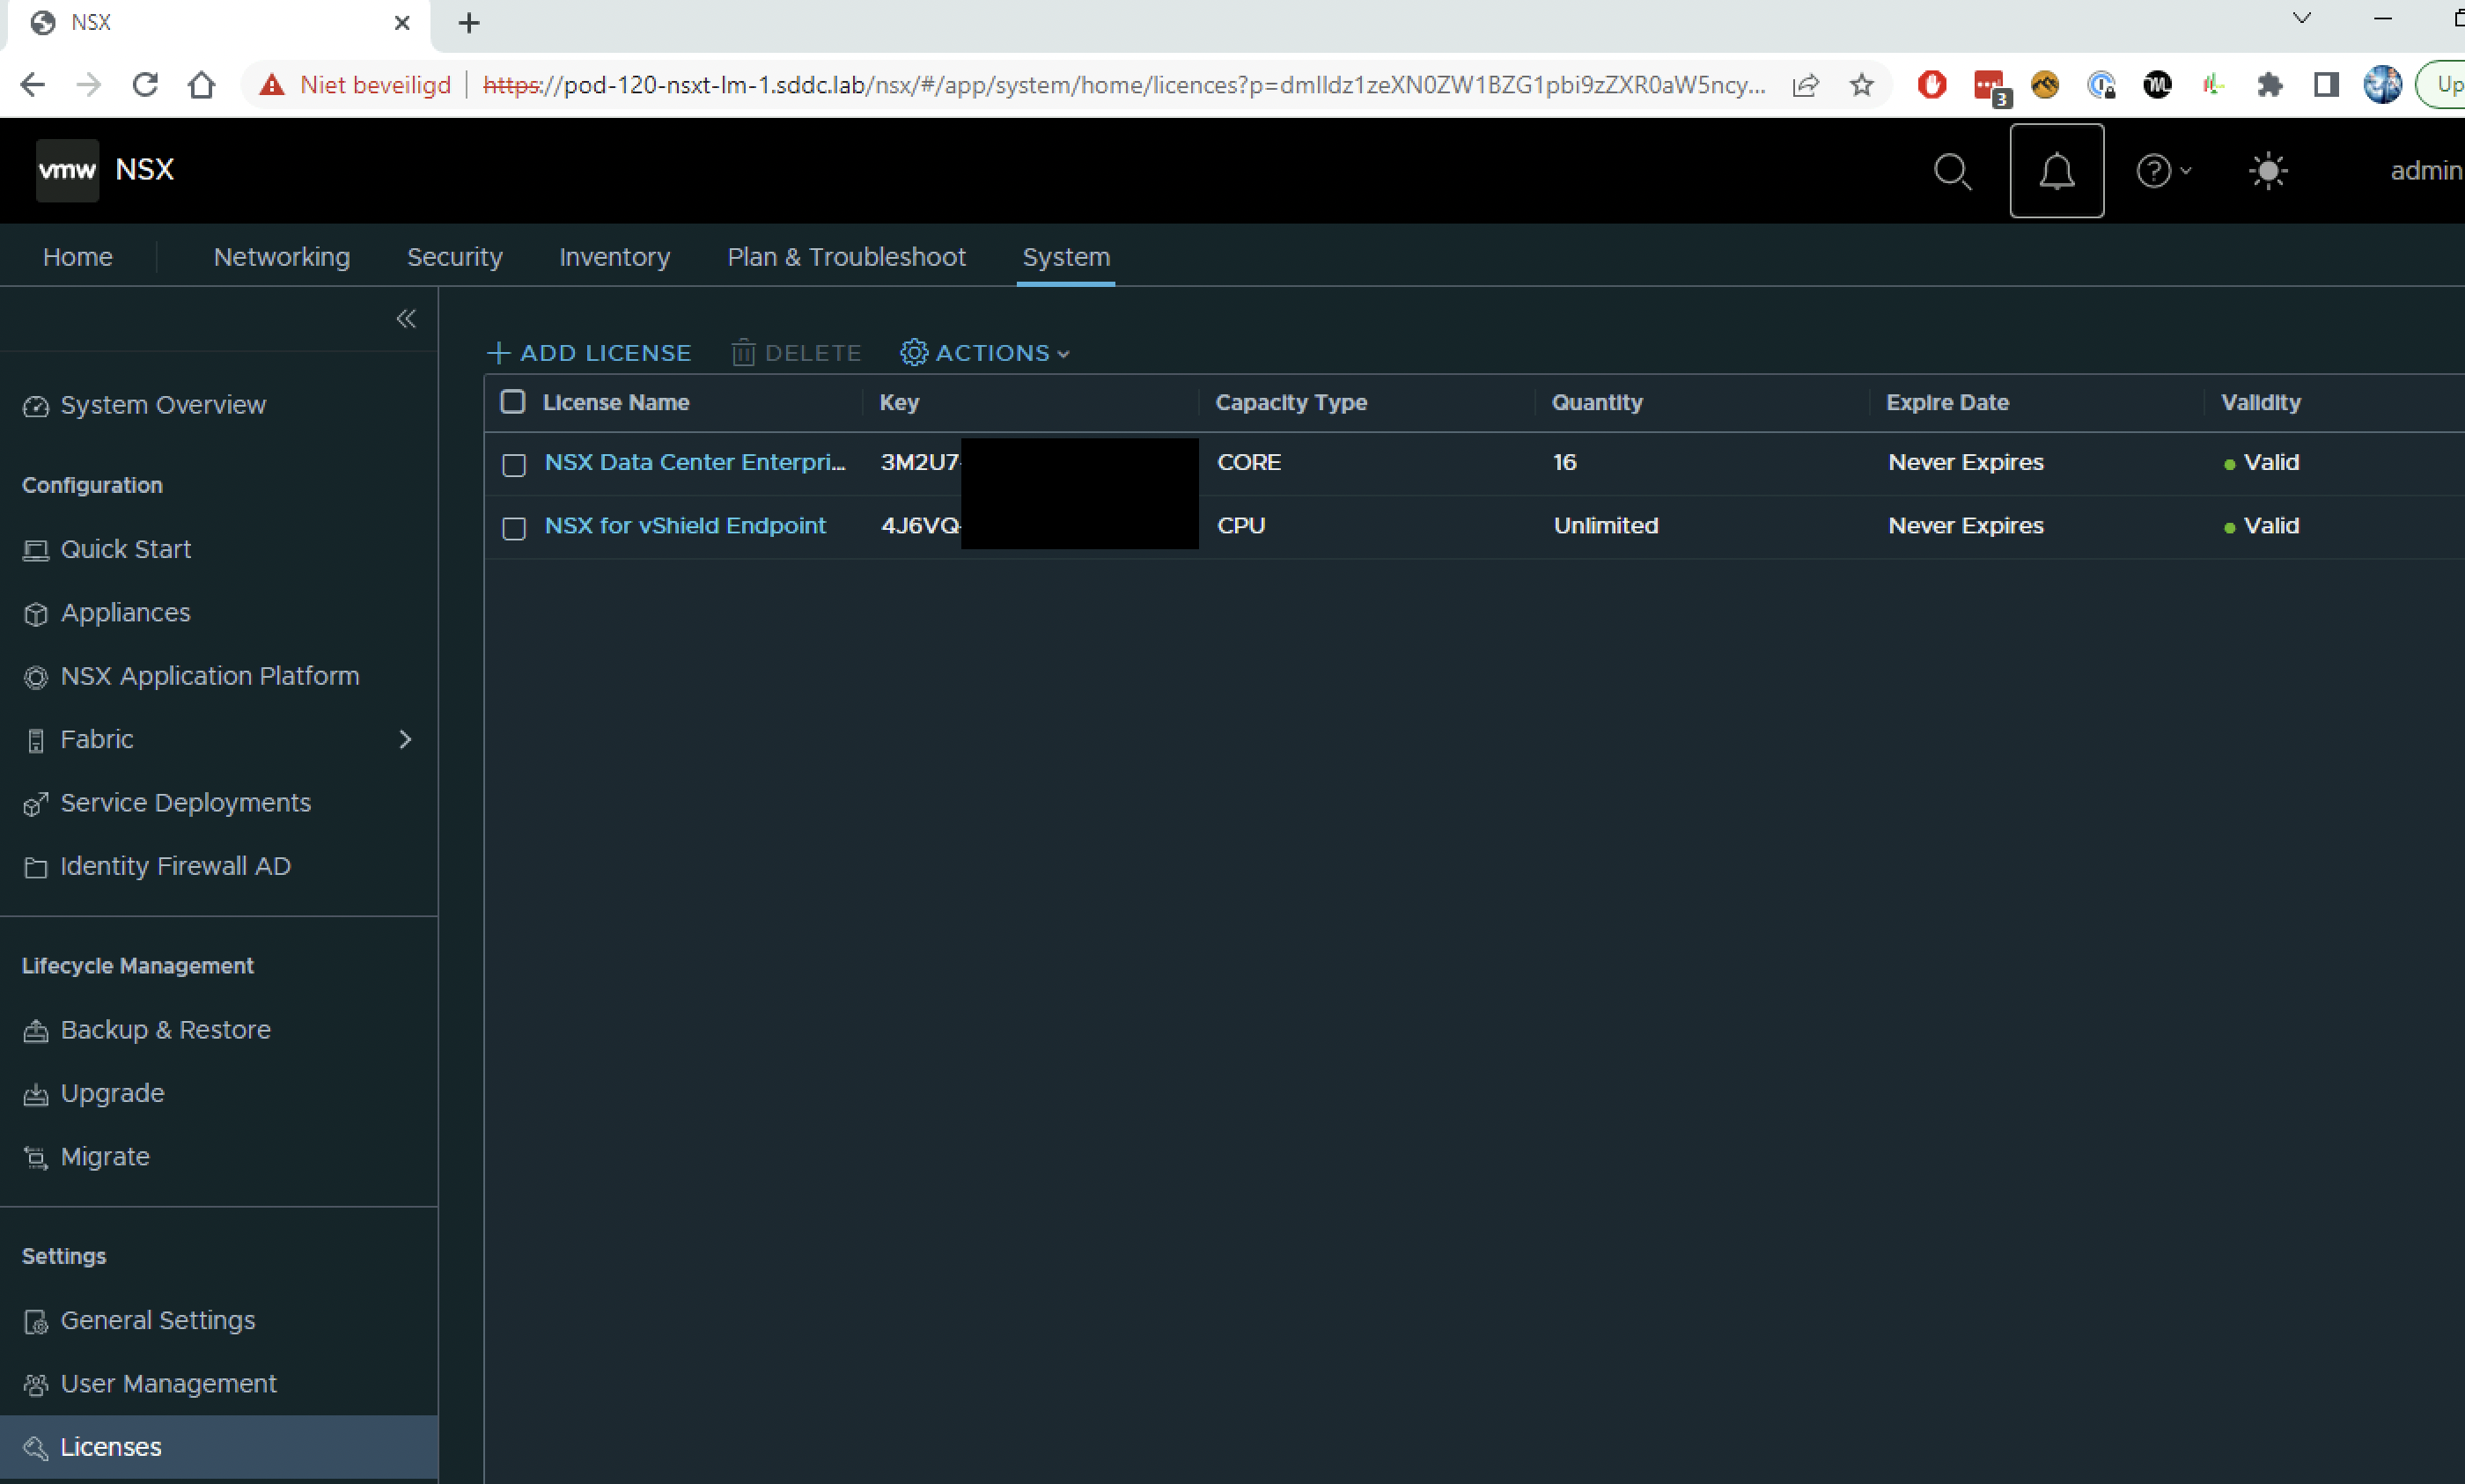
Or I can go to System → Settings → Licences and click on “Add License”.
Add the license.
Verify if the license is added.
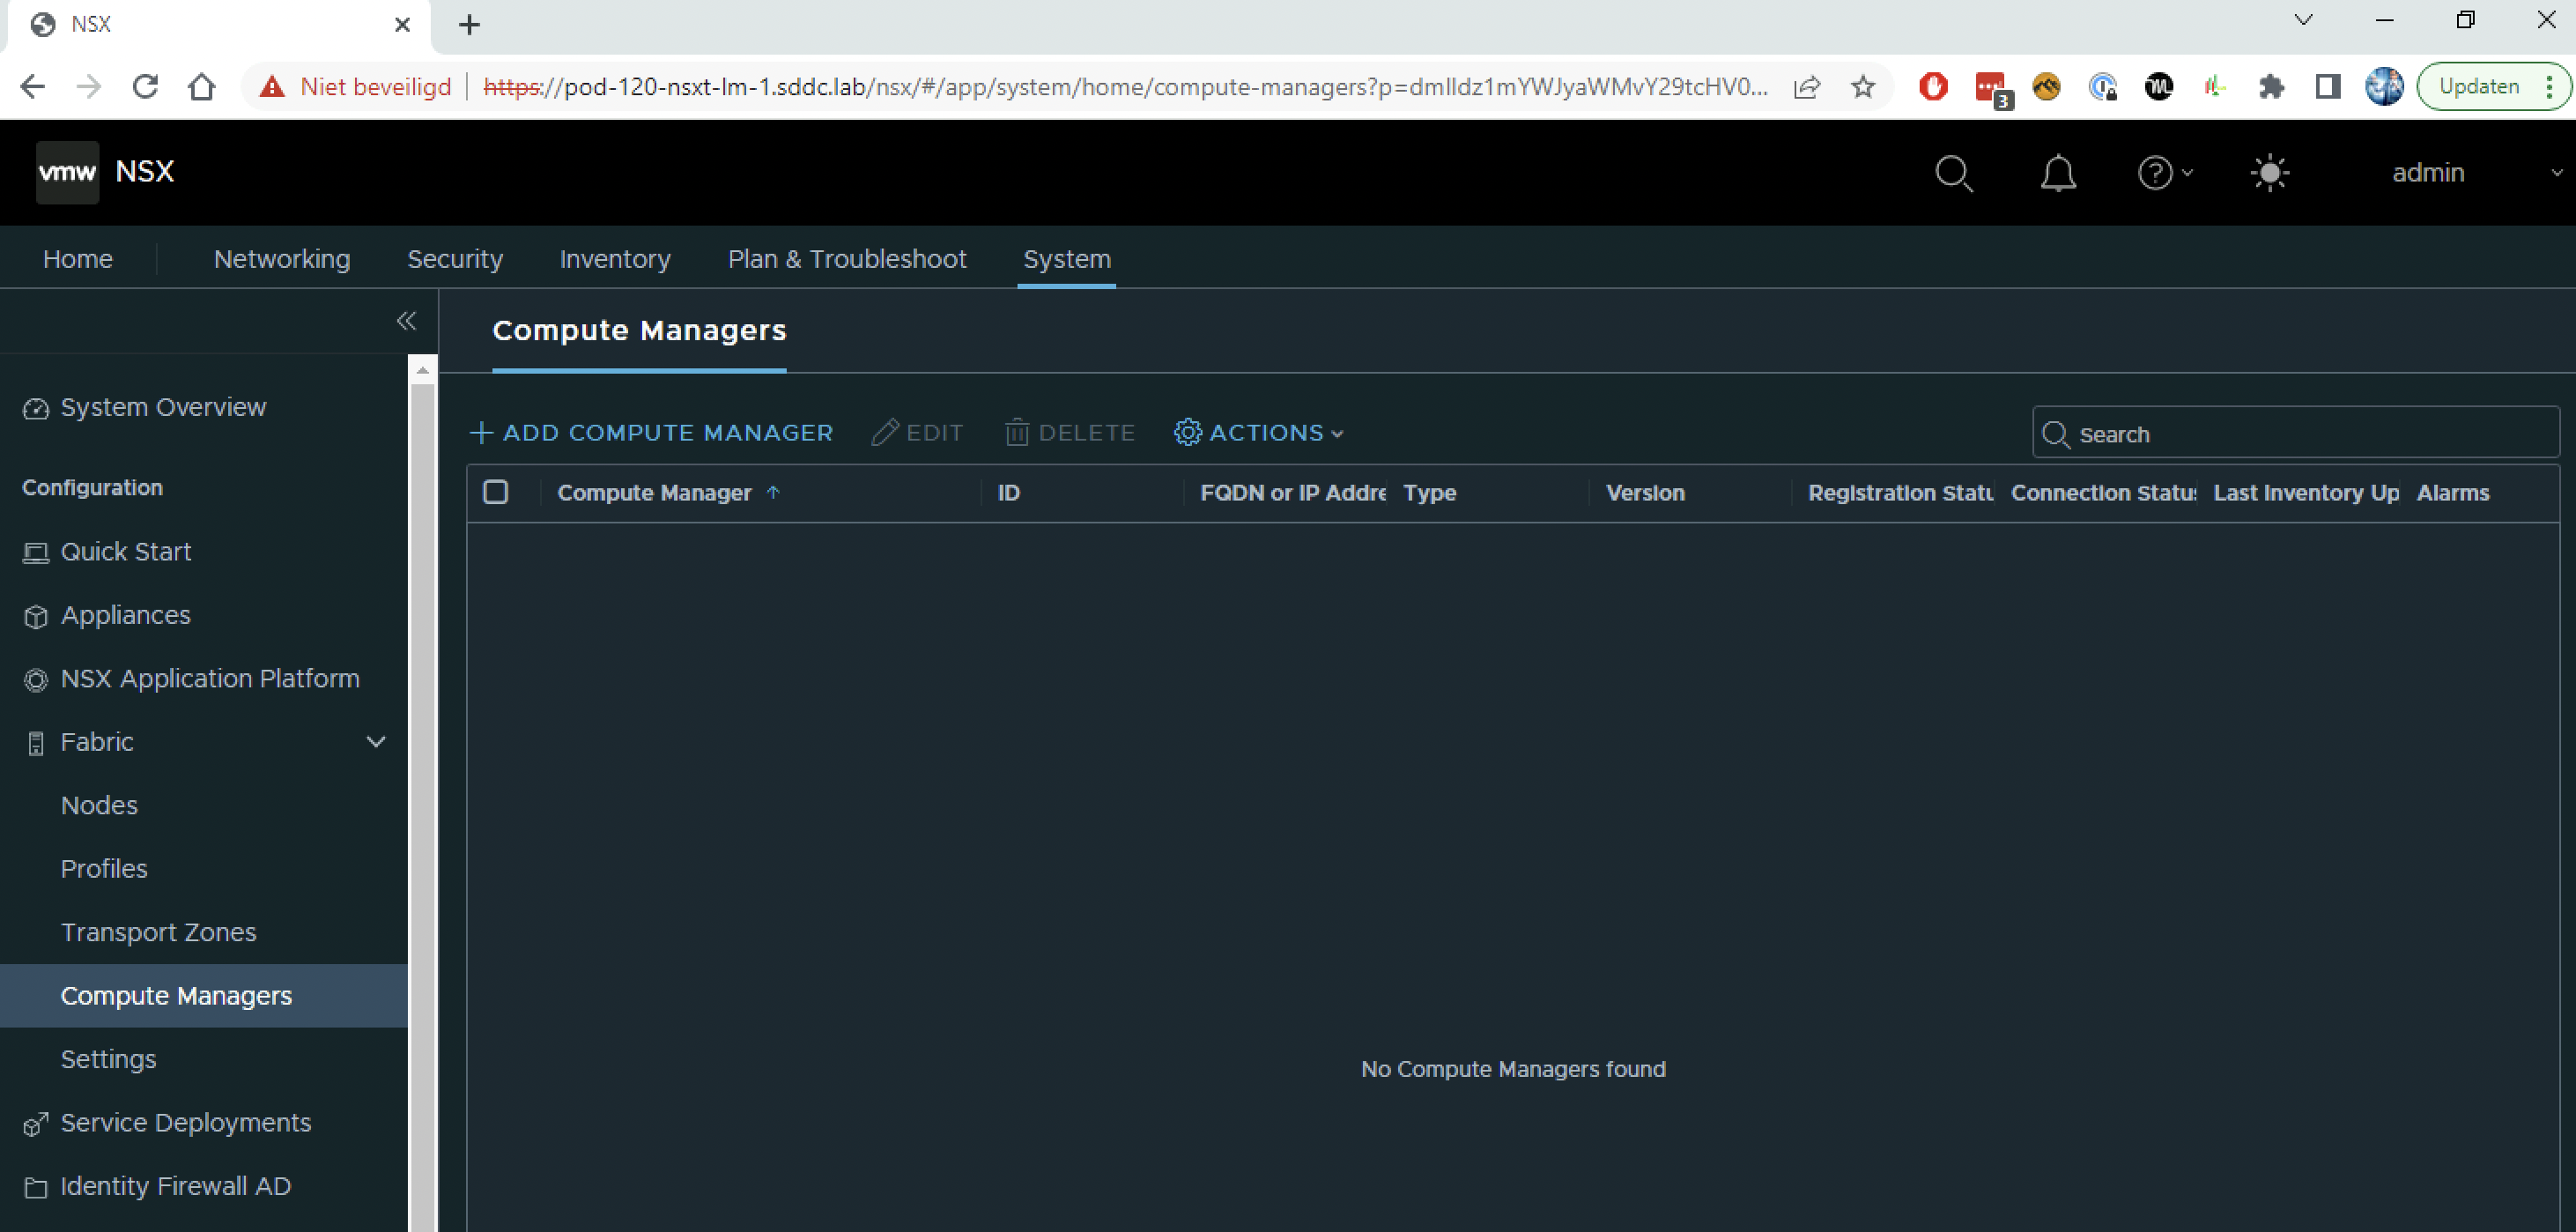
STEP 3» Add a Compute Manager
To prepare ESXi hosts to be an NSX Host Transport Node I need to add a Compute Manager. This is also needed if I want to deploy NSX Edge Transport Nodes and additional NSX Manager Nodes (to form an NSX Manager Cluster” using the NSX GUI.
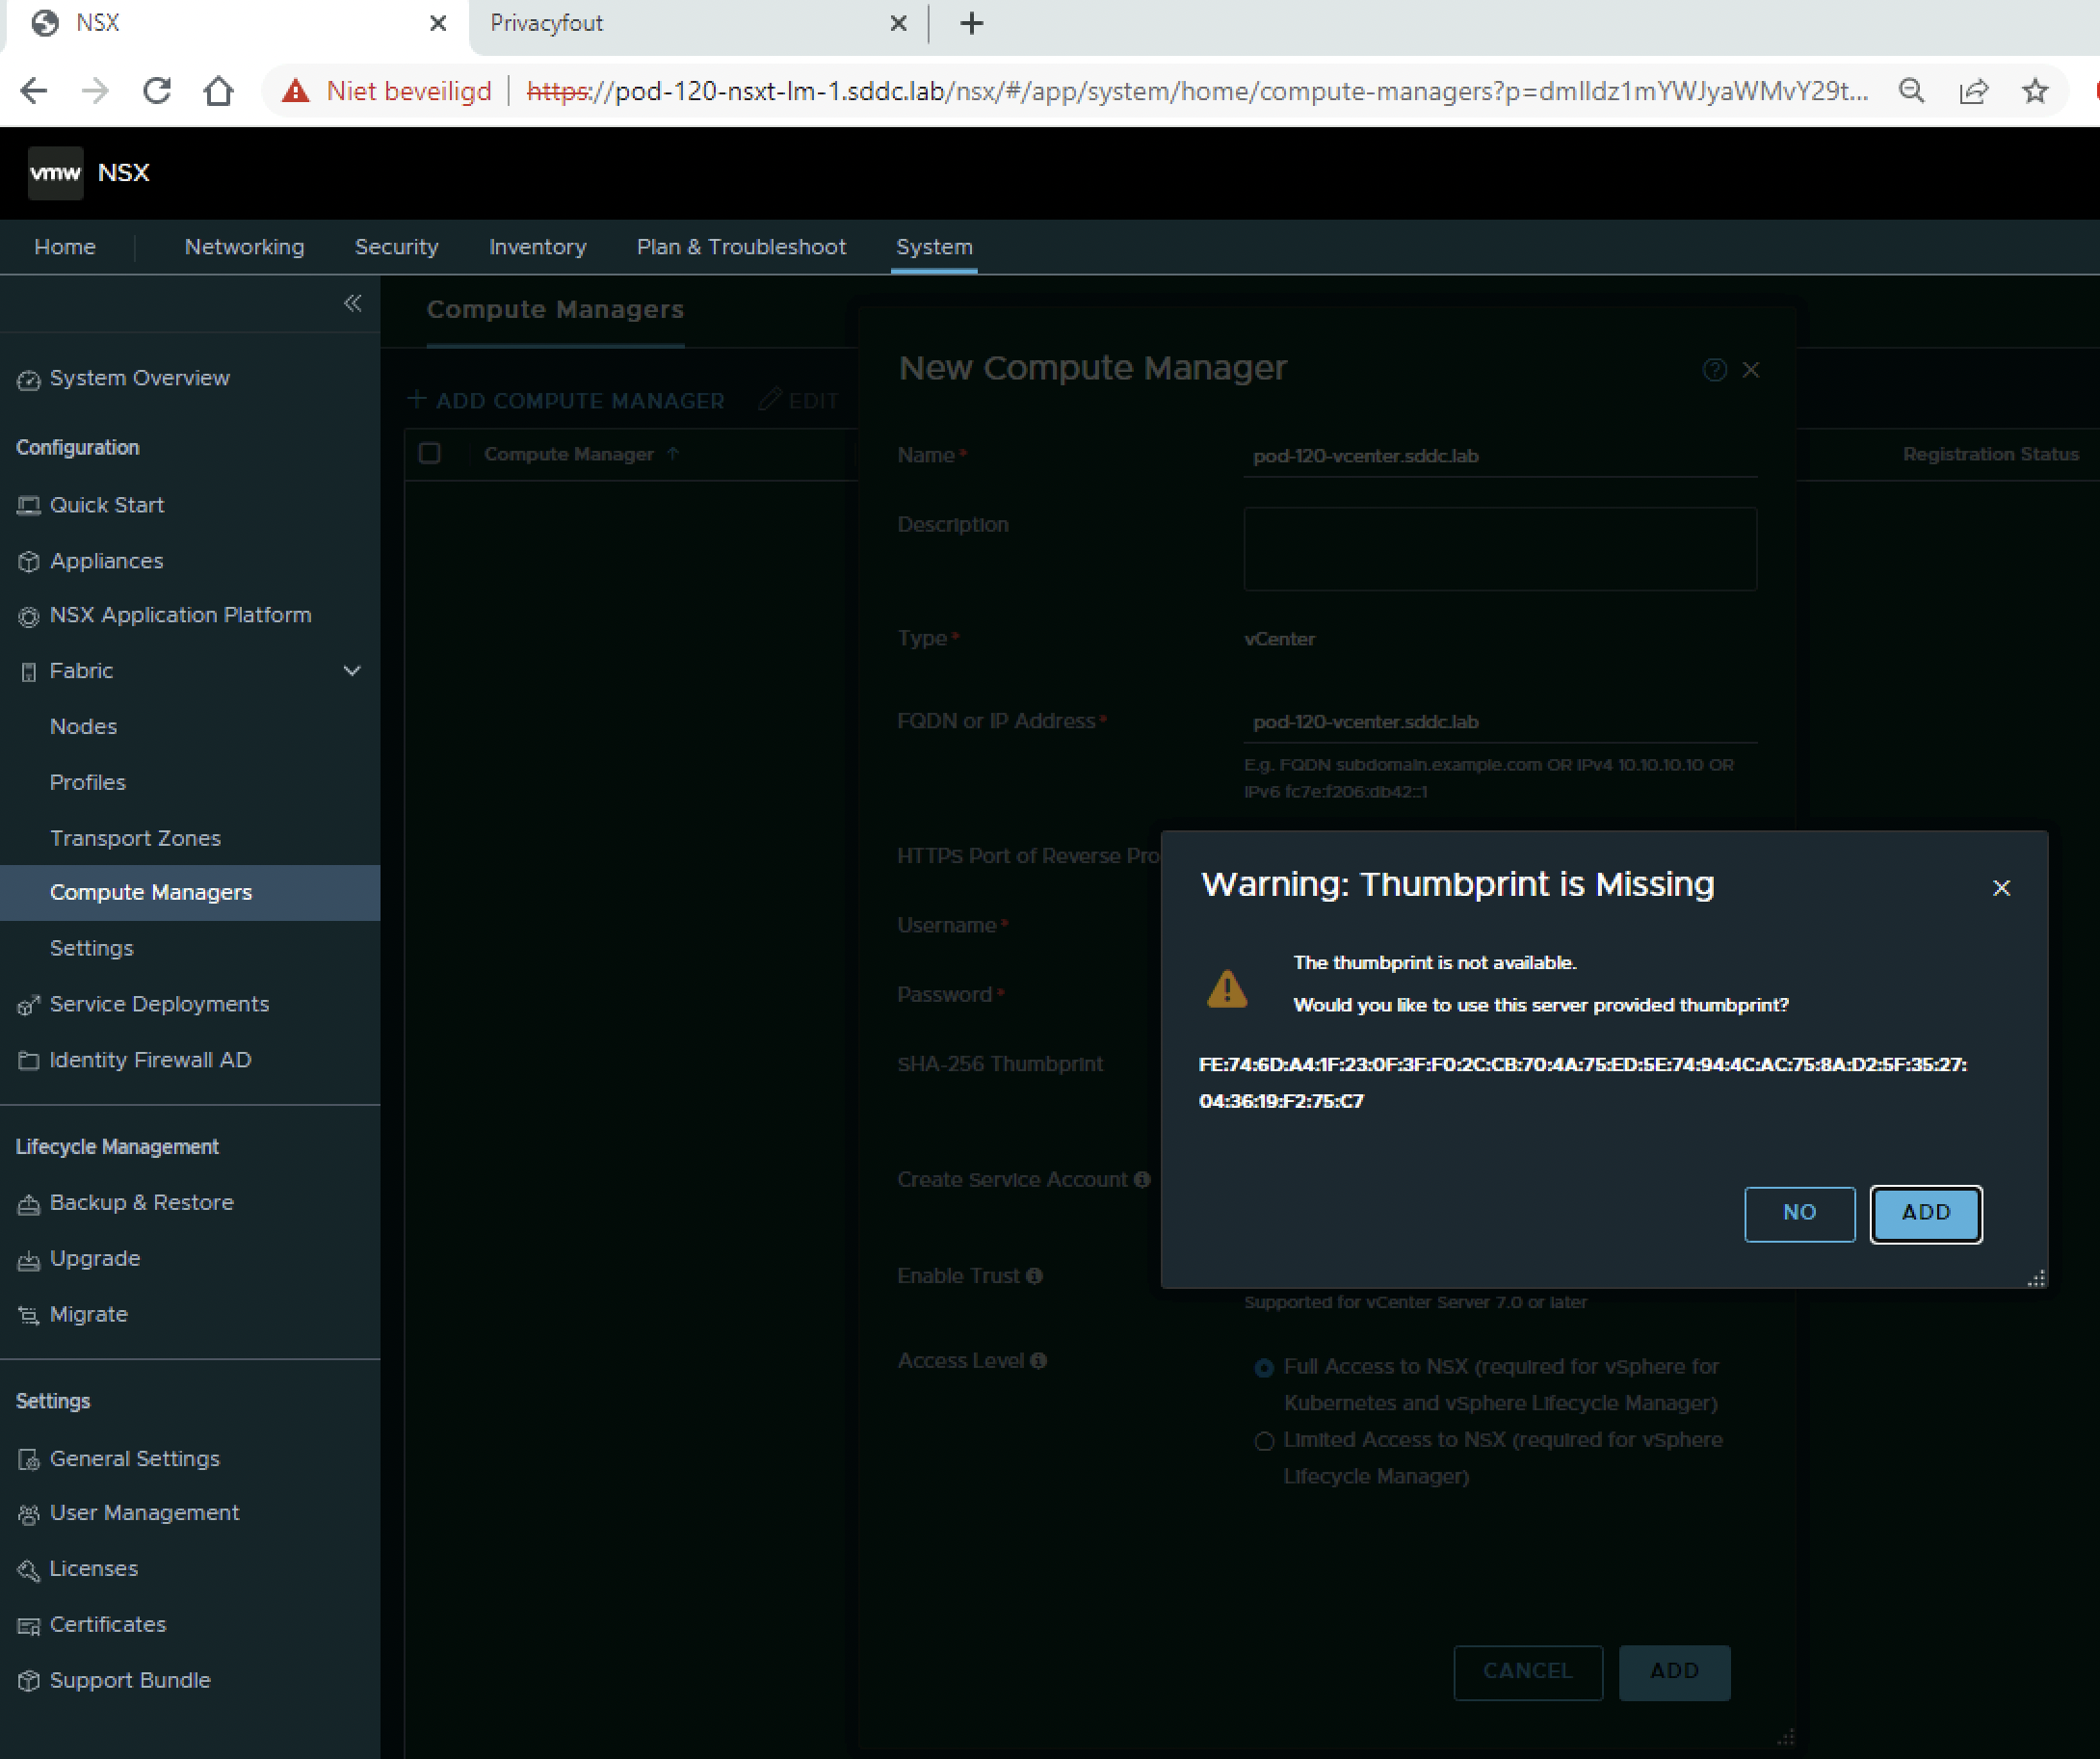
I add a compute manager by going to System → Configuration → Fabric → Compute Managers → and click on “Add Compute Manager”.
Use the following parameters to add the Compute Manager and click on “Add” when I am finished.
| Parameter Name | Input |
|---|---|
| Name | pod-120-vcenter.sddc.lab |
| FQDN or IP Address | pod-120-vcenter.sddc.lab |
| Username | administrator@vsphere.local |
| Password | VMware1! |
| Enable Trust | Yes |
| Access Level | Full Access |
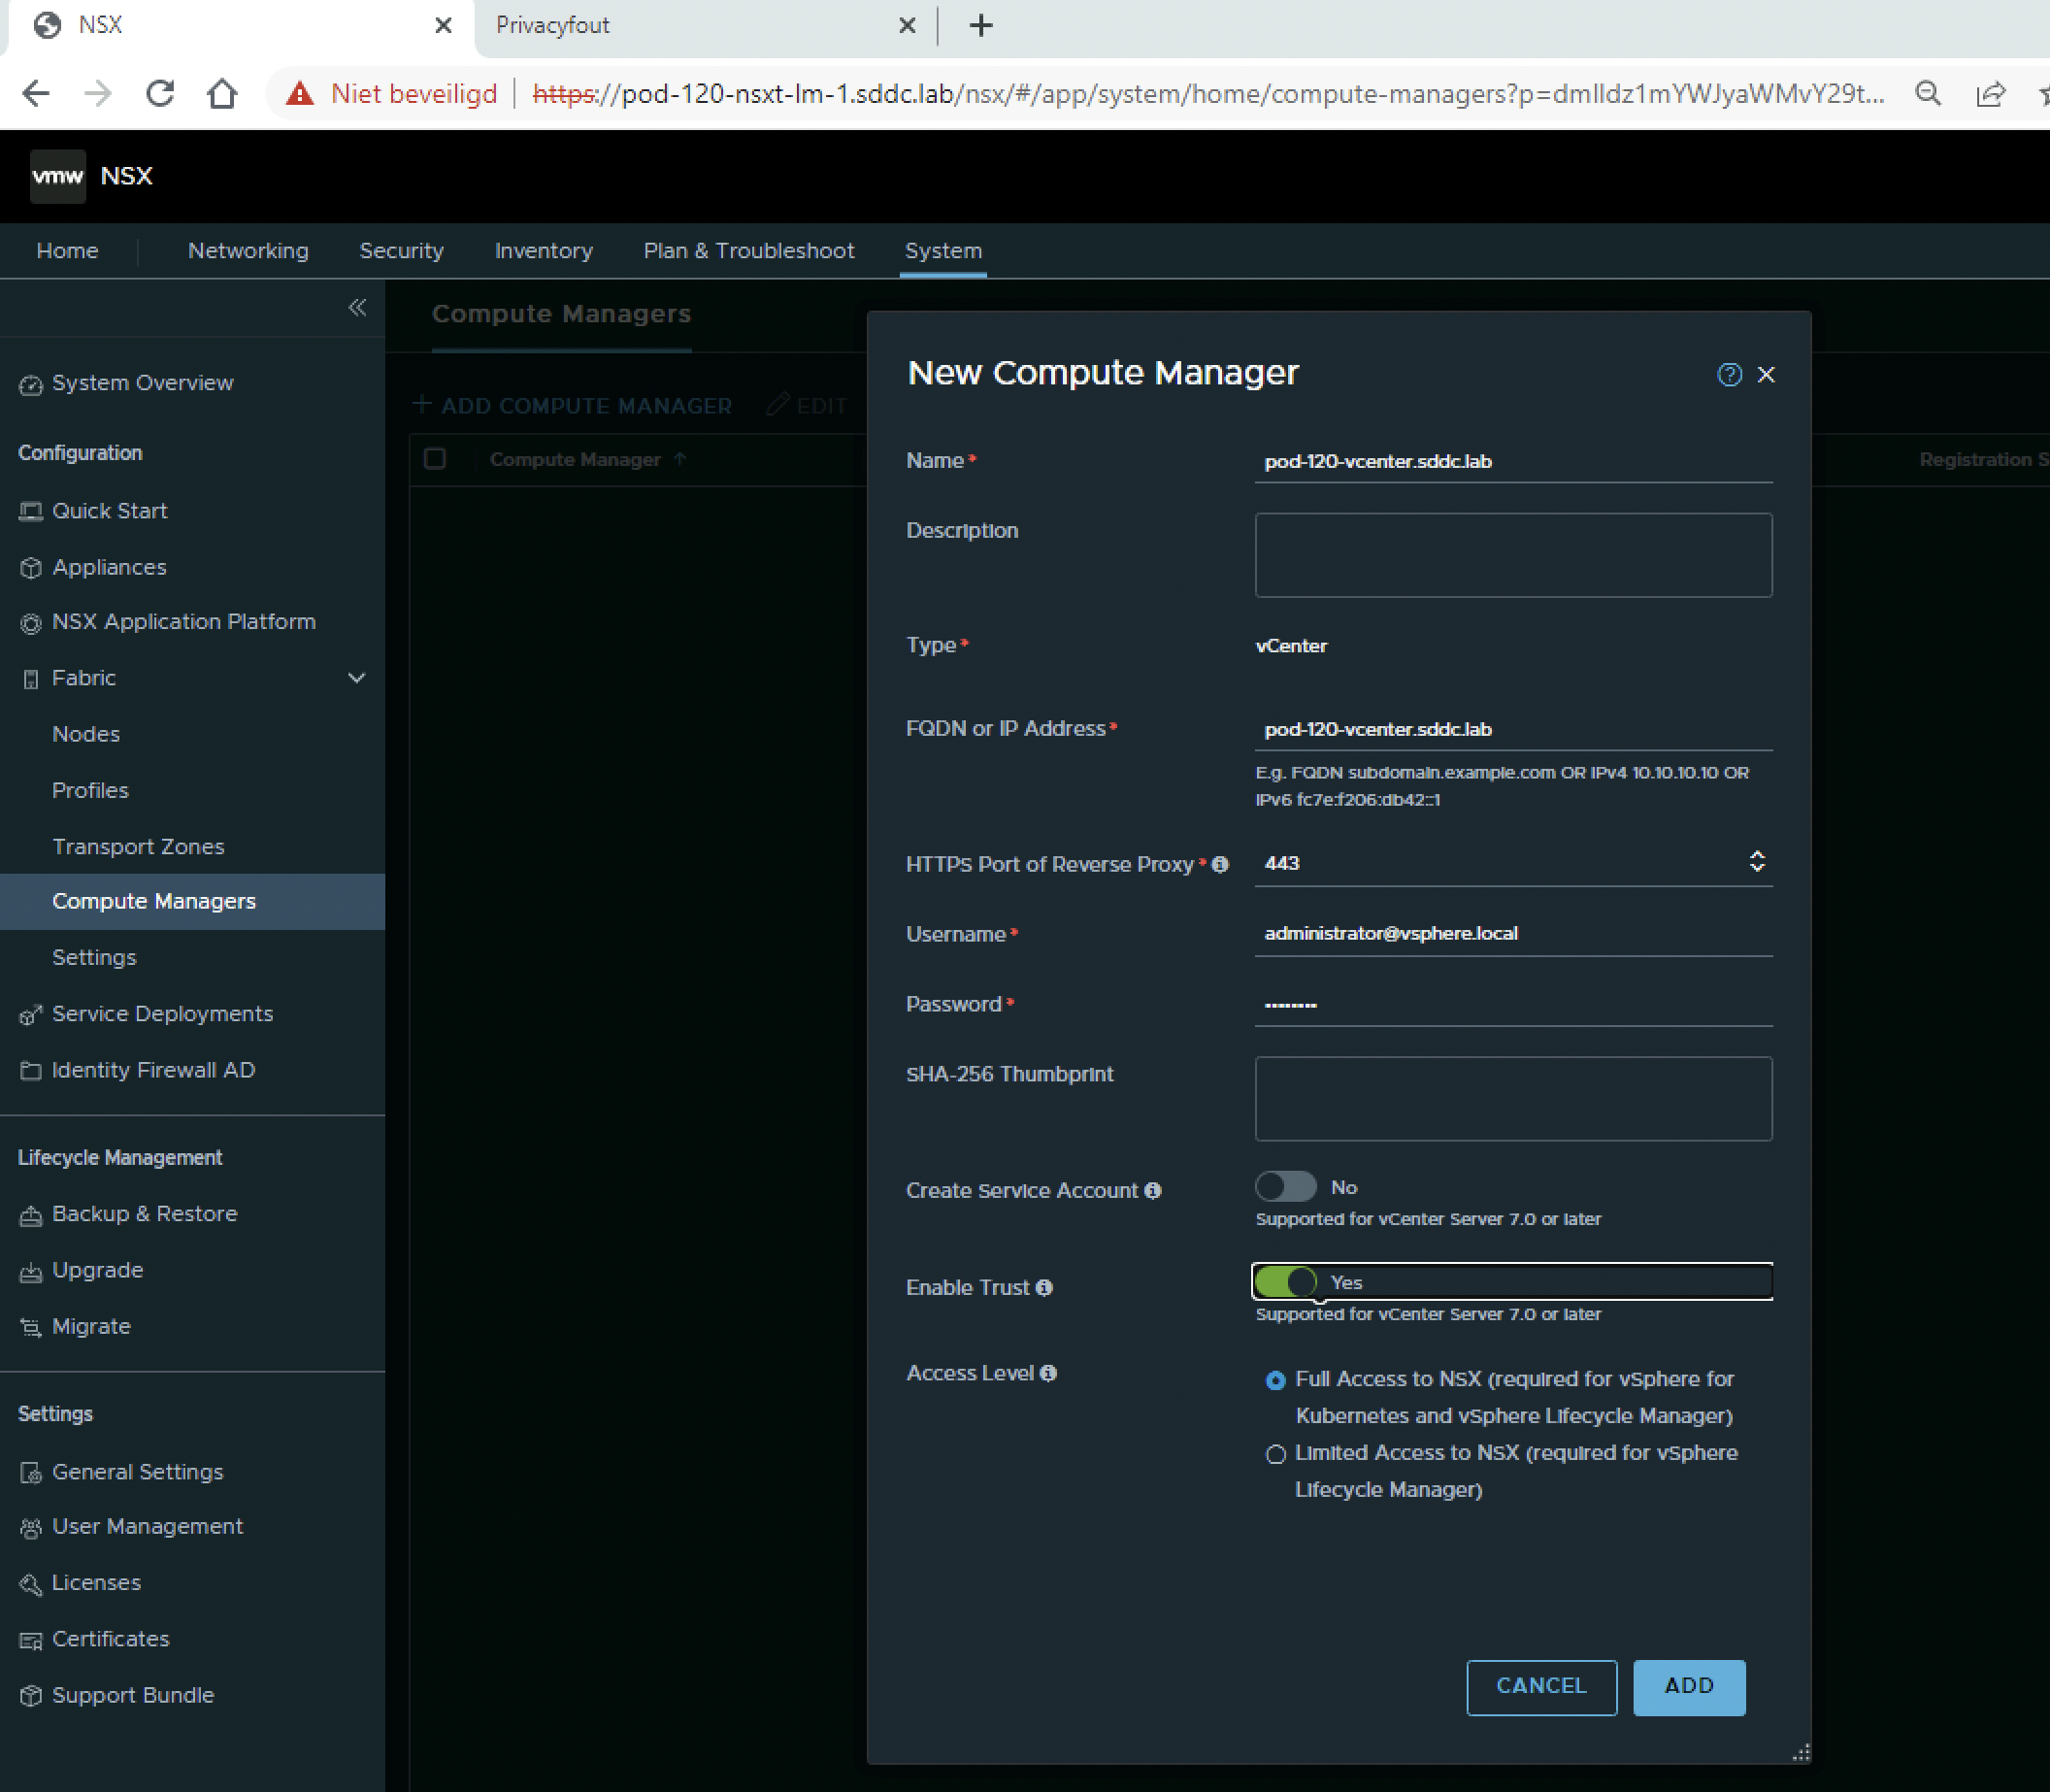
When I click “Save” I get a message to add the missing Fingerprint of the vCenter server. Click on “Add”.
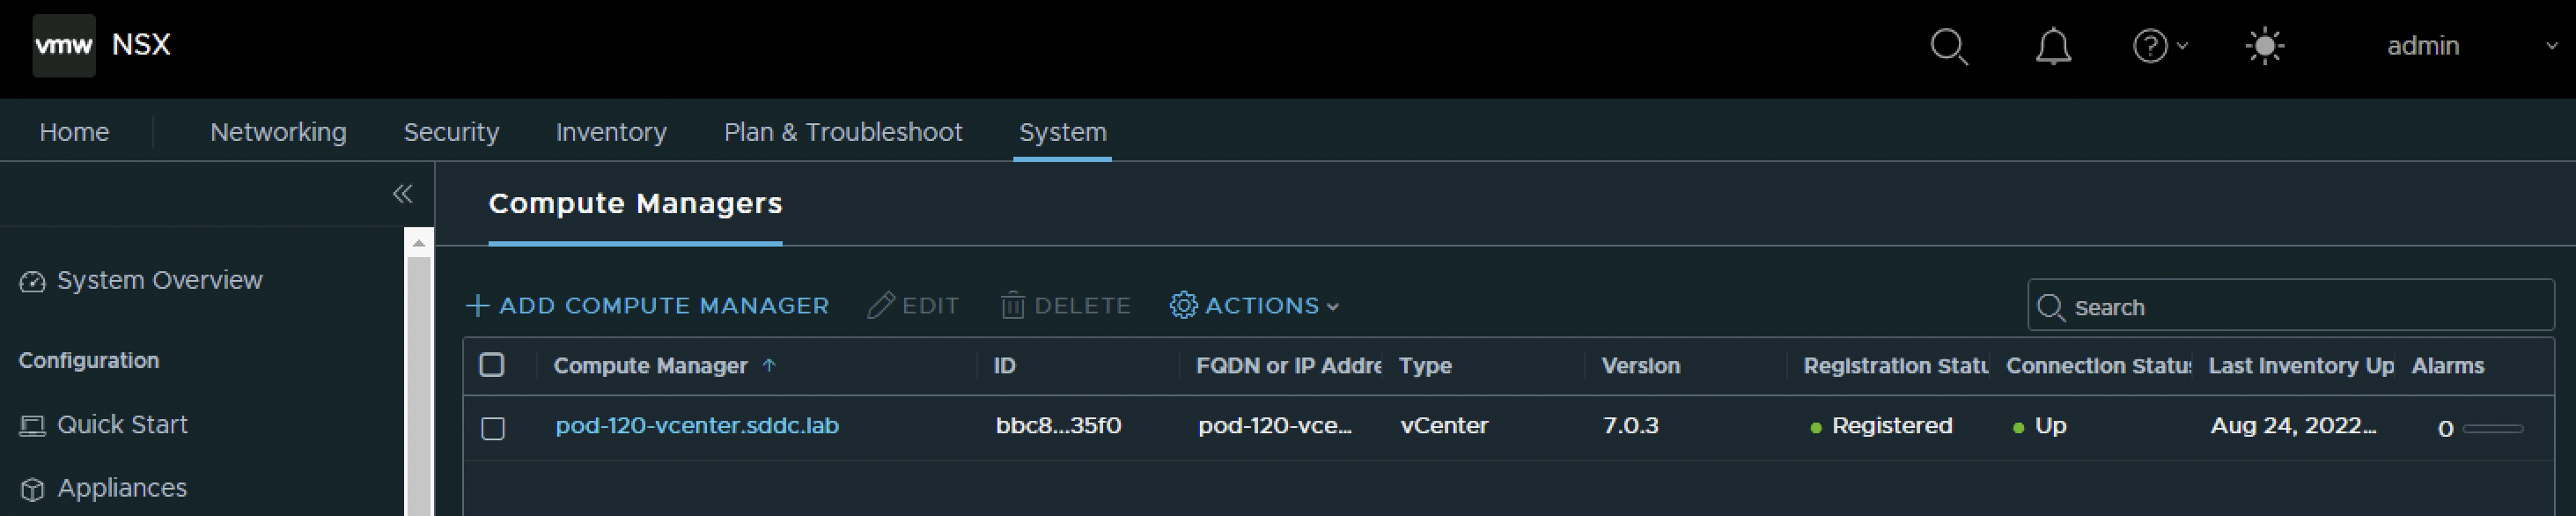
After I clicked on add I will see that the add is “In Progress”.

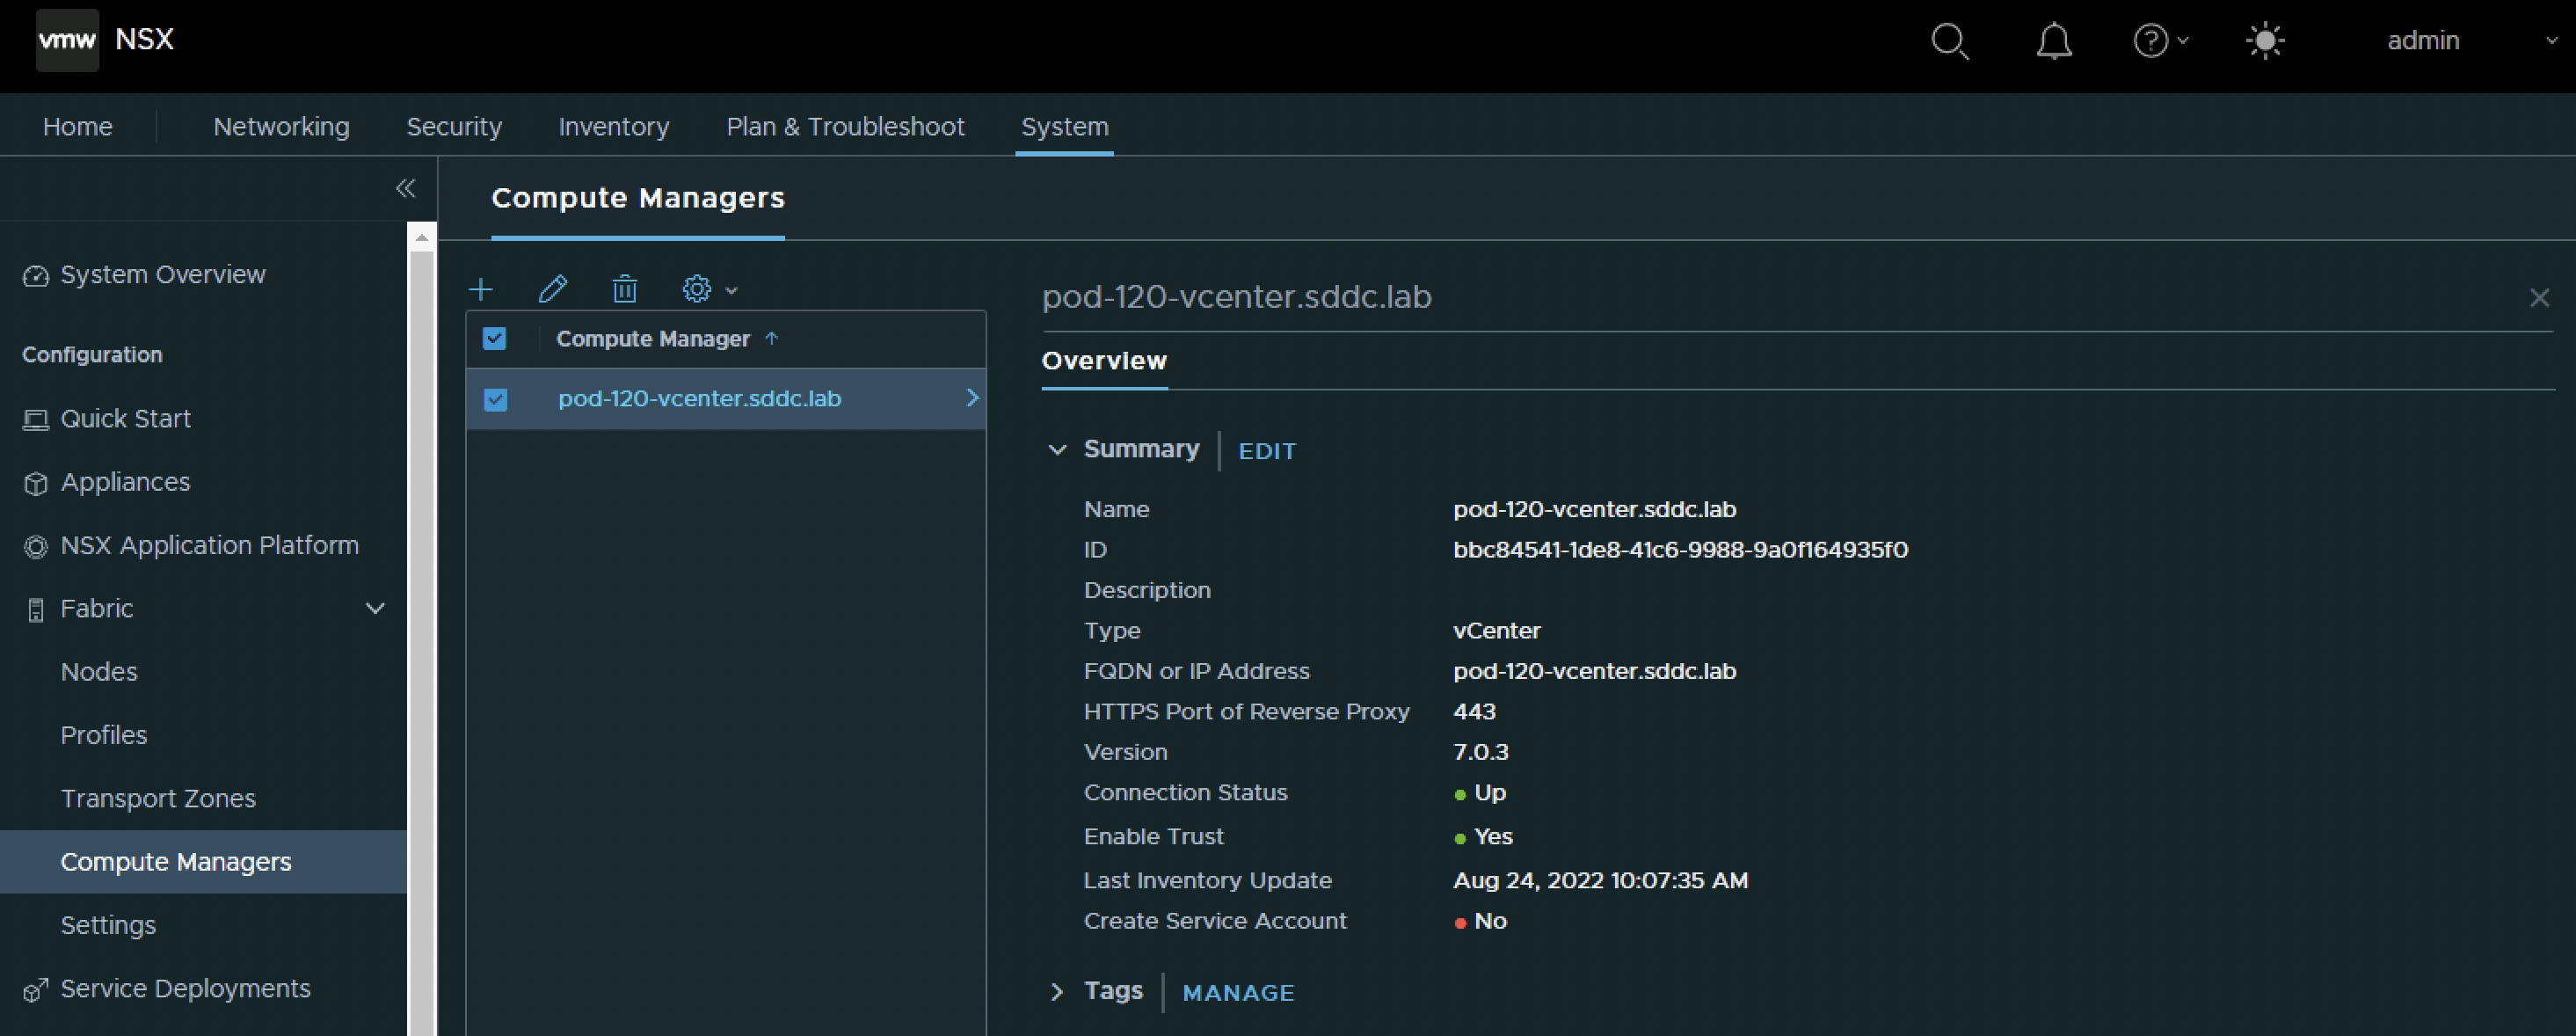
Look for the “Registered” and “Up” status when the Compute Manager is added successfully.
STEP 4» Deploy the second and third NSX Manager to form an NSX Manager Cluster
To form an NSX Manager Cluster I need two additional NSX Manager Nodes. These Manager Nodes can be deployed manually and added to the cluster using some CLI commands, or I can deploy the NSX Manager Nodes from the first NSX Manager Node’s GUI (Compute Manager configuration is required for this).
Deploy the second and third NSX Manager to form an NSX Manager Cluster 〈using the CLI〉 | Using the NSX Manager standalone deployments
Let’s start with the manual deployment of the second and third NSX Manager Nodes. Just for demonstration purposes I will also deploy these new NSX Manager Nodes in a different IP range (network) then the first one.
The table below will contain all the configuration parameters that I will need to deploy the second and third NSX Manager Node manually.
| Parameter Name | Input Second Node | Input Third Node |
|---|---|---|
| vSphere Cluster | N/A | N/A |
| VM Name | Pod-120-NSXT-LM-2 | Pod-120-NSXT-LM-3 |
| Storage | ESX-02-DS-01 | ESX-02-DS-01 |
| Network (Port Group) | Lab-Routers | Lab-Routers |
| System Root User Password | VMware1!VMware1! | VMware1!VMware1! |
| CLI "admin" User Password | VMware1!VMware1! | VMware1!VMware1! |
| CLI "audit" User Password | VMware1!VMware1! | VMware1!VMware1! |
| Hostname | Pod-120-NSXT-LM-2 | Pod-120-NSXT-LM-3 |
| Rolename | NSX Manager | NSX Manager |
| Management Network IPv4 Address | 10.203.0.11 | 10.203.0.12 |
| Management Network Netmask | 255.255.255.0 | 255.255.255.0 |
| Default IPv4 Gateway | 10.203.0.1 | 10.203.0.1 |
| DNS Server list | 10.203.0.5 | 10.203.0.5 |
| Domain Search List | sddc.lab | sddc.lab |
| NTP Server List | 10.203.0.5 | 10.203.0.5 |
| Enable SSH | yes | yes |
| Allow root SSH logins | yes | yes |
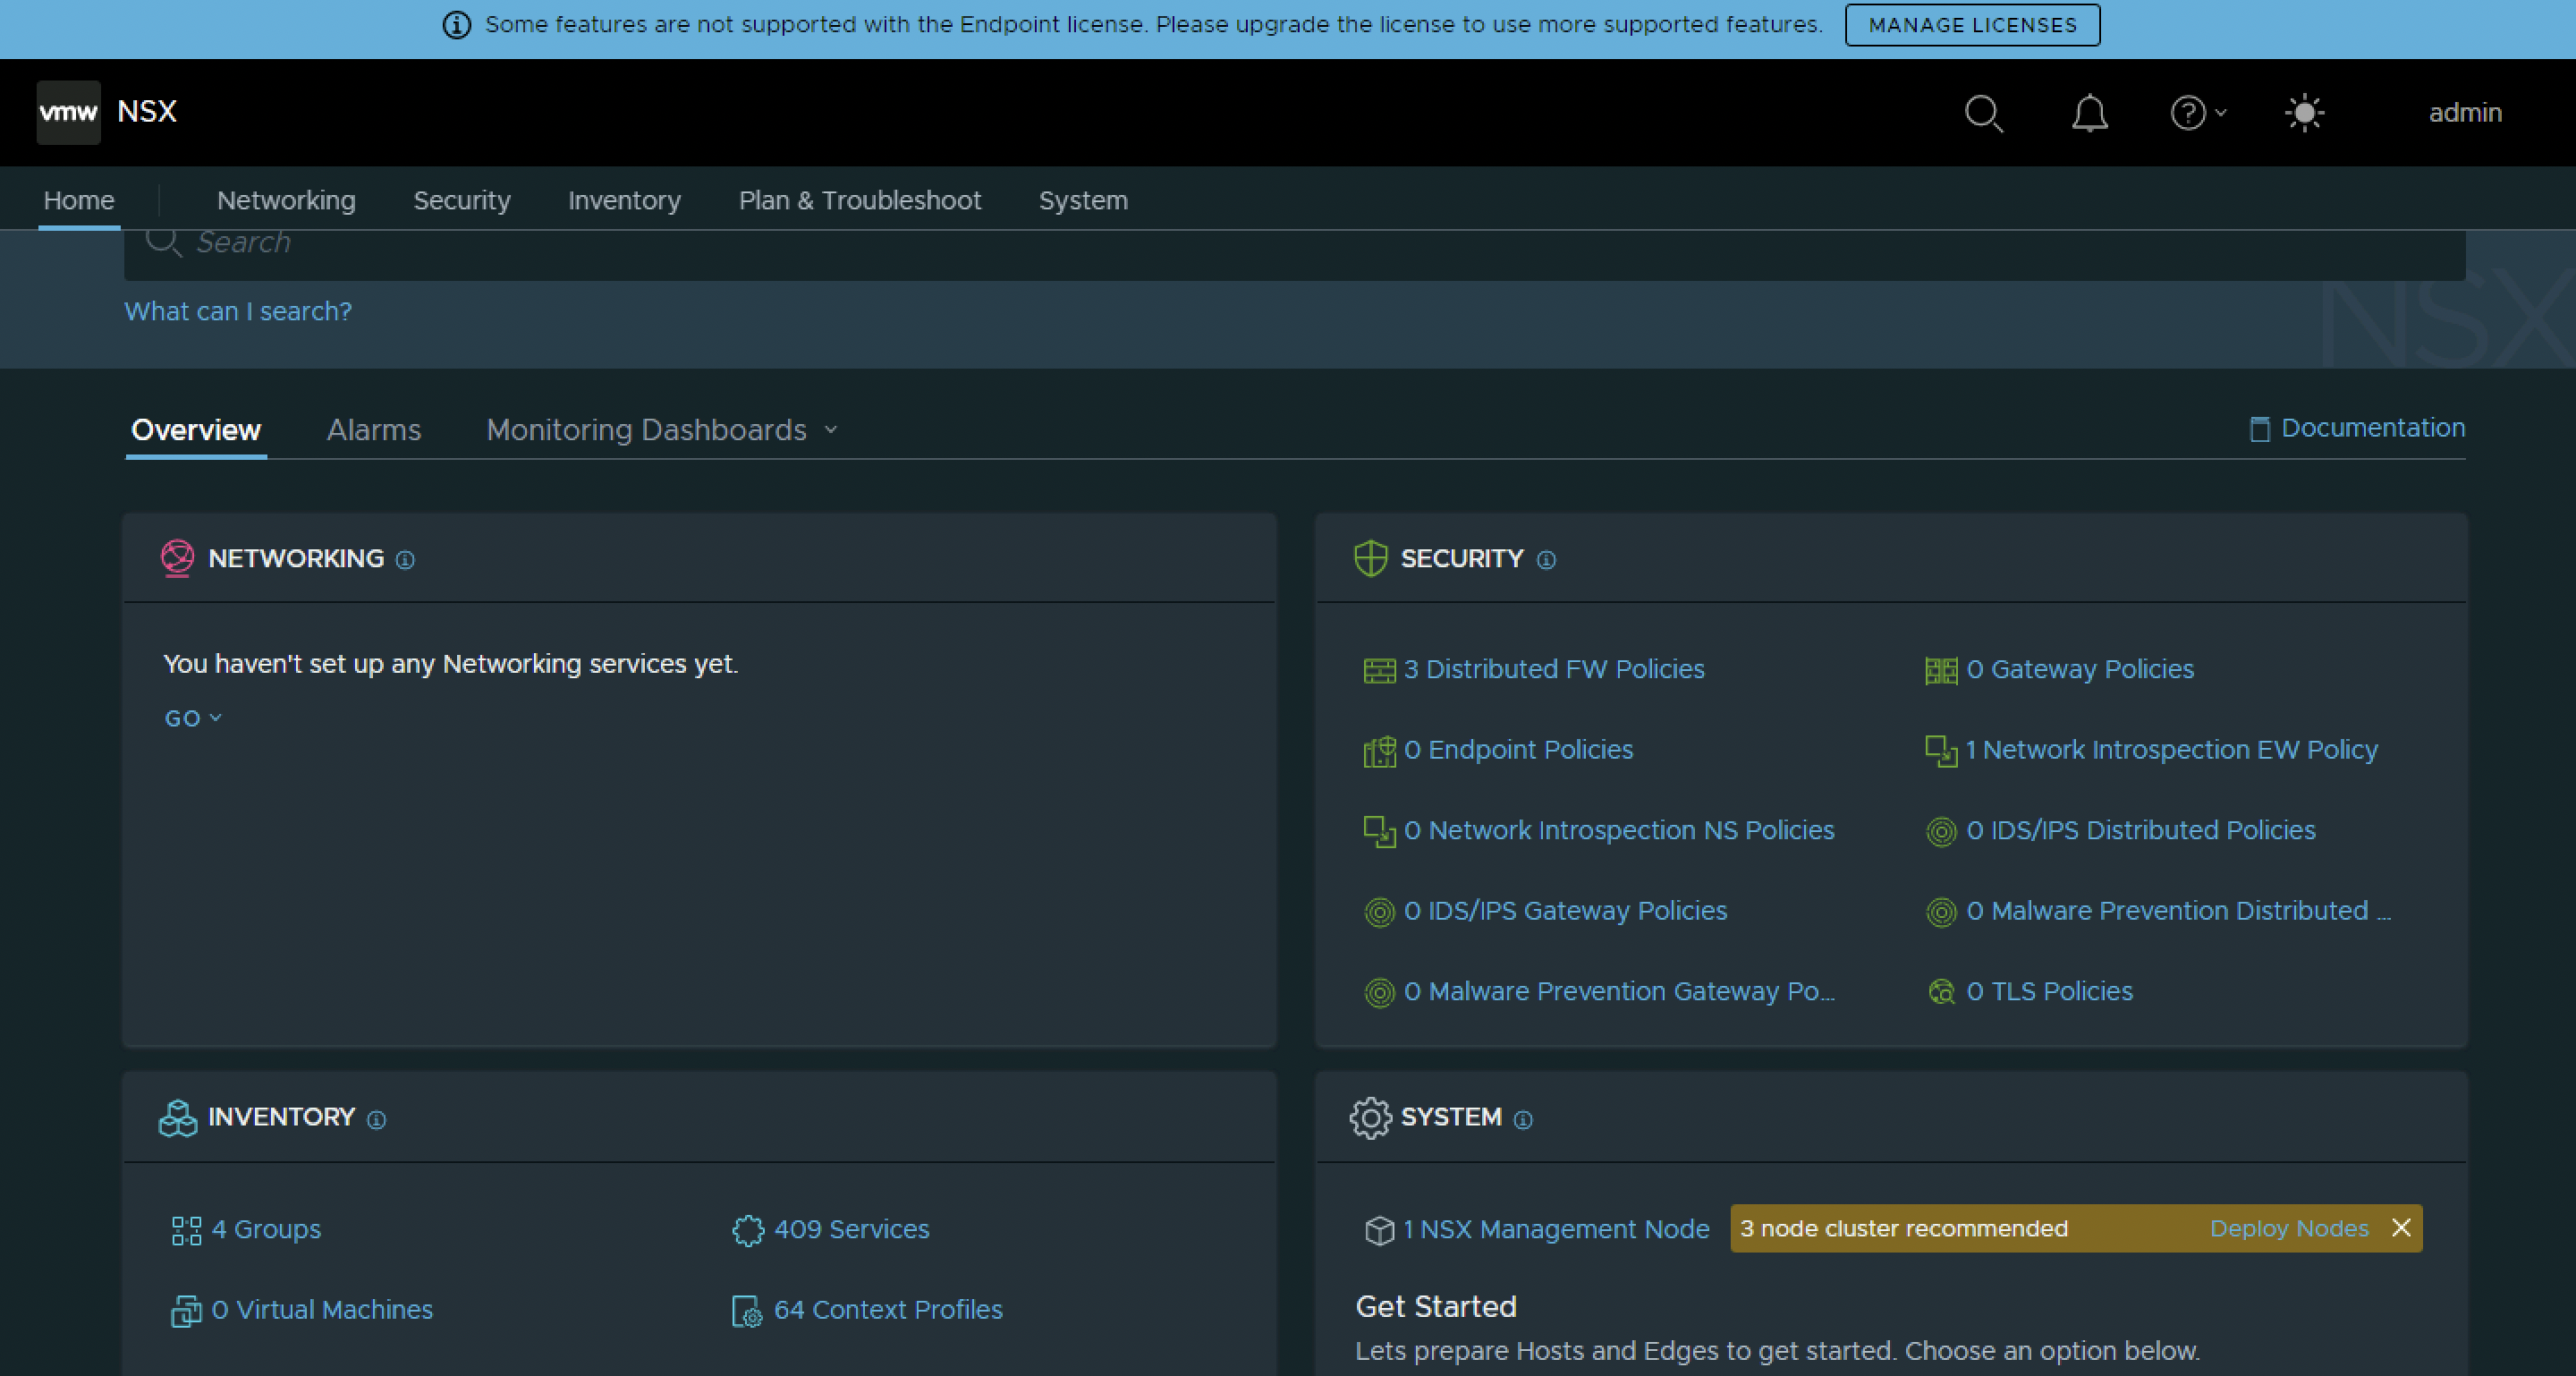
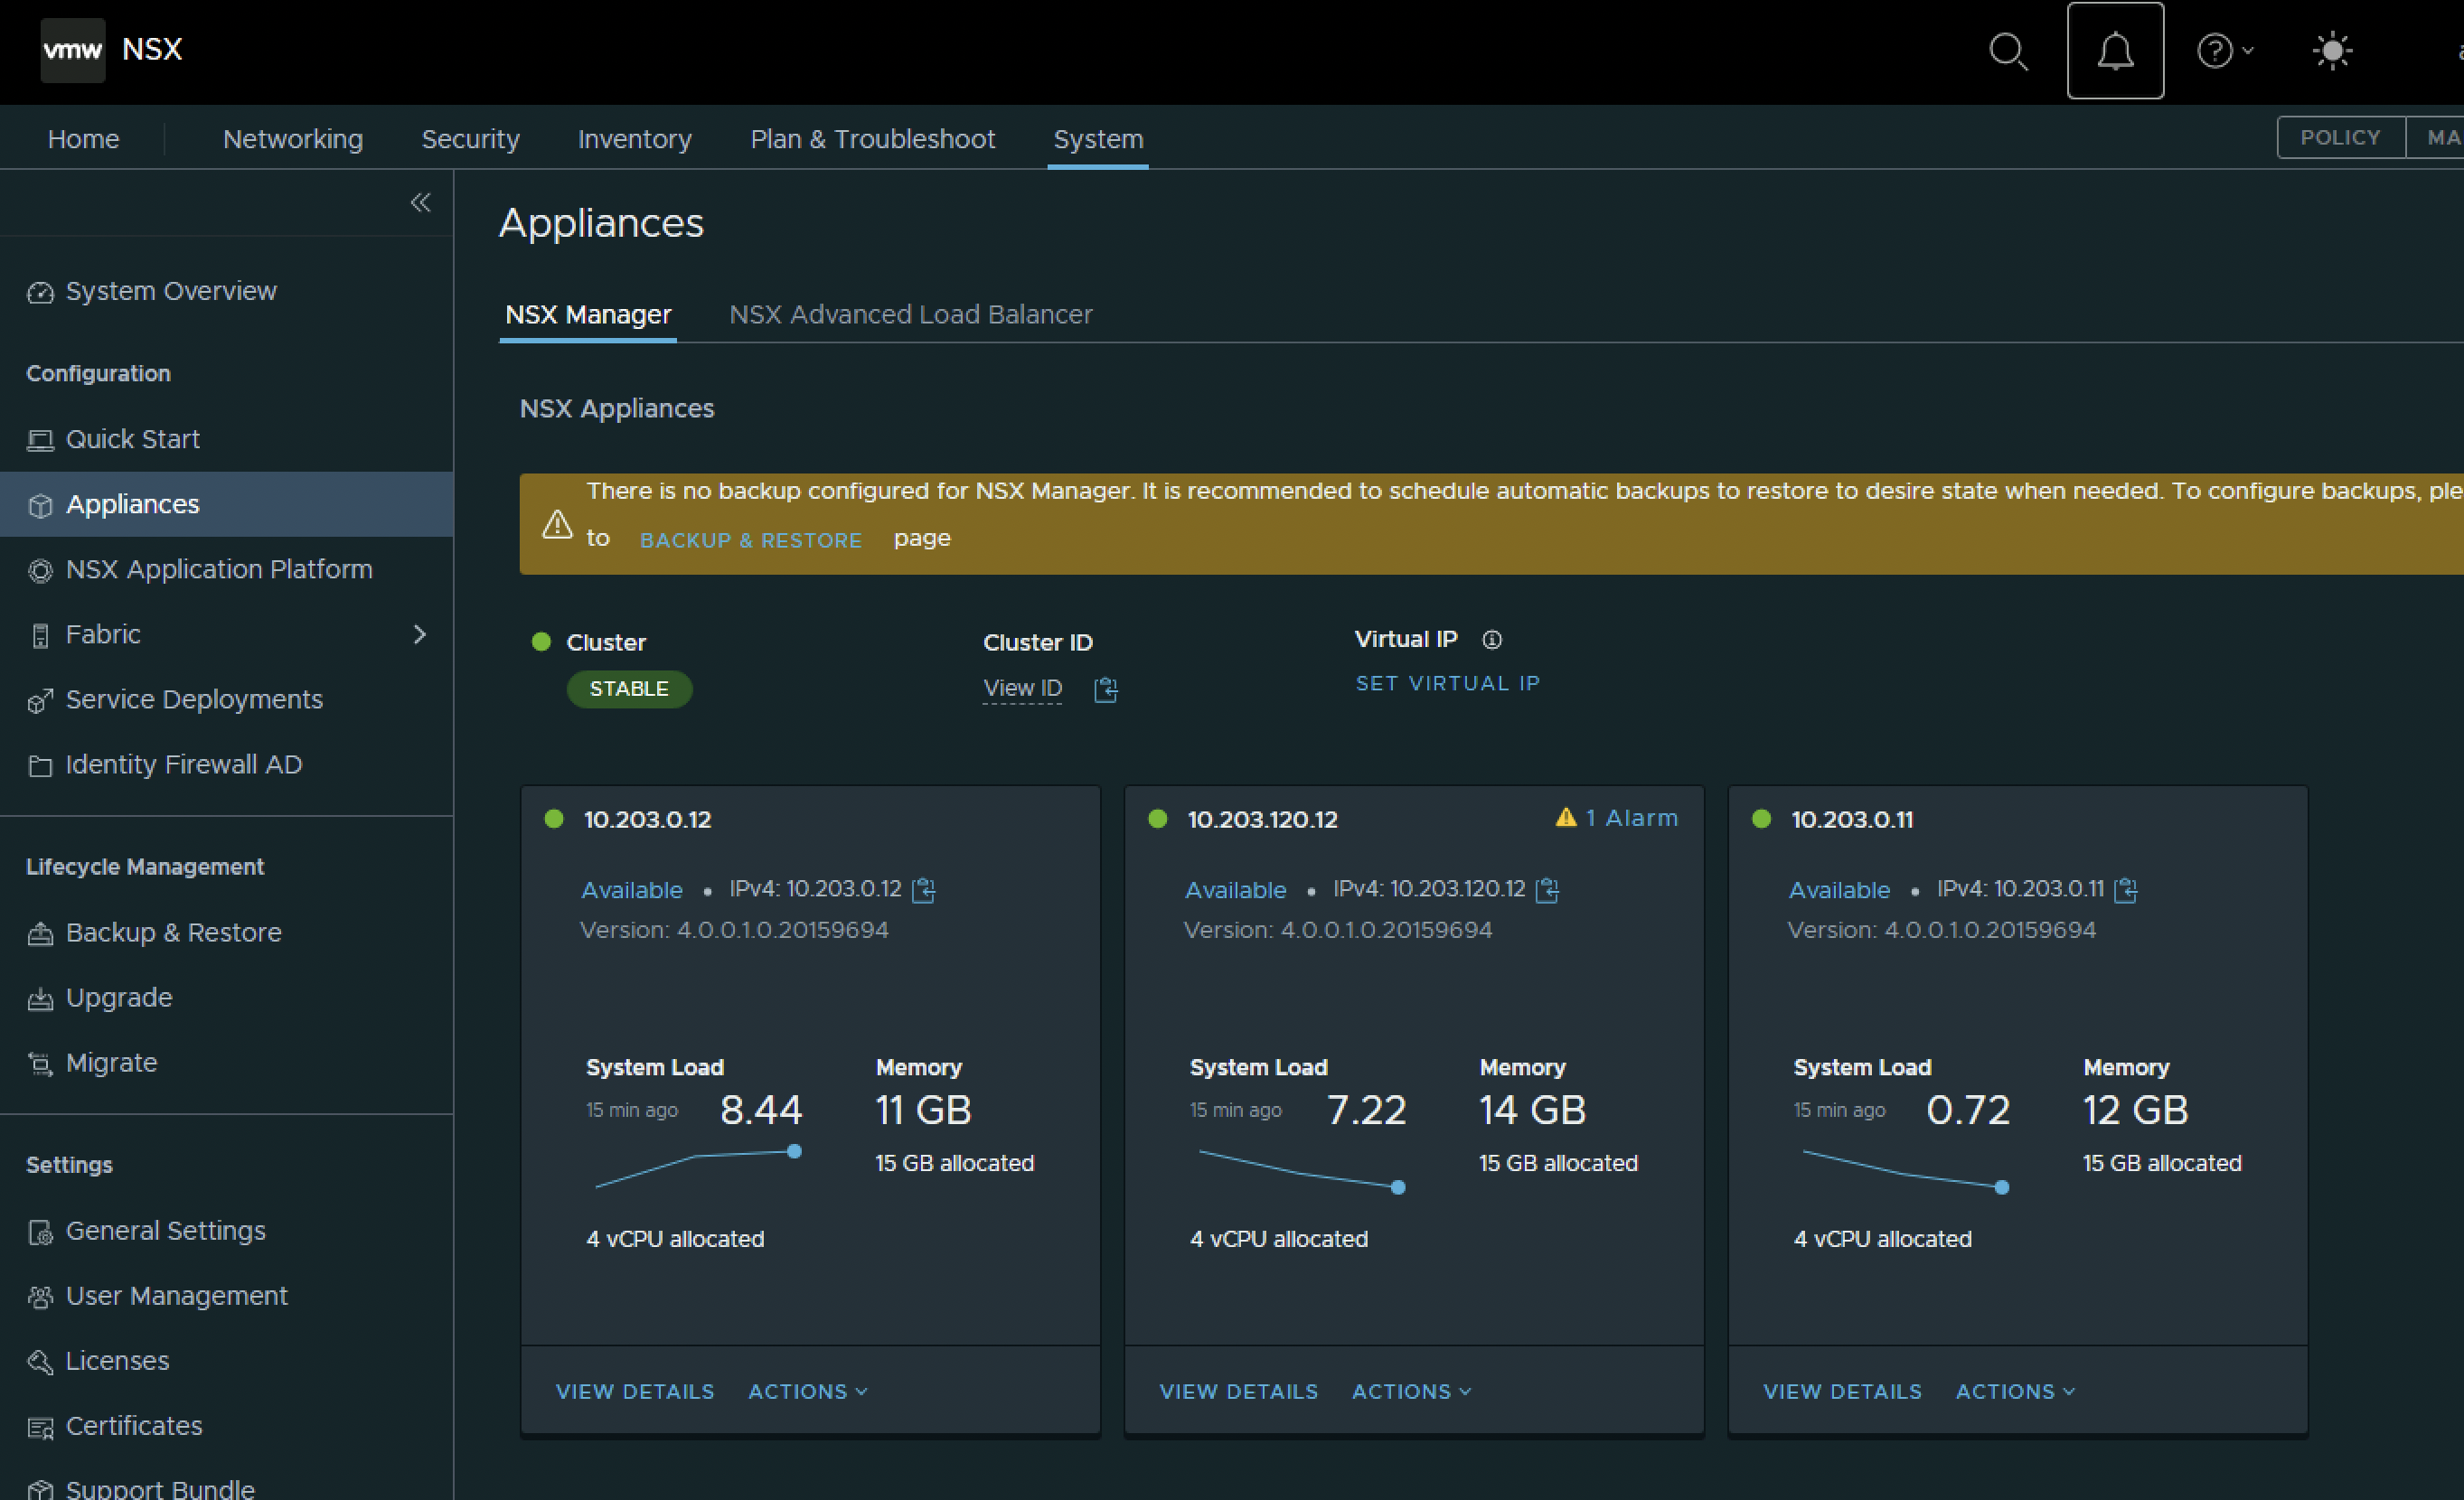
When I look at the NSX Home screen I will see the warning “3 node cluster recommended”.
When I click on “Deploy Nodes” it will take me to the Appliances screen.

I can also manually browse to the Appliances screen by browsing to System → Configuration → Appliances.
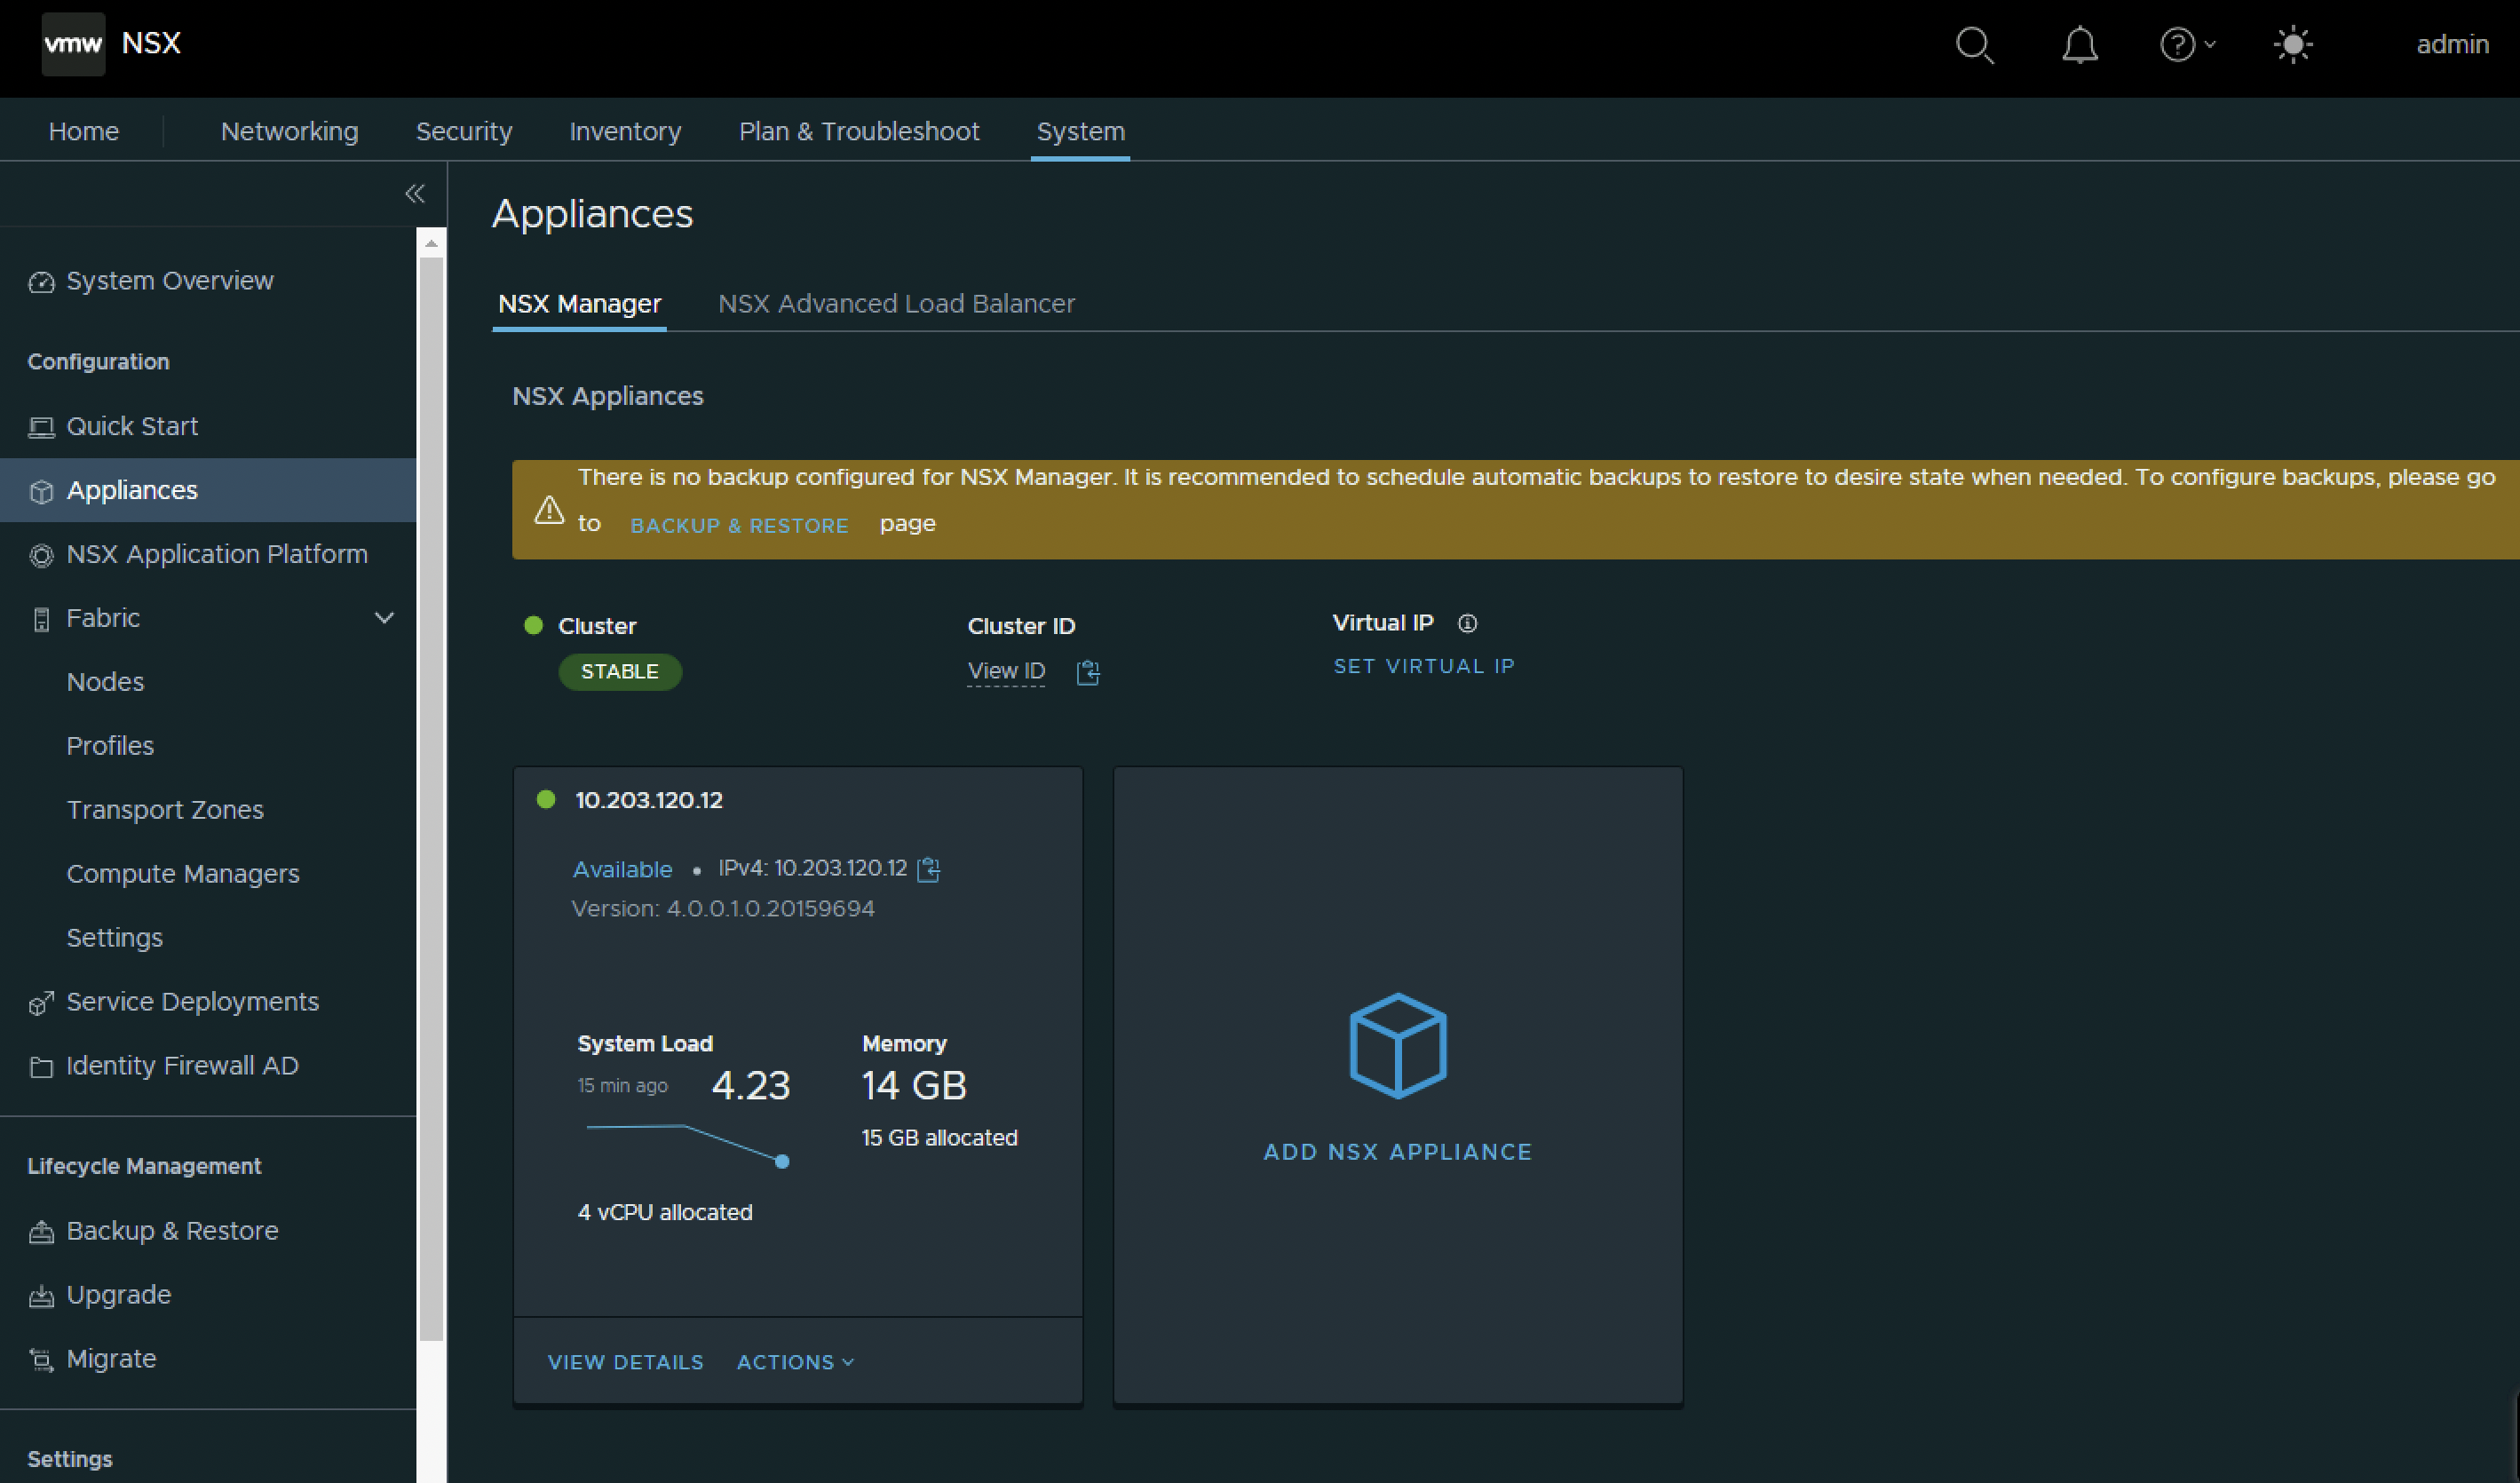
Notice that only one Node is listed.
Get information from the first NSX Manager Node
Make note of the IP address of the first NSX Manager Node.
Pod-120-NSXT-LM-1> get interface eth0
Wed Aug 24 2022 UTC 13:28:29.070
Interface: eth0
  IPv4 Address:
    Address: 10.203.120.12/24
    MAC address: 00:0c:29:75:b4:14
    MTU: 1500
    Default gateway: 10.203.120.1
    Broadcast address: 10.203.120.255
  Link status: up
  Admin status: up
  RX packets: 104708
  RX bytes: 13665374
  RX errors: 0
  RX dropped: 0
  TX packets: 16258
  TX bytes: 26292049
  TX errors: 0
  TX dropped: 0
  TX collisions: 0

Pod-120-NSXT-LM-1>
Make note of the certificate thumbprint of the first NSX Manager Node.
Pod-120-NSXT-LM-1> get certificate api thumbprint
Wed Aug 24 2022 UTC 13:31:23.839
bb0e0933b21052d8a29fac65d6a250877ed2cefb913033ccb962bd79bcae0a46

Pod-120-NSXT-LM-1>
Make note of the Cluster ID.
Pod-120-NSXT-LM-1> get cluster config
Wed Aug 24 2022 UTC 13:31:38.069
Cluster Id: 7262902c-d10a-4c40-a1d4-d24f737ccfaa
Cluster Configuration Version: 0
Number of nodes in the cluster: 1

Node UUID: fd0e4d56-4c33-0e61-8bff-9d8a1375b414
Node Status: JOINED
    ENTITY                               UUID                                       IP ADDRESS        IPV6 ADDRESS
              PORT     FQDN
    HTTPS                                9834c769-e08c-48de-beb9-d2d2509e1d0d       10.203.120.12     -
              443      Pod-120-NSXT-LM-1.SDDC.Lab
    ASYNC_REPLICATOR                     f8da85a9-66dd-4566-ac32-bd9f99644b9c       10.203.120.12     -
              -        Pod-120-NSXT-LM-1.SDDC.Lab
    CONTROLLER                           2b97a266-fa0d-4c38-b857-e88552aa5c13       10.203.120.12     -
              -        Pod-120-NSXT-LM-1.SDDC.Lab
    CLUSTER_BOOT_MANAGER                 fbca4c2f-28c3-4ce3-8452-9dfe04a91272       10.203.120.12     -
              -        Pod-120-NSXT-LM-1.SDDC.Lab
    CM-INVENTORY                         a18a55d1-8889-4352-912d-c340eb00a03d       10.203.120.12     -
              -        Pod-120-NSXT-LM-1.SDDC.Lab
    DATASTORE                            7de9e729-c7ea-482c-8014-7a613fe13e8b       10.203.120.12     -
              9000     Pod-120-NSXT-LM-1.SDDC.Lab
    CORFU_NONCONFIG                      26c912bd-0fb4-4067-961d-737e34521744       10.203.120.12     -
              9040     Pod-120-NSXT-LM-1.SDDC.Lab
    IDPS_REPORTING                       a1a10066-1508-4923-a197-fff5fc3b759b       10.203.120.12     -
              -        Pod-120-NSXT-LM-1.SDDC.Lab
    MESSAGING-MANAGER                    e6be3d88-5ebf-435e-8609-700929a427b6       10.203.120.12     -
              -        Pod-120-NSXT-LM-1.SDDC.Lab
    MONITORING                           f9dd4b01-2581-4d12-b4b2-4b09938657c3       10.203.120.12     -
              -        Pod-120-NSXT-LM-1.SDDC.Lab
    MANAGER                              4360cb53-c2b4-467a-8e24-e96b44a846ea       10.203.120.12     -
              -        Pod-120-NSXT-LM-1.SDDC.Lab
    SITE_MANAGER                         f9373036-1629-452b-b9e9-6470f06243ce       10.203.120.12     -
              -        Pod-120-NSXT-LM-1.SDDC.Lab
    UPGRADE_COORDINATOR                  c75bb26e-7151-46a9-a3e0-9235fccd05ac       10.203.120.12     -
              -        Pod-120-NSXT-LM-1.SDDC.Lab

Pod-120-NSXT-LM-1>
All the items I just made a note of are listed in the configuration parameters in the table below, and are required to join the new Nodes to the first Node.
| Parameter Name | Input |
|---|---|
| IP address | 10.203.120.12 |
| Cluster ID | 7262902c-d10a-4c40-a1d4-d24f737ccfaa |
| User name | admin |
| Password | VMware1!VMware1! |
| Certificate thumbprint | bb0e0933b21052d8a29fac65d6a250877ed2cefb913033ccb962bd79bcae0a46 |
Add the second NSX Manager Node
The deployment of the second / third NSX Manager Node can be done using the vCenter Server or ESXi Server deployments described earlier.
Join the second NSX Manager Node to the first Node (cluster).
Pod-120-NSXT-LM-2> join 10.203.120.12 cluster-id 7262902c-d10a-4c40-a1d4-d24f737ccfaa username admin password VMware1!VMware1! thumbprint bb0e0933b21052d8a29fac65d6a250877ed2cefb913033ccb962bd79bcae0a46
Data on this node will be lost. Are you sure? (yes/no): yes
Join operation successful. Services are being restarted. Cluster may take some time to stabilize.

Pod-120-NSXT-LM-2>
After I have issued the join command I can look at the Appliances screen to track the progress. During the join I might see some strange outputs like the one, but patience is key.
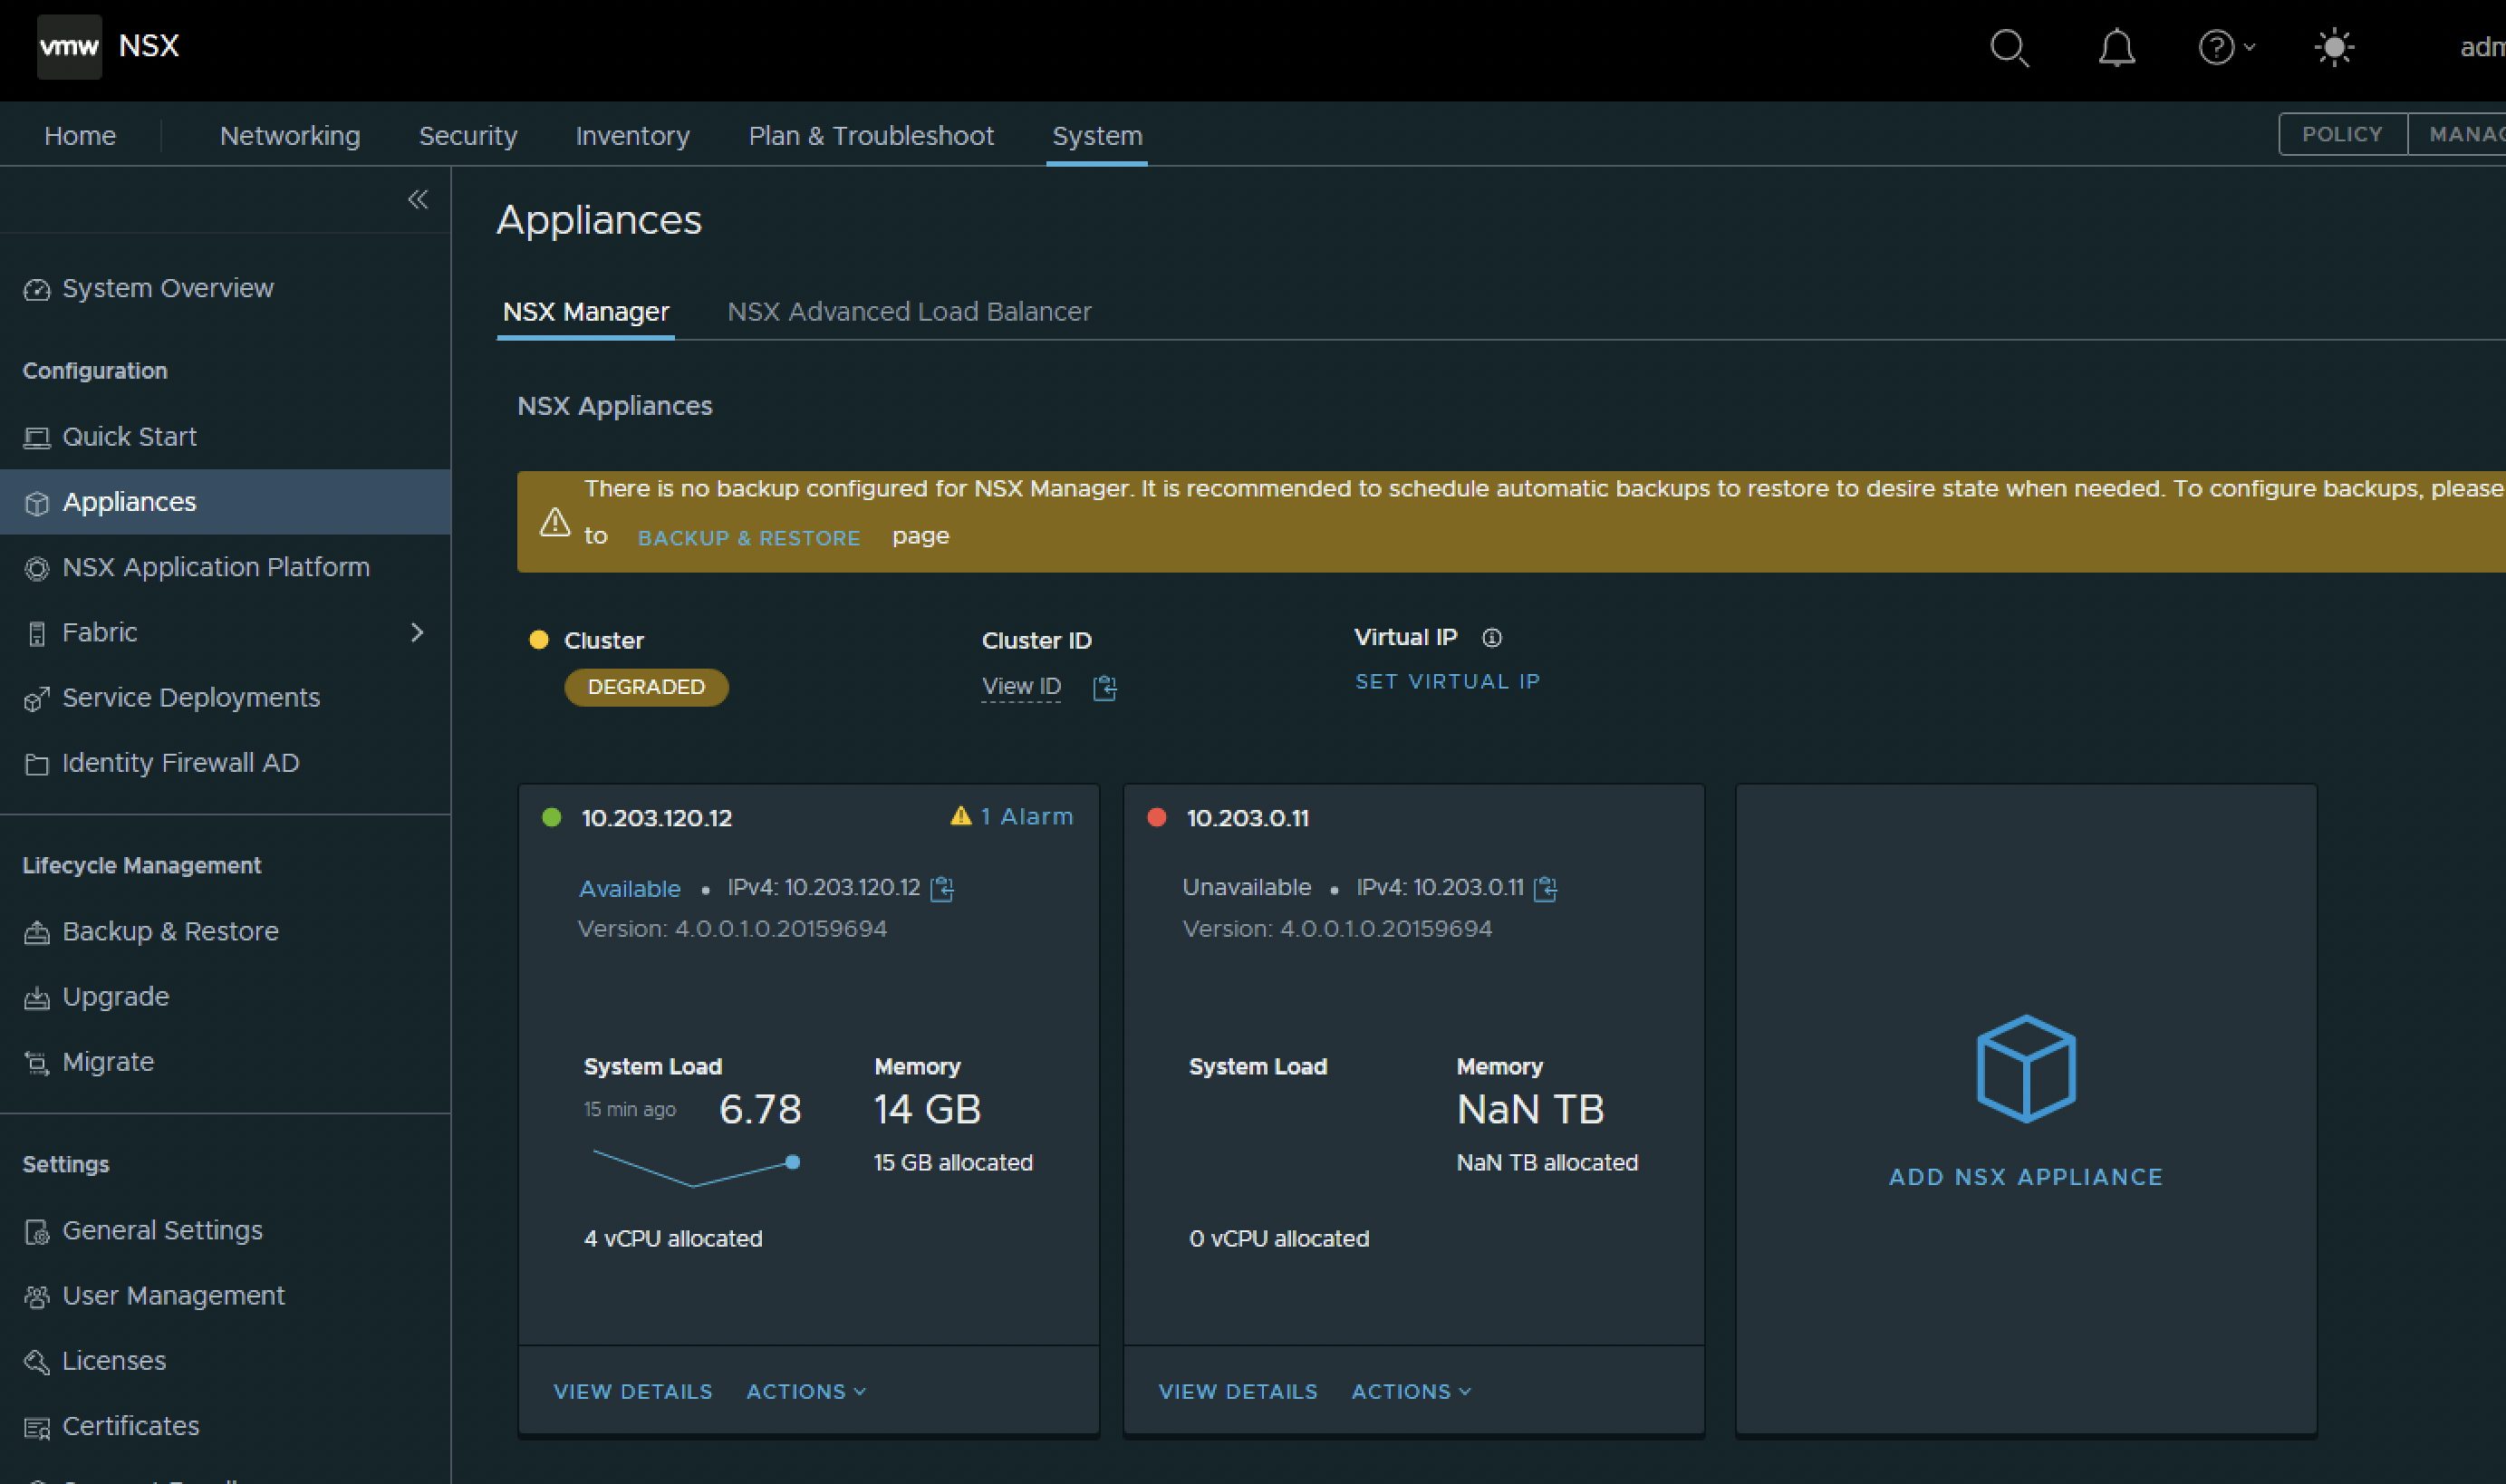
Joining and cluster stabilising will take around 15 minutes to finish.
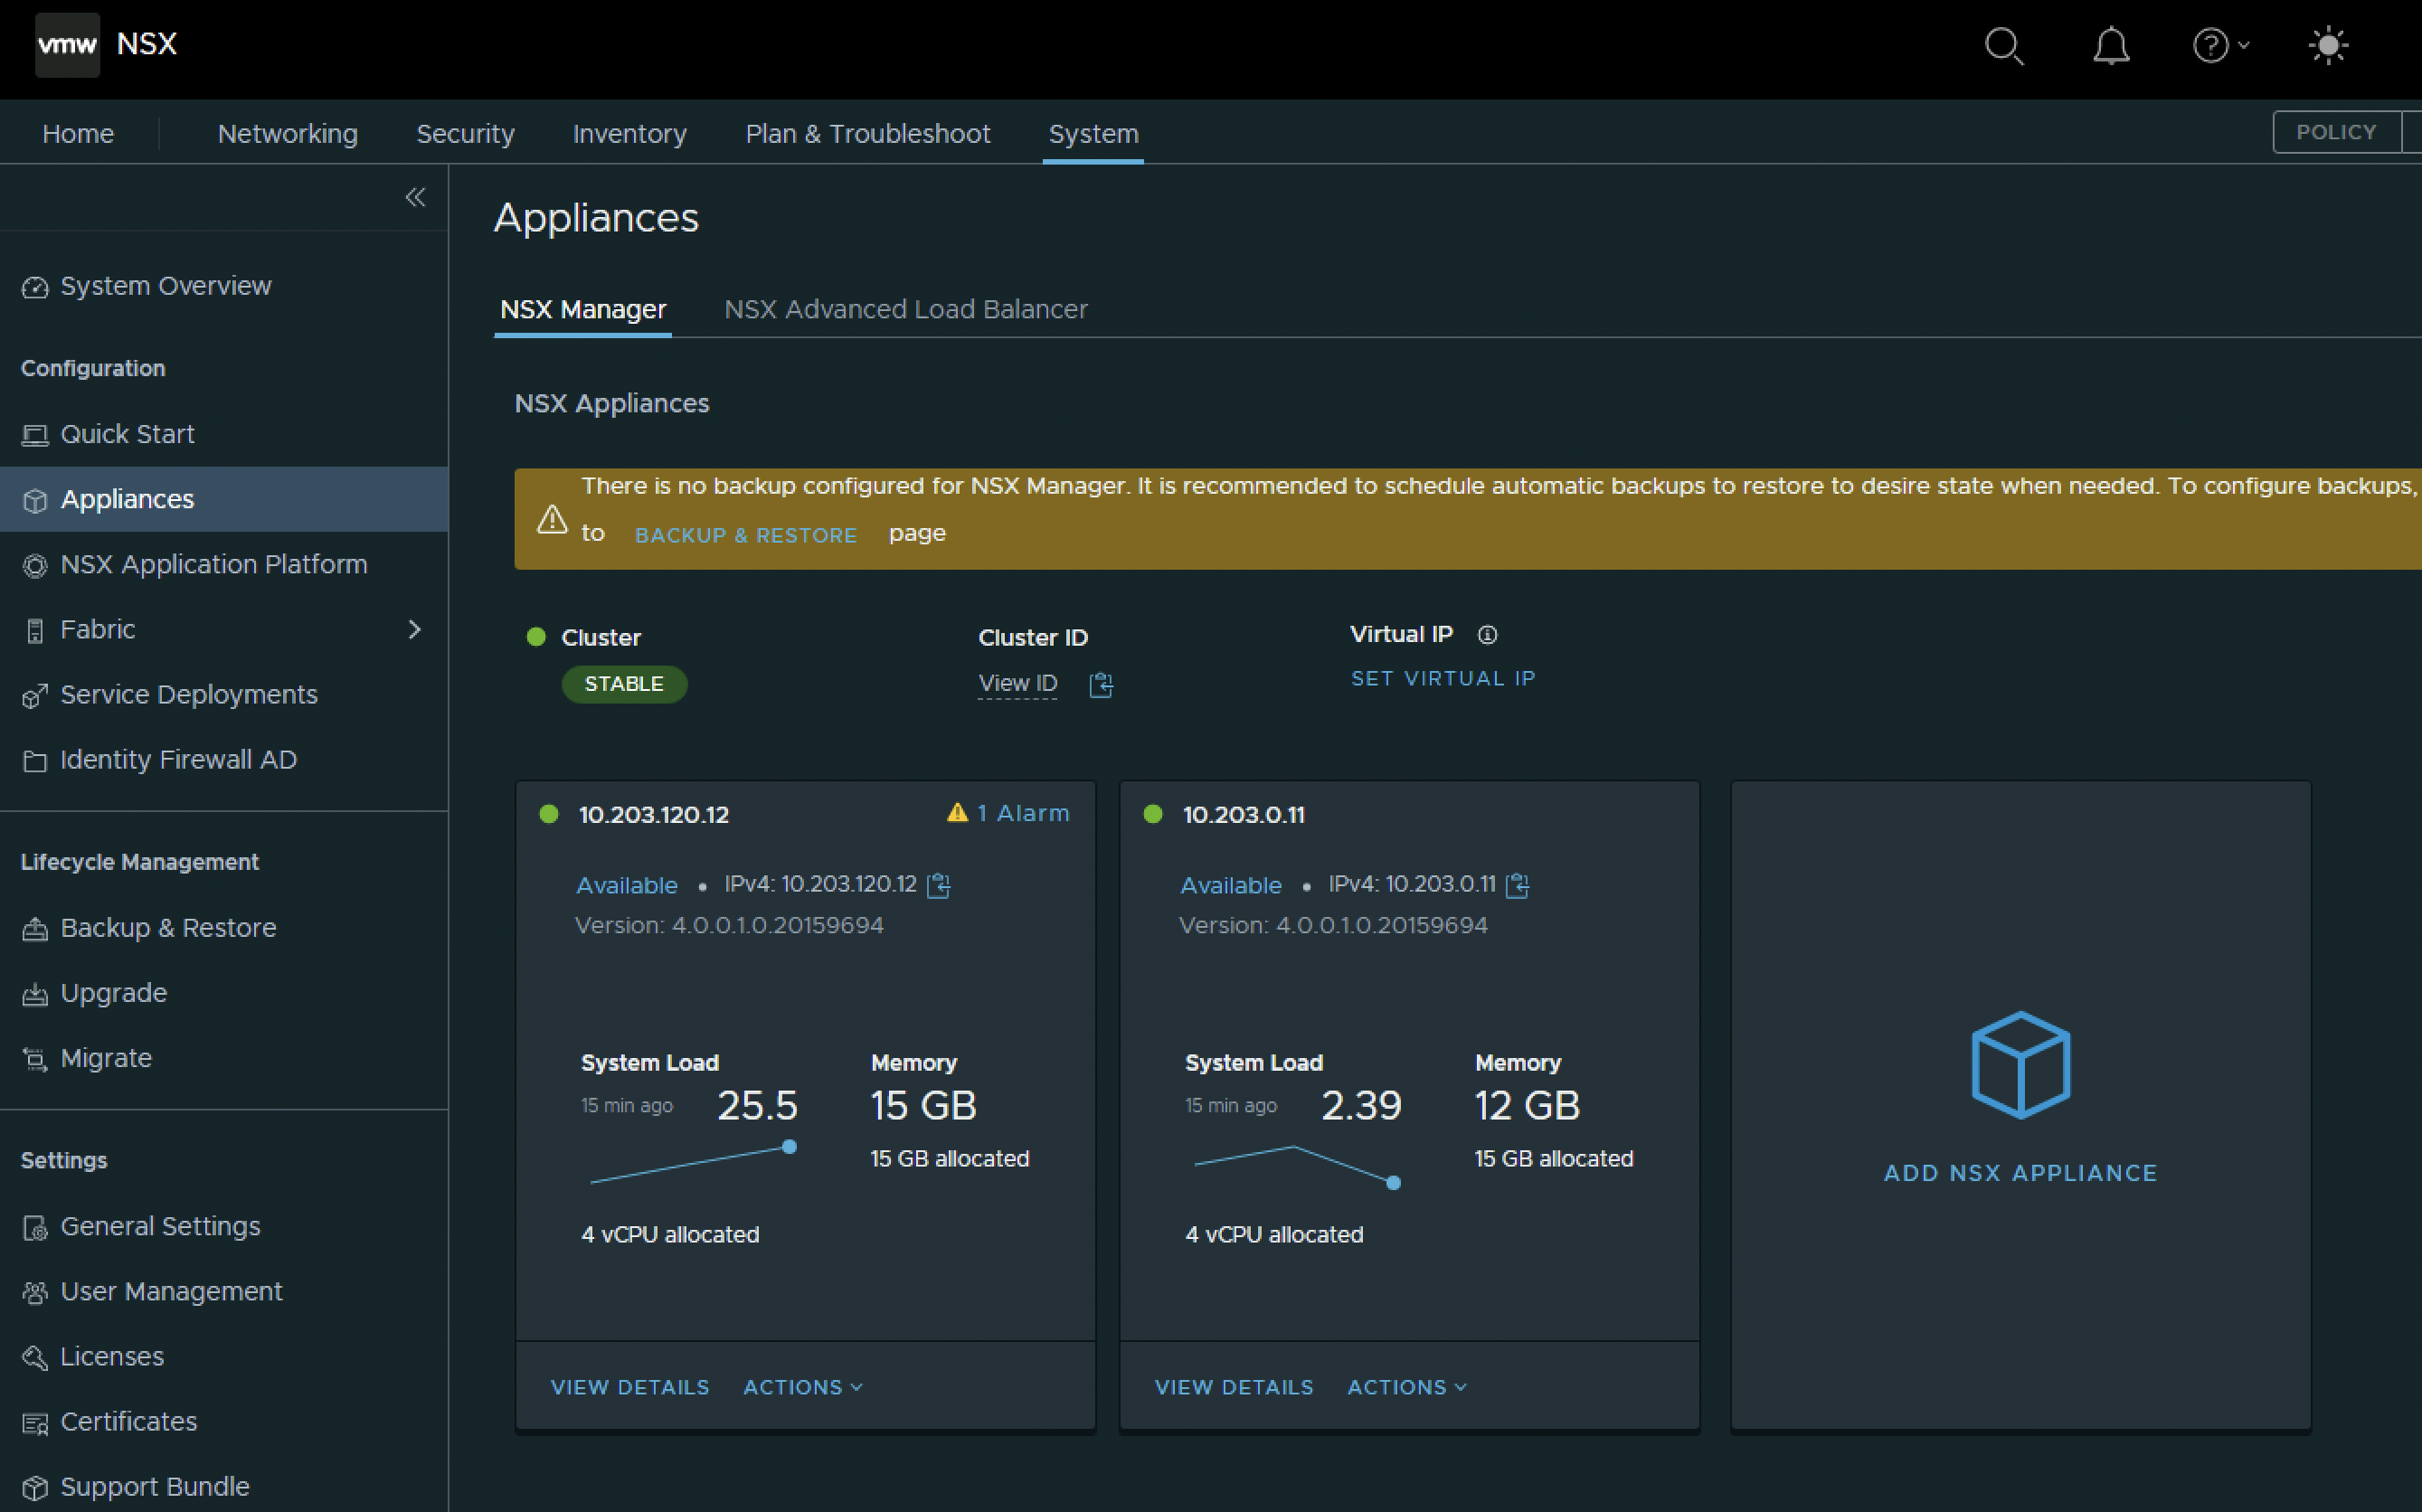
When the join is completed I will now have an NSX Manager Cluster with two NSX Manager Nodes.
I can issue the following CLI commands to verify is the status is “UP” for all the services.
get cluster statusPod-120-NSXT-LM-1> get cluster status
Wed Aug 24 2022 UTC 13:51:50.382
Cluster Id: 7262902c-d10a-4c40-a1d4-d24f737ccfaa
Overall Status: STABLE
Group Type: DATASTORE
Group Status: STABLE
Members:
UUID FQDN IP STATUS
fd0e4d56-4c33-0e61-8bff-9d8a1375b414 Pod-120-NSXT-LM-1.SDDC.Lab 10.203.120.12 UP
18cd2242-02f0-c2b9-68b8-0d70ff3d2aaf Pod-120-NSXT-LM-2 10.203.0.11 UP
Group Type: CLUSTER_BOOT_MANAGER
Group Status: STABLE
Members:
UUID FQDN IP STATUS
fd0e4d56-4c33-0e61-8bff-9d8a1375b414 Pod-120-NSXT-LM-1.SDDC.Lab 10.203.120.12 UP
18cd2242-02f0-c2b9-68b8-0d70ff3d2aaf Pod-120-NSXT-LM-2 10.203.0.11 UP
Group Type: CONTROLLER
Group Status: STABLE
Members:
UUID FQDN IP STATUS
2b97a266-fa0d-4c38-b857-e88552aa5c13 Pod-120-NSXT-LM-1.SDDC.Lab 10.203.120.12 UP
d0b3e07c-7d41-452c-9adf-2ae794797551 Pod-120-NSXT-LM-2 10.203.0.11 UP
Group Type: MANAGER
Group Status: STABLE
Members:
UUID FQDN IP STATUS
fd0e4d56-4c33-0e61-8bff-9d8a1375b414 Pod-120-NSXT-LM-1.SDDC.Lab 10.203.120.12 UP
18cd2242-02f0-c2b9-68b8-0d70ff3d2aaf Pod-120-NSXT-LM-2 10.203.0.11 UP
Group Type: HTTPS
Group Status: STABLE
Members:
UUID FQDN IP STATUS
fd0e4d56-4c33-0e61-8bff-9d8a1375b414 Pod-120-NSXT-LM-1.SDDC.Lab 10.203.120.12 UP
18cd2242-02f0-c2b9-68b8-0d70ff3d2aaf Pod-120-NSXT-LM-2 10.203.0.11 UP
Group Type: MONITORING
Group Status: STABLE
Members:
UUID FQDN IP STATUS
fd0e4d56-4c33-0e61-8bff-9d8a1375b414 Pod-120-NSXT-LM-1.SDDC.Lab 10.203.120.12 UP
18cd2242-02f0-c2b9-68b8-0d70ff3d2aaf Pod-120-NSXT-LM-2 10.203.0.11 UP
Group Type: MESSAGING-MANAGER
Group Status: STABLE
Members:
UUID FQDN IP STATUS
fd0e4d56-4c33-0e61-8bff-9d8a1375b414 Pod-120-NSXT-LM-1.SDDC.Lab 10.203.120.12 UP
18cd2242-02f0-c2b9-68b8-0d70ff3d2aaf Pod-120-NSXT-LM-2 10.203.0.11 UP
Group Type: SITE_MANAGER
Group Status: STABLE
Members:
UUID FQDN IP STATUS
fd0e4d56-4c33-0e61-8bff-9d8a1375b414 Pod-120-NSXT-LM-1.SDDC.Lab 10.203.120.12 UP
18cd2242-02f0-c2b9-68b8-0d70ff3d2aaf Pod-120-NSXT-LM-2 10.203.0.11 UP
Group Type: CM-INVENTORY
Group Status: STABLE
Members:
UUID FQDN IP STATUS
fd0e4d56-4c33-0e61-8bff-9d8a1375b414 Pod-120-NSXT-LM-1.SDDC.Lab 10.203.120.12 UP
18cd2242-02f0-c2b9-68b8-0d70ff3d2aaf Pod-120-NSXT-LM-2 10.203.0.11 UP
Group Type: IDPS_REPORTING
Group Status: STABLE
Members:
UUID FQDN IP STATUS
fd0e4d56-4c33-0e61-8bff-9d8a1375b414 Pod-120-NSXT-LM-1.SDDC.Lab 10.203.120.12 UP
18cd2242-02f0-c2b9-68b8-0d70ff3d2aaf Pod-120-NSXT-LM-2 10.203.0.11 UP
Group Type: CORFU_NONCONFIG
Group Status: STABLE
Members:
UUID FQDN IP STATUS
fd0e4d56-4c33-0e61-8bff-9d8a1375b414 Pod-120-NSXT-LM-1.SDDC.Lab 10.203.120.12 UP
18cd2242-02f0-c2b9-68b8-0d70ff3d2aaf Pod-120-NSXT-LM-2 10.203.0.11 UP
Pod-120-NSXT-LM-1>get cluster statusPod-120-NSXT-LM-2> get cluster status
Wed Aug 24 2022 UTC 13:51:10.907
Cluster Id: 7262902c-d10a-4c40-a1d4-d24f737ccfaa
Overall Status: STABLE
Group Type: DATASTORE
Group Status: STABLE
Members:
UUID FQDN IP STATUS
fd0e4d56-4c33-0e61-8bff-9d8a1375b414 Pod-120-NSXT-LM-1.SDDC.Lab 10.203.120.12 UP
18cd2242-02f0-c2b9-68b8-0d70ff3d2aaf Pod-120-NSXT-LM-2 10.203.0.11 UP
Group Type: CLUSTER_BOOT_MANAGER
Group Status: STABLE
Members:
UUID FQDN IP STATUS
fd0e4d56-4c33-0e61-8bff-9d8a1375b414 Pod-120-NSXT-LM-1.SDDC.Lab 10.203.120.12 UP
18cd2242-02f0-c2b9-68b8-0d70ff3d2aaf Pod-120-NSXT-LM-2 10.203.0.11 UP
Group Type: CONTROLLER
Group Status: STABLE
Members:
UUID FQDN IP STATUS
2b97a266-fa0d-4c38-b857-e88552aa5c13 Pod-120-NSXT-LM-1.SDDC.Lab 10.203.120.12 UP
d0b3e07c-7d41-452c-9adf-2ae794797551 Pod-120-NSXT-LM-2 10.203.0.11 UP
Group Type: MANAGER
Group Status: STABLE
Members:
UUID FQDN IP STATUS
fd0e4d56-4c33-0e61-8bff-9d8a1375b414 Pod-120-NSXT-LM-1.SDDC.Lab 10.203.120.12 UP
18cd2242-02f0-c2b9-68b8-0d70ff3d2aaf Pod-120-NSXT-LM-2 10.203.0.11 UP
Group Type: HTTPS
Group Status: STABLE
Members:
UUID FQDN IP STATUS
fd0e4d56-4c33-0e61-8bff-9d8a1375b414 Pod-120-NSXT-LM-1.SDDC.Lab 10.203.120.12 UP
18cd2242-02f0-c2b9-68b8-0d70ff3d2aaf Pod-120-NSXT-LM-2 10.203.0.11 UP
Group Type: SITE_MANAGER
Group Status: STABLE
Members:
UUID FQDN IP STATUS
fd0e4d56-4c33-0e61-8bff-9d8a1375b414 Pod-120-NSXT-LM-1.SDDC.Lab 10.203.120.12 UP
18cd2242-02f0-c2b9-68b8-0d70ff3d2aaf Pod-120-NSXT-LM-2 10.203.0.11 UP
Group Type: CM-INVENTORY
Group Status: STABLE
Members:
UUID FQDN IP STATUS
fd0e4d56-4c33-0e61-8bff-9d8a1375b414 Pod-120-NSXT-LM-1.SDDC.Lab 10.203.120.12 UP
18cd2242-02f0-c2b9-68b8-0d70ff3d2aaf Pod-120-NSXT-LM-2 10.203.0.11 UP
Group Type: IDPS_REPORTING
Group Status: STABLE
Members:
UUID FQDN IP STATUS
fd0e4d56-4c33-0e61-8bff-9d8a1375b414 Pod-120-NSXT-LM-1.SDDC.Lab 10.203.120.12 UP
18cd2242-02f0-c2b9-68b8-0d70ff3d2aaf Pod-120-NSXT-LM-2 10.203.0.11 UP
Group Type: MONITORING
Group Status: STABLE
Members:
UUID FQDN IP STATUS
fd0e4d56-4c33-0e61-8bff-9d8a1375b414 Pod-120-NSXT-LM-1.SDDC.Lab 10.203.120.12 UP
18cd2242-02f0-c2b9-68b8-0d70ff3d2aaf Pod-120-NSXT-LM-2 10.203.0.11 UP
Group Type: MESSAGING-MANAGER
Group Status: STABLE
Members:
UUID FQDN IP STATUS
fd0e4d56-4c33-0e61-8bff-9d8a1375b414 Pod-120-NSXT-LM-1.SDDC.Lab 10.203.120.12 UP
18cd2242-02f0-c2b9-68b8-0d70ff3d2aaf Pod-120-NSXT-LM-2 10.203.0.11 UP
Group Type: CORFU_NONCONFIG
Group Status: STABLE
Members:
UUID FQDN IP STATUS
fd0e4d56-4c33-0e61-8bff-9d8a1375b414 Pod-120-NSXT-LM-1.SDDC.Lab 10.203.120.12 UP
18cd2242-02f0-c2b9-68b8-0d70ff3d2aaf Pod-120-NSXT-LM-2 10.203.0.11 UP
Pod-120-NSXT-LM-2>
Add the third NSX Manager Node
When the join is completed I will now have an NSX Manager Cluster with two NSX Manager Nodes.
Join the third NSX Manager Node to the first and second Nodes (cluster).
Pod-120-NSXT-LM-3> join 10.203.120.12 cluster-id 7262902c-d10a-4c40-a1d4-d24f737ccfaa username admin password VMware1!VMware1! thumbprint bb0e0933b21052d8a29fac65d6a250877ed2cefb913033ccb962bd79bcae0a46
Data on this node will be lost. Are you sure? (yes/no): yes
Join operation successful. Services are being restarted. Cluster may take some time to stabilize.

Pod-120-NSXT-LM-3>
After I have issued the join command I can look at the Appliances screen to track the progress. During the join I might see some strange outputs like the one, but patience is key.
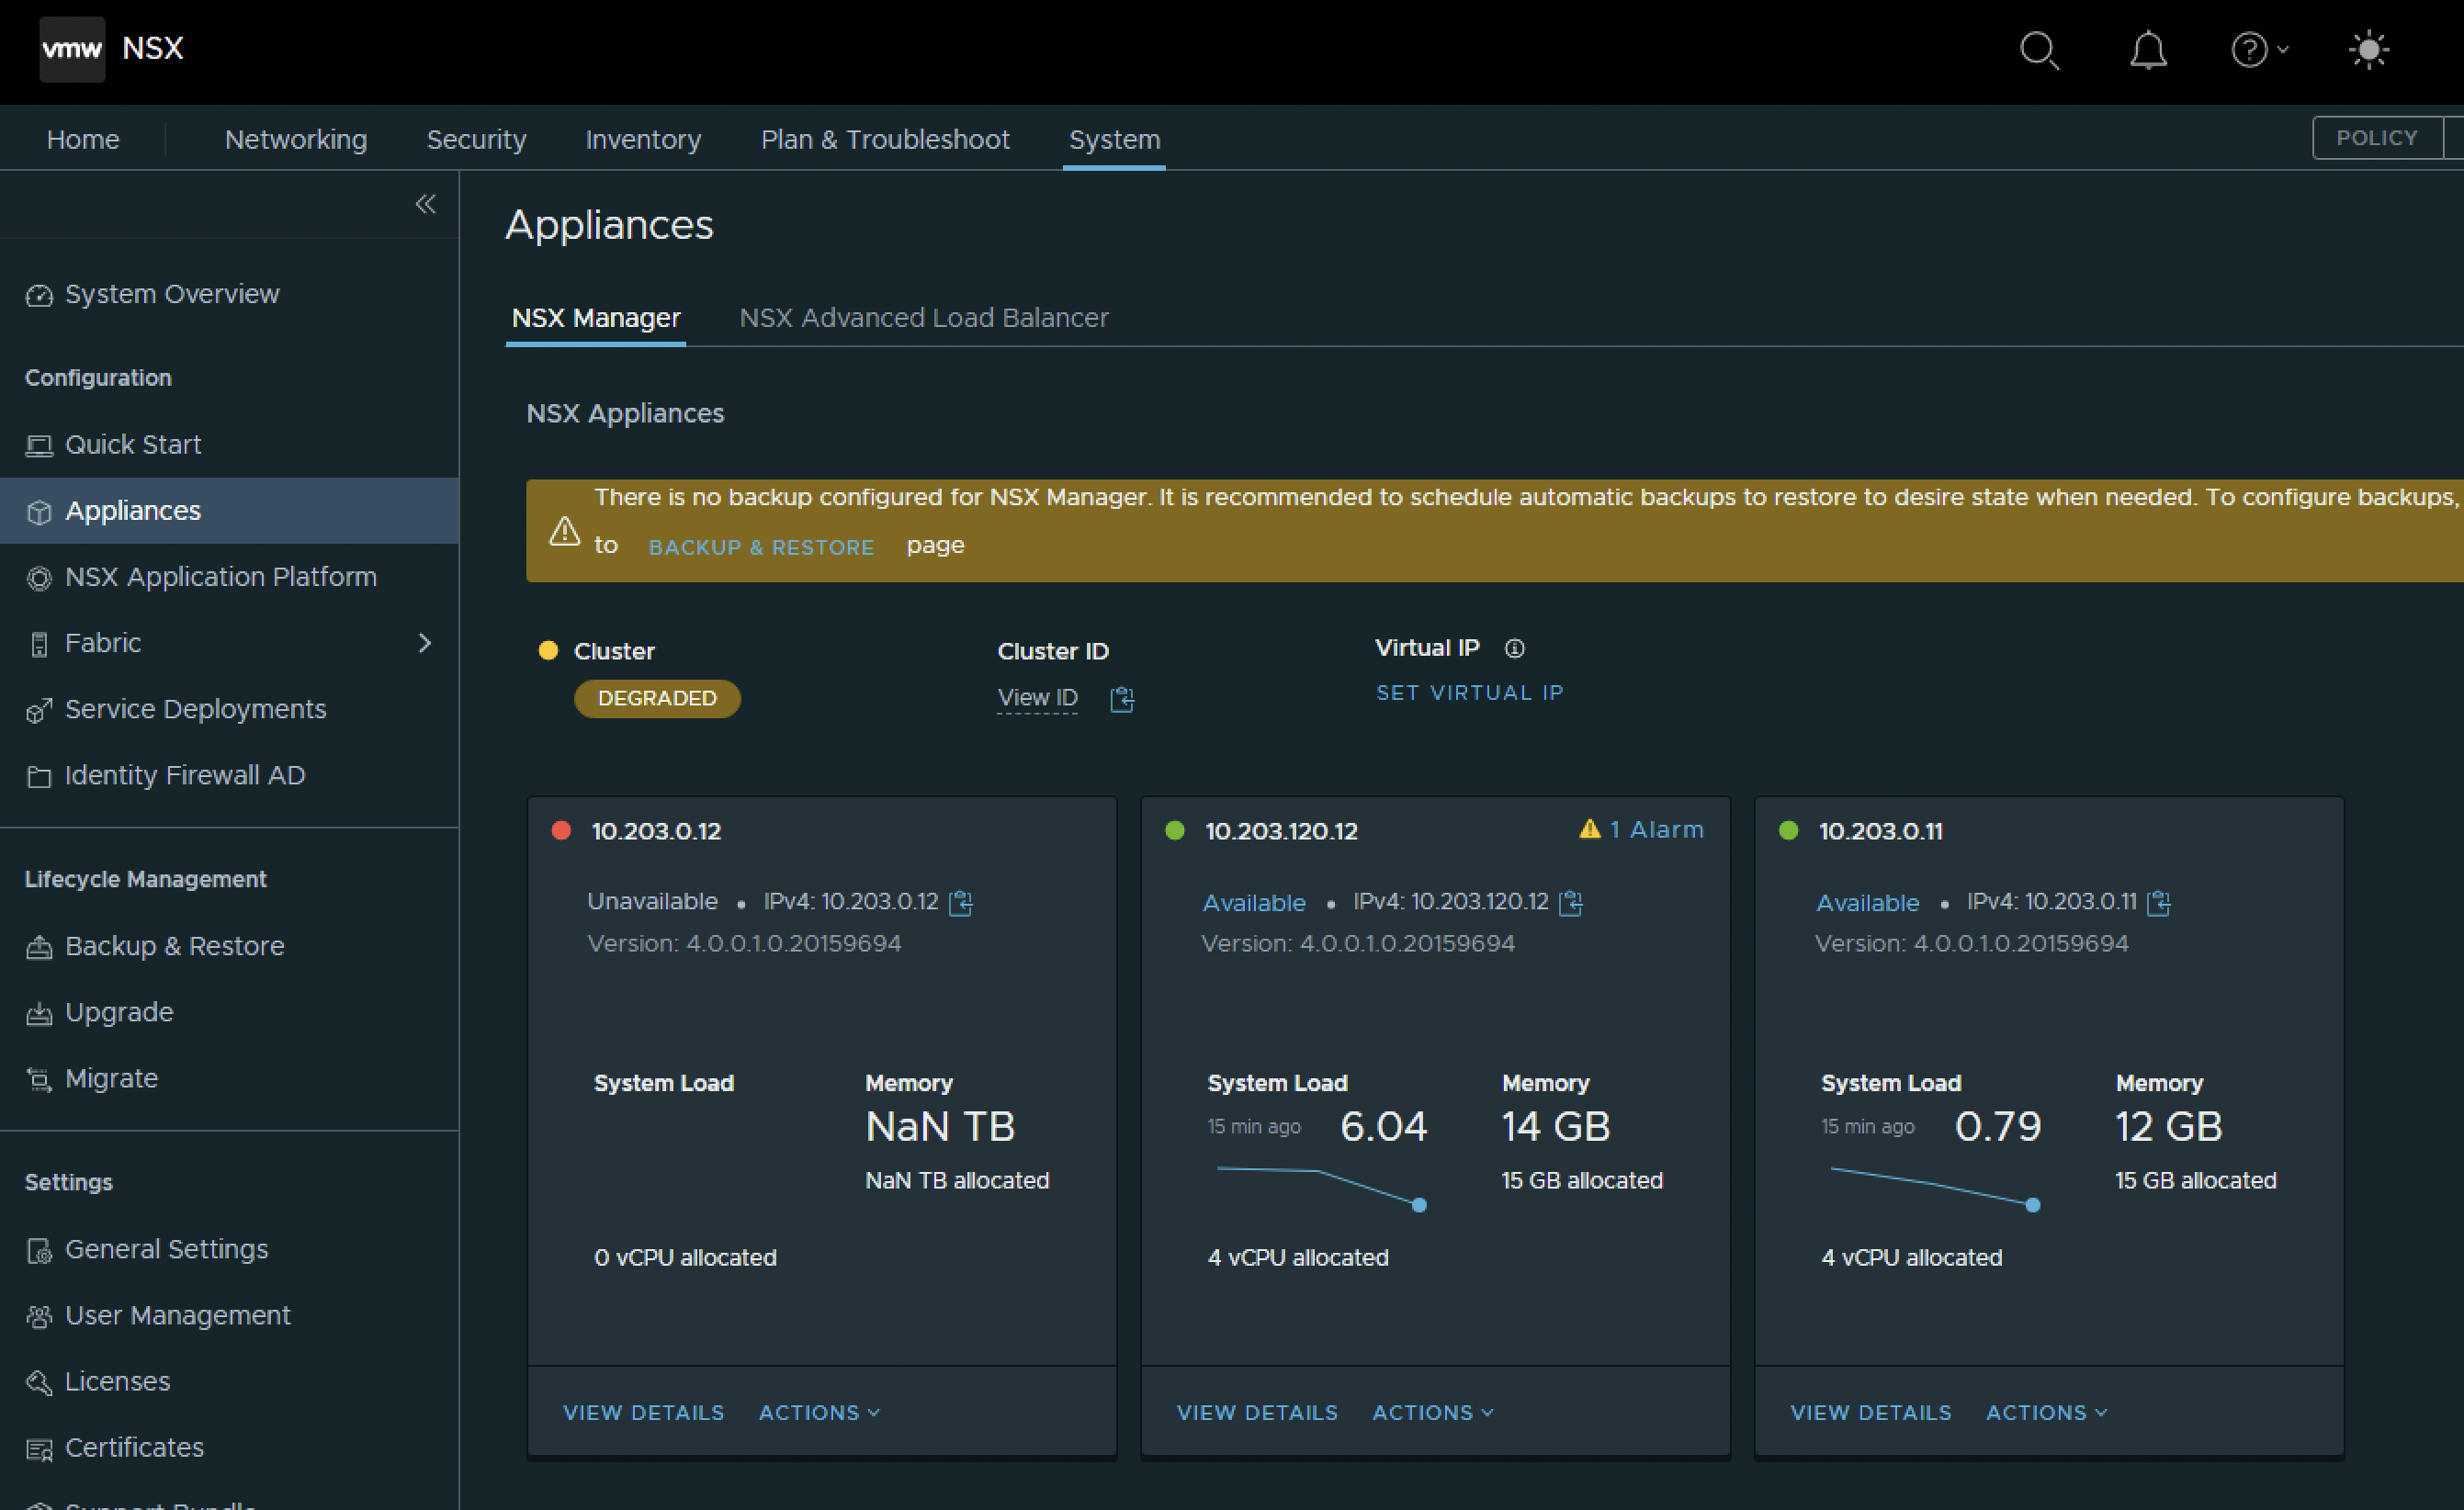
Joining and cluster stabilising will take around 15 minutes to finish.
When the join is completed I will now have an NSX Manager Cluster with three NSX Manager Nodes.
I can issue the following CLI commands to verify is the status is “UP” for all the services.
get cluster configPod-120-NSXT-LM-1> get cluster config
Wed Aug 24 2022 UTC 16:30:36.385
Cluster Id: 7262902c-d10a-4c40-a1d4-d24f737ccfaa
Cluster Configuration Version: 2
Number of nodes in the cluster: 3
Node UUID: fd0e4d56-4c33-0e61-8bff-9d8a1375b414
Node Status: JOINED
ENTITY UUID IP ADDRESS IPV6 ADDRESS
PORT FQDN
HTTPS 9834c769-e08c-48de-beb9-d2d2509e1d0d 10.203.120.12 -
443 Pod-120-NSXT-LM-1.SDDC.Lab
ASYNC_REPLICATOR f8da85a9-66dd-4566-ac32-bd9f99644b9c 10.203.120.12 -
- Pod-120-NSXT-LM-1.SDDC.Lab
CONTROLLER 2b97a266-fa0d-4c38-b857-e88552aa5c13 10.203.120.12 -
- Pod-120-NSXT-LM-1.SDDC.Lab
CLUSTER_BOOT_MANAGER fbca4c2f-28c3-4ce3-8452-9dfe04a91272 10.203.120.12 -
- Pod-120-NSXT-LM-1.SDDC.Lab
CM-INVENTORY a18a55d1-8889-4352-912d-c340eb00a03d 10.203.120.12 -
- Pod-120-NSXT-LM-1.SDDC.Lab
DATASTORE 7de9e729-c7ea-482c-8014-7a613fe13e8b 10.203.120.12 -
9000 Pod-120-NSXT-LM-1.SDDC.Lab
CORFU_NONCONFIG 26c912bd-0fb4-4067-961d-737e34521744 10.203.120.12 -
9040 Pod-120-NSXT-LM-1.SDDC.Lab
IDPS_REPORTING a1a10066-1508-4923-a197-fff5fc3b759b 10.203.120.12 -
- Pod-120-NSXT-LM-1.SDDC.Lab
MESSAGING-MANAGER e6be3d88-5ebf-435e-8609-700929a427b6 10.203.120.12 -
- Pod-120-NSXT-LM-1.SDDC.Lab
MONITORING f9dd4b01-2581-4d12-b4b2-4b09938657c3 10.203.120.12 -
- Pod-120-NSXT-LM-1.SDDC.Lab
MANAGER 4360cb53-c2b4-467a-8e24-e96b44a846ea 10.203.120.12 -
- Pod-120-NSXT-LM-1.SDDC.Lab
SITE_MANAGER f9373036-1629-452b-b9e9-6470f06243ce 10.203.120.12 -
- Pod-120-NSXT-LM-1.SDDC.Lab
UPGRADE_COORDINATOR c75bb26e-7151-46a9-a3e0-9235fccd05ac 10.203.120.12 -
- Pod-120-NSXT-LM-1.SDDC.Lab
Node UUID: 18cd2242-02f0-c2b9-68b8-0d70ff3d2aaf
Node Status: JOINED
ENTITY UUID IP ADDRESS IPV6 ADDRESS
PORT FQDN
HTTPS 6bd094ec-9407-4495-9cd0-b03c155ade9a 10.203.0.11 -
443 Pod-120-NSXT-LM-2
ASYNC_REPLICATOR b783c086-2da7-4289-a4c4-da8123b9d736 10.203.0.11 -
- Pod-120-NSXT-LM-2
CONTROLLER d0b3e07c-7d41-452c-9adf-2ae794797551 10.203.0.11 -
- Pod-120-NSXT-LM-2
CLUSTER_BOOT_MANAGER f2e77537-ad26-4595-b4ff-8ecccd03888b 10.203.0.11 -
- Pod-120-NSXT-LM-2
CM-INVENTORY 1ed1f723-dfdc-4ab5-8840-c55cfc3a59e0 10.203.0.11 -
- Pod-120-NSXT-LM-2
DATASTORE c20a9bba-425f-425e-a703-089e77717763 10.203.0.11 -
9000 Pod-120-NSXT-LM-2
CORFU_NONCONFIG 9e3be29c-8bb4-484c-aa6a-65fc45f21587 10.203.0.11 -
9040 Pod-120-NSXT-LM-2
IDPS_REPORTING f9cc923e-824f-4624-b838-26e0c56b2c6b 10.203.0.11 -
- Pod-120-NSXT-LM-2
MESSAGING-MANAGER 17c8b927-b9cc-4028-a3cf-56ba1774dfb7 10.203.0.11 -
- Pod-120-NSXT-LM-2
MONITORING b7772420-d816-4e93-b644-f264c4d00b30 10.203.0.11 -
- Pod-120-NSXT-LM-2
MANAGER ea97278a-08ba-48a0-a722-59647d84bdd8 10.203.0.11 -
- Pod-120-NSXT-LM-2
SITE_MANAGER 07d56dd4-d38f-4952-b60b-69bd8991a9b1 10.203.0.11 -
- Pod-120-NSXT-LM-2
UPGRADE_COORDINATOR fd59bb19-10f2-462e-90fe-b35353ef31ec 10.203.0.11 -
- Pod-120-NSXT-LM-2
Node UUID: eeda2242-6b5d-cf12-64bf-e825bf9128ab
Node Status: JOINED
ENTITY UUID IP ADDRESS IPV6 ADDRESS
PORT FQDN
HTTPS 24a5c202-305c-45ca-bb7a-c3a6a5fc8e7b 10.203.0.12 -
443 Pod-120-NSXT-LM-3
ASYNC_REPLICATOR 689b1f67-7858-4f29-8e28-dbfaf4840b14 10.203.0.12 -
- Pod-120-NSXT-LM-3
CONTROLLER 52f97c28-411a-4d59-8783-5b85247e1f94 10.203.0.12 -
- Pod-120-NSXT-LM-3
CLUSTER_BOOT_MANAGER 076b18e7-6f30-4918-baea-024c0c7c1edd 10.203.0.12 -
- Pod-120-NSXT-LM-3
CM-INVENTORY 7556c130-b0b3-4918-89ca-f242bdaf6514 10.203.0.12 -
- Pod-120-NSXT-LM-3
DATASTORE 4ea6a3d0-1db0-49ed-9214-db4f63b928e6 10.203.0.12 -
9000 Pod-120-NSXT-LM-3
CORFU_NONCONFIG fb9dfa79-4aee-4d3a-84c5-3daa300ff4ab 10.203.0.12 -
9040 Pod-120-NSXT-LM-3
IDPS_REPORTING 31342a00-c53d-482e-ae97-792eb9cae196 10.203.0.12 -
- Pod-120-NSXT-LM-3
MESSAGING-MANAGER 1b74454e-da8a-432a-a71f-02af8838849a 10.203.0.12 -
- Pod-120-NSXT-LM-3
MONITORING 83993414-3aa3-4fca-99ff-cedb368ad9bc 10.203.0.12 -
- Pod-120-NSXT-LM-3
MANAGER 66d3718f-405d-4e7d-8909-7daccbd2a856 10.203.0.12 -
- Pod-120-NSXT-LM-3
SITE_MANAGER ddbe38a3-908d-4795-adeb-0f526ff8802b 10.203.0.12 -
- Pod-120-NSXT-LM-3
UPGRADE_COORDINATOR 80cc3089-ed2c-49eb-8324-2a47771fd0f7 10.203.0.12 -
- Pod-120-NSXT-LM-3
Pod-120-NSXT-LM-1>get cluster statusPod-120-NSXT-LM-1> get cluster status
Wed Aug 24 2022 UTC 16:30:37.295
Cluster Id: e0681397-166e-4b49-9a3c-74fc1df3e9d1
Overall Status: STABLE
Group Type: DATASTORE
Group Status: STABLE
Members:
UUID FQDN IP STATUS
a7d94d56-cbfd-4ca9-8b9b-b2a9daa2d45a Pod-120-NSXT-LM-1.SDDC.Lab 10.203.120.12 UP
09d4df47-f293-4ea7-8173-92a320fed685 Pod-120-NSXT-LM-2 10.203.120.13 UP
f77633c9-69f2-41a2-b3f8-b14c96a7bec5 Pod-120-NSXT-LM-3 10.203.120.14 UP
Group Type: CLUSTER_BOOT_MANAGER
Group Status: STABLE
Members:
UUID FQDN IP STATUS
a7d94d56-cbfd-4ca9-8b9b-b2a9daa2d45a Pod-120-NSXT-LM-1.SDDC.Lab 10.203.120.12 UP
09d4df47-f293-4ea7-8173-92a320fed685 Pod-120-NSXT-LM-2 10.203.120.13 UP
f77633c9-69f2-41a2-b3f8-b14c96a7bec5 Pod-120-NSXT-LM-3 10.203.120.14 UP
Group Type: CONTROLLER
Group Status: STABLE
Members:
UUID FQDN IP STATUS
81e59552-30ba-4cff-9540-1eda464c0072 Pod-120-NSXT-LM-1.SDDC.Lab 10.203.120.12 UP
537c5d50-a89e-4f93-933f-d94c75e1b5cd Pod-120-NSXT-LM-2 10.203.120.13 UP
1826609d-288d-4b21-87da-1a9aeb3a07a4 Pod-120-NSXT-LM-3 10.203.120.14 UP
Group Type: MANAGER
Group Status: STABLE
Members:
UUID FQDN IP STATUS
a7d94d56-cbfd-4ca9-8b9b-b2a9daa2d45a Pod-120-NSXT-LM-1.SDDC.Lab 10.203.120.12 UP
09d4df47-f293-4ea7-8173-92a320fed685 Pod-120-NSXT-LM-2 10.203.120.13 UP
f77633c9-69f2-41a2-b3f8-b14c96a7bec5 Pod-120-NSXT-LM-3 10.203.120.14 UP
Group Type: HTTPS
Group Status: STABLE
Members:
UUID FQDN IP STATUS
a7d94d56-cbfd-4ca9-8b9b-b2a9daa2d45a Pod-120-NSXT-LM-1.SDDC.Lab 10.203.120.12 UP
09d4df47-f293-4ea7-8173-92a320fed685 Pod-120-NSXT-LM-2 10.203.120.13 UP
f77633c9-69f2-41a2-b3f8-b14c96a7bec5 Pod-120-NSXT-LM-3 10.203.120.14 UP
Group Type: IDPS_REPORTING
Group Status: STABLE
Members:
UUID FQDN IP STATUS
a7d94d56-cbfd-4ca9-8b9b-b2a9daa2d45a Pod-120-NSXT-LM-1.SDDC.Lab 10.203.120.12 UP
09d4df47-f293-4ea7-8173-92a320fed685 Pod-120-NSXT-LM-2 10.203.120.13 UP
f77633c9-69f2-41a2-b3f8-b14c96a7bec5 Pod-120-NSXT-LM-3 10.203.120.14 UP
Group Type: MONITORING
Group Status: STABLE
Members:
UUID FQDN IP STATUS
a7d94d56-cbfd-4ca9-8b9b-b2a9daa2d45a Pod-120-NSXT-LM-1.SDDC.Lab 10.203.120.12 UP
09d4df47-f293-4ea7-8173-92a320fed685 Pod-120-NSXT-LM-2 10.203.120.13 UP
f77633c9-69f2-41a2-b3f8-b14c96a7bec5 Pod-120-NSXT-LM-3 10.203.120.14 UP
Group Type: CM-INVENTORY
Group Status: STABLE
Members:
UUID FQDN IP STATUS
a7d94d56-cbfd-4ca9-8b9b-b2a9daa2d45a Pod-120-NSXT-LM-1.SDDC.Lab 10.203.120.12 UP
09d4df47-f293-4ea7-8173-92a320fed685 Pod-120-NSXT-LM-2 10.203.120.13 UP
f77633c9-69f2-41a2-b3f8-b14c96a7bec5 Pod-120-NSXT-LM-3 10.203.120.14 UP
Group Type: MESSAGING-MANAGER
Group Status: STABLE
Members:
UUID FQDN IP STATUS
a7d94d56-cbfd-4ca9-8b9b-b2a9daa2d45a Pod-120-NSXT-LM-1.SDDC.Lab 10.203.120.12 UP
09d4df47-f293-4ea7-8173-92a320fed685 Pod-120-NSXT-LM-2 10.203.120.13 UP
f77633c9-69f2-41a2-b3f8-b14c96a7bec5 Pod-120-NSXT-LM-3 10.203.120.14 UP
Group Type: SITE_MANAGER
Group Status: STABLE
Members:
UUID FQDN IP STATUS
a7d94d56-cbfd-4ca9-8b9b-b2a9daa2d45a Pod-120-NSXT-LM-1.SDDC.Lab 10.203.120.12 UP
09d4df47-f293-4ea7-8173-92a320fed685 Pod-120-NSXT-LM-2 10.203.120.13 UP
f77633c9-69f2-41a2-b3f8-b14c96a7bec5 Pod-120-NSXT-LM-3 10.203.120.14 UP
Group Type: CORFU_NONCONFIG
Group Status: STABLE
Members:
UUID FQDN IP STATUS
a7d94d56-cbfd-4ca9-8b9b-b2a9daa2d45a Pod-120-NSXT-LM-1.SDDC.Lab 10.203.120.12 UP
09d4df47-f293-4ea7-8173-92a320fed685 Pod-120-NSXT-LM-2 10.203.120.13 UP
f77633c9-69f2-41a2-b3f8-b14c96a7bec5 Pod-120-NSXT-LM-3 10.203.120.14 UP
Pod-120-NSXT-LM-1>get cluster configPod-120-NSXT-LM-2> get cluster config
Wed Aug 24 2022 UTC 16:30:59.819
Cluster Id: 7262902c-d10a-4c40-a1d4-d24f737ccfaa
Cluster Configuration Version: 2
Number of nodes in the cluster: 3
Node UUID: fd0e4d56-4c33-0e61-8bff-9d8a1375b414
Node Status: JOINED
ENTITY UUID IP ADDRESS IPV6 ADDRESS
PORT FQDN
HTTPS 9834c769-e08c-48de-beb9-d2d2509e1d0d 10.203.120.12 -
443 Pod-120-NSXT-LM-1.SDDC.Lab
ASYNC_REPLICATOR f8da85a9-66dd-4566-ac32-bd9f99644b9c 10.203.120.12 -
- Pod-120-NSXT-LM-1.SDDC.Lab
CONTROLLER 2b97a266-fa0d-4c38-b857-e88552aa5c13 10.203.120.12 -
- Pod-120-NSXT-LM-1.SDDC.Lab
CLUSTER_BOOT_MANAGER fbca4c2f-28c3-4ce3-8452-9dfe04a91272 10.203.120.12 -
- Pod-120-NSXT-LM-1.SDDC.Lab
CM-INVENTORY a18a55d1-8889-4352-912d-c340eb00a03d 10.203.120.12 -
- Pod-120-NSXT-LM-1.SDDC.Lab
DATASTORE 7de9e729-c7ea-482c-8014-7a613fe13e8b 10.203.120.12 -
9000 Pod-120-NSXT-LM-1.SDDC.Lab
CORFU_NONCONFIG 26c912bd-0fb4-4067-961d-737e34521744 10.203.120.12 -
9040 Pod-120-NSXT-LM-1.SDDC.Lab
IDPS_REPORTING a1a10066-1508-4923-a197-fff5fc3b759b 10.203.120.12 -
- Pod-120-NSXT-LM-1.SDDC.Lab
MESSAGING-MANAGER e6be3d88-5ebf-435e-8609-700929a427b6 10.203.120.12 -
- Pod-120-NSXT-LM-1.SDDC.Lab
MONITORING f9dd4b01-2581-4d12-b4b2-4b09938657c3 10.203.120.12 -
- Pod-120-NSXT-LM-1.SDDC.Lab
MANAGER 4360cb53-c2b4-467a-8e24-e96b44a846ea 10.203.120.12 -
- Pod-120-NSXT-LM-1.SDDC.Lab
SITE_MANAGER f9373036-1629-452b-b9e9-6470f06243ce 10.203.120.12 -
- Pod-120-NSXT-LM-1.SDDC.Lab
UPGRADE_COORDINATOR c75bb26e-7151-46a9-a3e0-9235fccd05ac 10.203.120.12 -
- Pod-120-NSXT-LM-1.SDDC.Lab
Node UUID: 18cd2242-02f0-c2b9-68b8-0d70ff3d2aaf
Node Status: JOINED
ENTITY UUID IP ADDRESS IPV6 ADDRESS
PORT FQDN
HTTPS 6bd094ec-9407-4495-9cd0-b03c155ade9a 10.203.0.11 -
443 Pod-120-NSXT-LM-2
ASYNC_REPLICATOR b783c086-2da7-4289-a4c4-da8123b9d736 10.203.0.11 -
- Pod-120-NSXT-LM-2
CONTROLLER d0b3e07c-7d41-452c-9adf-2ae794797551 10.203.0.11 -
- Pod-120-NSXT-LM-2
CLUSTER_BOOT_MANAGER f2e77537-ad26-4595-b4ff-8ecccd03888b 10.203.0.11 -
- Pod-120-NSXT-LM-2
CM-INVENTORY 1ed1f723-dfdc-4ab5-8840-c55cfc3a59e0 10.203.0.11 -
- Pod-120-NSXT-LM-2
DATASTORE c20a9bba-425f-425e-a703-089e77717763 10.203.0.11 -
9000 Pod-120-NSXT-LM-2
CORFU_NONCONFIG 9e3be29c-8bb4-484c-aa6a-65fc45f21587 10.203.0.11 -
9040 Pod-120-NSXT-LM-2
IDPS_REPORTING f9cc923e-824f-4624-b838-26e0c56b2c6b 10.203.0.11 -
- Pod-120-NSXT-LM-2
MESSAGING-MANAGER 17c8b927-b9cc-4028-a3cf-56ba1774dfb7 10.203.0.11 -
- Pod-120-NSXT-LM-2
MONITORING b7772420-d816-4e93-b644-f264c4d00b30 10.203.0.11 -
- Pod-120-NSXT-LM-2
MANAGER ea97278a-08ba-48a0-a722-59647d84bdd8 10.203.0.11 -
- Pod-120-NSXT-LM-2
SITE_MANAGER 07d56dd4-d38f-4952-b60b-69bd8991a9b1 10.203.0.11 -
- Pod-120-NSXT-LM-2
UPGRADE_COORDINATOR fd59bb19-10f2-462e-90fe-b35353ef31ec 10.203.0.11 -
- Pod-120-NSXT-LM-2
Node UUID: eeda2242-6b5d-cf12-64bf-e825bf9128ab
Node Status: JOINED
ENTITY UUID IP ADDRESS IPV6 ADDRESS
PORT FQDN
HTTPS 24a5c202-305c-45ca-bb7a-c3a6a5fc8e7b 10.203.0.12 -
443 Pod-120-NSXT-LM-3
ASYNC_REPLICATOR 689b1f67-7858-4f29-8e28-dbfaf4840b14 10.203.0.12 -
- Pod-120-NSXT-LM-3
CONTROLLER 52f97c28-411a-4d59-8783-5b85247e1f94 10.203.0.12 -
- Pod-120-NSXT-LM-3
CLUSTER_BOOT_MANAGER 076b18e7-6f30-4918-baea-024c0c7c1edd 10.203.0.12 -
- Pod-120-NSXT-LM-3
CM-INVENTORY 7556c130-b0b3-4918-89ca-f242bdaf6514 10.203.0.12 -
- Pod-120-NSXT-LM-3
DATASTORE 4ea6a3d0-1db0-49ed-9214-db4f63b928e6 10.203.0.12 -
9000 Pod-120-NSXT-LM-3
CORFU_NONCONFIG fb9dfa79-4aee-4d3a-84c5-3daa300ff4ab 10.203.0.12 -
9040 Pod-120-NSXT-LM-3
IDPS_REPORTING 31342a00-c53d-482e-ae97-792eb9cae196 10.203.0.12 -
- Pod-120-NSXT-LM-3
MESSAGING-MANAGER 1b74454e-da8a-432a-a71f-02af8838849a 10.203.0.12 -
- Pod-120-NSXT-LM-3
MONITORING 83993414-3aa3-4fca-99ff-cedb368ad9bc 10.203.0.12 -
- Pod-120-NSXT-LM-3
MANAGER 66d3718f-405d-4e7d-8909-7daccbd2a856 10.203.0.12 -
- Pod-120-NSXT-LM-3
SITE_MANAGER ddbe38a3-908d-4795-adeb-0f526ff8802b 10.203.0.12 -
- Pod-120-NSXT-LM-3
UPGRADE_COORDINATOR 80cc3089-ed2c-49eb-8324-2a47771fd0f7 10.203.0.12 -
- Pod-120-NSXT-LM-3
Pod-120-NSXT-LM-2>get cluster statusPod-120-NSXT-LM-2> get cluster status
Wed Aug 24 2022 UTC 14:03:42.263
Cluster Id: 7262902c-d10a-4c40-a1d4-d24f737ccfaa
Overall Status: STABLE
Group Type: DATASTORE
Group Status: STABLE
Members:
UUID FQDN IP STATUS
fd0e4d56-4c33-0e61-8bff-9d8a1375b414 Pod-120-NSXT-LM-1.SDDC.Lab 10.203.120.12 UP
18cd2242-02f0-c2b9-68b8-0d70ff3d2aaf Pod-120-NSXT-LM-2 10.203.0.11 UP
eeda2242-6b5d-cf12-64bf-e825bf9128ab Pod-120-NSXT-LM-3 10.203.0.12 UP
Group Type: CLUSTER_BOOT_MANAGER
Group Status: STABLE
Members:
UUID FQDN IP STATUS
fd0e4d56-4c33-0e61-8bff-9d8a1375b414 Pod-120-NSXT-LM-1.SDDC.Lab 10.203.120.12 UP
18cd2242-02f0-c2b9-68b8-0d70ff3d2aaf Pod-120-NSXT-LM-2 10.203.0.11 UP
eeda2242-6b5d-cf12-64bf-e825bf9128ab Pod-120-NSXT-LM-3 10.203.0.12 UP
Group Type: CONTROLLER
Group Status: STABLE
Members:
UUID FQDN IP STATUS
2b97a266-fa0d-4c38-b857-e88552aa5c13 Pod-120-NSXT-LM-1.SDDC.Lab 10.203.120.12 UP
d0b3e07c-7d41-452c-9adf-2ae794797551 Pod-120-NSXT-LM-2 10.203.0.11 UP
52f97c28-411a-4d59-8783-5b85247e1f94 Pod-120-NSXT-LM-3 10.203.0.12 UP
Group Type: MANAGER
Group Status: STABLE
Members:
UUID FQDN IP STATUS
fd0e4d56-4c33-0e61-8bff-9d8a1375b414 Pod-120-NSXT-LM-1.SDDC.Lab 10.203.120.12 UP
18cd2242-02f0-c2b9-68b8-0d70ff3d2aaf Pod-120-NSXT-LM-2 10.203.0.11 UP
eeda2242-6b5d-cf12-64bf-e825bf9128ab Pod-120-NSXT-LM-3 10.203.0.12 UP
Group Type: HTTPS
Group Status: STABLE
Members:
UUID FQDN IP STATUS
fd0e4d56-4c33-0e61-8bff-9d8a1375b414 Pod-120-NSXT-LM-1.SDDC.Lab 10.203.120.12 UP
18cd2242-02f0-c2b9-68b8-0d70ff3d2aaf Pod-120-NSXT-LM-2 10.203.0.11 UP
eeda2242-6b5d-cf12-64bf-e825bf9128ab Pod-120-NSXT-LM-3 10.203.0.12 UP
Group Type: SITE_MANAGER
Group Status: STABLE
Members:
UUID FQDN IP STATUS
fd0e4d56-4c33-0e61-8bff-9d8a1375b414 Pod-120-NSXT-LM-1.SDDC.Lab 10.203.120.12 UP
18cd2242-02f0-c2b9-68b8-0d70ff3d2aaf Pod-120-NSXT-LM-2 10.203.0.11 UP
eeda2242-6b5d-cf12-64bf-e825bf9128ab Pod-120-NSXT-LM-3 10.203.0.12 UP
Group Type: CM-INVENTORY
Group Status: STABLE
Members:
UUID FQDN IP STATUS
fd0e4d56-4c33-0e61-8bff-9d8a1375b414 Pod-120-NSXT-LM-1.SDDC.Lab 10.203.120.12 UP
18cd2242-02f0-c2b9-68b8-0d70ff3d2aaf Pod-120-NSXT-LM-2 10.203.0.11 UP
eeda2242-6b5d-cf12-64bf-e825bf9128ab Pod-120-NSXT-LM-3 10.203.0.12 UP
Group Type: IDPS_REPORTING
Group Status: STABLE
Members:
UUID FQDN IP STATUS
fd0e4d56-4c33-0e61-8bff-9d8a1375b414 Pod-120-NSXT-LM-1.SDDC.Lab 10.203.120.12 UP
18cd2242-02f0-c2b9-68b8-0d70ff3d2aaf Pod-120-NSXT-LM-2 10.203.0.11 UP
eeda2242-6b5d-cf12-64bf-e825bf9128ab Pod-120-NSXT-LM-3 10.203.0.12 UP
Group Type: MONITORING
Group Status: STABLE
Members:
UUID FQDN IP STATUS
fd0e4d56-4c33-0e61-8bff-9d8a1375b414 Pod-120-NSXT-LM-1.SDDC.Lab 10.203.120.12 UP
18cd2242-02f0-c2b9-68b8-0d70ff3d2aaf Pod-120-NSXT-LM-2 10.203.0.11 UP
eeda2242-6b5d-cf12-64bf-e825bf9128ab Pod-120-NSXT-LM-3 10.203.0.12 UP
Group Type: MESSAGING-MANAGER
Group Status: STABLE
Members:
UUID FQDN IP STATUS
fd0e4d56-4c33-0e61-8bff-9d8a1375b414 Pod-120-NSXT-LM-1.SDDC.Lab 10.203.120.12 UP
18cd2242-02f0-c2b9-68b8-0d70ff3d2aaf Pod-120-NSXT-LM-2 10.203.0.11 UP
eeda2242-6b5d-cf12-64bf-e825bf9128ab Pod-120-NSXT-LM-3 10.203.0.12 UP
Group Type: CORFU_NONCONFIG
Group Status: STABLE
Members:
UUID FQDN IP STATUS
fd0e4d56-4c33-0e61-8bff-9d8a1375b414 Pod-120-NSXT-LM-1.SDDC.Lab 10.203.120.12 UP
18cd2242-02f0-c2b9-68b8-0d70ff3d2aaf Pod-120-NSXT-LM-2 10.203.0.11 UP
eeda2242-6b5d-cf12-64bf-e825bf9128ab Pod-120-NSXT-LM-3 10.203.0.12 UP
Pod-120-NSXT-LM-2>get cluster configPod-120-NSXT-LM-3> get cluster config
Wed Aug 24 2022 UTC 16:31:02.827
Cluster Id: 7262902c-d10a-4c40-a1d4-d24f737ccfaa
Cluster Configuration Version: 2
Number of nodes in the cluster: 3
Node UUID: fd0e4d56-4c33-0e61-8bff-9d8a1375b414
Node Status: JOINED
ENTITY UUID IP ADDRESS IPV6 ADDRESS
PORT FQDN
HTTPS 9834c769-e08c-48de-beb9-d2d2509e1d0d 10.203.120.12 -
443 Pod-120-NSXT-LM-1.SDDC.Lab
ASYNC_REPLICATOR f8da85a9-66dd-4566-ac32-bd9f99644b9c 10.203.120.12 -
- Pod-120-NSXT-LM-1.SDDC.Lab
CONTROLLER 2b97a266-fa0d-4c38-b857-e88552aa5c13 10.203.120.12 -
- Pod-120-NSXT-LM-1.SDDC.Lab
CLUSTER_BOOT_MANAGER fbca4c2f-28c3-4ce3-8452-9dfe04a91272 10.203.120.12 -
- Pod-120-NSXT-LM-1.SDDC.Lab
CM-INVENTORY a18a55d1-8889-4352-912d-c340eb00a03d 10.203.120.12 -
- Pod-120-NSXT-LM-1.SDDC.Lab
DATASTORE 7de9e729-c7ea-482c-8014-7a613fe13e8b 10.203.120.12 -
9000 Pod-120-NSXT-LM-1.SDDC.Lab
CORFU_NONCONFIG 26c912bd-0fb4-4067-961d-737e34521744 10.203.120.12 -
9040 Pod-120-NSXT-LM-1.SDDC.Lab
IDPS_REPORTING a1a10066-1508-4923-a197-fff5fc3b759b 10.203.120.12 -
- Pod-120-NSXT-LM-1.SDDC.Lab
MESSAGING-MANAGER e6be3d88-5ebf-435e-8609-700929a427b6 10.203.120.12 -
- Pod-120-NSXT-LM-1.SDDC.Lab
MONITORING f9dd4b01-2581-4d12-b4b2-4b09938657c3 10.203.120.12 -
- Pod-120-NSXT-LM-1.SDDC.Lab
MANAGER 4360cb53-c2b4-467a-8e24-e96b44a846ea 10.203.120.12 -
- Pod-120-NSXT-LM-1.SDDC.Lab
SITE_MANAGER f9373036-1629-452b-b9e9-6470f06243ce 10.203.120.12 -
- Pod-120-NSXT-LM-1.SDDC.Lab
UPGRADE_COORDINATOR c75bb26e-7151-46a9-a3e0-9235fccd05ac 10.203.120.12 -
- Pod-120-NSXT-LM-1.SDDC.Lab
Node UUID: 18cd2242-02f0-c2b9-68b8-0d70ff3d2aaf
Node Status: JOINED
ENTITY UUID IP ADDRESS IPV6 ADDRESS
PORT FQDN
HTTPS 6bd094ec-9407-4495-9cd0-b03c155ade9a 10.203.0.11 -
443 Pod-120-NSXT-LM-2
ASYNC_REPLICATOR b783c086-2da7-4289-a4c4-da8123b9d736 10.203.0.11 -
- Pod-120-NSXT-LM-2
CONTROLLER d0b3e07c-7d41-452c-9adf-2ae794797551 10.203.0.11 -
- Pod-120-NSXT-LM-2
CLUSTER_BOOT_MANAGER f2e77537-ad26-4595-b4ff-8ecccd03888b 10.203.0.11 -
- Pod-120-NSXT-LM-2
CM-INVENTORY 1ed1f723-dfdc-4ab5-8840-c55cfc3a59e0 10.203.0.11 -
- Pod-120-NSXT-LM-2
DATASTORE c20a9bba-425f-425e-a703-089e77717763 10.203.0.11 -
9000 Pod-120-NSXT-LM-2
CORFU_NONCONFIG 9e3be29c-8bb4-484c-aa6a-65fc45f21587 10.203.0.11 -
9040 Pod-120-NSXT-LM-2
IDPS_REPORTING f9cc923e-824f-4624-b838-26e0c56b2c6b 10.203.0.11 -
- Pod-120-NSXT-LM-2
MESSAGING-MANAGER 17c8b927-b9cc-4028-a3cf-56ba1774dfb7 10.203.0.11 -
- Pod-120-NSXT-LM-2
MONITORING b7772420-d816-4e93-b644-f264c4d00b30 10.203.0.11 -
- Pod-120-NSXT-LM-2
MANAGER ea97278a-08ba-48a0-a722-59647d84bdd8 10.203.0.11 -
- Pod-120-NSXT-LM-2
SITE_MANAGER 07d56dd4-d38f-4952-b60b-69bd8991a9b1 10.203.0.11 -
- Pod-120-NSXT-LM-2
UPGRADE_COORDINATOR fd59bb19-10f2-462e-90fe-b35353ef31ec 10.203.0.11 -
- Pod-120-NSXT-LM-2
Node UUID: eeda2242-6b5d-cf12-64bf-e825bf9128ab
Node Status: JOINED
ENTITY UUID IP ADDRESS IPV6 ADDRESS
PORT FQDN
HTTPS 24a5c202-305c-45ca-bb7a-c3a6a5fc8e7b 10.203.0.12 -
443 Pod-120-NSXT-LM-3
ASYNC_REPLICATOR 689b1f67-7858-4f29-8e28-dbfaf4840b14 10.203.0.12 -
- Pod-120-NSXT-LM-3
CONTROLLER 52f97c28-411a-4d59-8783-5b85247e1f94 10.203.0.12 -
- Pod-120-NSXT-LM-3
CLUSTER_BOOT_MANAGER 076b18e7-6f30-4918-baea-024c0c7c1edd 10.203.0.12 -
- Pod-120-NSXT-LM-3
CM-INVENTORY 7556c130-b0b3-4918-89ca-f242bdaf6514 10.203.0.12 -
- Pod-120-NSXT-LM-3
DATASTORE 4ea6a3d0-1db0-49ed-9214-db4f63b928e6 10.203.0.12 -
9000 Pod-120-NSXT-LM-3
CORFU_NONCONFIG fb9dfa79-4aee-4d3a-84c5-3daa300ff4ab 10.203.0.12 -
9040 Pod-120-NSXT-LM-3
IDPS_REPORTING 31342a00-c53d-482e-ae97-792eb9cae196 10.203.0.12 -
- Pod-120-NSXT-LM-3
MESSAGING-MANAGER 1b74454e-da8a-432a-a71f-02af8838849a 10.203.0.12 -
- Pod-120-NSXT-LM-3
MONITORING 83993414-3aa3-4fca-99ff-cedb368ad9bc 10.203.0.12 -
- Pod-120-NSXT-LM-3
MANAGER 66d3718f-405d-4e7d-8909-7daccbd2a856 10.203.0.12 -
- Pod-120-NSXT-LM-3
SITE_MANAGER ddbe38a3-908d-4795-adeb-0f526ff8802b 10.203.0.12 -
- Pod-120-NSXT-LM-3
UPGRADE_COORDINATOR 80cc3089-ed2c-49eb-8324-2a47771fd0f7 10.203.0.12 -
- Pod-120-NSXT-LM-3
Pod-120-NSXT-LM-3>get cluster statusPod-120-NSXT-LM-3> get cluster status
Wed Aug 24 2022 UTC 14:03:45.388
Cluster Id: 7262902c-d10a-4c40-a1d4-d24f737ccfaa
Overall Status: STABLE
Group Type: DATASTORE
Group Status: STABLE
Members:
UUID FQDN IP STATUS
fd0e4d56-4c33-0e61-8bff-9d8a1375b414 Pod-120-NSXT-LM-1.SDDC.Lab 10.203.120.12 UP
18cd2242-02f0-c2b9-68b8-0d70ff3d2aaf Pod-120-NSXT-LM-2 10.203.0.11 UP
eeda2242-6b5d-cf12-64bf-e825bf9128ab Pod-120-NSXT-LM-3 10.203.0.12 UP
Group Type: CLUSTER_BOOT_MANAGER
Group Status: STABLE
Members:
UUID FQDN IP STATUS
fd0e4d56-4c33-0e61-8bff-9d8a1375b414 Pod-120-NSXT-LM-1.SDDC.Lab 10.203.120.12 UP
18cd2242-02f0-c2b9-68b8-0d70ff3d2aaf Pod-120-NSXT-LM-2 10.203.0.11 UP
eeda2242-6b5d-cf12-64bf-e825bf9128ab Pod-120-NSXT-LM-3 10.203.0.12 UP
Group Type: CONTROLLER
Group Status: STABLE
Members:
UUID FQDN IP STATUS
2b97a266-fa0d-4c38-b857-e88552aa5c13 Pod-120-NSXT-LM-1.SDDC.Lab 10.203.120.12 UP
d0b3e07c-7d41-452c-9adf-2ae794797551 Pod-120-NSXT-LM-2 10.203.0.11 UP
52f97c28-411a-4d59-8783-5b85247e1f94 Pod-120-NSXT-LM-3 10.203.0.12 UP
Group Type: MANAGER
Group Status: STABLE
Members:
UUID FQDN IP STATUS
fd0e4d56-4c33-0e61-8bff-9d8a1375b414 Pod-120-NSXT-LM-1.SDDC.Lab 10.203.120.12 UP
18cd2242-02f0-c2b9-68b8-0d70ff3d2aaf Pod-120-NSXT-LM-2 10.203.0.11 UP
eeda2242-6b5d-cf12-64bf-e825bf9128ab Pod-120-NSXT-LM-3 10.203.0.12 UP
Group Type: HTTPS
Group Status: STABLE
Members:
UUID FQDN IP STATUS
fd0e4d56-4c33-0e61-8bff-9d8a1375b414 Pod-120-NSXT-LM-1.SDDC.Lab 10.203.120.12 UP
18cd2242-02f0-c2b9-68b8-0d70ff3d2aaf Pod-120-NSXT-LM-2 10.203.0.11 UP
eeda2242-6b5d-cf12-64bf-e825bf9128ab Pod-120-NSXT-LM-3 10.203.0.12 UP
Group Type: MONITORING
Group Status: STABLE
Members:
UUID FQDN IP STATUS
fd0e4d56-4c33-0e61-8bff-9d8a1375b414 Pod-120-NSXT-LM-1.SDDC.Lab 10.203.120.12 UP
18cd2242-02f0-c2b9-68b8-0d70ff3d2aaf Pod-120-NSXT-LM-2 10.203.0.11 UP
eeda2242-6b5d-cf12-64bf-e825bf9128ab Pod-120-NSXT-LM-3 10.203.0.12 UP
Group Type: IDPS_REPORTING
Group Status: STABLE
Members:
UUID FQDN IP STATUS
fd0e4d56-4c33-0e61-8bff-9d8a1375b414 Pod-120-NSXT-LM-1.SDDC.Lab 10.203.120.12 UP
18cd2242-02f0-c2b9-68b8-0d70ff3d2aaf Pod-120-NSXT-LM-2 10.203.0.11 UP
eeda2242-6b5d-cf12-64bf-e825bf9128ab Pod-120-NSXT-LM-3 10.203.0.12 UP
Group Type: MESSAGING-MANAGER
Group Status: STABLE
Members:
UUID FQDN IP STATUS
fd0e4d56-4c33-0e61-8bff-9d8a1375b414 Pod-120-NSXT-LM-1.SDDC.Lab 10.203.120.12 UP
18cd2242-02f0-c2b9-68b8-0d70ff3d2aaf Pod-120-NSXT-LM-2 10.203.0.11 UP
eeda2242-6b5d-cf12-64bf-e825bf9128ab Pod-120-NSXT-LM-3 10.203.0.12 UP
Group Type: CM-INVENTORY
Group Status: STABLE
Members:
UUID FQDN IP STATUS
fd0e4d56-4c33-0e61-8bff-9d8a1375b414 Pod-120-NSXT-LM-1.SDDC.Lab 10.203.120.12 UP
18cd2242-02f0-c2b9-68b8-0d70ff3d2aaf Pod-120-NSXT-LM-2 10.203.0.11 UP
eeda2242-6b5d-cf12-64bf-e825bf9128ab Pod-120-NSXT-LM-3 10.203.0.12 UP
Group Type: SITE_MANAGER
Group Status: STABLE
Members:
UUID FQDN IP STATUS
fd0e4d56-4c33-0e61-8bff-9d8a1375b414 Pod-120-NSXT-LM-1.SDDC.Lab 10.203.120.12 UP
18cd2242-02f0-c2b9-68b8-0d70ff3d2aaf Pod-120-NSXT-LM-2 10.203.0.11 UP
eeda2242-6b5d-cf12-64bf-e825bf9128ab Pod-120-NSXT-LM-3 10.203.0.12 UP
Group Type: CORFU_NONCONFIG
Group Status: STABLE
Members:
UUID FQDN IP STATUS
fd0e4d56-4c33-0e61-8bff-9d8a1375b414 Pod-120-NSXT-LM-1.SDDC.Lab 10.203.120.12 UP
18cd2242-02f0-c2b9-68b8-0d70ff3d2aaf Pod-120-NSXT-LM-2 10.203.0.11 UP
eeda2242-6b5d-cf12-64bf-e825bf9128ab Pod-120-NSXT-LM-3 10.203.0.12 UP
Pod-120-NSXT-LM-3>
Deploy the second and third NSX Manager to form an NSX Manager Cluster - Using the NSX Manager GUI
When I do not want to deploy the NSX Manager Nodes manually I can deploy the NSX Manager Nodes from the first NSX Manager Node using the GUI (Compute Manager configuration is required for this).
When I look at the NSX Home screen I will see the warning “3 node cluster recommended”.
When I click on “Deploy Nodes” it will take me to the Appliances screen.
I can also manually browse to the Appliances screen by browsing to System → Configuration → Appliances.
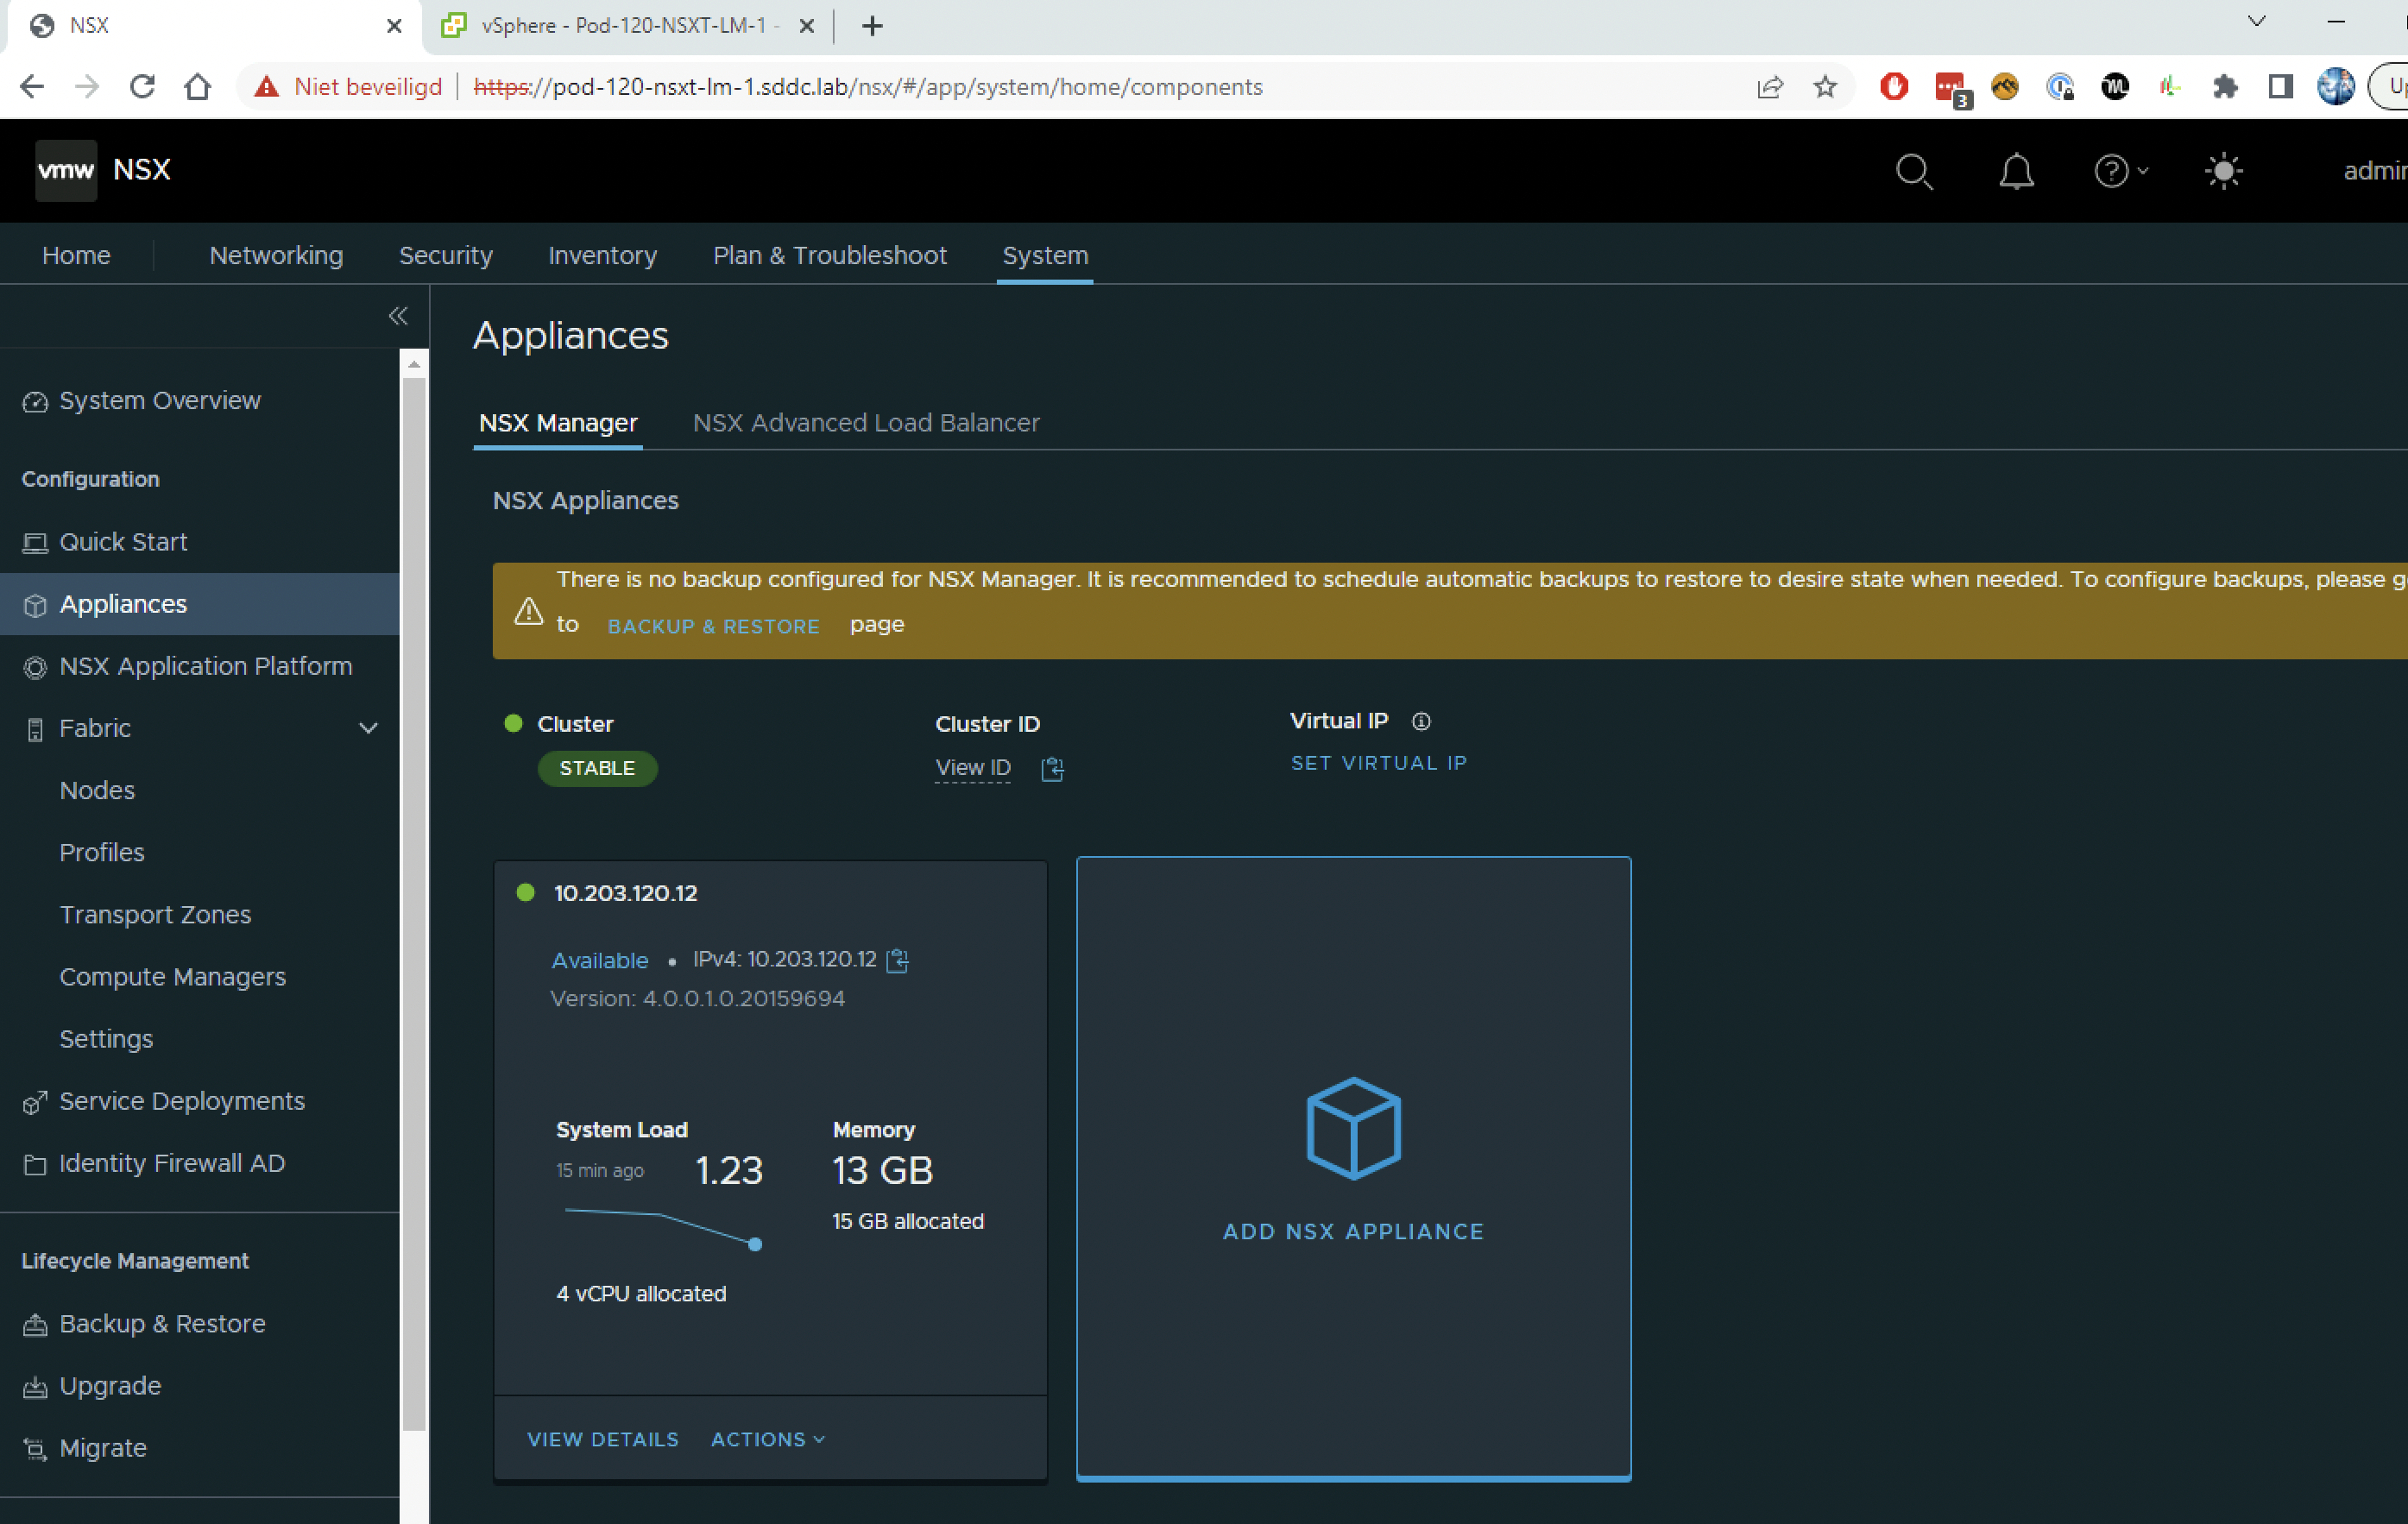
Notice that only one Node is listed.
Again for demonstration purposes I will now deploy these new NSX Manager Nodes in the same IP range (network) then the first one. I will need this later when I want to configure a Virtual IP address on the NSX Manager Cluster.
The table below will contain all the configuration parameters that I will need to deploy the second and third NSX Manager Node using the GUI.
| Parameter Name | Input Second Node | Input Third Node |
|---|---|---|
| vSphere Cluster | N/A | N/A |
| VM Name | Pod-120-NSXT-LM-2 | Pod-120-NSXT-LM-3 |
| Storage | ESX-03-DS-01 | ESX-03-DS-01 |
| Network (Port Group) | Pod-120-Mgmt | Pod-120-Mgmt |
| System Root User Password | VMware1!VMware1! | VMware1!VMware1! |
| CLI "admin" User Password | VMware1!VMware1! | VMware1!VMware1! |
| CLI "audit" User Password | VMware1!VMware1! | VMware1!VMware1! |
| Hostname | Pod-120-NSXT-LM-2 | Pod-120-NSXT-LM-3 |
| Rolename | NSX Manager | NSX Manager |
| Management Network IPv4 Address | 10.203.120.13 | 10.203.120.14 |
| Management Network Netmask | 255.255.255.0 | 255.255.255.0 |
| Default IPv4 Gateway | 10.203.120.1 | 10.203.120.1 |
| DNS Server list | 10.203.0.5 | 10.203.0.5 |
| Domain Search List | sddc.lab | sddc.lab |
| NTP Server List | 10.203.0.5 | 10.203.0.5 |
| Enable SSH | yes | yes |
| Allow root SSH logins | yes | yes |
Add the second NSX Manager Node
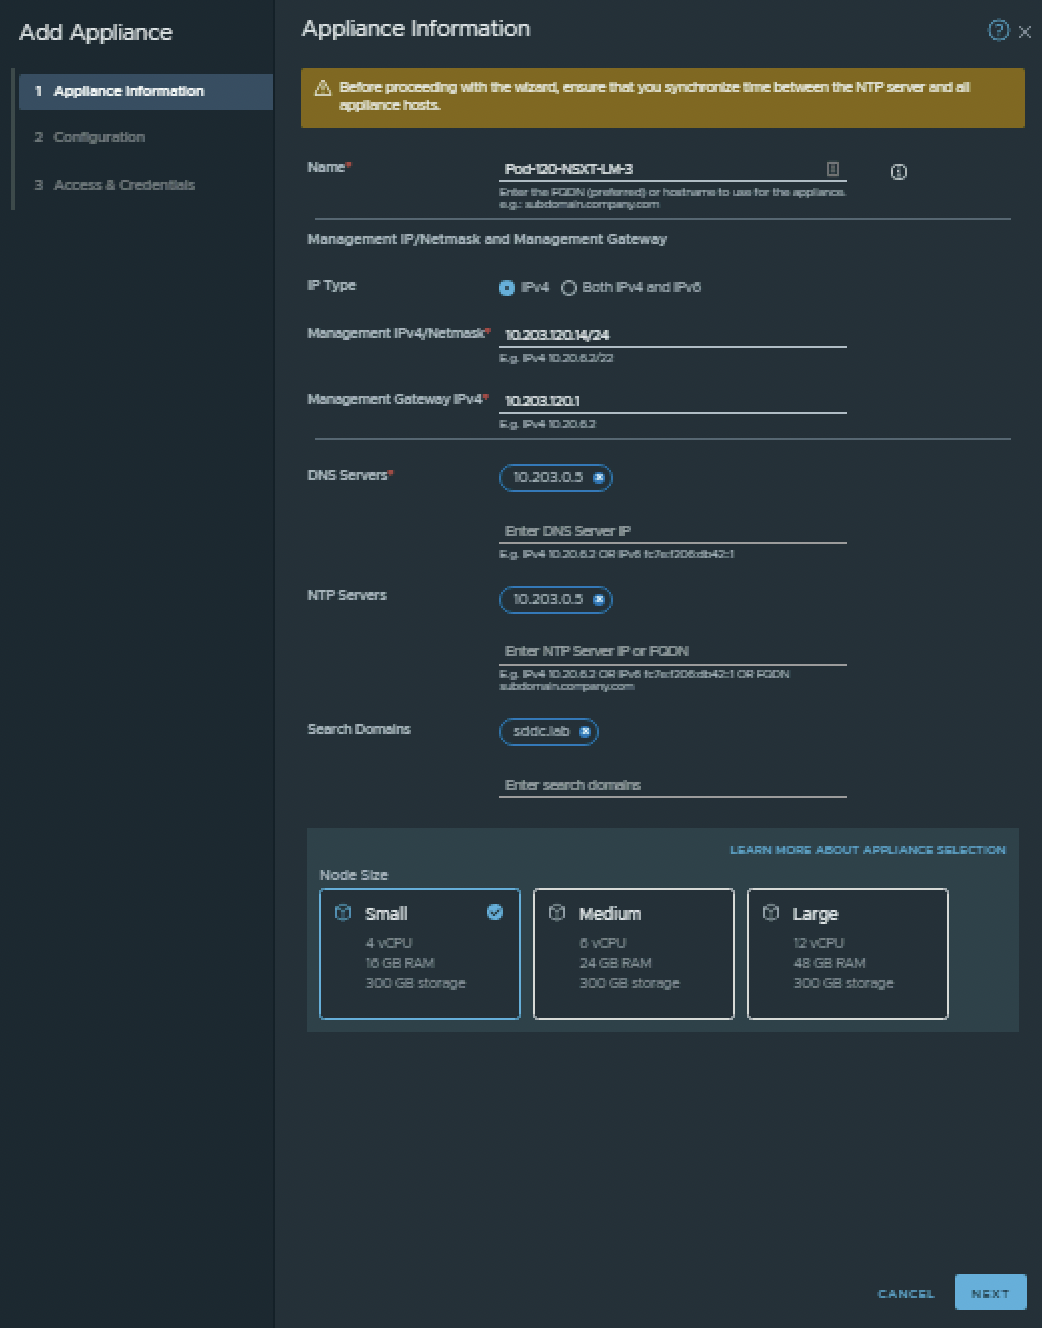
After I clicked “Add NSX Appliance” I can start with the deployment of the second NSX Manager Node. Use the Configuration Parameters from the table above to specify the Appliance Information.

Use the Configuration Parameters from the table above to specify the Configuration.
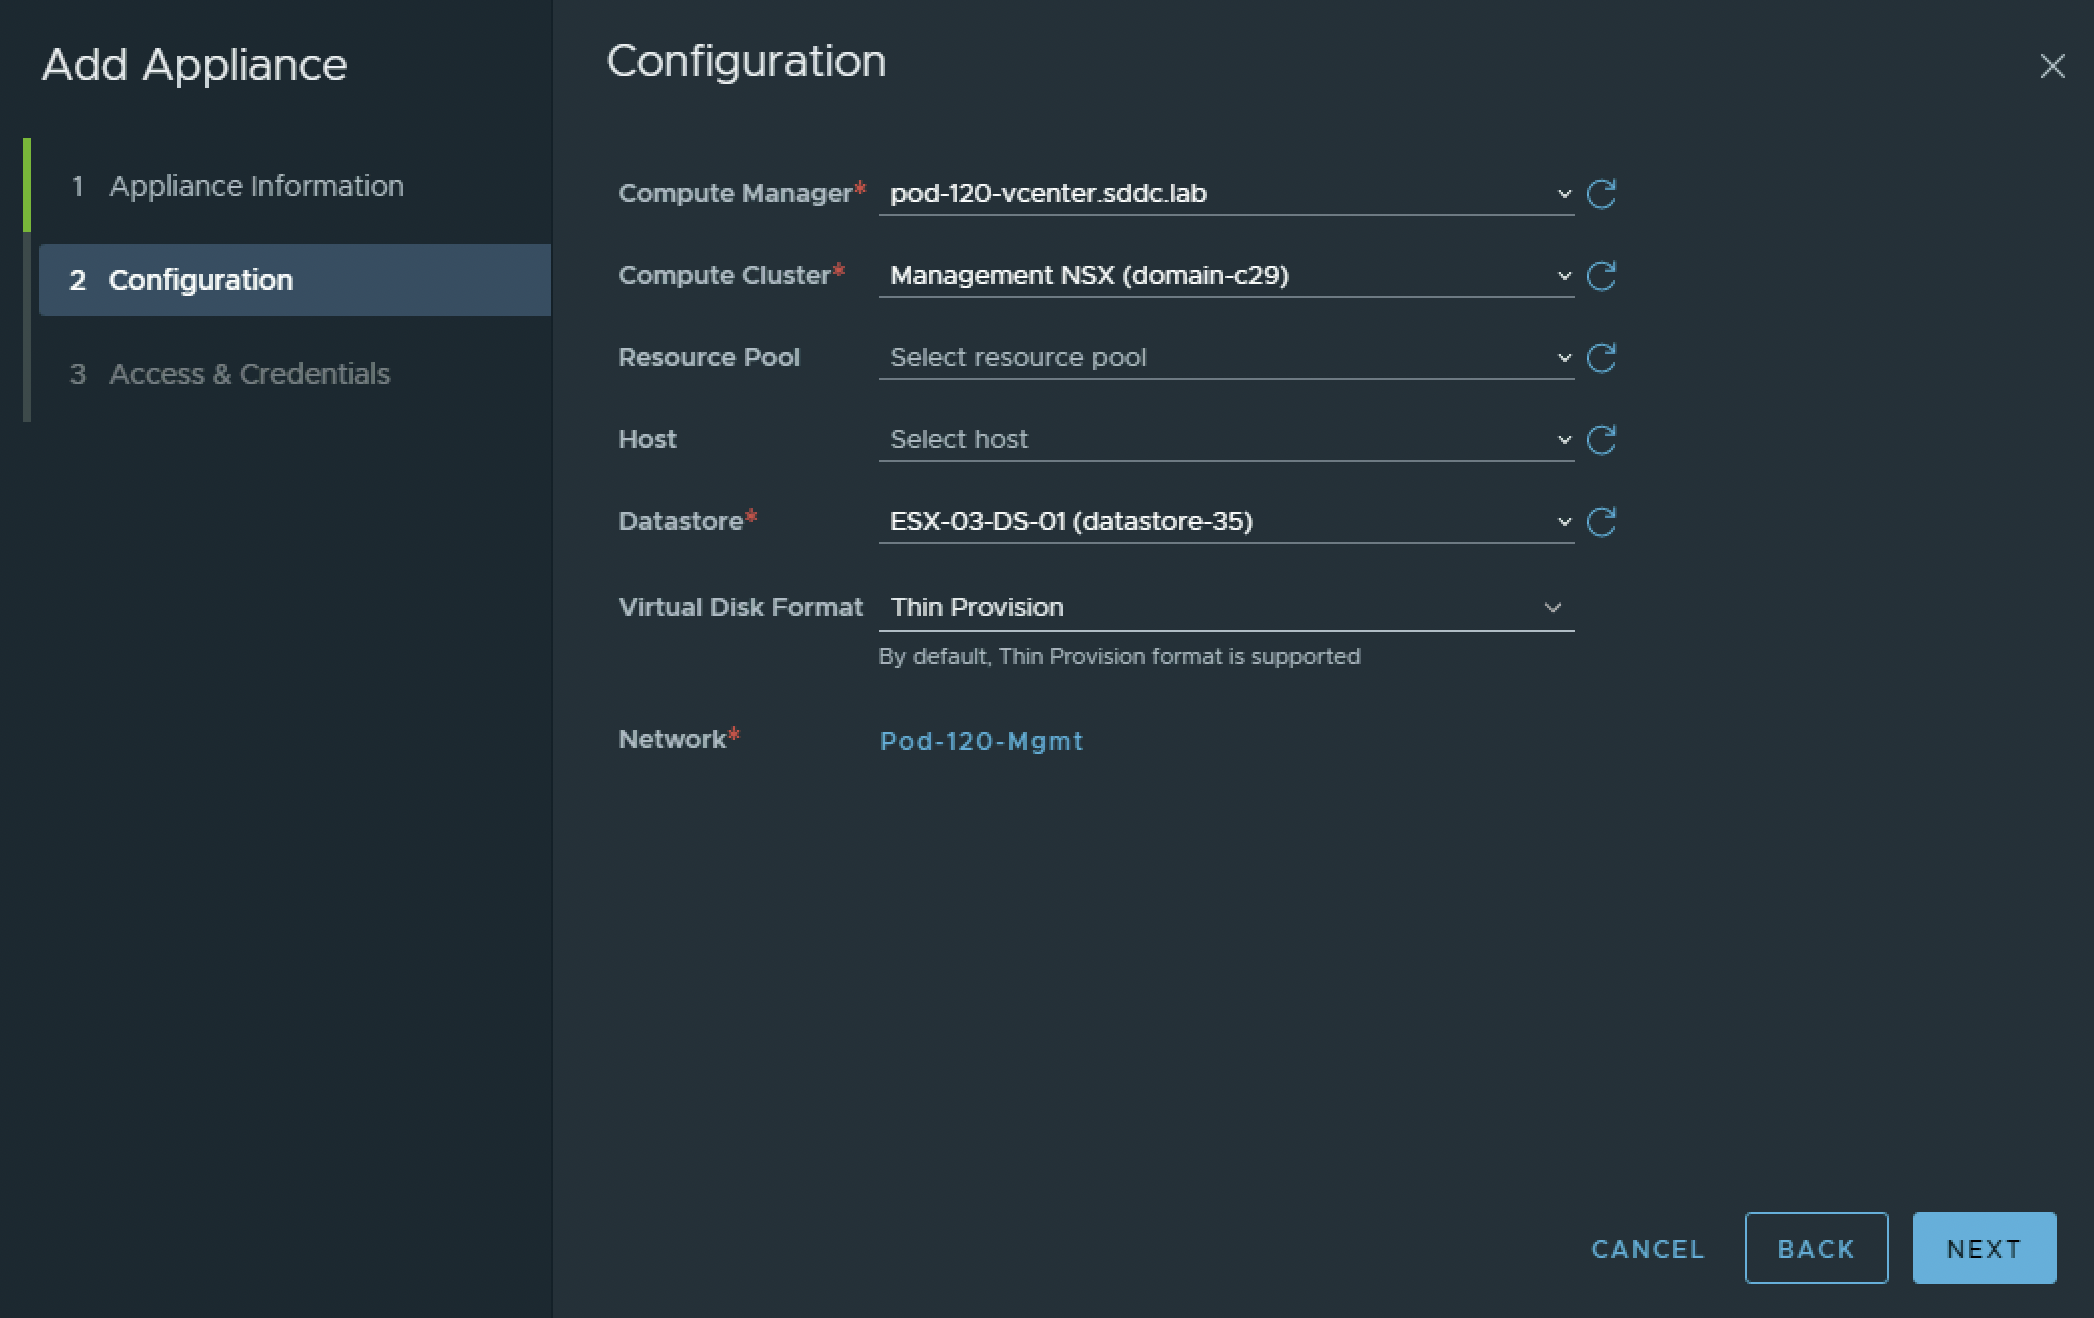
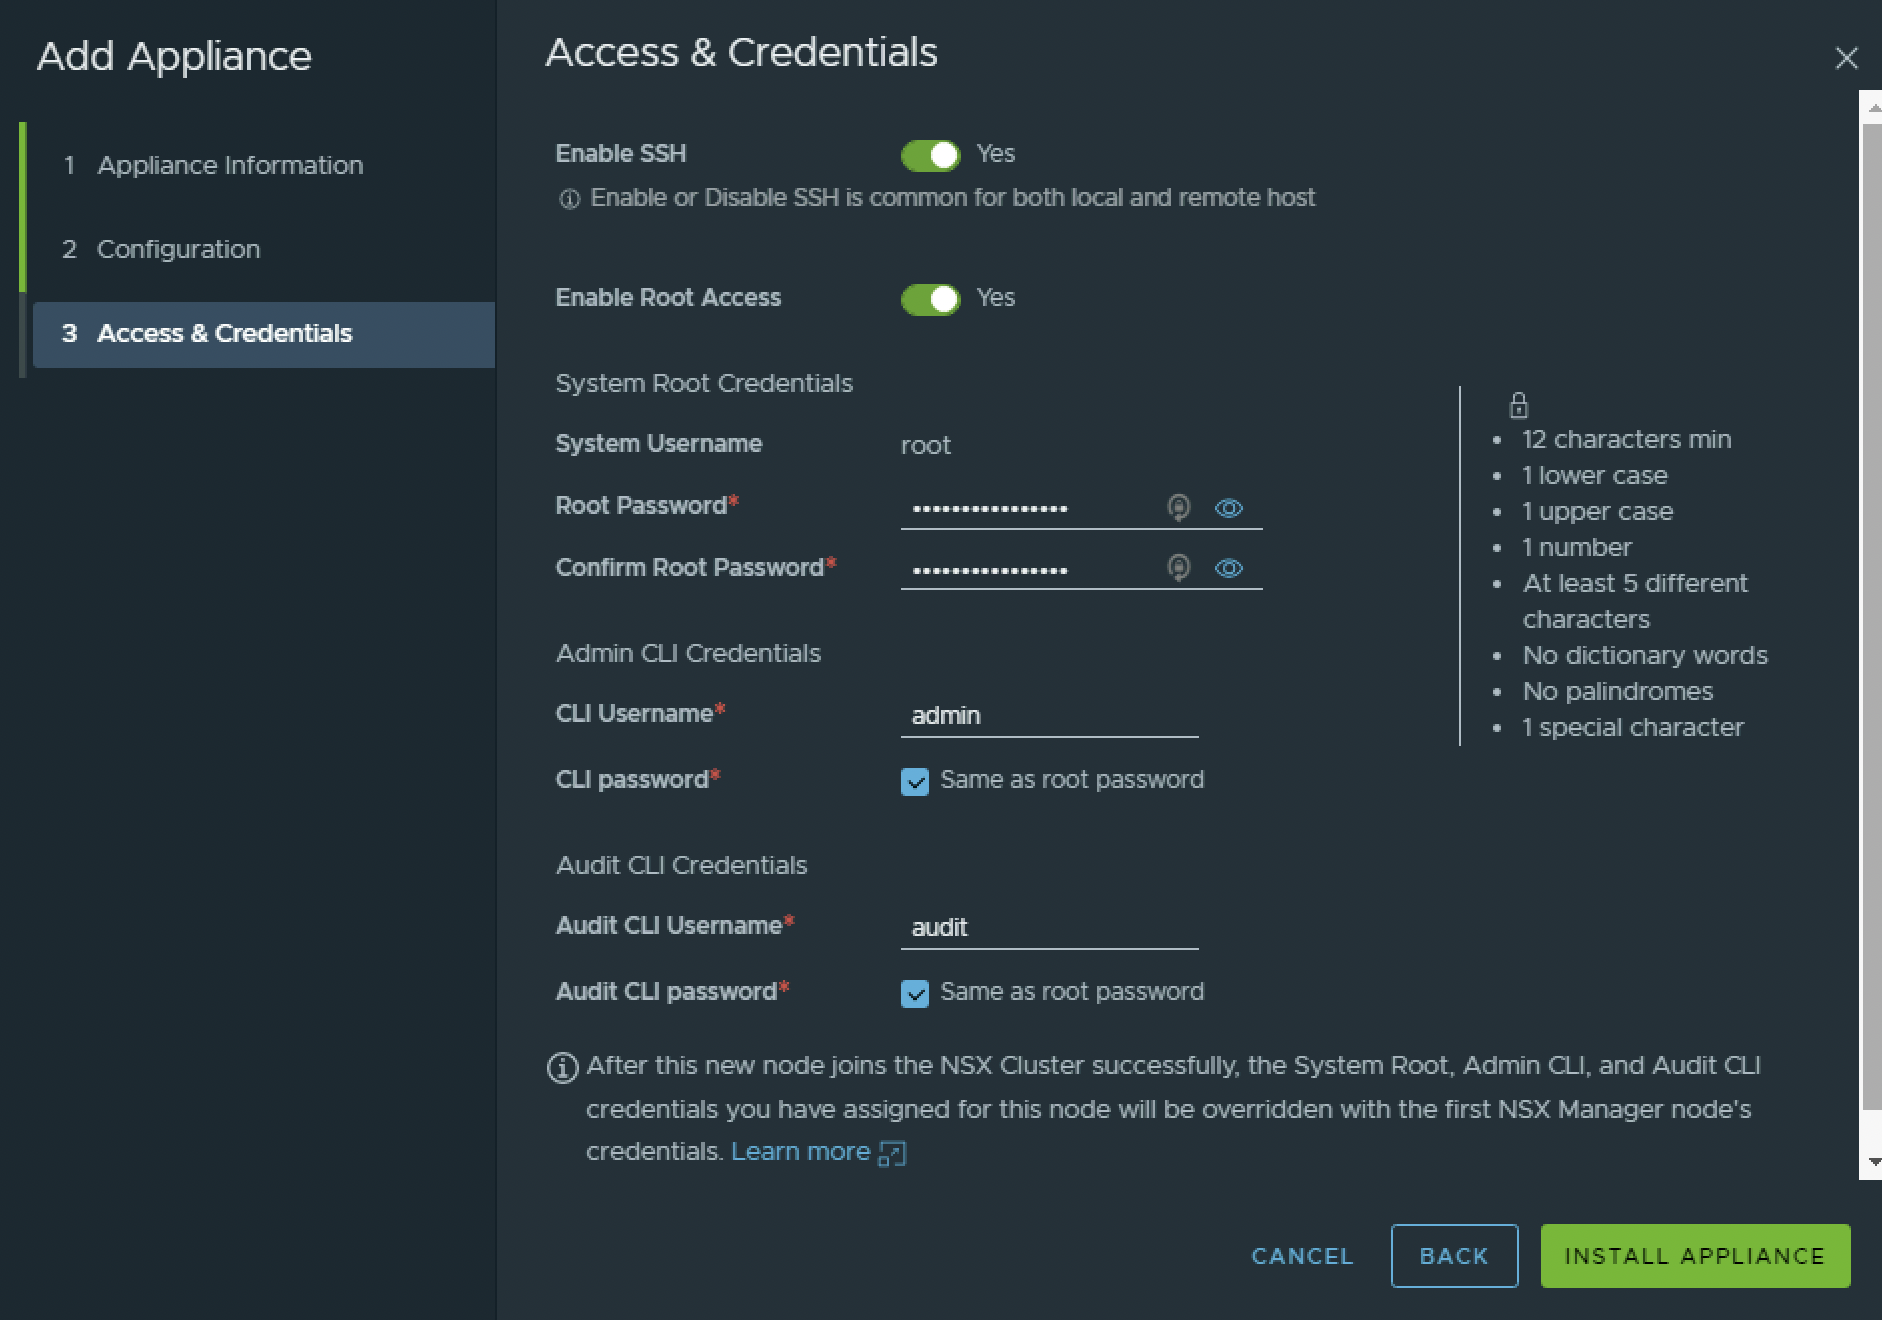
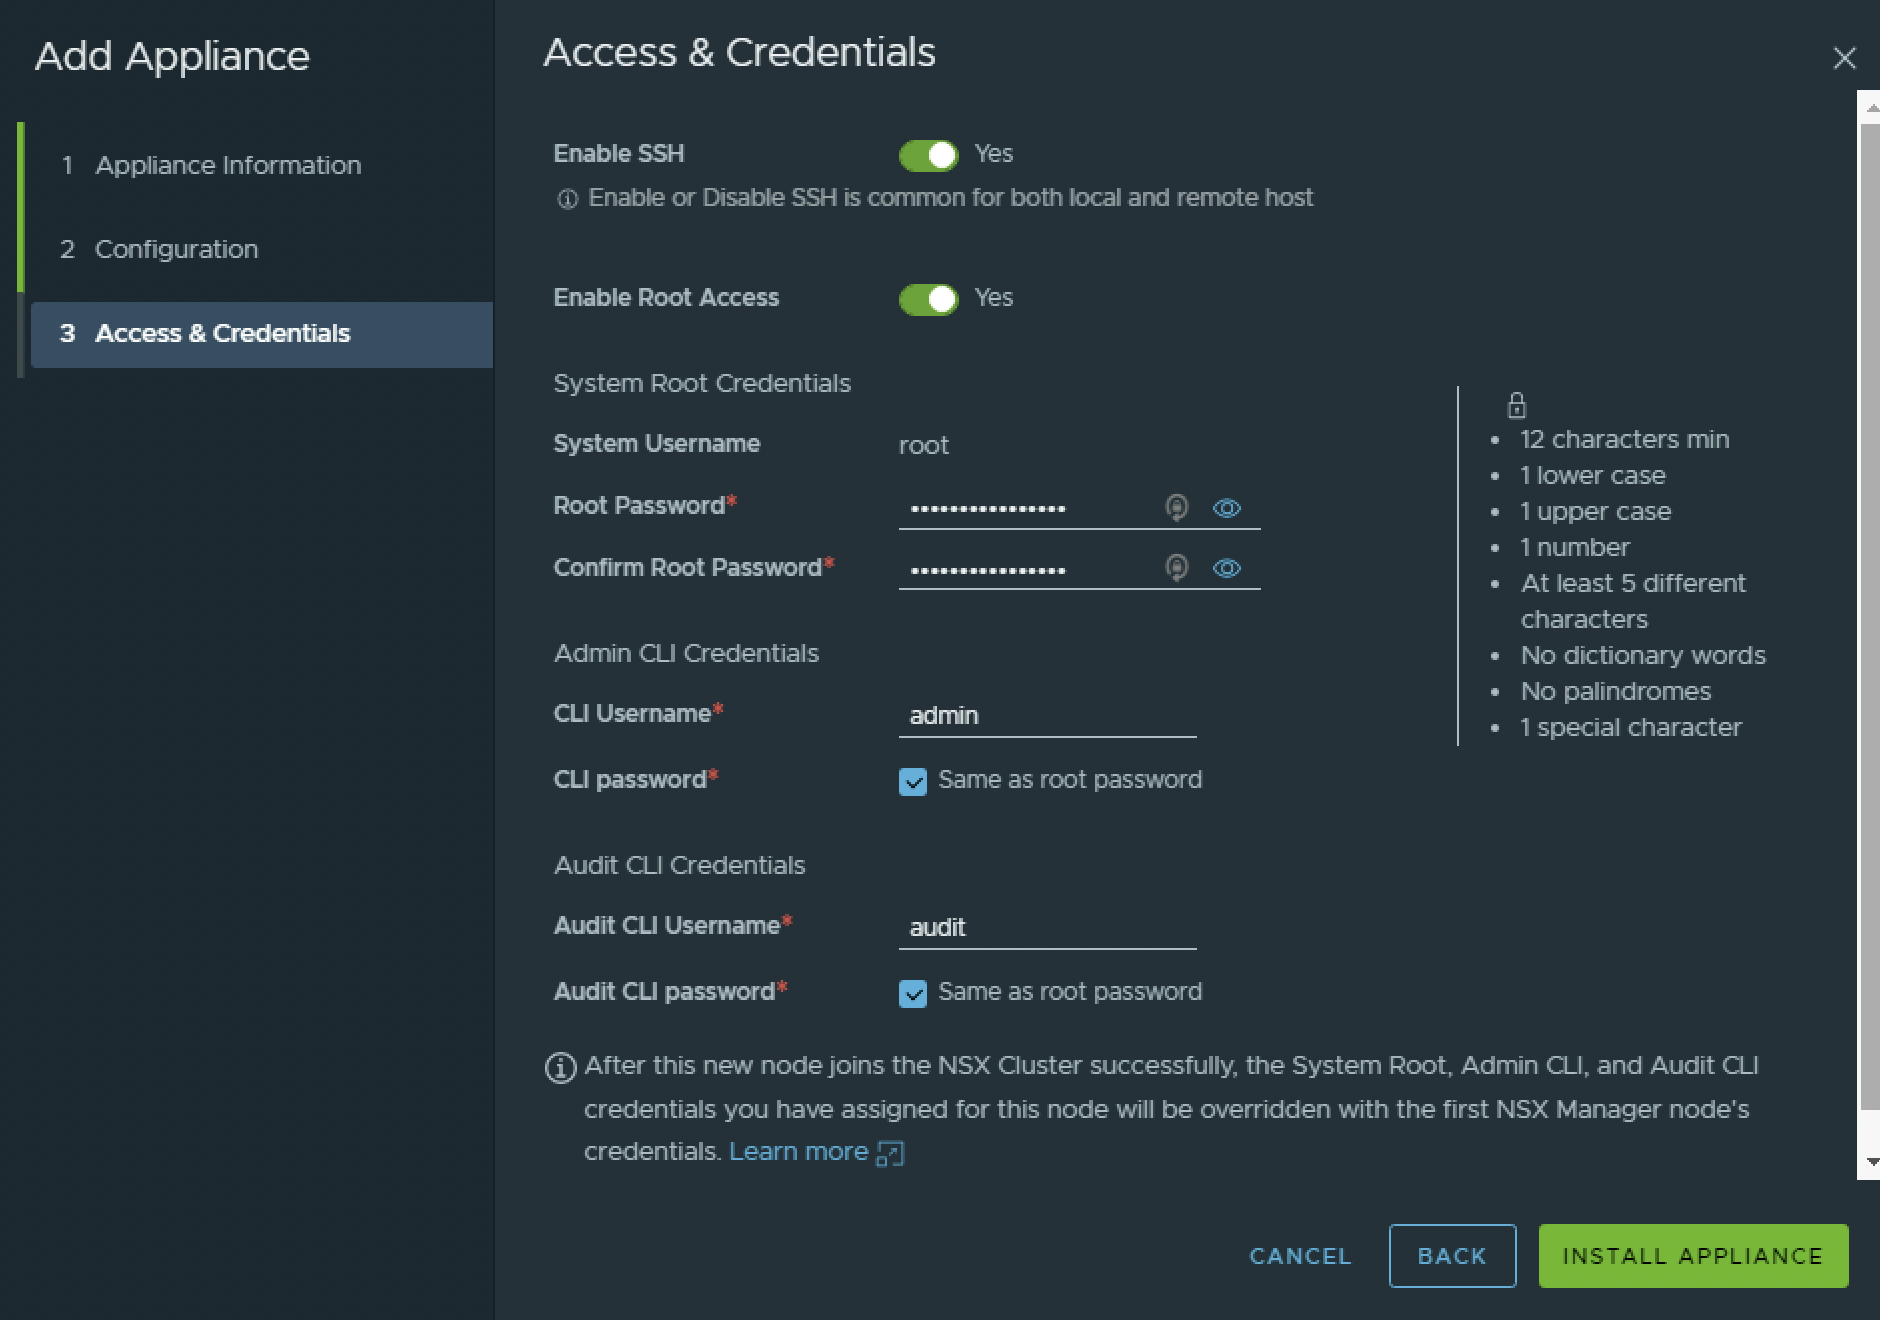
Use the Configuration Parameters from the table above to specify the Access & Credentials.
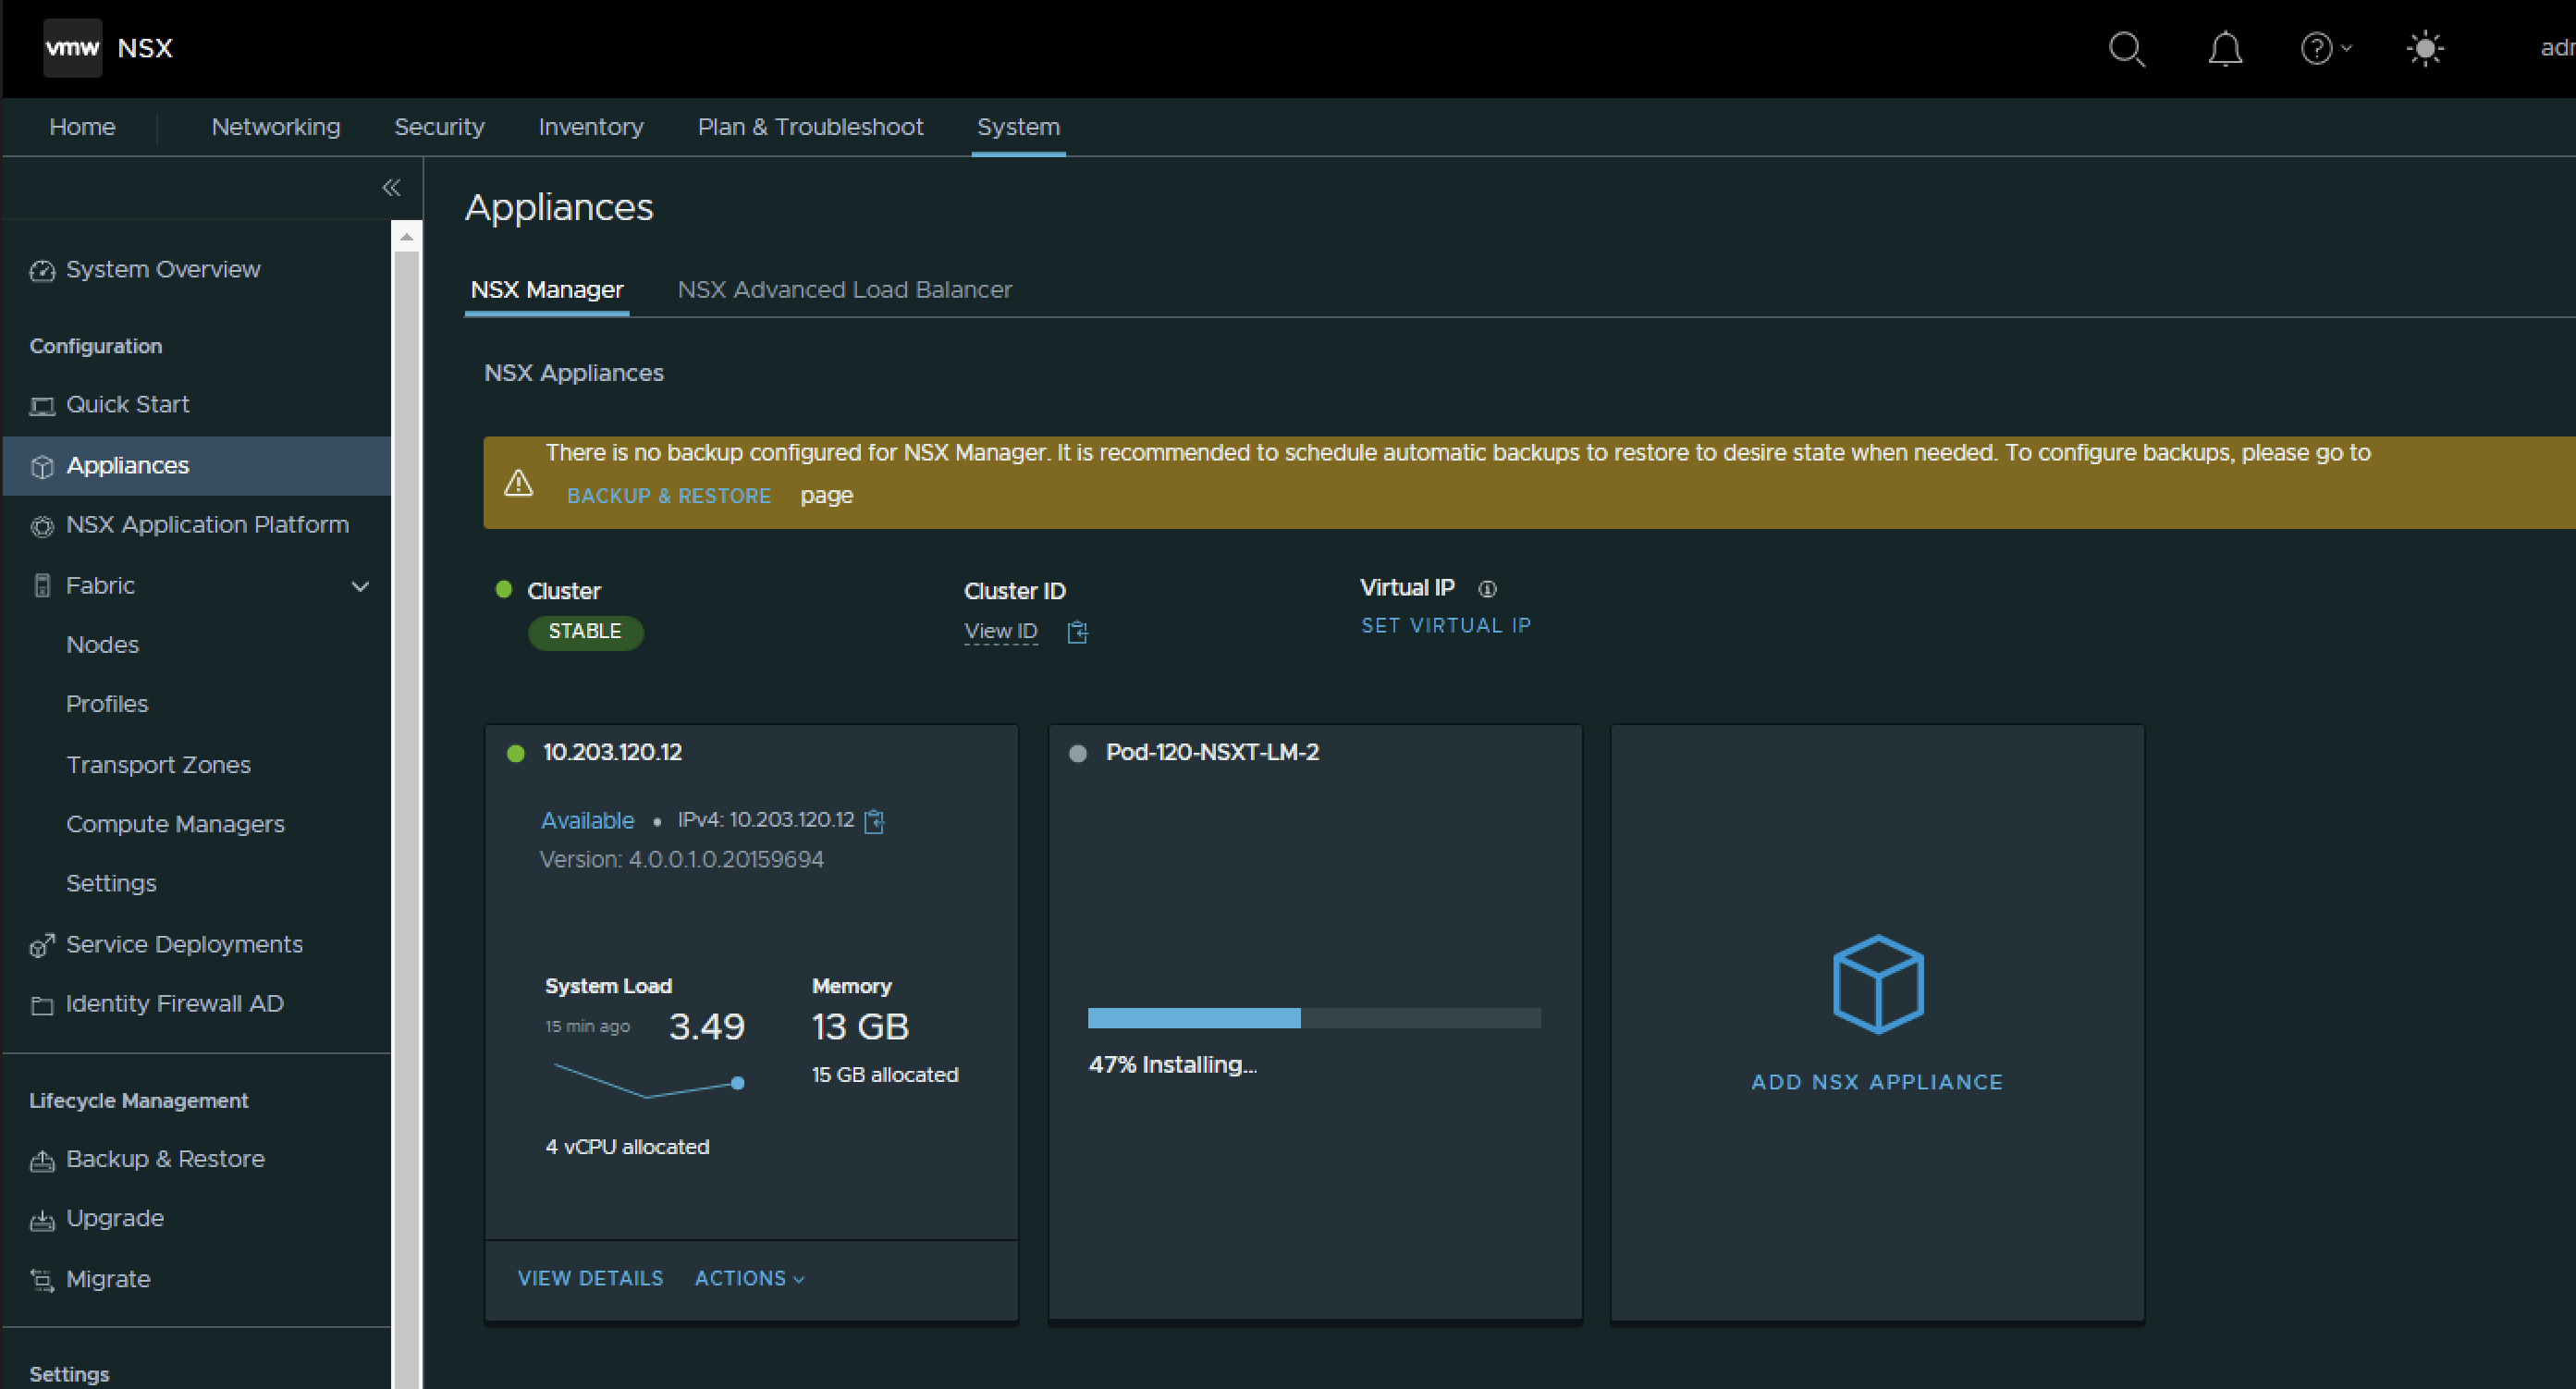
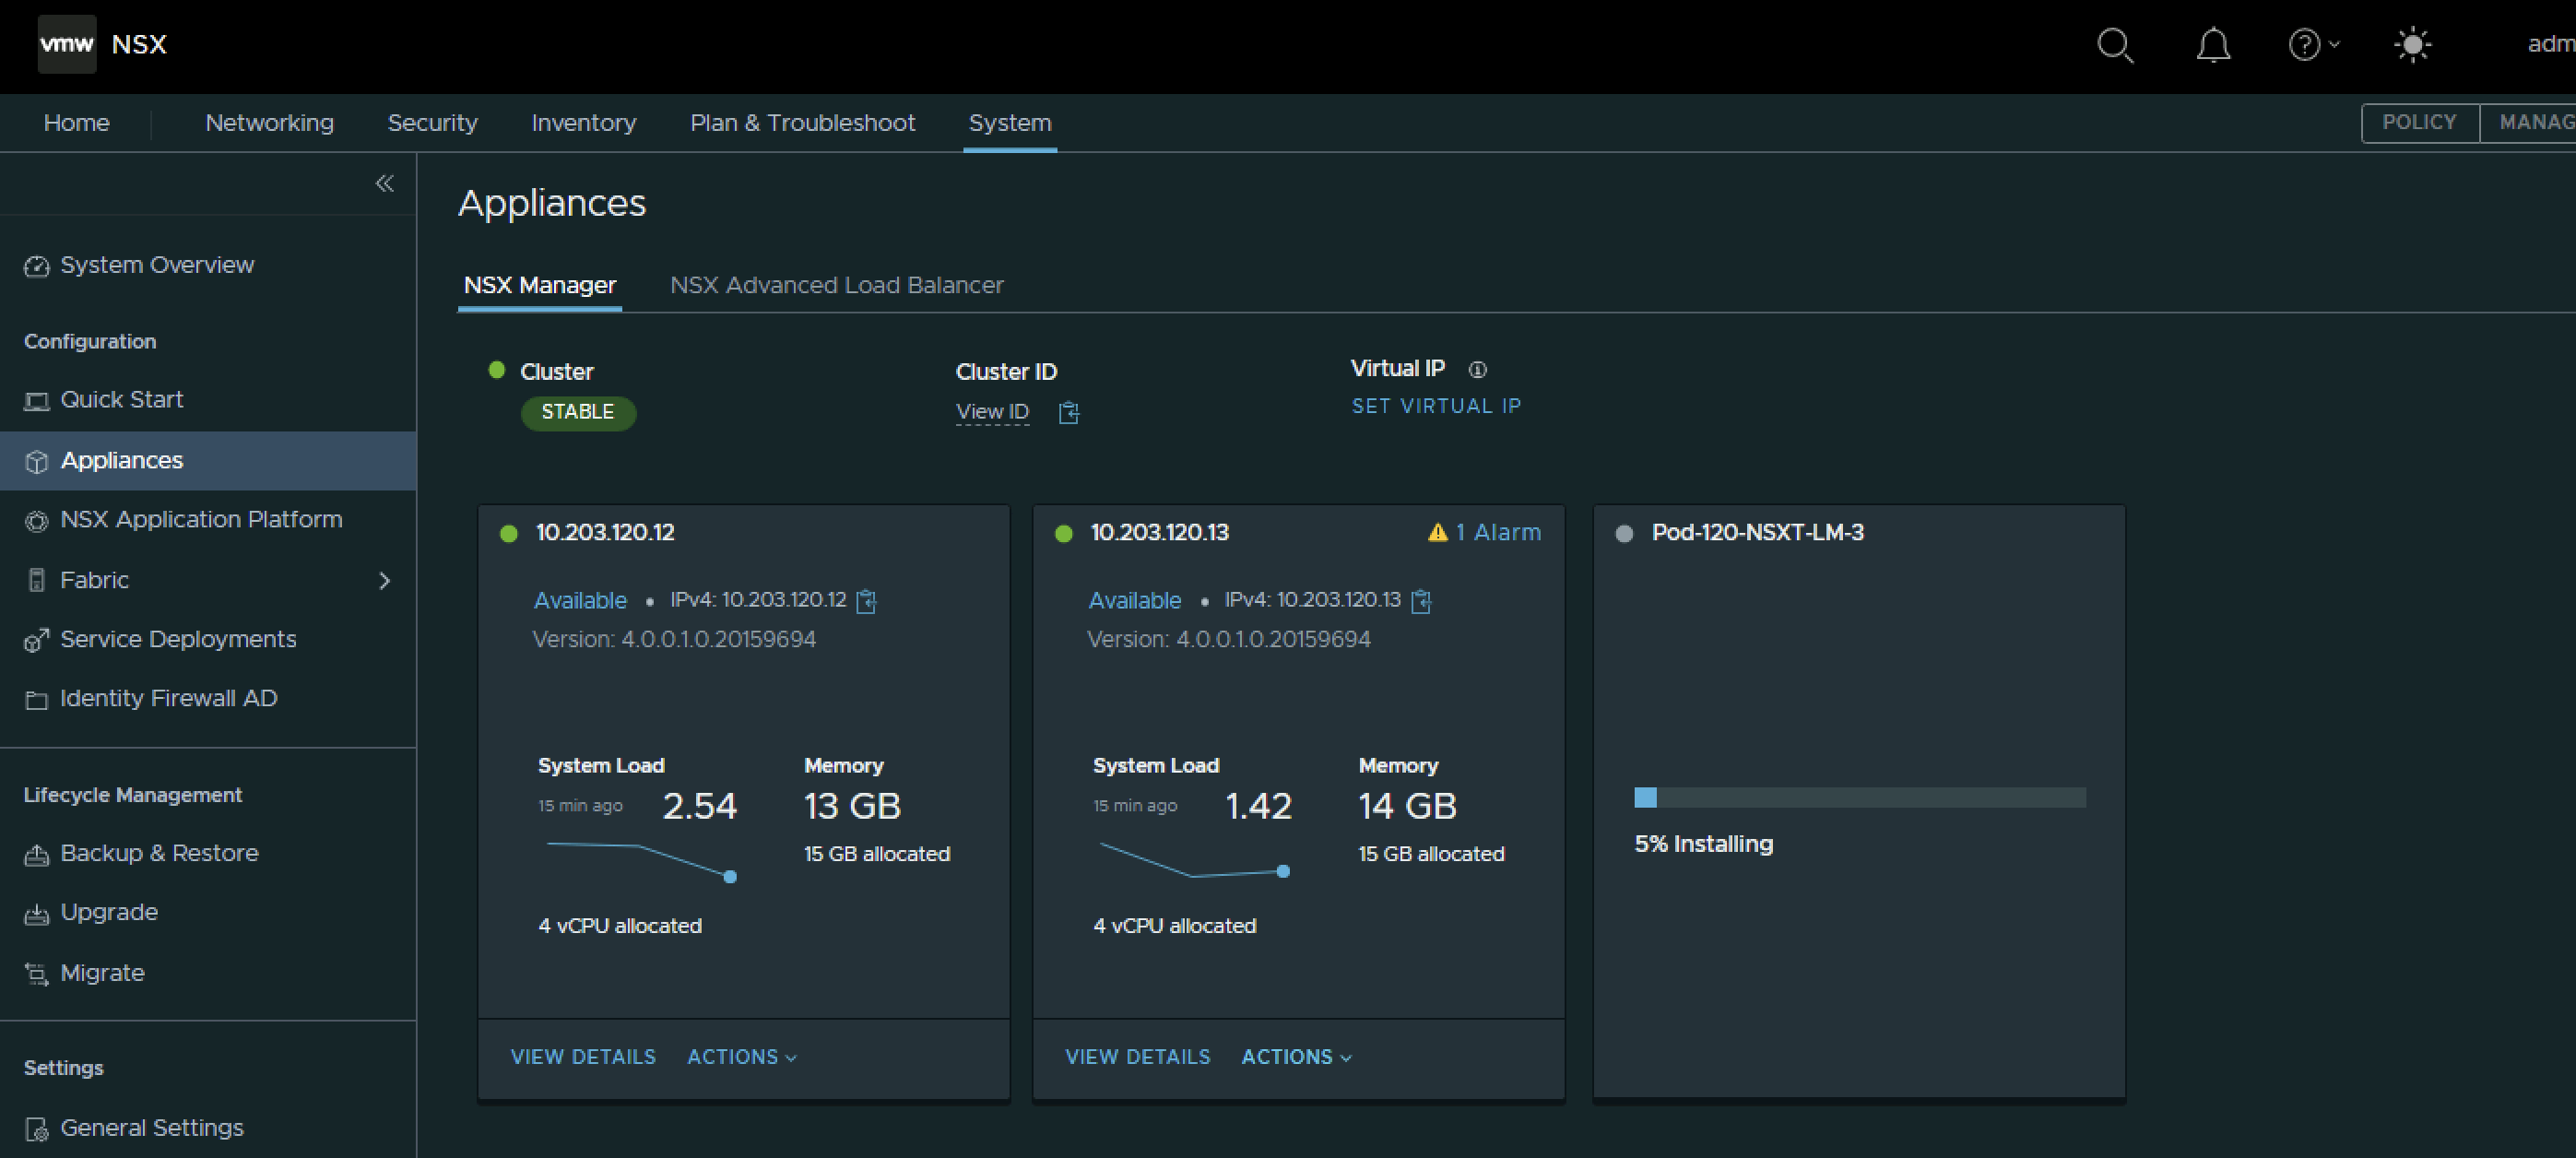
After I have clicked “Install Appliance” I can look at the Appliances screen to track the progress.
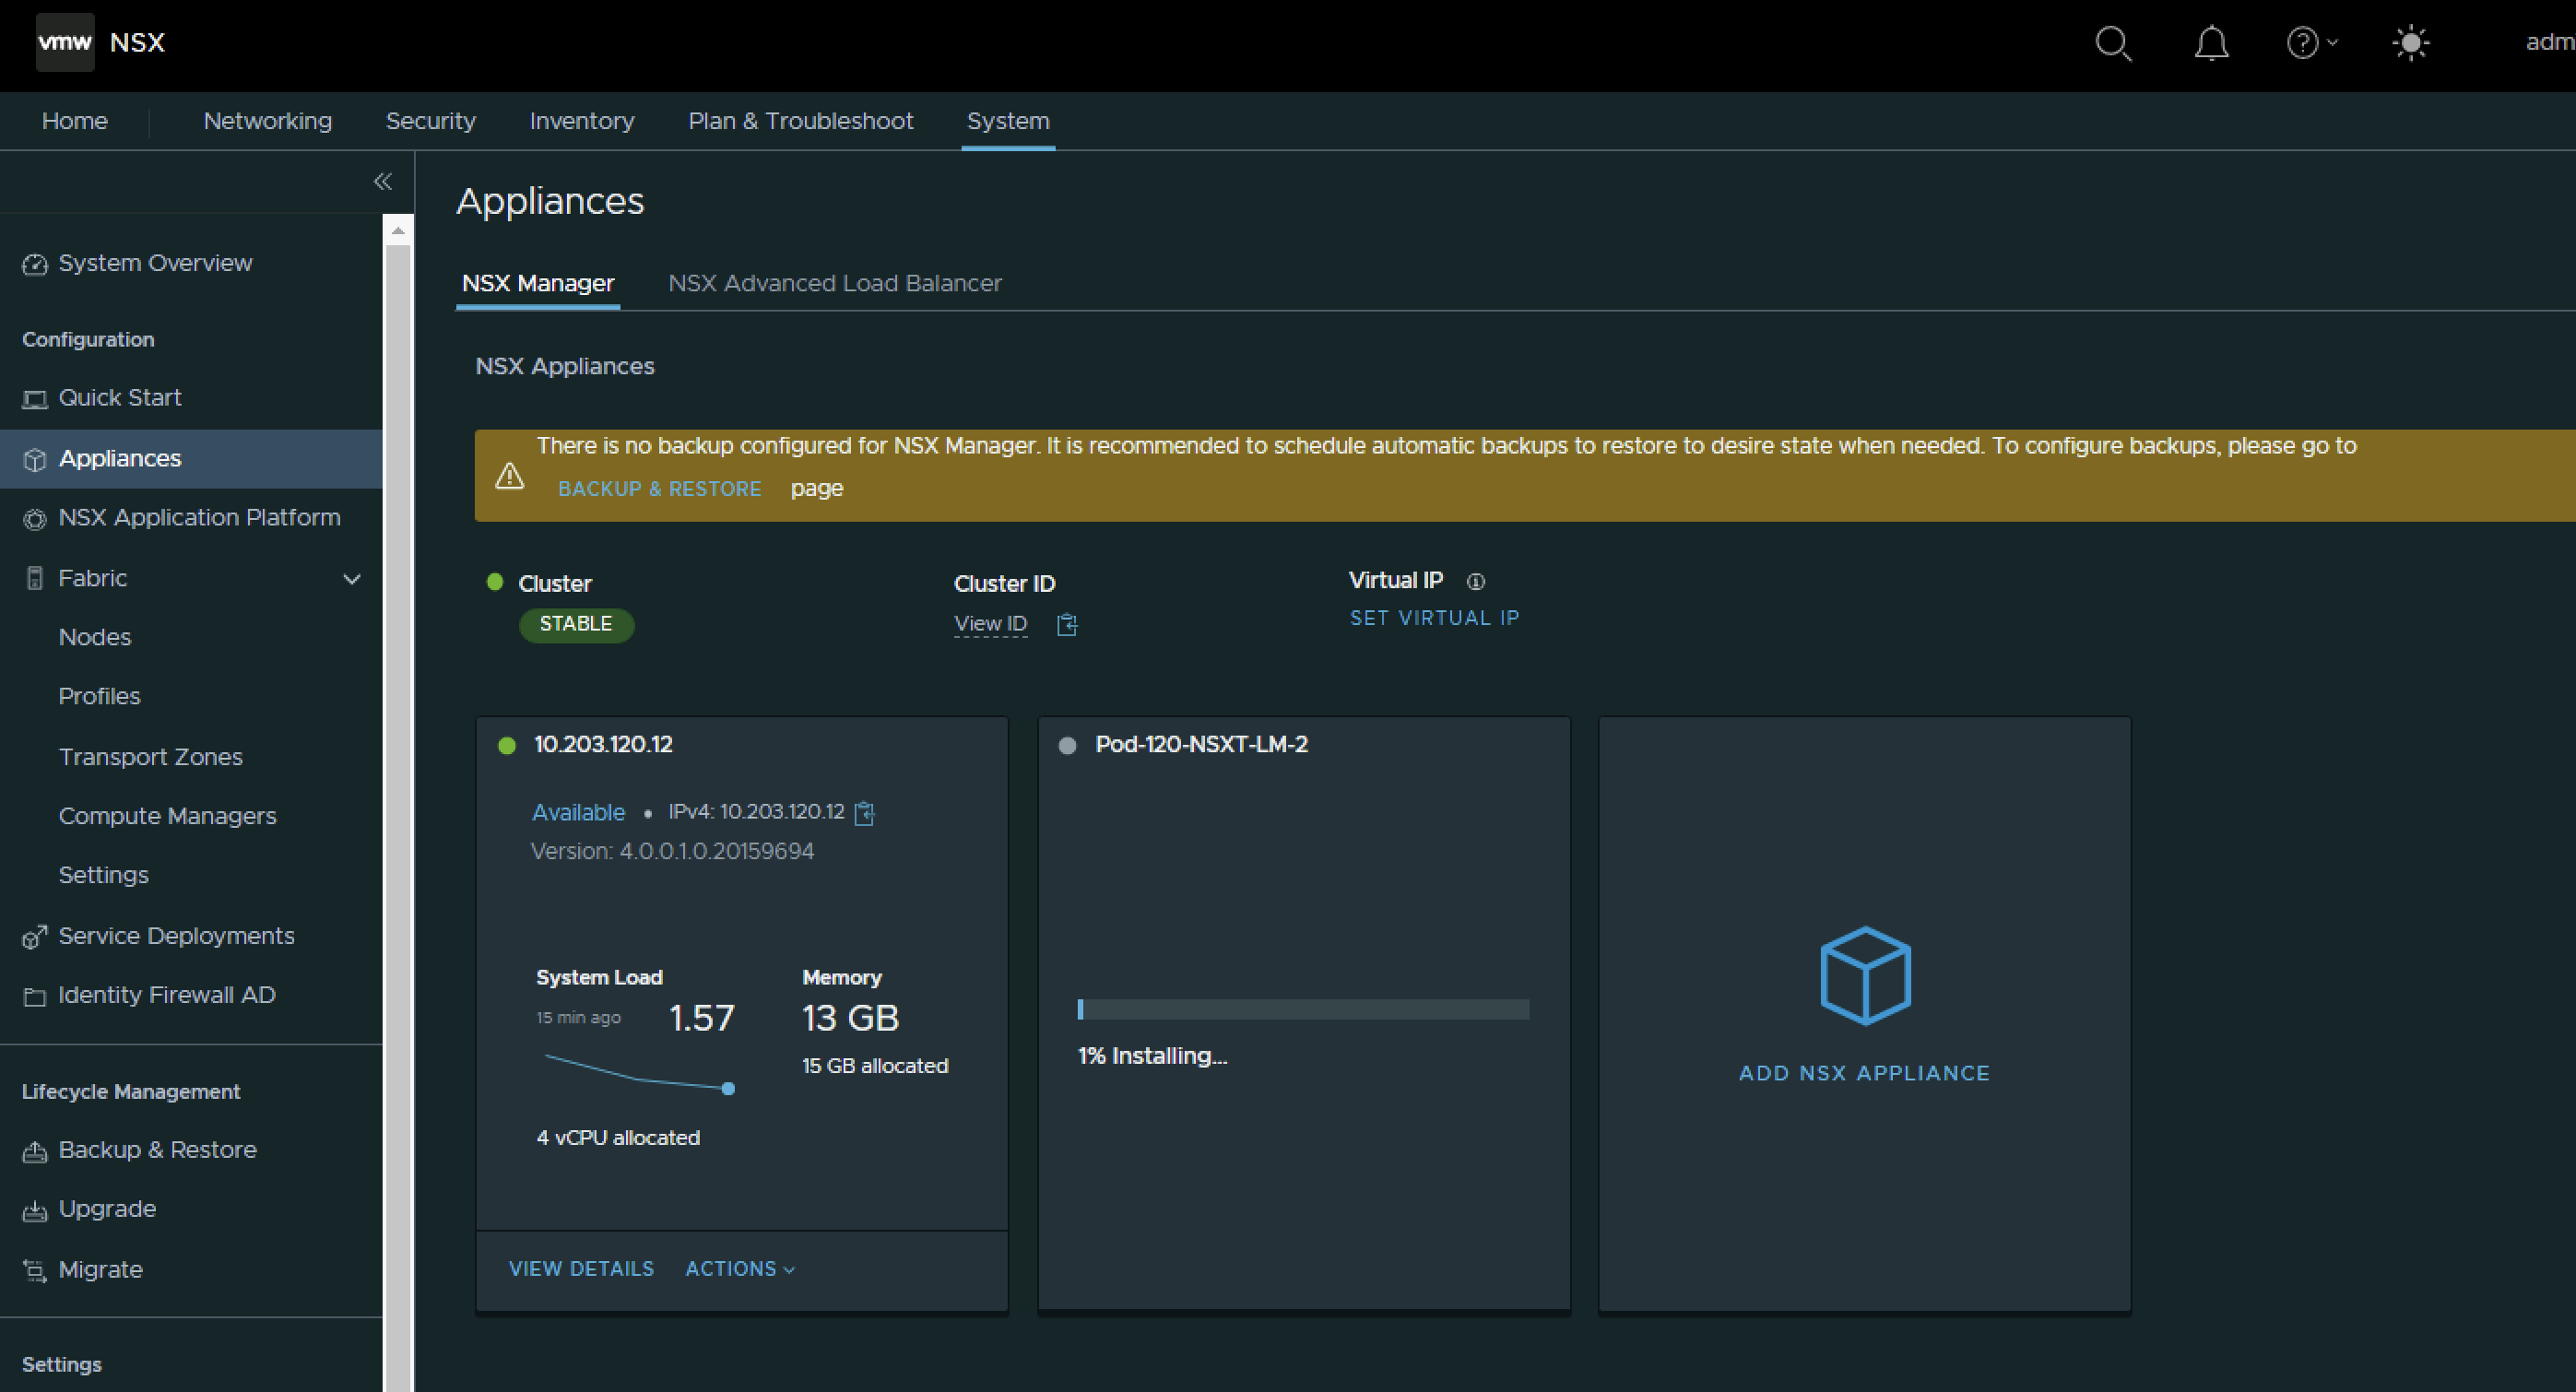
After I have clicked “Install Appliance” I can look at the Appliances screen to track the progress.
When the deployment is completed I will now have an NSX Manager Cluster with two NSX Manager Nodes.

Add the third NSX Manager Node
Click on “Add NSX Appliance” again to start with the deployment of the third NSX Manager Node. Use the Configuration Parameters from the table above to specify the Appliance Information.
Use the Configuration Parameters from the table above to specify the Configuration.

Use the Configuration Parameters from the table above to specify the Access & Credentials.
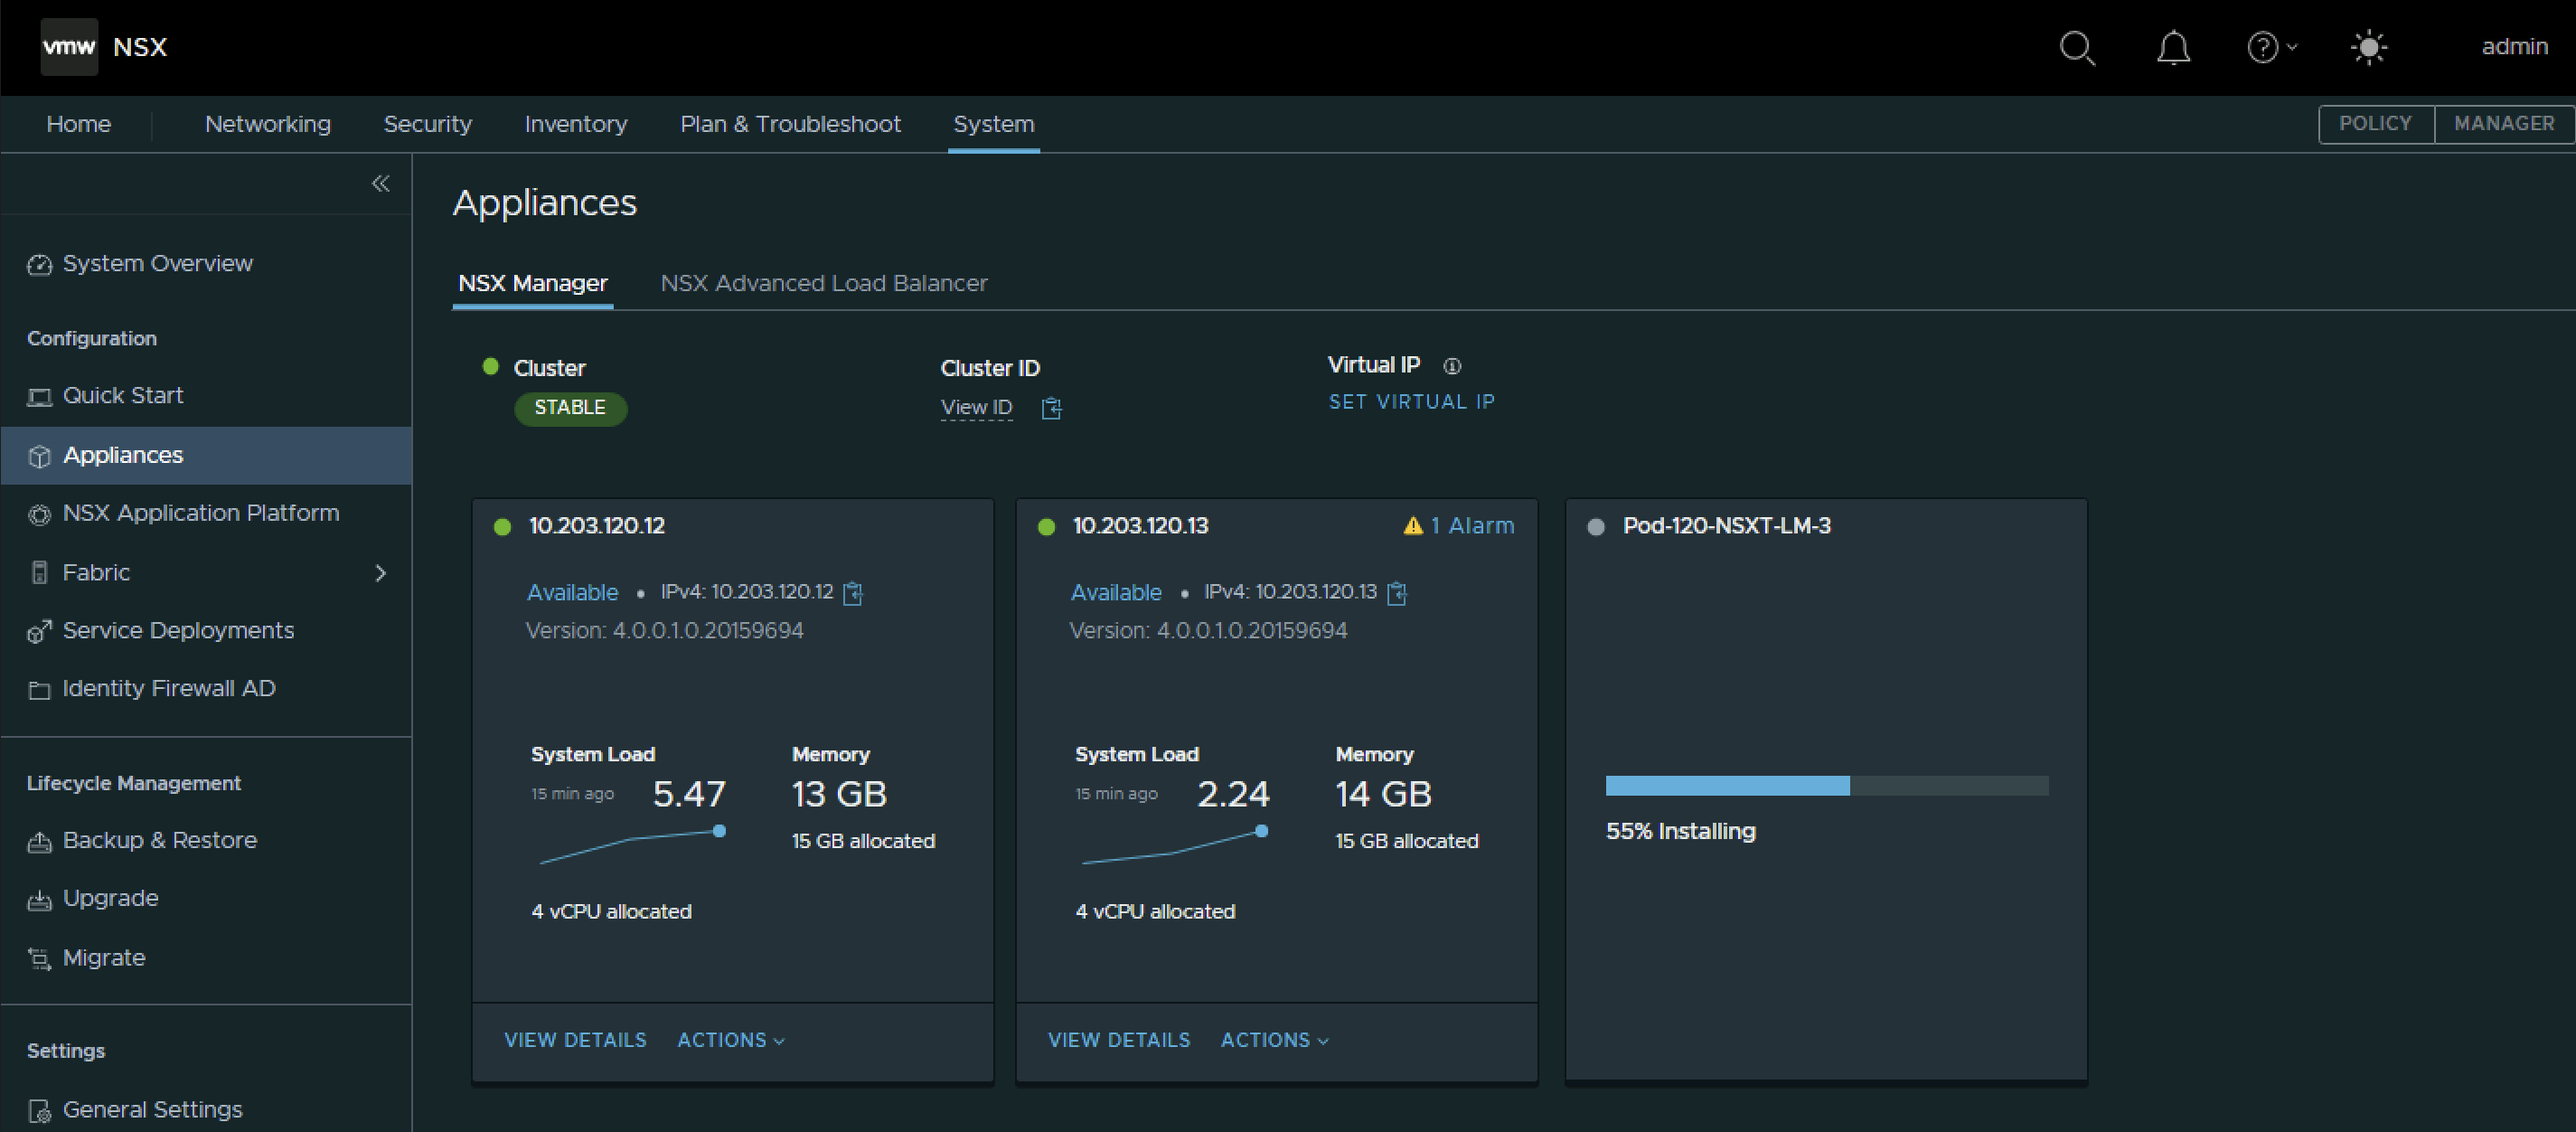
After I have clicked “Install Appliance” I can look at the Appliances screen to track the progress.
After I have clicked “Install Appliance” I can look at the Appliances screen to track the progress.
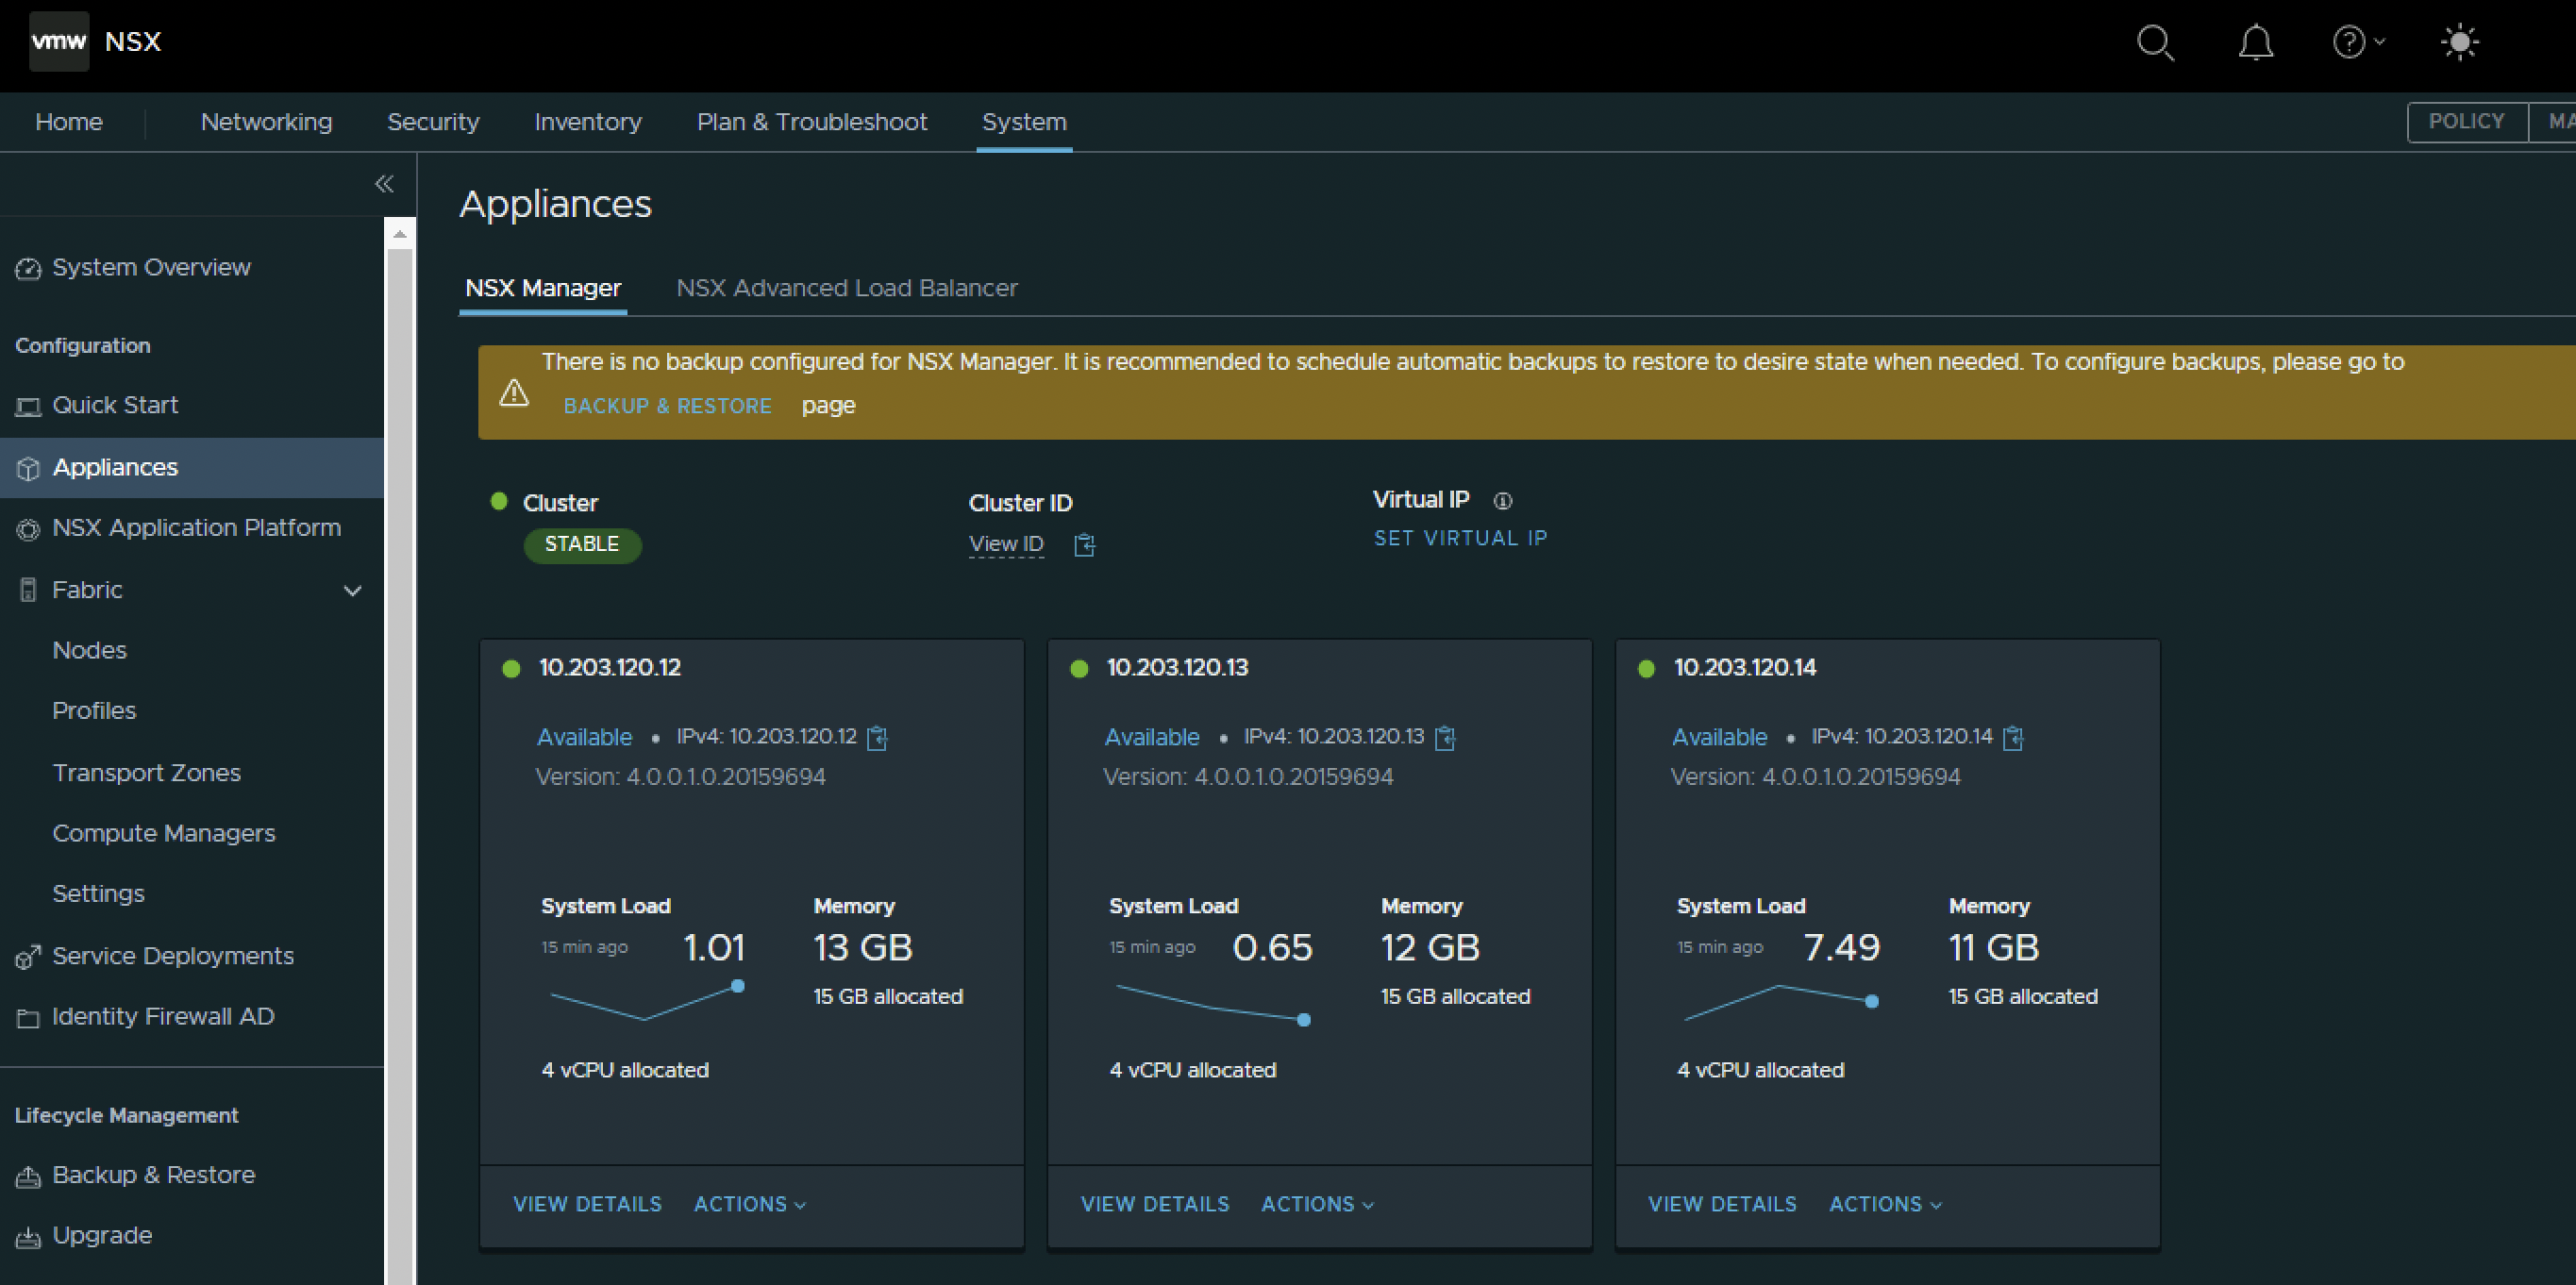
When the deployment is completed I will now have an NSX Manager Cluster with three NSX Manager Nodes.
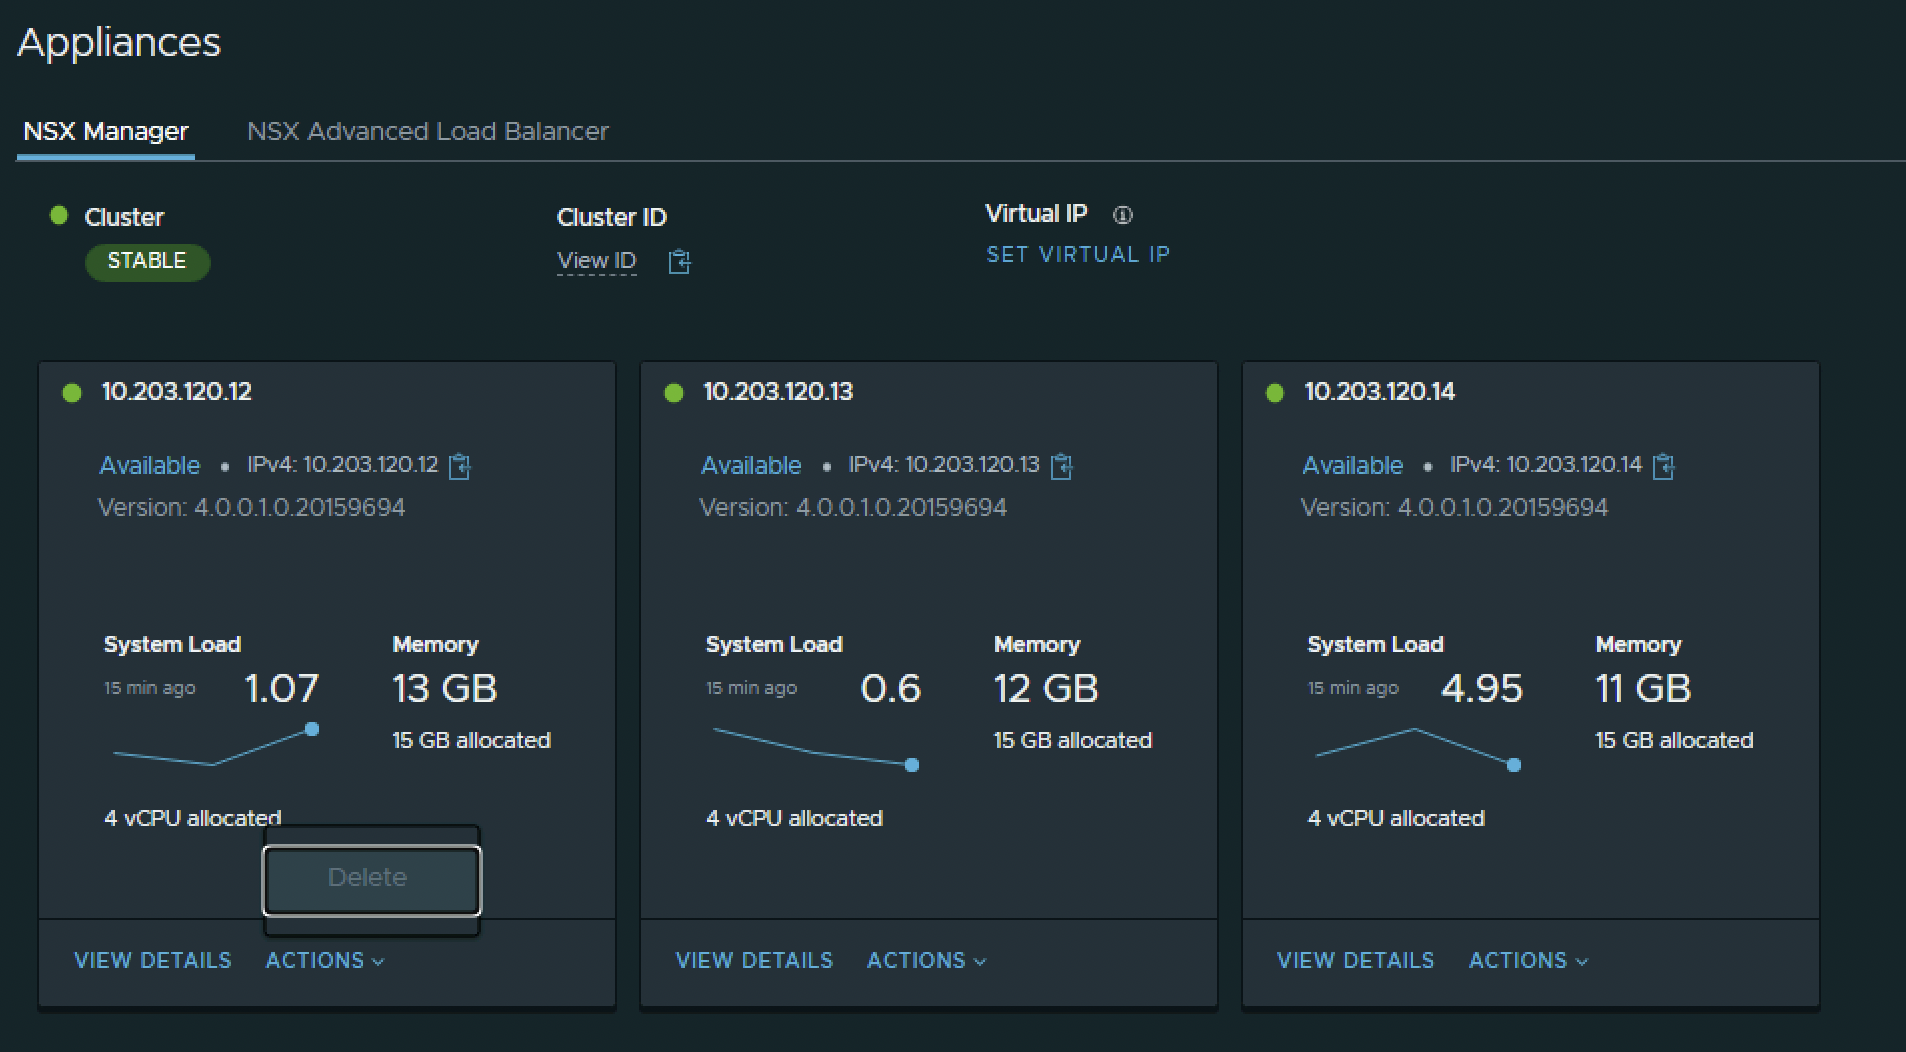
One thing that I want to point out is that if I have manually deployed an NSX Manager Node I will not be able to delete it from the GUI. Look as the button that is greyed out.
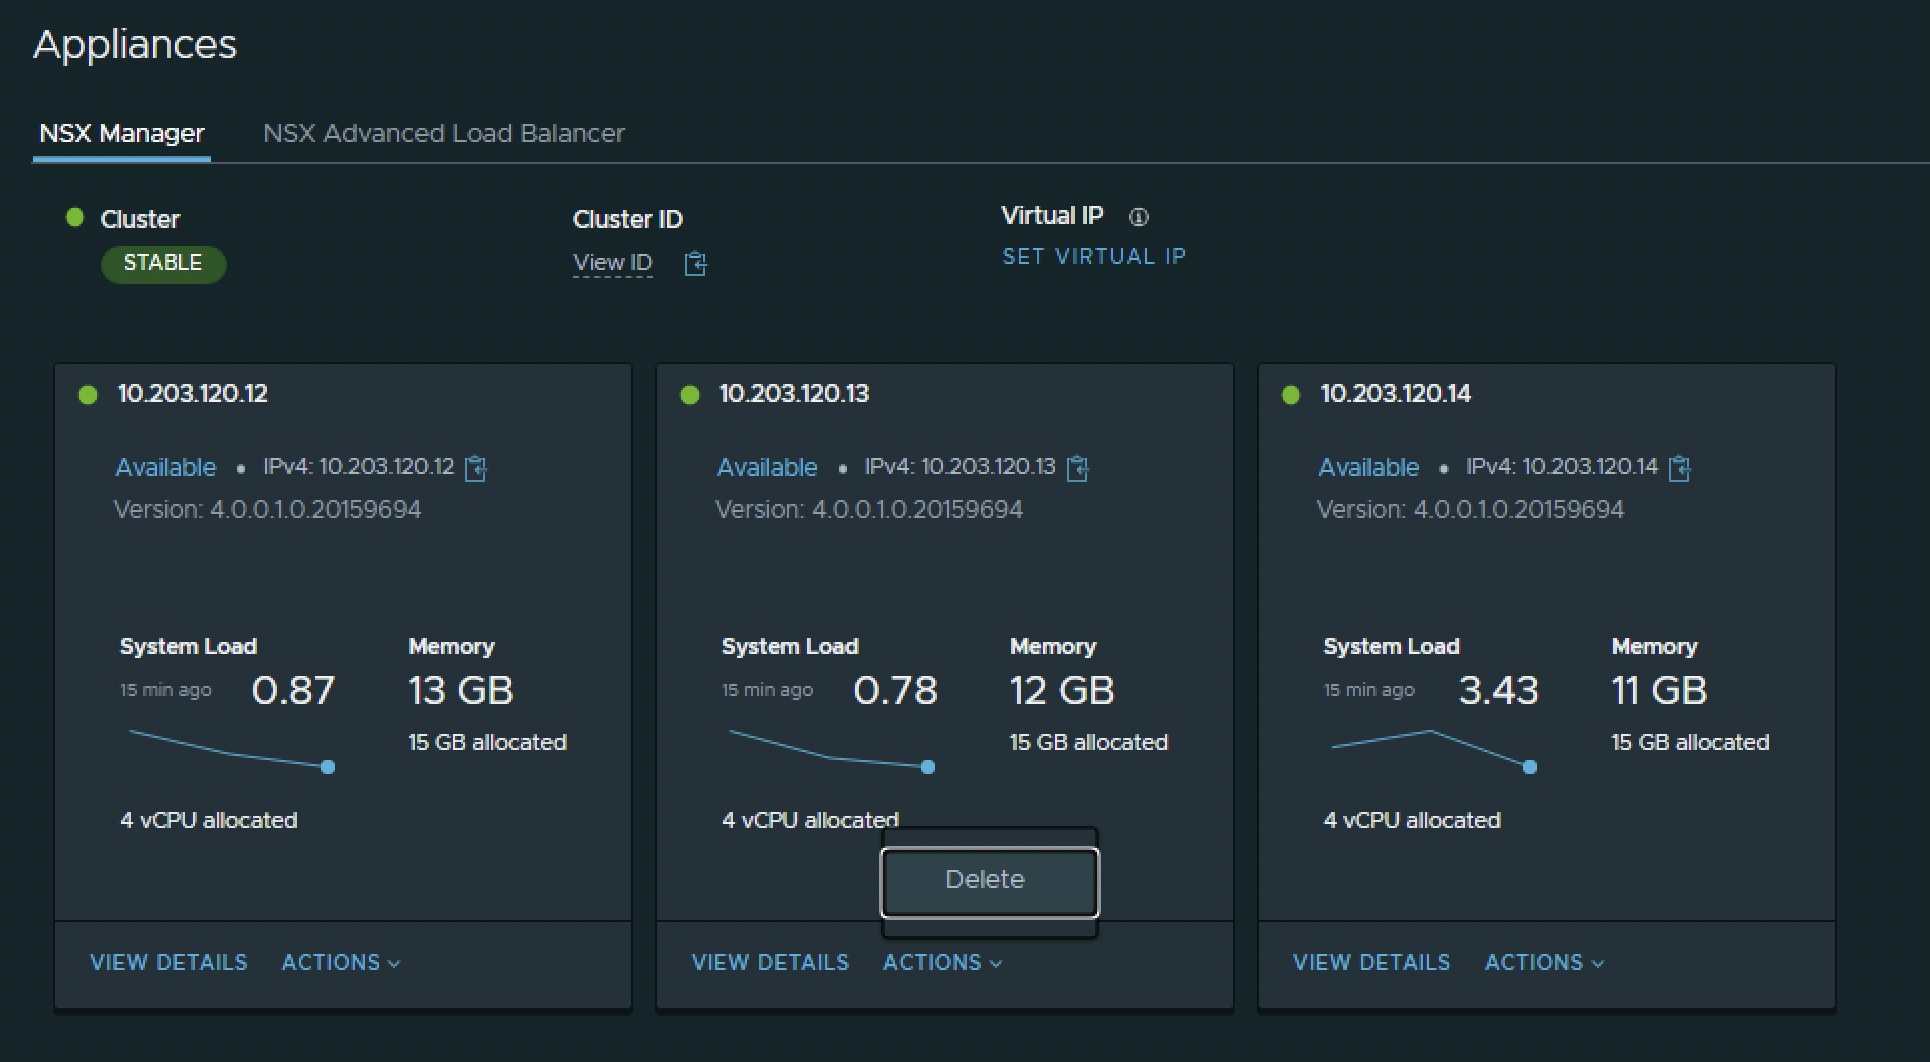
When I have deployed an NSX Manager Node using the GUI I will be able to delete it from the GUI. Look as the button that can now be used.
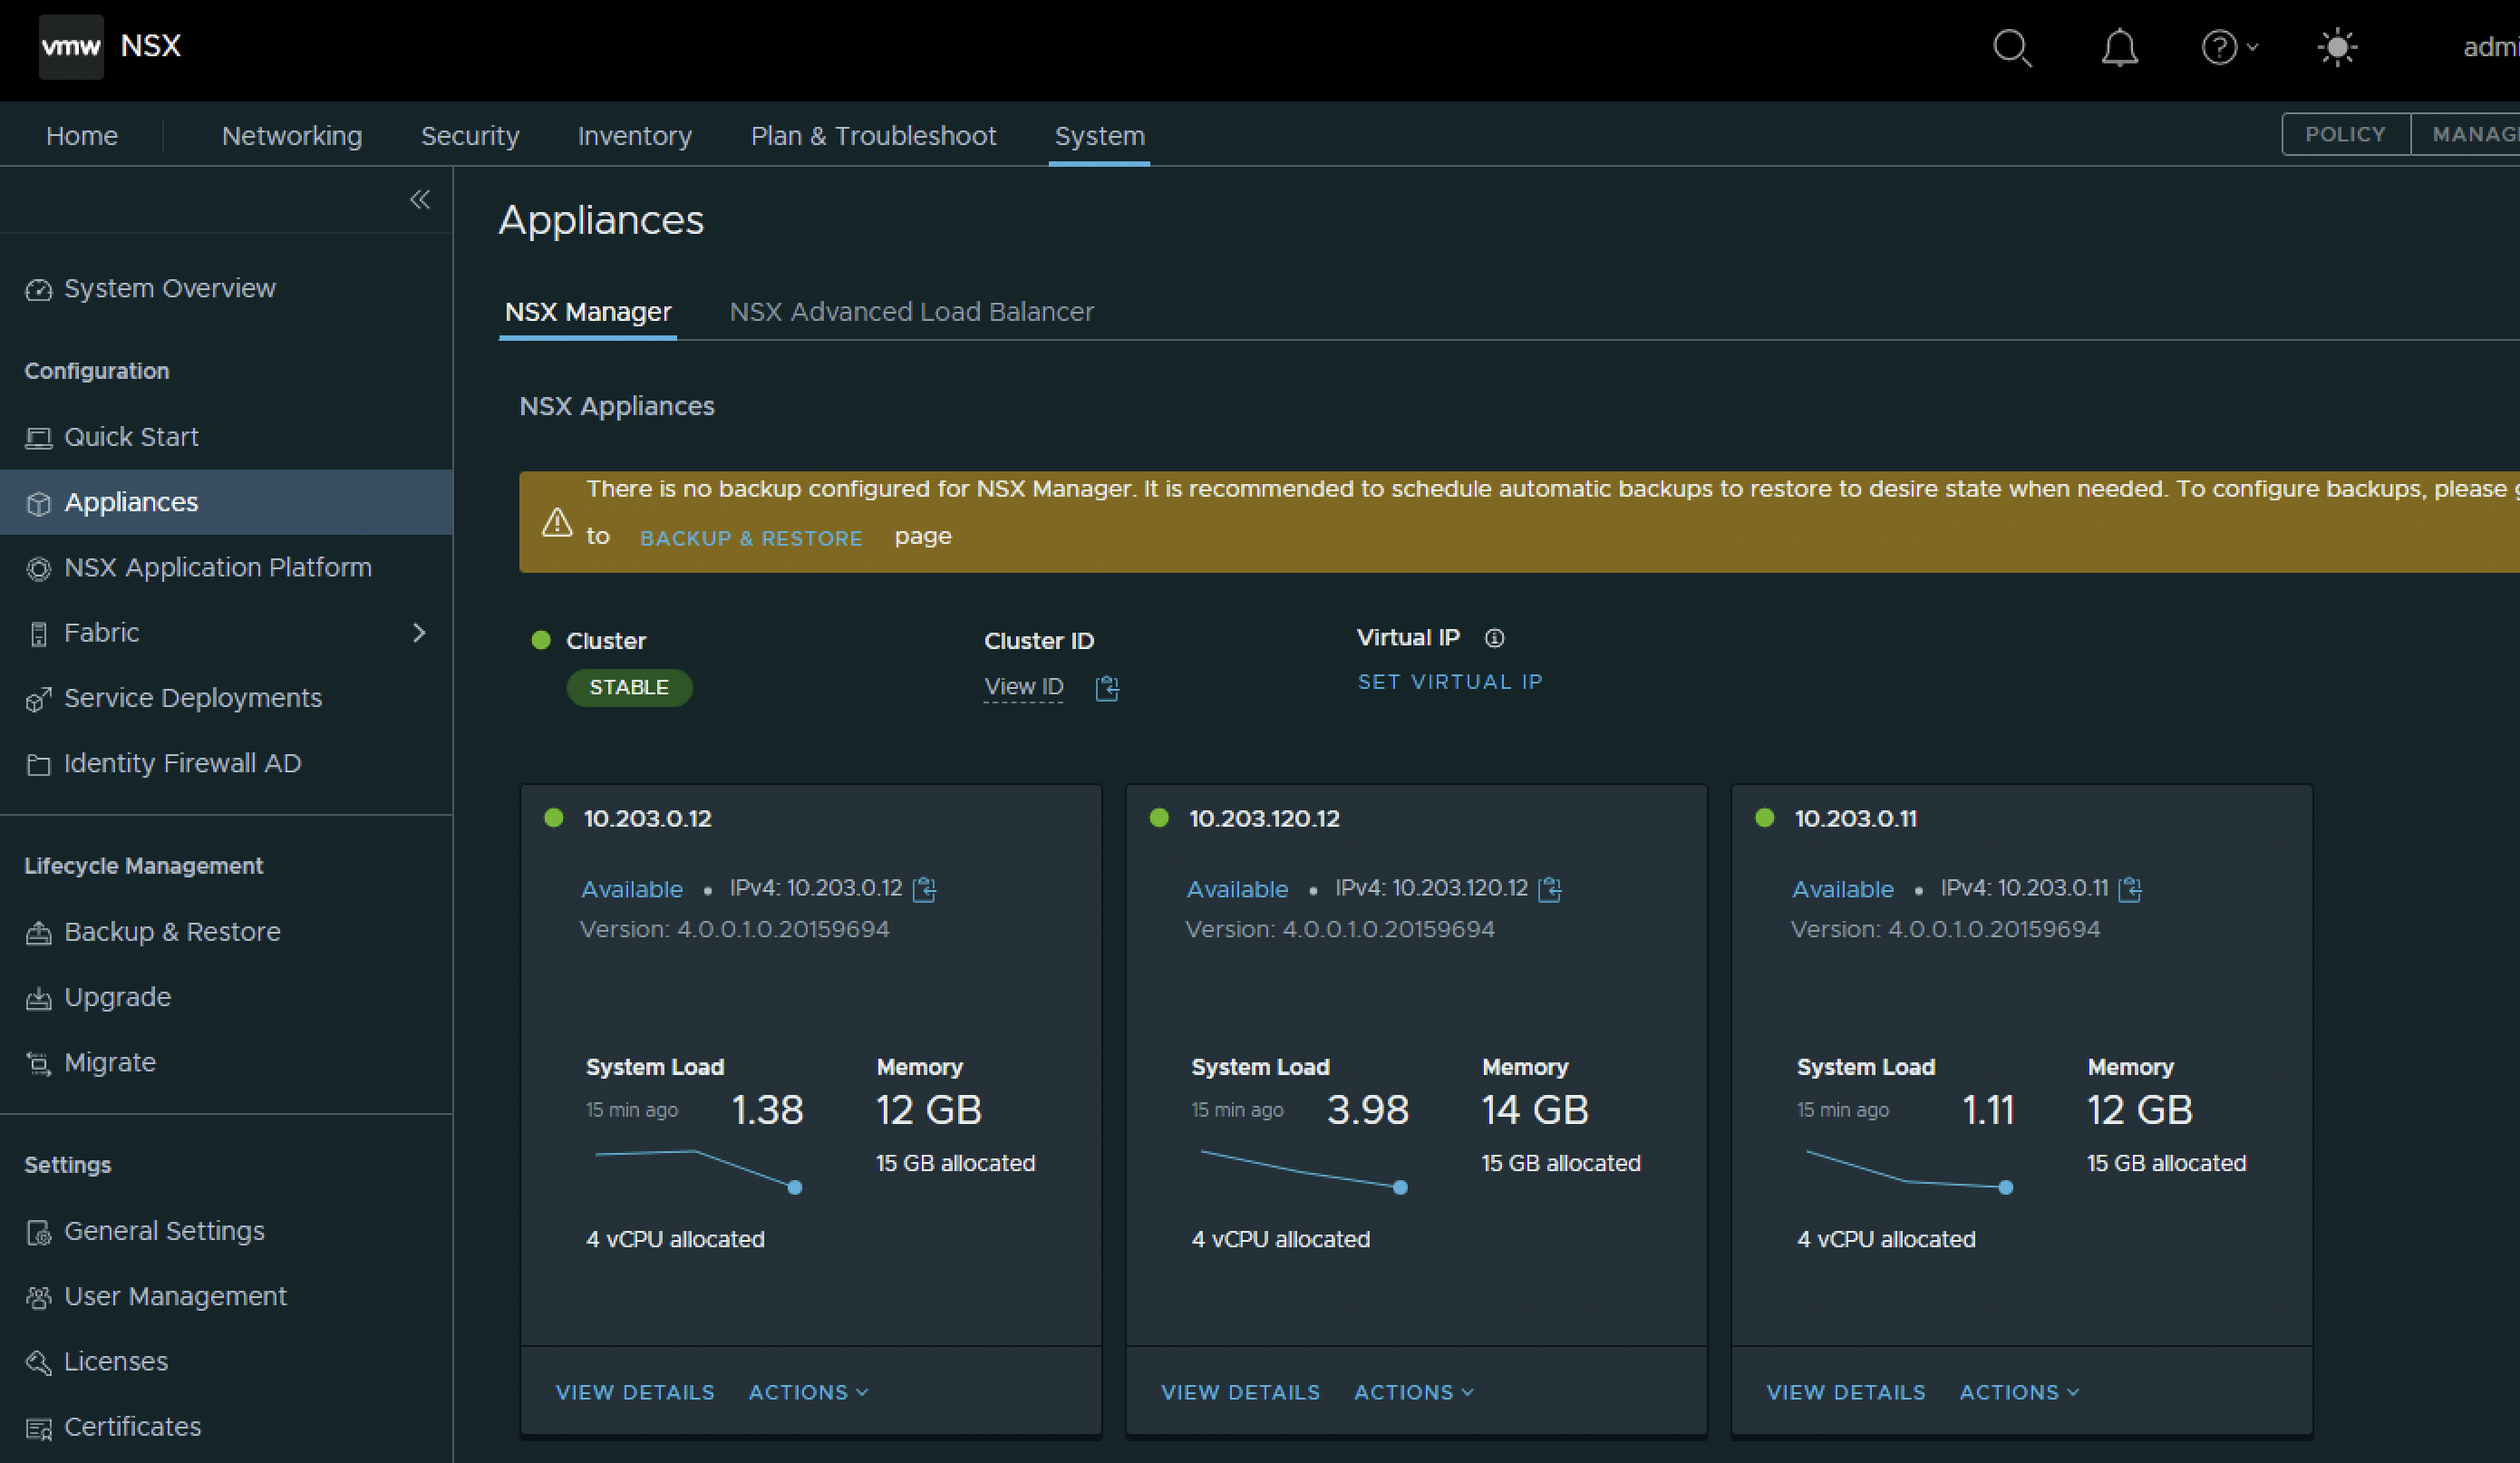
Also pay attention to the NSX Home screen that the W warning “3 node cluster recommended” is now gone.

STEP 5» Configure the NSX Virtual IP Address - VIP
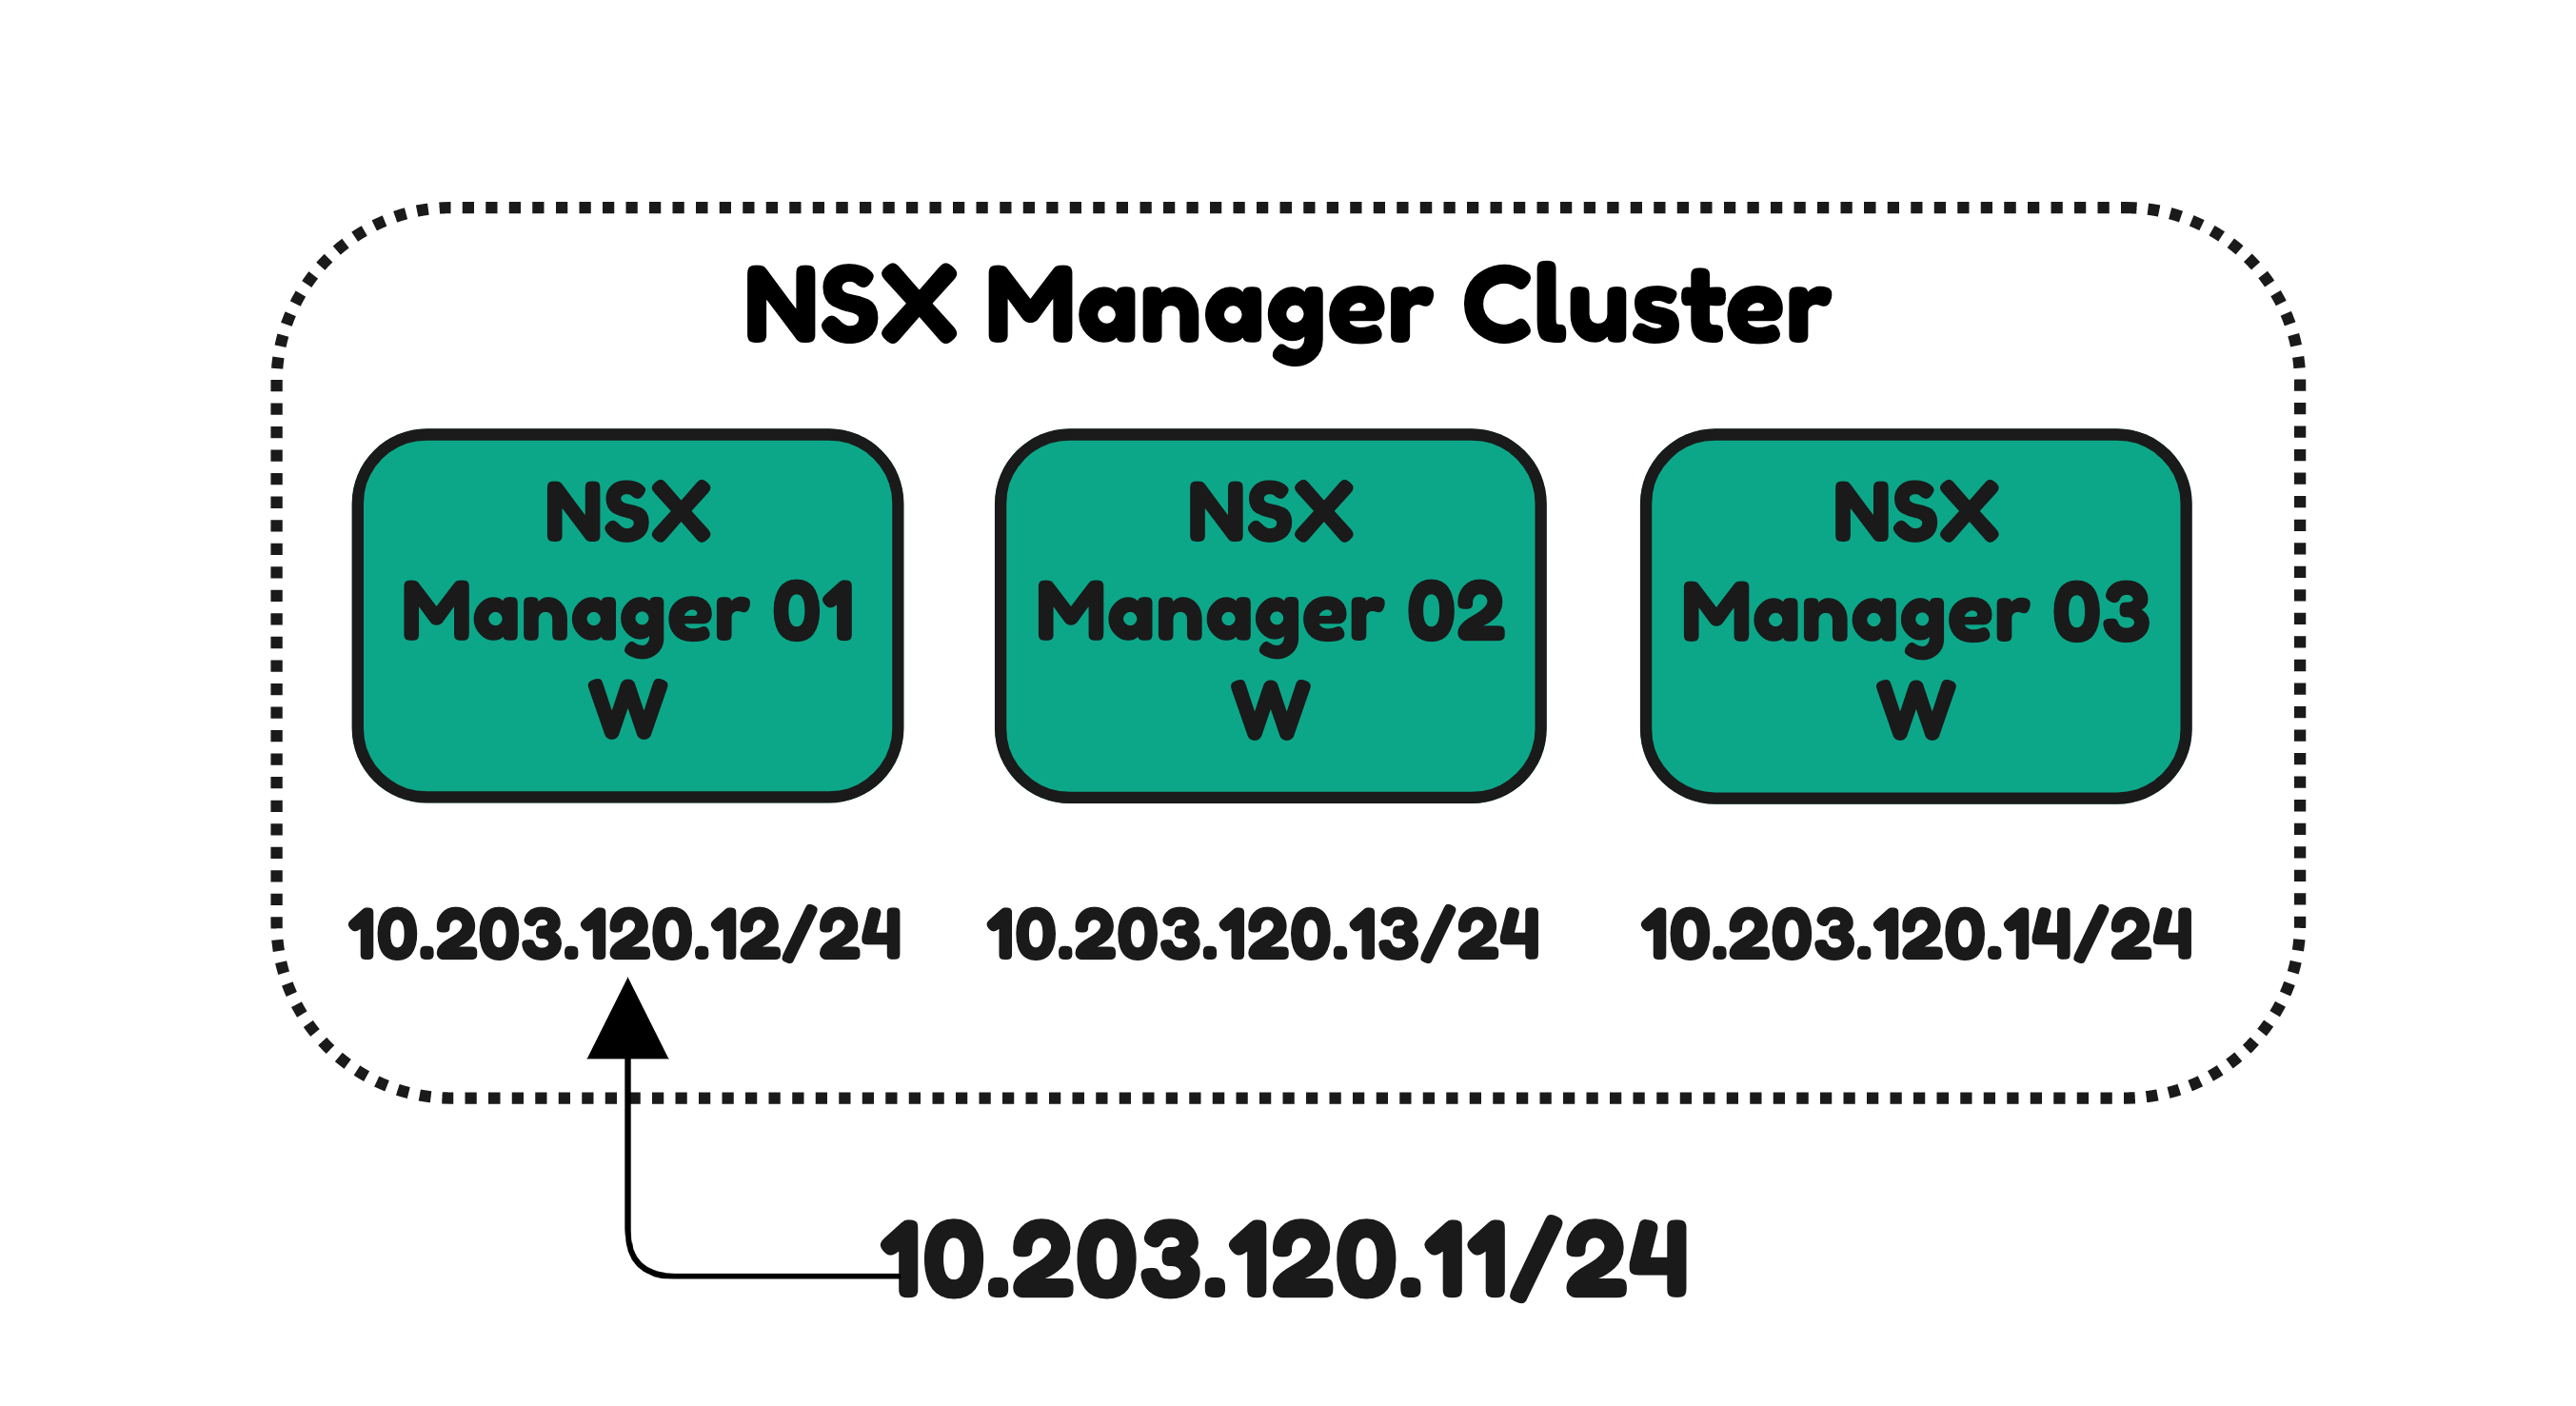
Now that I have an NSX Manager Cluster consisting out of three Nodes I can configure the NSX Manager Cluster Virtual IP Address.
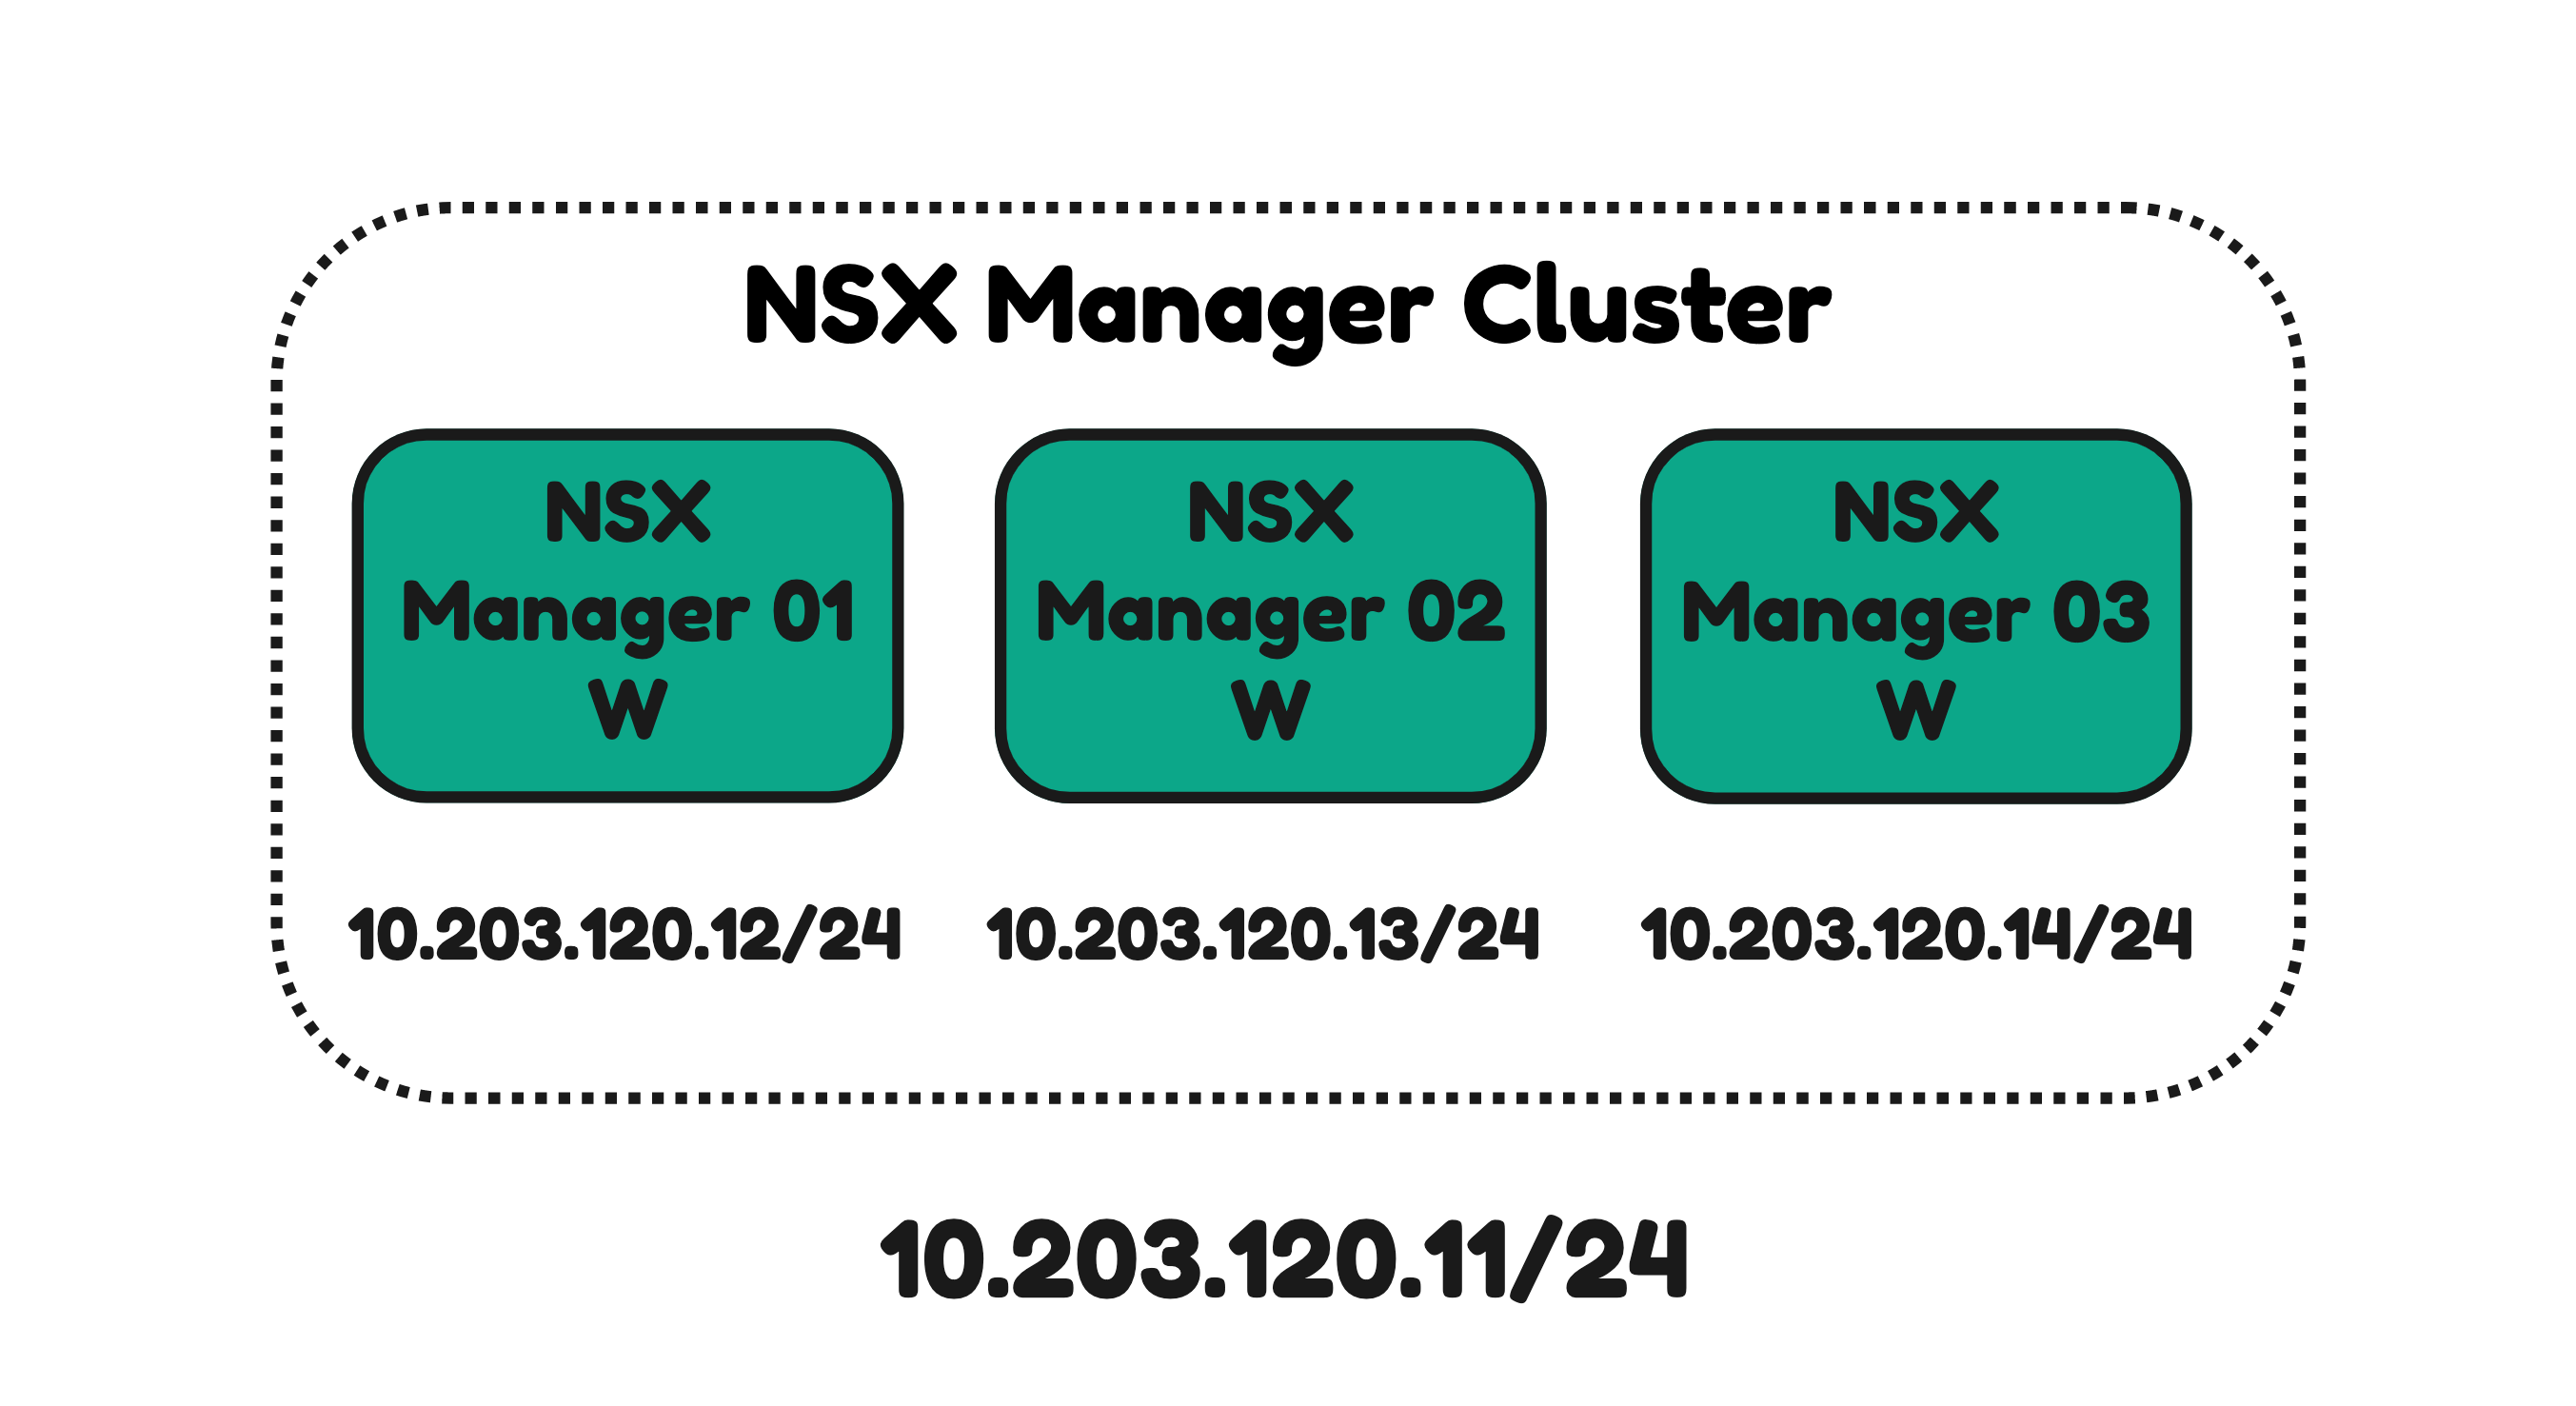
| Parameter Name | Input |
|---|---|
| Virtual IP | 10.203.120.11 |
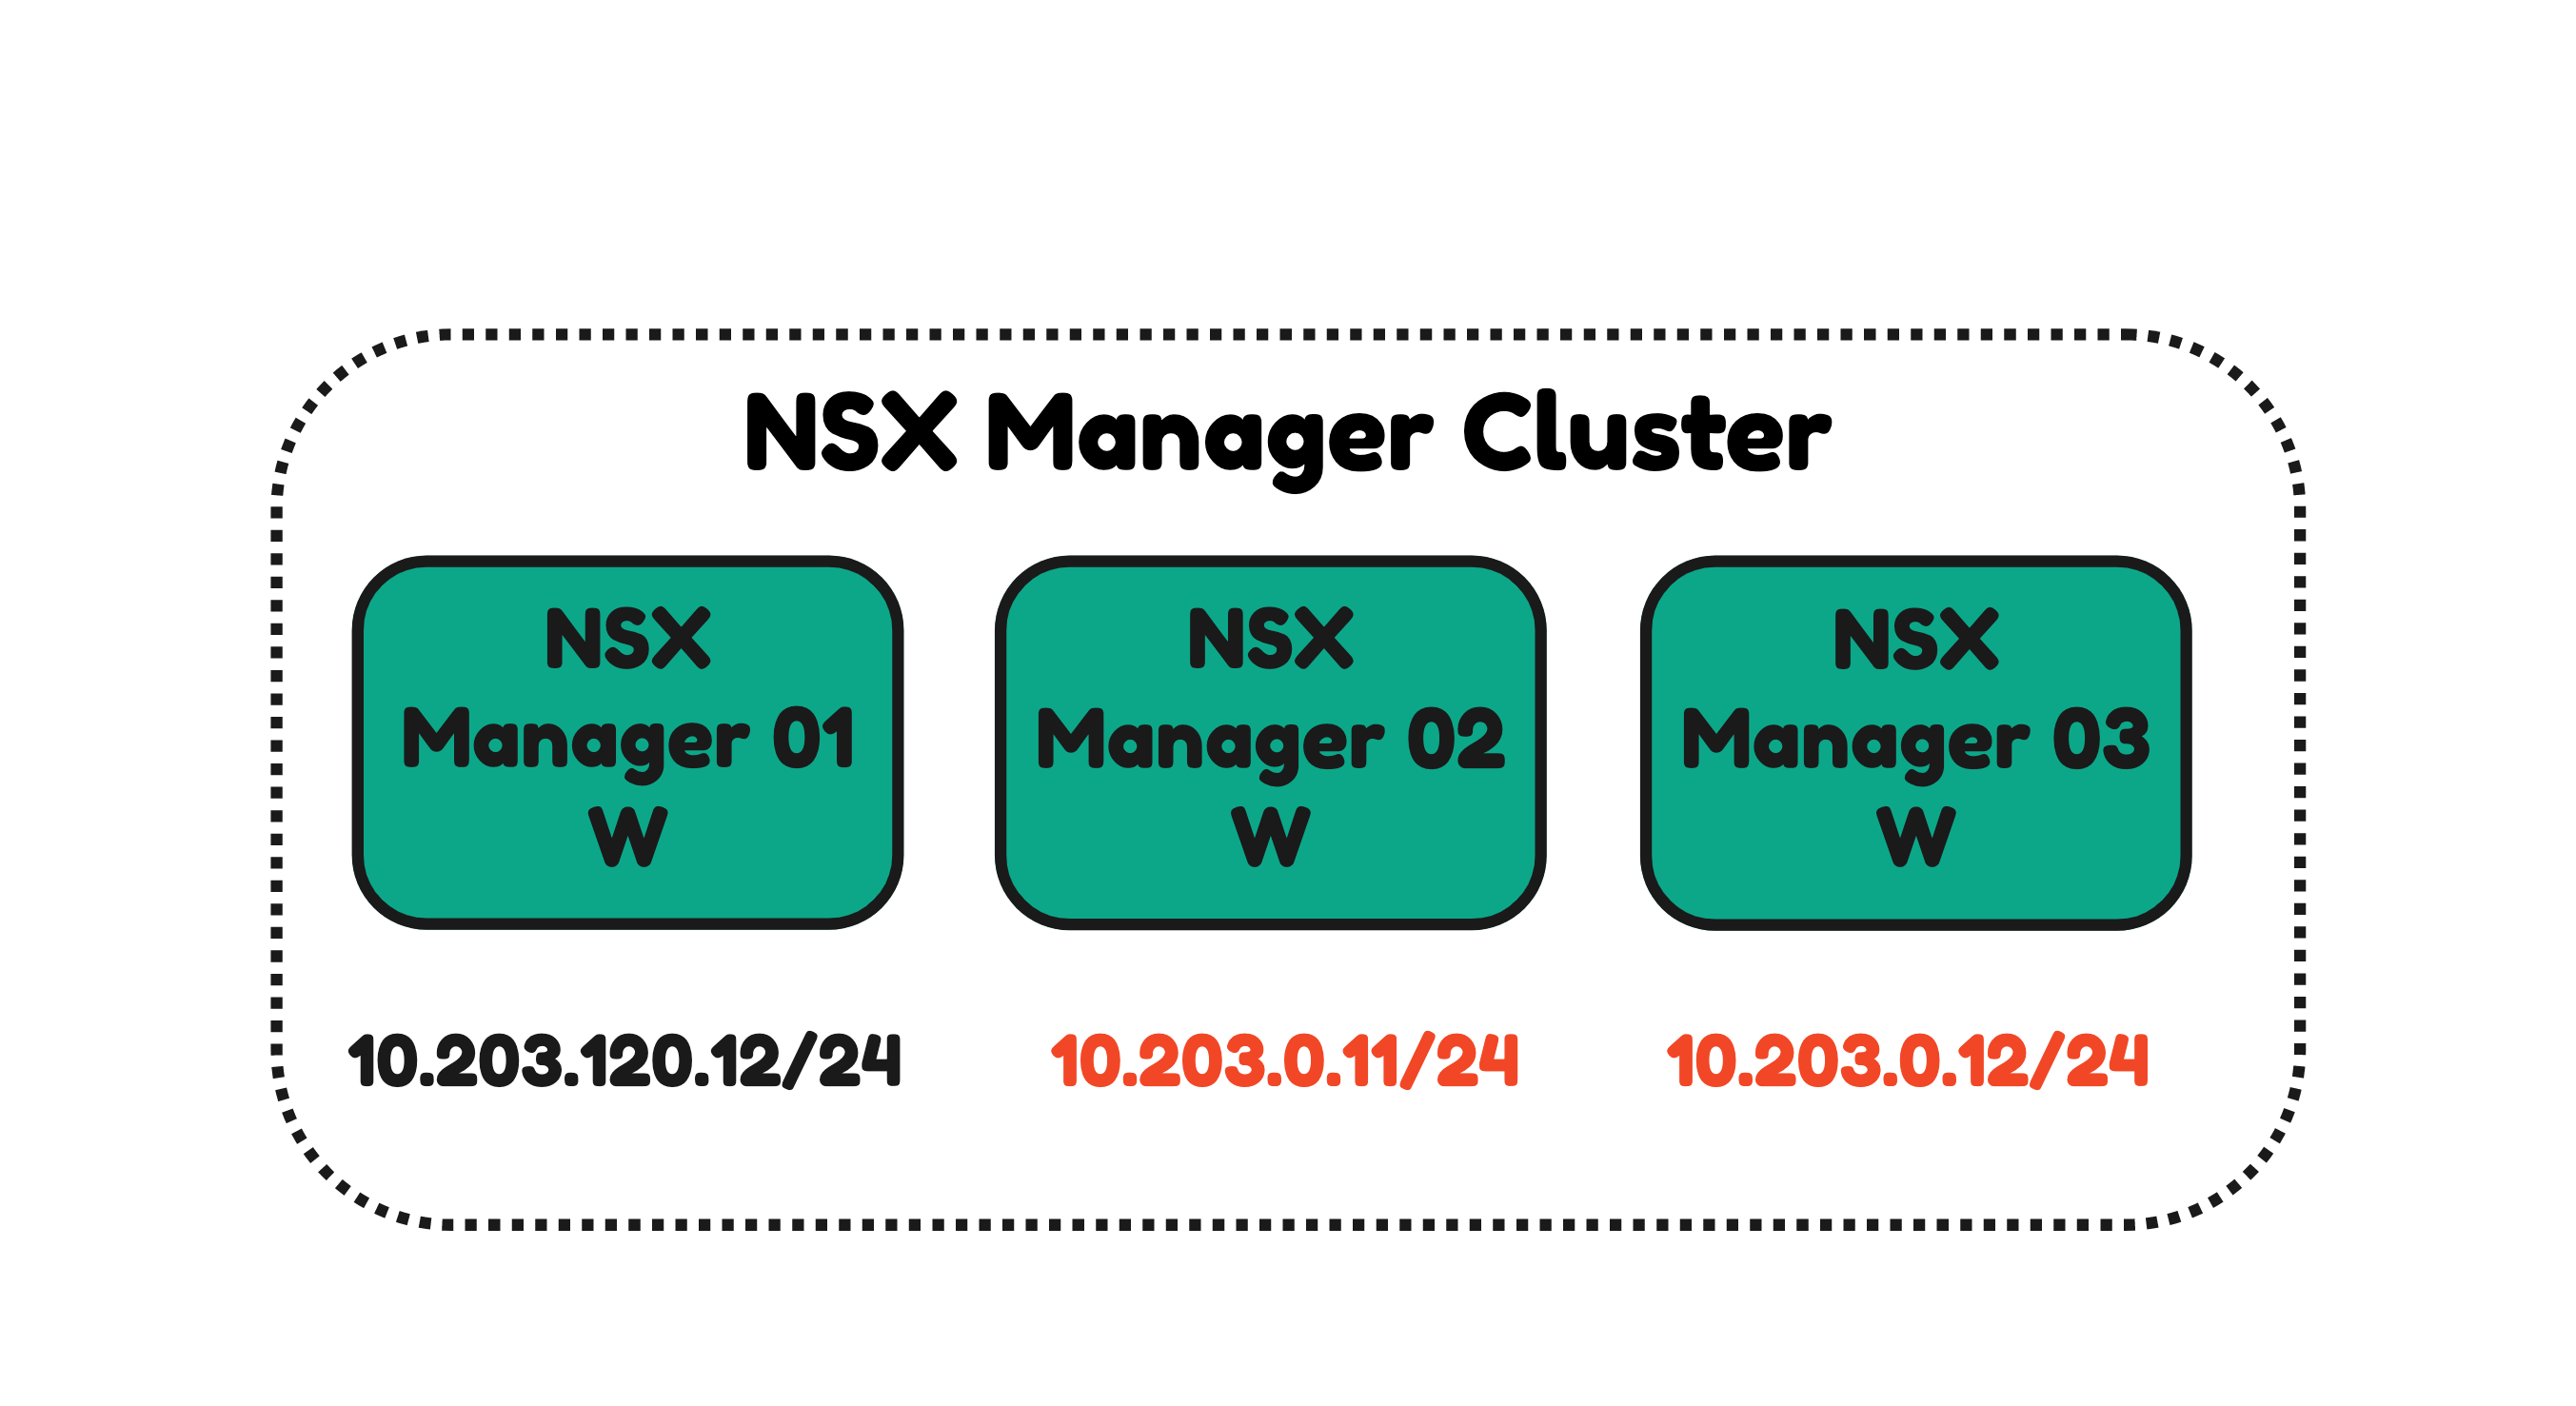
NSX Manager Nodes not in the same network
One of the constraints of configuring an NSX Manager Cluster Virtual IP Address is that all the Nodes needs to be part of the same network.
For demonstration purpose I have three NSX Manager Nodes that are NOT in the same network. Click on “Set Virtual IP”.
Specify the IP address.
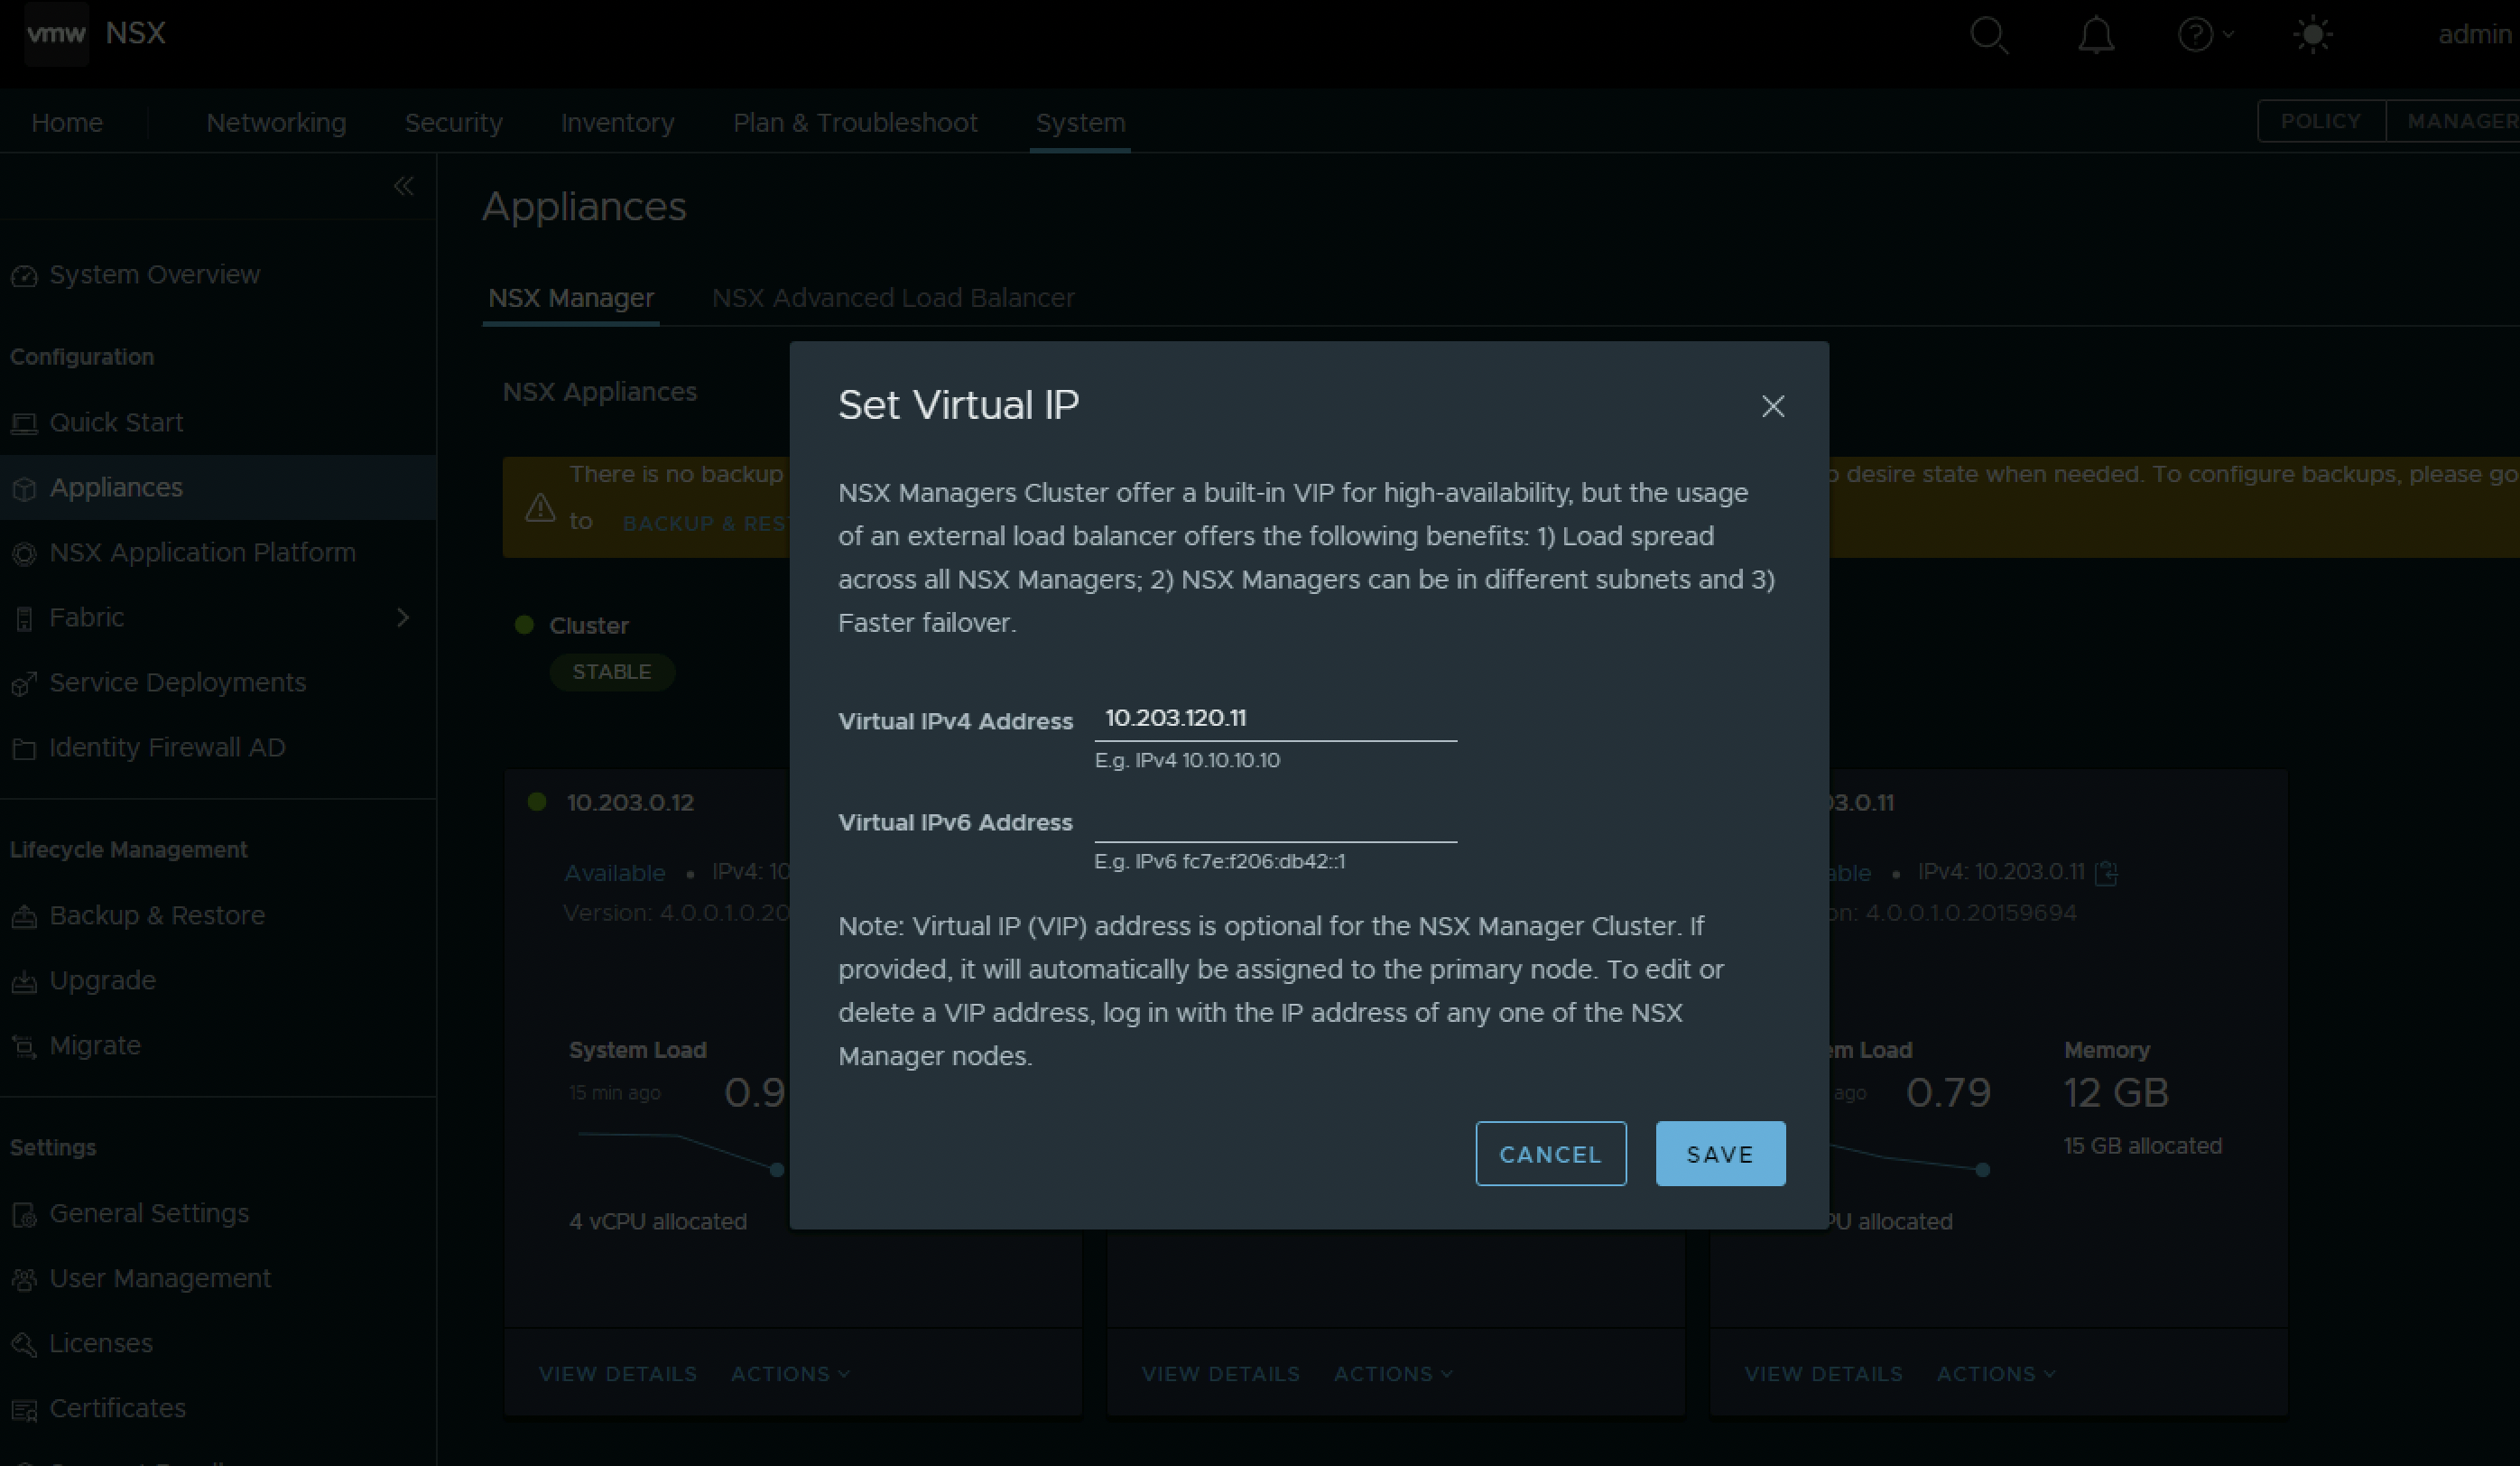
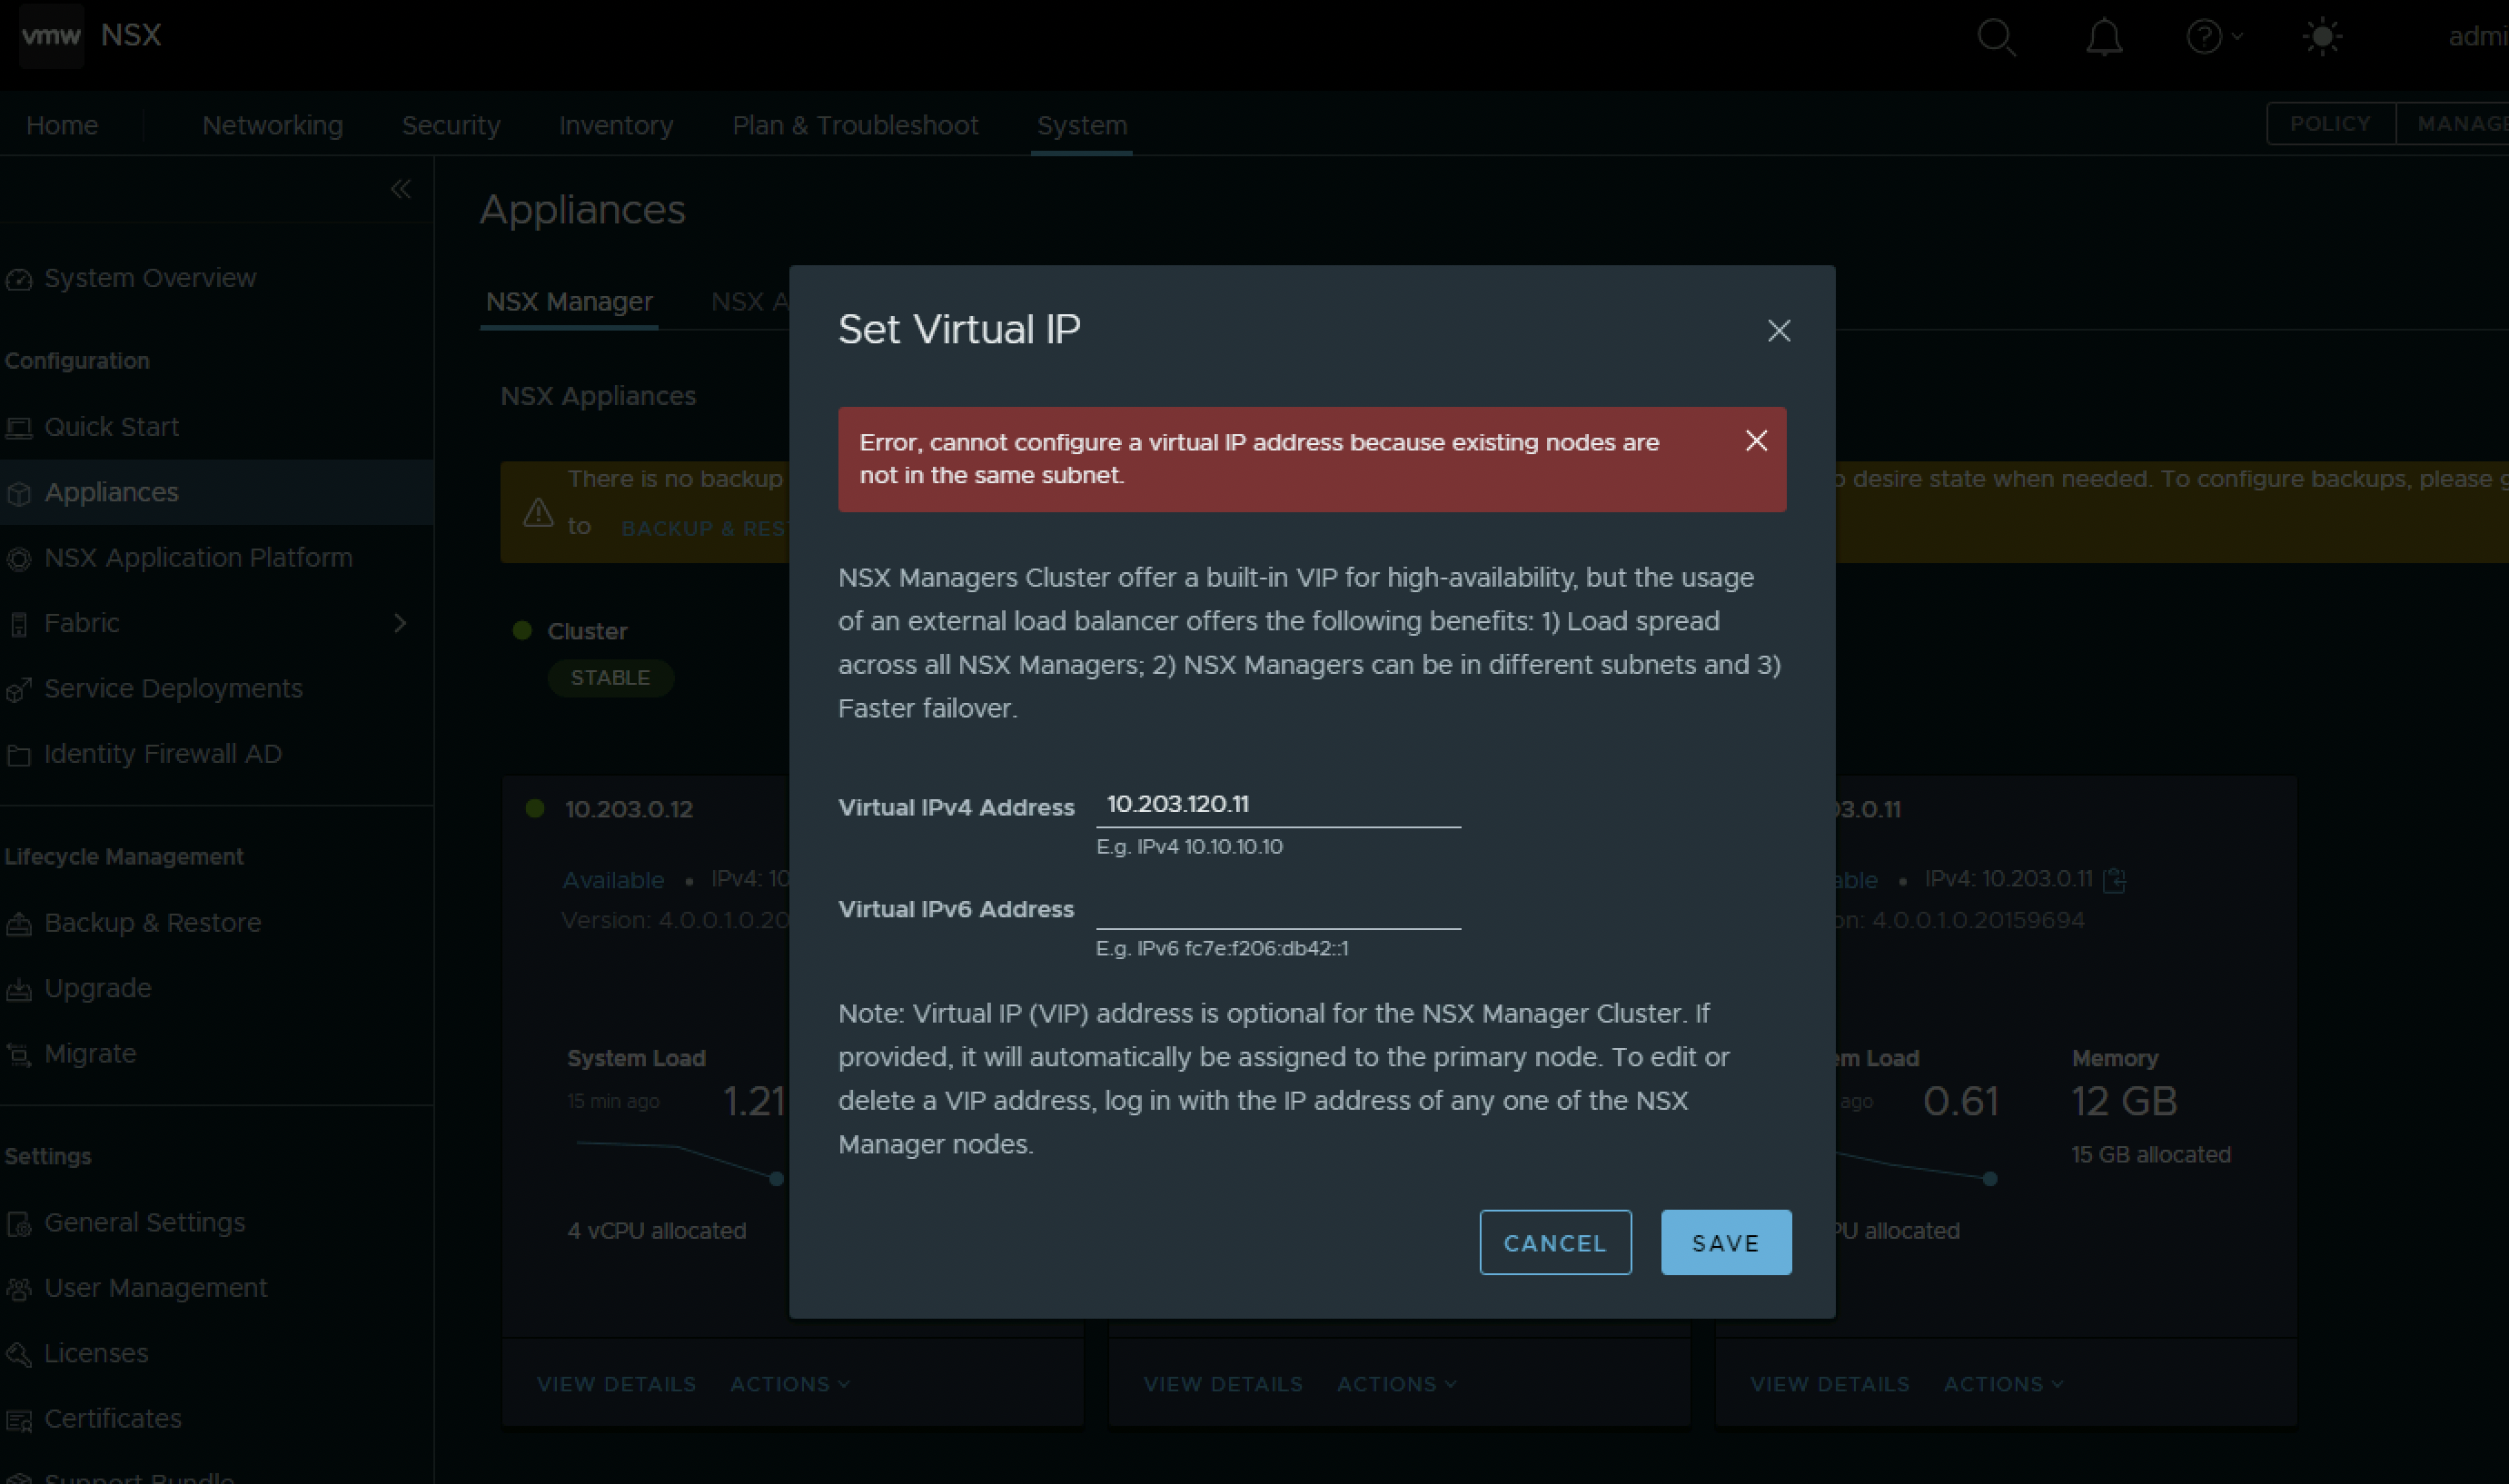
Make note of the error, as I am trying to do something that is not allowed.
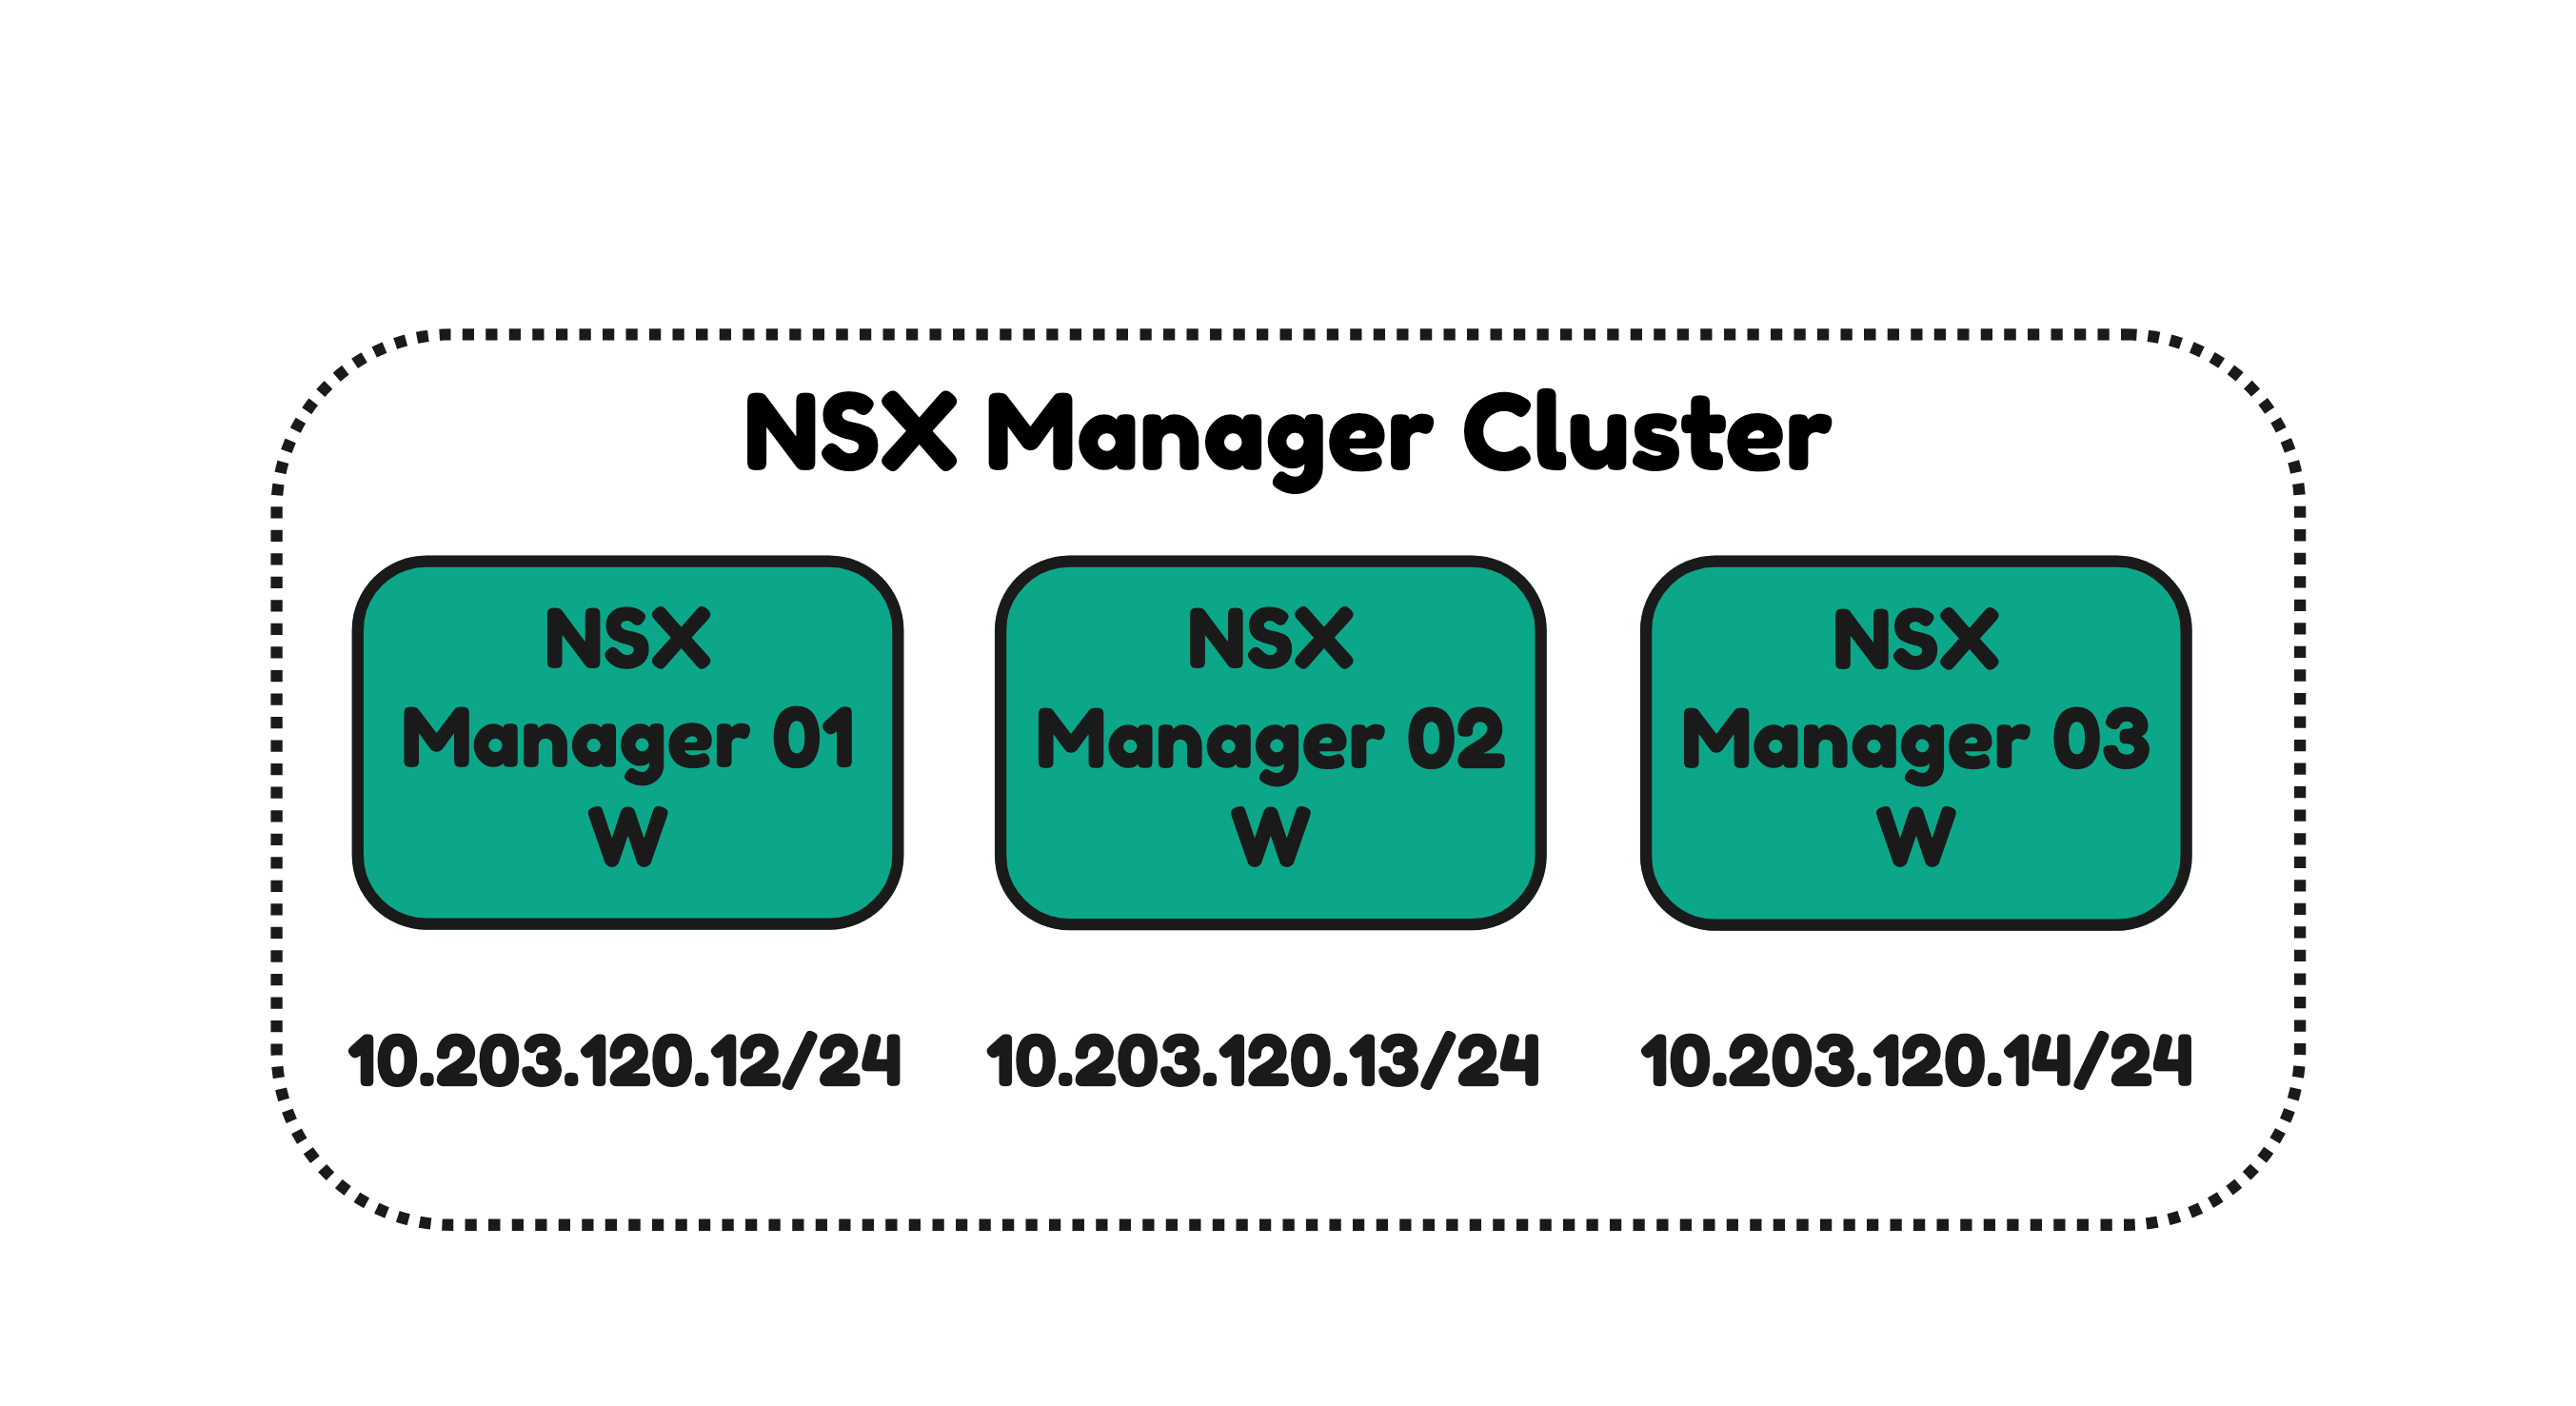
NSX Manager Nodes in the same network
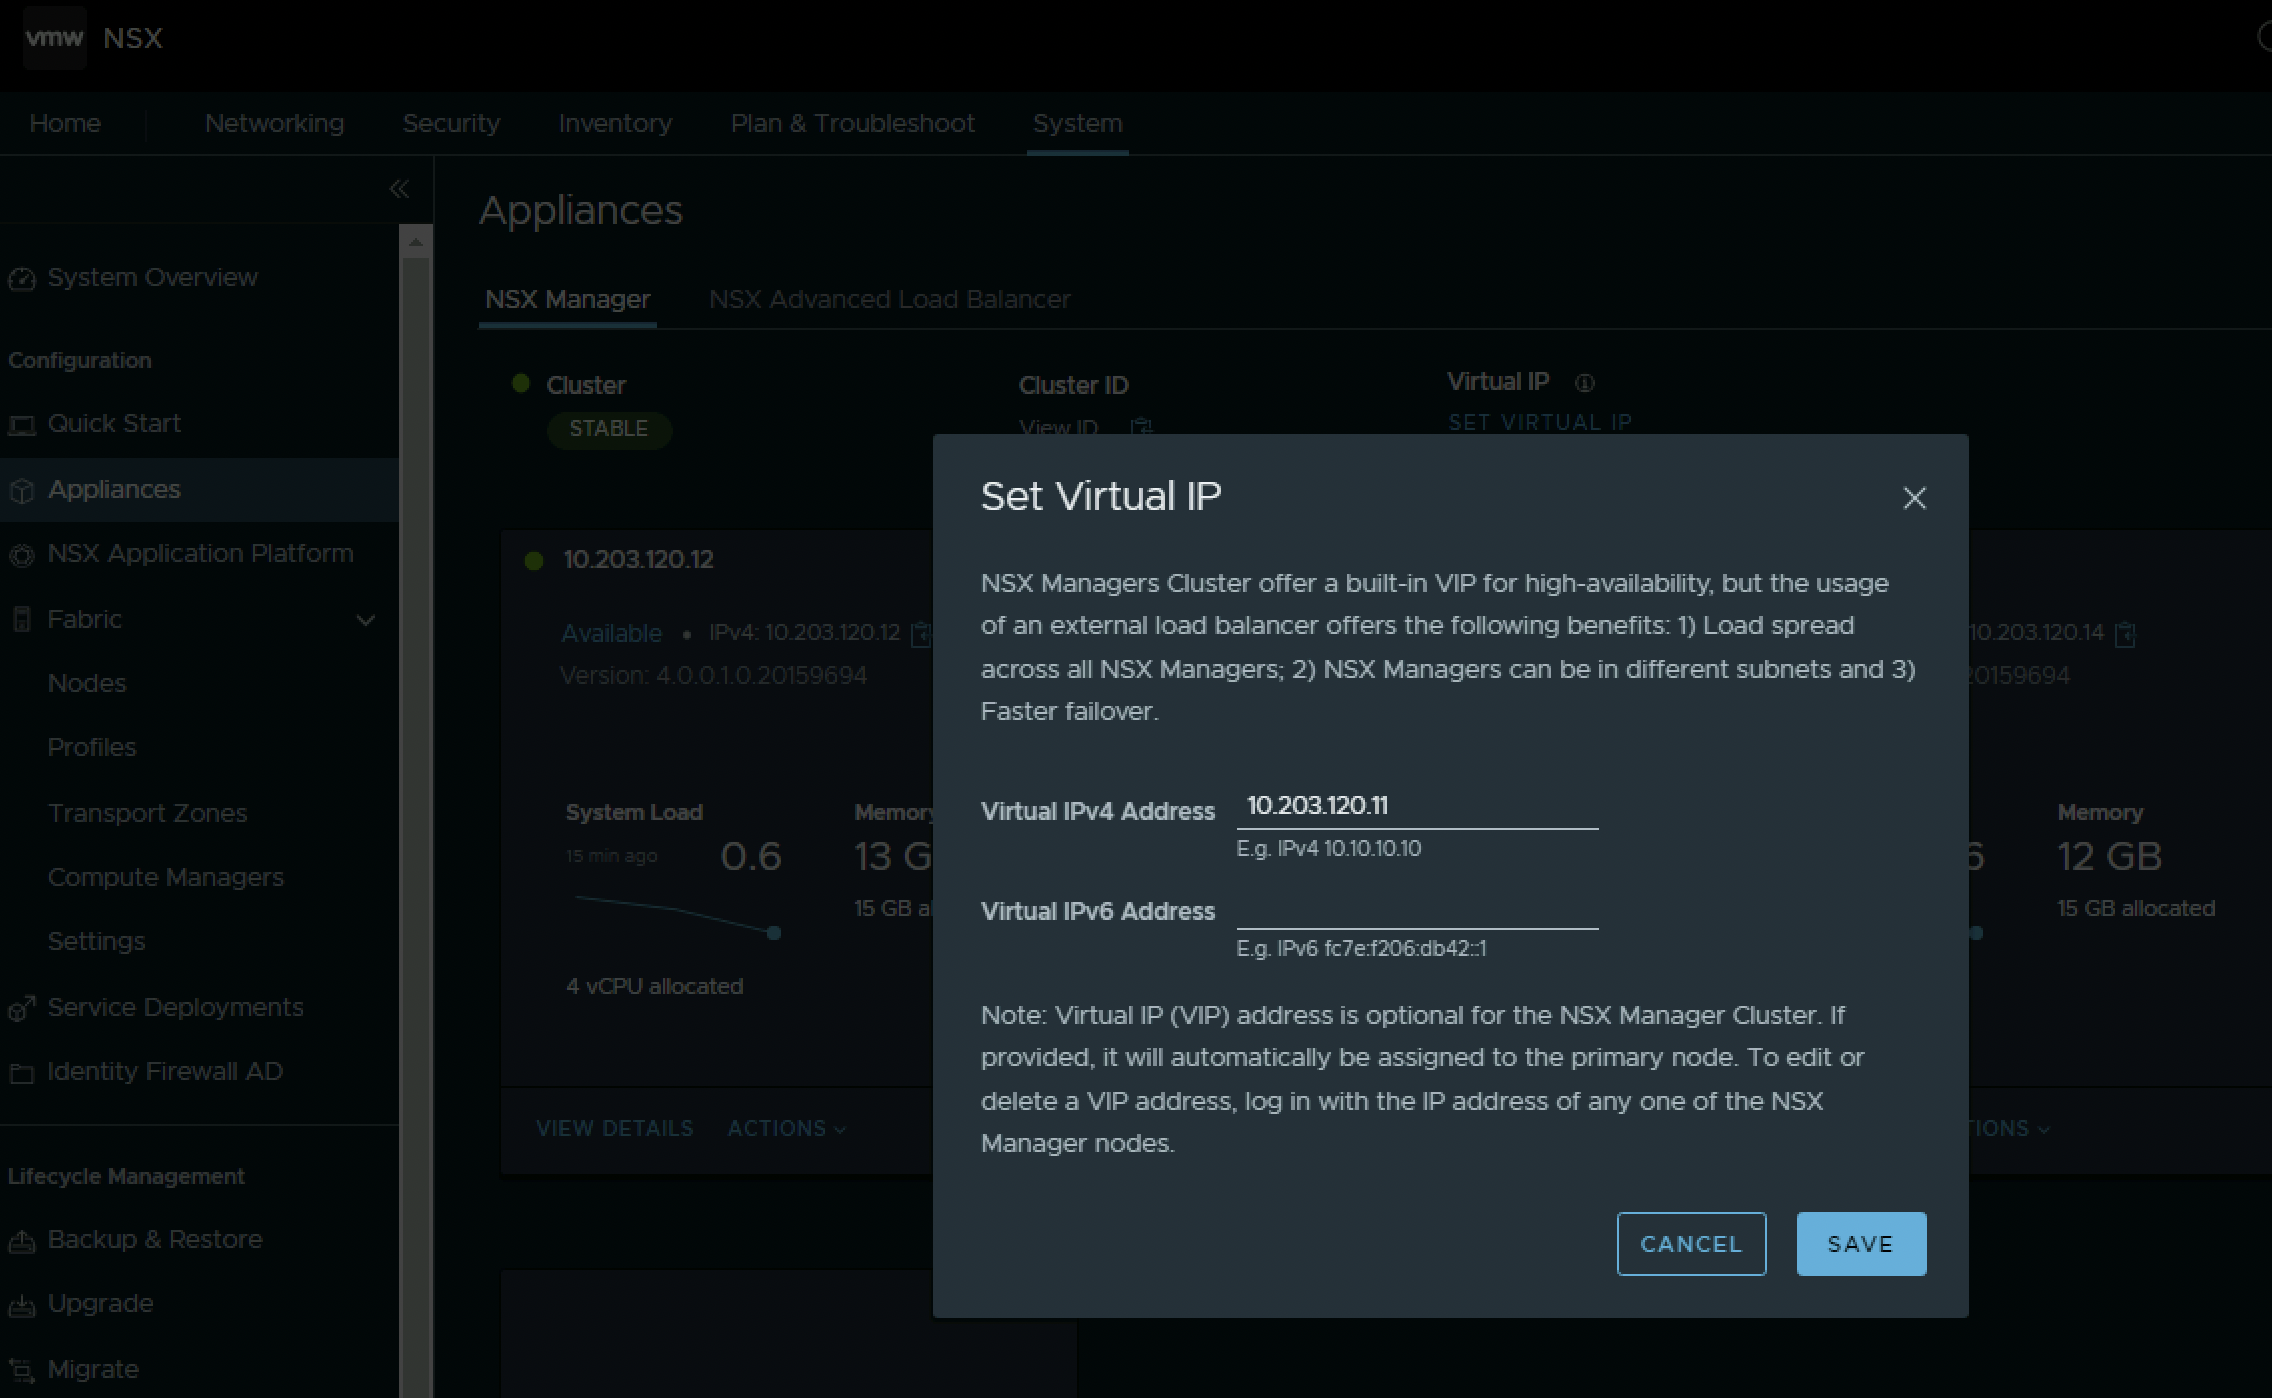
Let’s now try it with three NSX Manager Nodes that ARE in the same network. Click on “Set Virtual IP”.
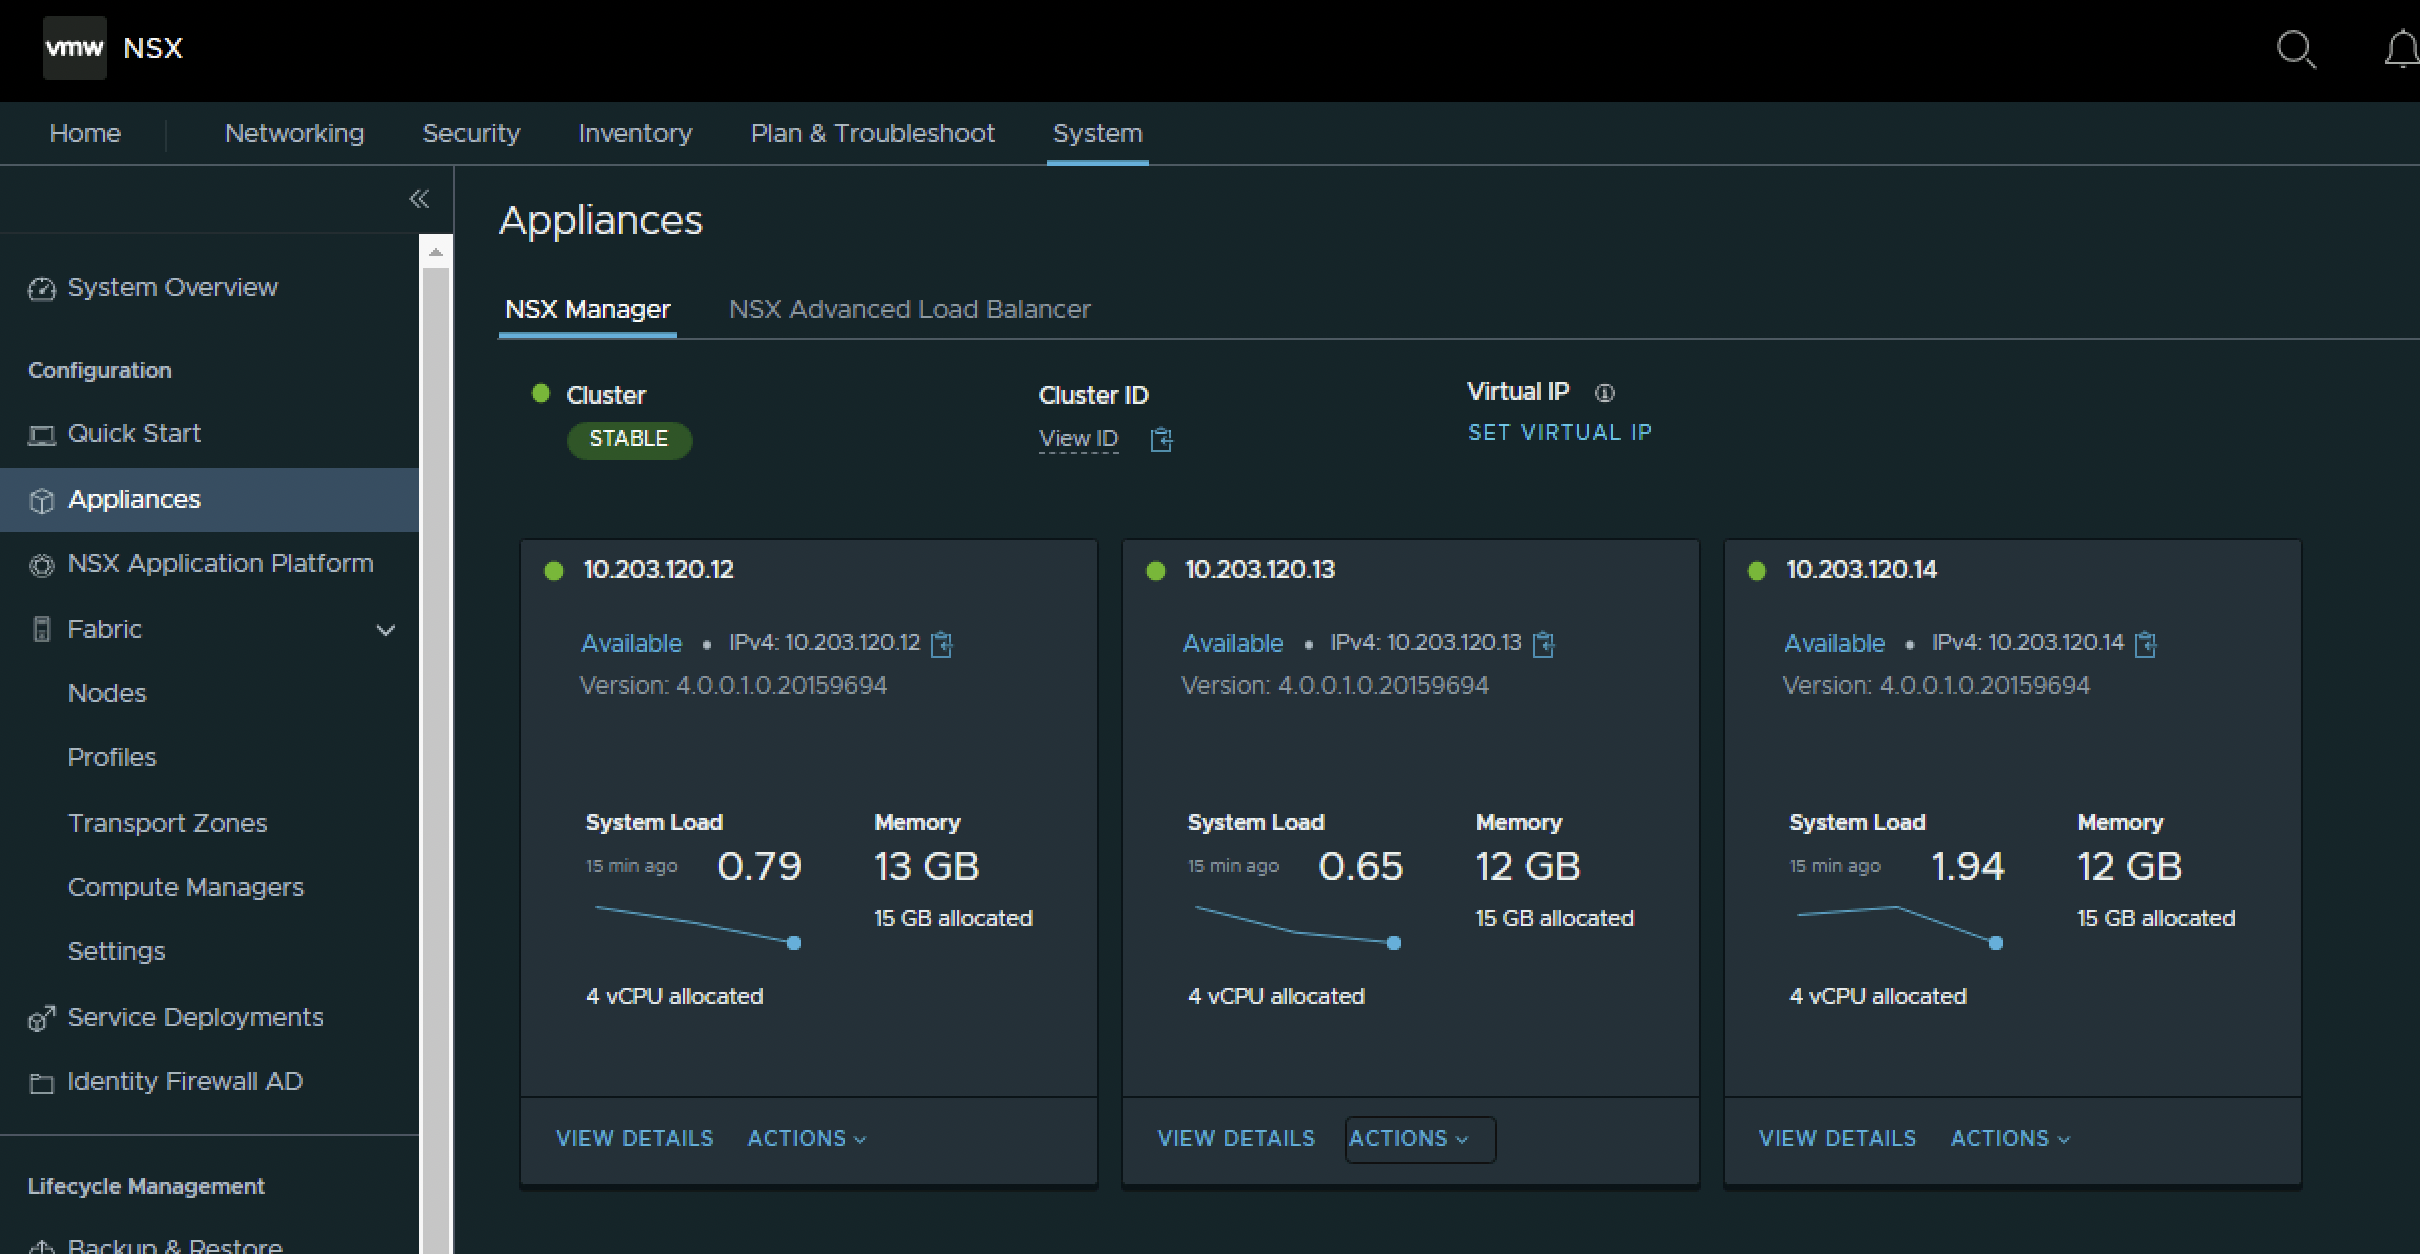
Specify the IP address.
Look at the status.

Verify if the Virtual IP is correctly configured below the “Virtual IP” label.
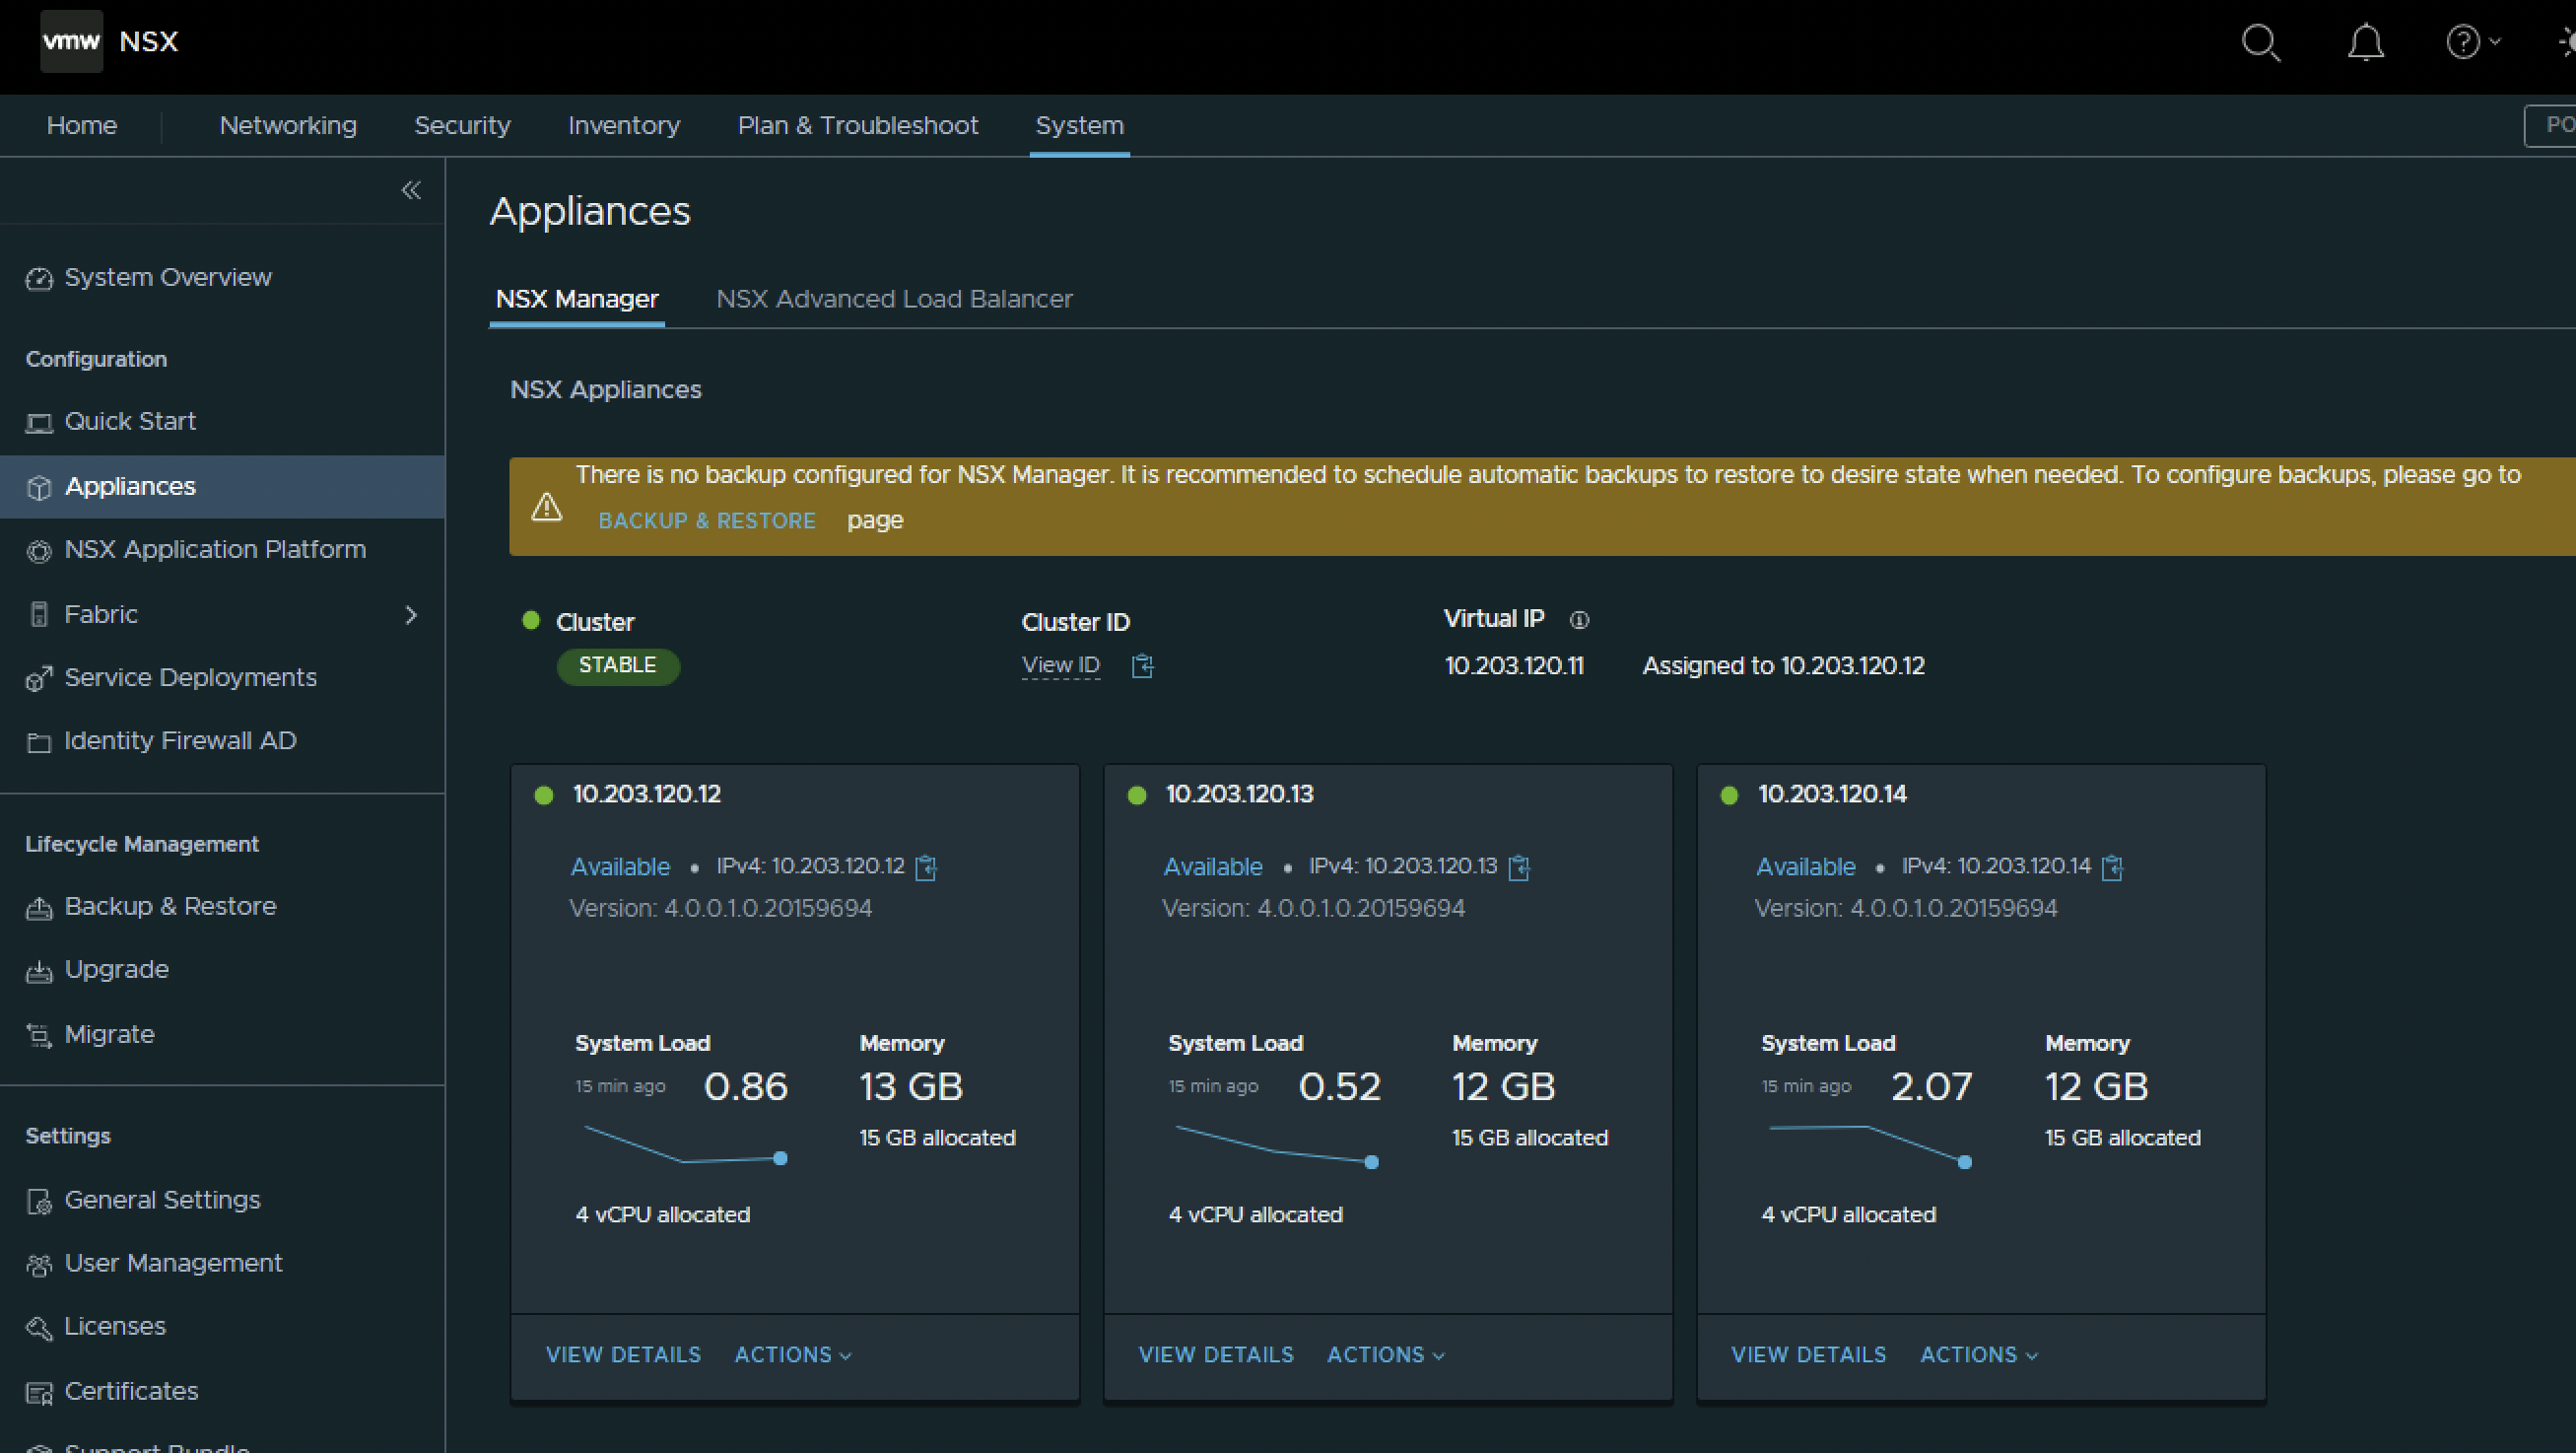
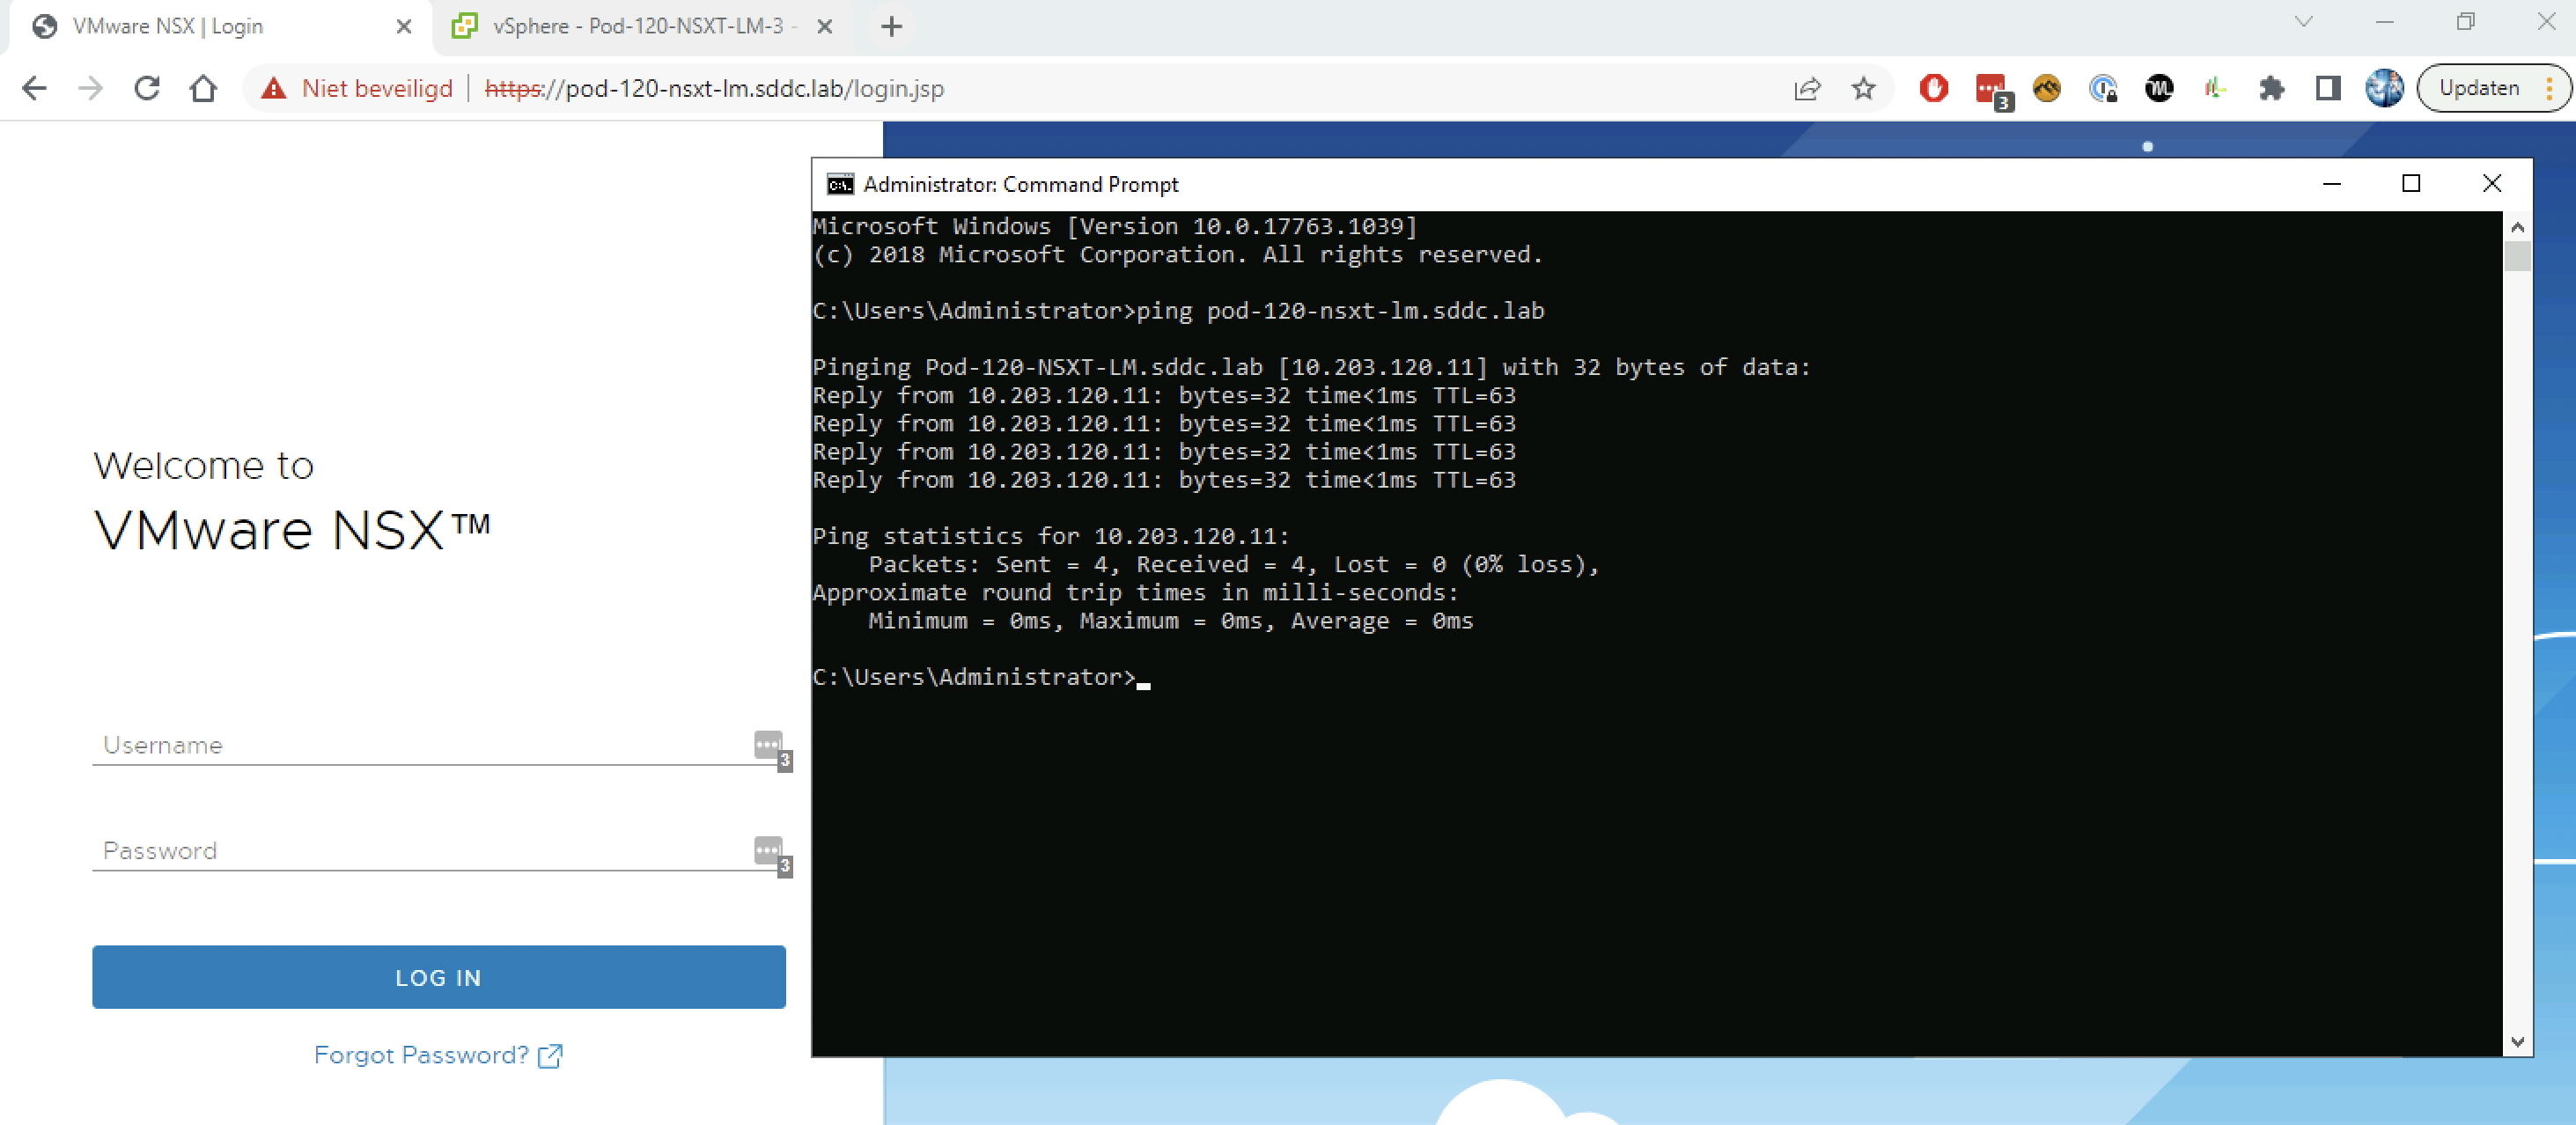
I can now browse to the FQDN that translates to the Virtual IP address to connect to the NSX Manager Cluster using this new Virtual IP address.
When I have the Virtual IP address (VIP) configured one of the NSX Manager Nodes will always be the leader, and this VIP is bound to the leader. To find out which NSX Manager Node is the leader issue the following command:
get cluster status verbosePod-120-NSXT-LM-1> get cluster status verbose
Thu Aug 25 2022 UTC 11:24:19.964
Cluster Id: e0681397-166e-4b49-9a3c-74fc1df3e9d1
Overall Status: STABLE
Group Type: DATASTORE
Group Status: STABLE
Members:
UUID FQDN IP STATUS
a7d94d56-cbfd-4ca9-8b9b-b2a9daa2d45a Pod-120-NSXT-LM-1.SDDC.Lab 10.203.120.12 UP
09d4df47-f293-4ea7-8173-92a320fed685 Pod-120-NSXT-LM-2 10.203.120.13 UP
f77633c9-69f2-41a2-b3f8-b14c96a7bec5 Pod-120-NSXT-LM-3 10.203.120.14 UP
Group Type: CLUSTER_BOOT_MANAGER
Group Status: STABLE
Members:
UUID FQDN IP STATUS
a7d94d56-cbfd-4ca9-8b9b-b2a9daa2d45a Pod-120-NSXT-LM-1.SDDC.Lab 10.203.120.12 UP
09d4df47-f293-4ea7-8173-92a320fed685 Pod-120-NSXT-LM-2 10.203.120.13 UP
f77633c9-69f2-41a2-b3f8-b14c96a7bec5 Pod-120-NSXT-LM-3 10.203.120.14 UP
Leaders:
SERVICE LEADER LEASE VERSION
cluster-manager a7d94d56-cbfd-4ca9-8b9b-b2a9daa2d45a 767
Group Type: CONTROLLER
Group Status: STABLE
Members:
UUID FQDN IP STATUS
81e59552-30ba-4cff-9540-1eda464c0072 Pod-120-NSXT-LM-1.SDDC.Lab 10.203.120.12 UP
537c5d50-a89e-4f93-933f-d94c75e1b5cd Pod-120-NSXT-LM-2 10.203.120.13 UP
1826609d-288d-4b21-87da-1a9aeb3a07a4 Pod-120-NSXT-LM-3 10.203.120.14 UP
Leaders:
SERVICE LEADER LEASE VERSION
ShardingService 81e59552-30ba-4cff-9540-1eda464c0072 726
Group Type: MANAGER
Group Status: STABLE
Members:
UUID FQDN IP STATUS
a7d94d56-cbfd-4ca9-8b9b-b2a9daa2d45a Pod-120-NSXT-LM-1.SDDC.Lab 10.203.120.12 UP
09d4df47-f293-4ea7-8173-92a320fed685 Pod-120-NSXT-LM-2 10.203.120.13 UP
f77633c9-69f2-41a2-b3f8-b14c96a7bec5 Pod-120-NSXT-LM-3 10.203.120.14 UP
Leaders:
SERVICE LEADER LEASE VERSION
ServiceConfigChangeWorker-GiServiceProfile a7d94d56-cbfd-4ca9-8b9b-b2a9daa2d45a 739
POLICY_SVC_IDS_GATEWAY_POLICY_PROVIDER a7d94d56-cbfd-4ca9-8b9b-b2a9daa2d45a 739
SHA_APPLIANCE_SERVICE a7d94d56-cbfd-4ca9-8b9b-b2a9daa2d45a 737
POLICY_SVC_POLICY_TRANSPORT_ZONE a7d94d56-cbfd-4ca9-8b9b-b2a9daa2d45a 739
POLICY_SVC_EDGE_TRANSPORT_NODE a7d94d56-cbfd-4ca9-8b9b-b2a9daa2d45a 737
UnderlayRouteWorker-UnderlayRouteRefreshTrigger a7d94d56-cbfd-4ca9-8b9b-b2a9daa2d45a 737
POLICY_SVC_LOADBALANCER a7d94d56-cbfd-4ca9-8b9b-b2a9daa2d45a 739
POLICY_SVC_TLS_PROFILE_PROVIDER a7d94d56-cbfd-4ca9-8b9b-b2a9daa2d45a 739
POLICY_SVC_GLOBAL a7d94d56-cbfd-4ca9-8b9b-b2a9daa2d45a 737
POLICY_SVC_FIREWALL a7d94d56-cbfd-4ca9-8b9b-b2a9daa2d45a 737
POLICY_SVC_PORTMIRRORINGPROFILE a7d94d56-cbfd-4ca9-8b9b-b2a9daa2d45a 737
MtuCheckQuartzSetupServiceImpl a7d94d56-cbfd-4ca9-8b9b-b2a9daa2d45a 739
POLICY_SVC_FLOOD_PROTECTION_PROFILES_PROVIDER a7d94d56-cbfd-4ca9-8b9b-b2a9daa2d45a 737
POLICY_SVC_IDS_SECTION_PROVIDER a7d94d56-cbfd-4ca9-8b9b-b2a9daa2d45a 740
EdgeNodeExternalConfigWorker-EdgeNodeExternalConfig a7d94d56-cbfd-4ca9-8b9b-b2a9daa2d45a 737
FirewallStatsPersistedQueueProcessor a7d94d56-cbfd-4ca9-8b9b-b2a9daa2d45a 737
AutoHealthCheckMonitor a7d94d56-cbfd-4ca9-8b9b-b2a9daa2d45a 739
POLICY_SVC_IDS_SIGNATURES_COMP_FILE_PROVIDER a7d94d56-cbfd-4ca9-8b9b-b2a9daa2d45a 737
LbAlarmShardingServiceImpl a7d94d56-cbfd-4ca9-8b9b-b2a9daa2d45a 737
POLICY_SVC_SHA_DYNAMIC_PLUGIN a7d94d56-cbfd-4ca9-8b9b-b2a9daa2d45a 740
IntelligenceHostConfigWorker-IntelligenceHostConfig a7d94d56-cbfd-4ca9-8b9b-b2a9daa2d45a 740
CentralConfigProcessor a7d94d56-cbfd-4ca9-8b9b-b2a9daa2d45a 739
POLICY_SVC_BYOD_POLICY_SERVICE_INSERTION a7d94d56-cbfd-4ca9-8b9b-b2a9daa2d45a 737
LM_NOTIFICATION_MANAGER a7d94d56-cbfd-4ca9-8b9b-b2a9daa2d45a 737
ALARMS_REFRESH_TASK a7d94d56-cbfd-4ca9-8b9b-b2a9daa2d45a 739
POLICY_SVC_GENERAL_SECURITY_PROFILES_PROVIDER a7d94d56-cbfd-4ca9-8b9b-b2a9daa2d45a 737
TraceflowCacheManager a7d94d56-cbfd-4ca9-8b9b-b2a9daa2d45a 740
POLICY_SVC_FORWARDING a7d94d56-cbfd-4ca9-8b9b-b2a9daa2d45a 737
POLICY_SVC_IDFW_IDS_TOGGLE a7d94d56-cbfd-4ca9-8b9b-b2a9daa2d45a 739
EdgeTNDeleteWorker-TransportNodeState a7d94d56-cbfd-4ca9-8b9b-b2a9daa2d45a 739
POLICY_SVC_EDGE_FIREWALL a7d94d56-cbfd-4ca9-8b9b-b2a9daa2d45a 739
CertificateShardingServiceImpl a7d94d56-cbfd-4ca9-8b9b-b2a9daa2d45a 737
POLICY_SVC_FIREWALL_IDENTITY a7d94d56-cbfd-4ca9-8b9b-b2a9daa2d45a 739
POLICY_SVC_LM_SITE_SPAN a7d94d56-cbfd-4ca9-8b9b-b2a9daa2d45a 740
POLICY_SVC_POLICY_FQDN_ANALYSIS_CONFIG_PROVIDER a7d94d56-cbfd-4ca9-8b9b-b2a9daa2d45a 740
OpsClusterService a7d94d56-cbfd-4ca9-8b9b-b2a9daa2d45a 737
POLICY_SVC_SECURITY_FEATURE_TOGGLE a7d94d56-cbfd-4ca9-8b9b-b2a9daa2d45a 737
POLICY_SVC_DFW_EXCLUDE_LIST a7d94d56-cbfd-4ca9-8b9b-b2a9daa2d45a 737
POLICY_SVC_IPFIX_DFW_PROFILE a7d94d56-cbfd-4ca9-8b9b-b2a9daa2d45a 739
POLICY_SVC_CLUSTER_CONTROL_PLANE a7d94d56-cbfd-4ca9-8b9b-b2a9daa2d45a 737
POLICY_SVC_QOS_PROFILE a7d94d56-cbfd-4ca9-8b9b-b2a9daa2d45a 739
POLICY_SVC_IPFIX_L2_COLLECTOR_PROFILE a7d94d56-cbfd-4ca9-8b9b-b2a9daa2d45a 739
POLICY_SVC_POLICY_SERVICE_INSERTION a7d94d56-cbfd-4ca9-8b9b-b2a9daa2d45a 739
POLICY_SVC_POLICY_GUEST_INTROSPECTION a7d94d56-cbfd-4ca9-8b9b-b2a9daa2d45a 737
POLICY_SVC_SEGMENTPORT a7d94d56-cbfd-4ca9-8b9b-b2a9daa2d45a 737
POLICY_SVC_MALWARE_PREVENTION_PROFILE_PROVIDER a7d94d56-cbfd-4ca9-8b9b-b2a9daa2d45a 739
POLICY_SVC_ADVANCELOADBALANCER a7d94d56-cbfd-4ca9-8b9b-b2a9daa2d45a 739
POLICY_SVC_POLICY_SERVICE_INSERTION_EW a7d94d56-cbfd-4ca9-8b9b-b2a9daa2d45a 737
ENFORCEMENT_POINT_RELOAD_TASK a7d94d56-cbfd-4ca9-8b9b-b2a9daa2d45a 737
POLICY_SVC_GATEWAY_QOS_PROFILE a7d94d56-cbfd-4ca9-8b9b-b2a9daa2d45a 737
RealizationServiceMaintenanceManager a7d94d56-cbfd-4ca9-8b9b-b2a9daa2d45a 739
IntelligenceClusterConfigWorker-IntelligenceClusterConfig a7d94d56-cbfd-4ca9-8b9b-b2a9daa2d45a 737
MirrorStackMonitorImpl a7d94d56-cbfd-4ca9-8b9b-b2a9daa2d45a 737
IP_REPUTATION_FEED_DOWNLOAD_TASK a7d94d56-cbfd-4ca9-8b9b-b2a9daa2d45a 739
ShaClusterServiceImpl a7d94d56-cbfd-4ca9-8b9b-b2a9daa2d45a 739
POLICY_SVC_NSSERVICEGROUP a7d94d56-cbfd-4ca9-8b9b-b2a9daa2d45a 737
POLICY_SVC_POLICY_UC_DEPLOYMENT_CONFIG a7d94d56-cbfd-4ca9-8b9b-b2a9daa2d45a 739
POLICY_SVC_IPFIX_L2_GLOBAL_PROFILE a7d94d56-cbfd-4ca9-8b9b-b2a9daa2d45a 737
SECURITY_ALARM_SERVICE a7d94d56-cbfd-4ca9-8b9b-b2a9daa2d45a 739
POLICY_SVC_DISCOVERY a7d94d56-cbfd-4ca9-8b9b-b2a9daa2d45a 737
POLICY_SVC_IDS_GLOBAL_CONFIG a7d94d56-cbfd-4ca9-8b9b-b2a9daa2d45a 739
POLICY_SVC_FIREWALL_SCHEDULER a7d94d56-cbfd-4ca9-8b9b-b2a9daa2d45a 739
POLICY_SVC_IDS_GATEWAY_SECTION_PROVIDER a7d94d56-cbfd-4ca9-8b9b-b2a9daa2d45a 737
POLICY_SVC_CERTIFICATE a7d94d56-cbfd-4ca9-8b9b-b2a9daa2d45a 739
POLICY_SVC_OPS_GLOBAL_CONFIG a7d94d56-cbfd-4ca9-8b9b-b2a9daa2d45a 737
POLICY_SVC_POLICY_EDGE_CLUSTER_PROVIDER a7d94d56-cbfd-4ca9-8b9b-b2a9daa2d45a 739
POLICY_SVC_VM_TAG_REPLICATION_POLICY_PROVIDER a7d94d56-cbfd-4ca9-8b9b-b2a9daa2d45a 739
POLICY_SVC_MAC_DISCOVERY a7d94d56-cbfd-4ca9-8b9b-b2a9daa2d45a 737
POLICY_SVC_LATENCY_STAT_PROFILE a7d94d56-cbfd-4ca9-8b9b-b2a9daa2d45a 739
LicensingShardingServiceImpl a7d94d56-cbfd-4ca9-8b9b-b2a9daa2d45a 737
LiveTraceMessageManager a7d94d56-cbfd-4ca9-8b9b-b2a9daa2d45a 737
POLICY_SVC_IDS_STANDALONE_HOST_CONFIG a7d94d56-cbfd-4ca9-8b9b-b2a9daa2d45a 737
POLICY_SVC_IPFIX_DFW_GROUP_PROFILE a7d94d56-cbfd-4ca9-8b9b-b2a9daa2d45a 737
POLICY_SVC_L7_ACCESS_PROFILE a7d94d56-cbfd-4ca9-8b9b-b2a9daa2d45a 740
POLICY_SVC_GROUPING a7d94d56-cbfd-4ca9-8b9b-b2a9daa2d45a 739
DataReaper a7d94d56-cbfd-4ca9-8b9b-b2a9daa2d45a 739
POLICY_SVC_ROUTING a7d94d56-cbfd-4ca9-8b9b-b2a9daa2d45a 740
POLICY_SVC_METADATA_PROXY a7d94d56-cbfd-4ca9-8b9b-b2a9daa2d45a 739
COMMON_AGENT_SERVICE a7d94d56-cbfd-4ca9-8b9b-b2a9daa2d45a 739
POLICY_SVC_VPN a7d94d56-cbfd-4ca9-8b9b-b2a9daa2d45a 737
POLICY_SVC_IPFIXSWITCHCOLLECTION a7d94d56-cbfd-4ca9-8b9b-b2a9daa2d45a 737
POLICY_SVC_CONTEXT_PROFILE a7d94d56-cbfd-4ca9-8b9b-b2a9daa2d45a 737
NodeStatusPropertiesStreamListenerService a7d94d56-cbfd-4ca9-8b9b-b2a9daa2d45a 737
POLICY-INTENT-CLEANUP-SERVICE a7d94d56-cbfd-4ca9-8b9b-b2a9daa2d45a 737
POLICY_SVC_FIREWALL_CPU_MEMORY_THRESHOLDS_PROFILE_PROVIDER a7d94d56-cbfd-4ca9-8b9b-b2a9daa2d45a 737
COMMON_AGENT_ALARM_SERVICE a7d94d56-cbfd-4ca9-8b9b-b2a9daa2d45a 737
POLICY_SVC_TIER1 a7d94d56-cbfd-4ca9-8b9b-b2a9daa2d45a 737
FirewallPersistenceQueueProcessor a7d94d56-cbfd-4ca9-8b9b-b2a9daa2d45a 739
POLICY_SVC_DNS a7d94d56-cbfd-4ca9-8b9b-b2a9daa2d45a 737
POLICY_SVC_TIER0 a7d94d56-cbfd-4ca9-8b9b-b2a9daa2d45a 737
TNStateWorker-TransportNodeState a7d94d56-cbfd-4ca9-8b9b-b2a9daa2d45a 740
POLICY_SVC_NATRULE a7d94d56-cbfd-4ca9-8b9b-b2a9daa2d45a 739
ManualHealthCheckMonitor a7d94d56-cbfd-4ca9-8b9b-b2a9daa2d45a 739
POLICY_SVC_BASE_HOST_SWITCH_PROFILE a7d94d56-cbfd-4ca9-8b9b-b2a9daa2d45a 737
ActivityPurger a7d94d56-cbfd-4ca9-8b9b-b2a9daa2d45a 740
POLICY_SVC_METRIC_GLOBAL_CONFIG a7d94d56-cbfd-4ca9-8b9b-b2a9daa2d45a 739
CentralNodeConfigService a7d94d56-cbfd-4ca9-8b9b-b2a9daa2d45a 739
POLICY_SVC_IPFIX_L2_PROFILE a7d94d56-cbfd-4ca9-8b9b-b2a9daa2d45a 737
POLICY_SVC_IPFIXDFWCOLLECTORPROFILE a7d94d56-cbfd-4ca9-8b9b-b2a9daa2d45a 739
POLICY_SVC_SHA_PLUGIN_PROFILE a7d94d56-cbfd-4ca9-8b9b-b2a9daa2d45a 737
POLICY_SVC_POLICY_URL_CATEGORIZATION_CONFIG_PROVIDER a7d94d56-cbfd-4ca9-8b9b-b2a9daa2d45a 737
POLICY_SVC_DFW_SESSION_TIMER_PROFILE a7d94d56-cbfd-4ca9-8b9b-b2a9daa2d45a 739
POLICY_SVC_IPAM a7d94d56-cbfd-4ca9-8b9b-b2a9daa2d45a 737
POLICY_SVC_SESSION_TIMER_PROFILES_PROVIDER a7d94d56-cbfd-4ca9-8b9b-b2a9daa2d45a 739
LM_CONSUMER_SERVICE a7d94d56-cbfd-4ca9-8b9b-b2a9daa2d45a 737
POLICY_SVC_INITIALIZER a7d94d56-cbfd-4ca9-8b9b-b2a9daa2d45a 737
POLICY_SVC_IDS_PROFILE_PROVIDER a7d94d56-cbfd-4ca9-8b9b-b2a9daa2d45a 737
com.vmware.nsx.management.nsxealarms.facade.NsxeAlarmFacadeImpl a7d94d56-cbfd-4ca9-8b9b-b2a9daa2d45a 737
ServiceConfigChangeWorker-ServiceConfig a7d94d56-cbfd-4ca9-8b9b-b2a9daa2d45a 740
HealthCheckRequestMonitor a7d94d56-cbfd-4ca9-8b9b-b2a9daa2d45a 739
POLICY_SVC_SECURITY_PROFILE a7d94d56-cbfd-4ca9-8b9b-b2a9daa2d45a 737
IdfwDbDaemon a7d94d56-cbfd-4ca9-8b9b-b2a9daa2d45a 737
METRIC_AGENT_SERVICE a7d94d56-cbfd-4ca9-8b9b-b2a9daa2d45a 739
POLICY_SVC_CVX_SECURITY a7d94d56-cbfd-4ca9-8b9b-b2a9daa2d45a 739
POLICY_SVC_TRACE_GLOBAL_CONFIG a7d94d56-cbfd-4ca9-8b9b-b2a9daa2d45a 737
POLICY_SVC_REDIRECTION_FIREWALL a7d94d56-cbfd-4ca9-8b9b-b2a9daa2d45a 737
LM_SITE_OFFBOARDING a7d94d56-cbfd-4ca9-8b9b-b2a9daa2d45a 737
TransportNodeStatusMessageListener a7d94d56-cbfd-4ca9-8b9b-b2a9daa2d45a 737
CentralNodeConfigProcessor a7d94d56-cbfd-4ca9-8b9b-b2a9daa2d45a 739
INTELLIGENCE_AGENT_SERVICE a7d94d56-cbfd-4ca9-8b9b-b2a9daa2d45a 737
QuartzSetupServiceImpl a7d94d56-cbfd-4ca9-8b9b-b2a9daa2d45a 739
POLICY_SVC_POLICY_PLATFORM_DEPLOYMENT_CONFIG a7d94d56-cbfd-4ca9-8b9b-b2a9daa2d45a 739
POLICY_SVC_TAG_BULK_OPERATION a7d94d56-cbfd-4ca9-8b9b-b2a9daa2d45a 737
ServiceInsertionPersistenceQueueProcessor a7d94d56-cbfd-4ca9-8b9b-b2a9daa2d45a 737
POLICY_SVC_CONNECTIVITY a7d94d56-cbfd-4ca9-8b9b-b2a9daa2d45a 737
POLICY_SVC_POLICY_TRANSPORT_ZONE_PROFILE a7d94d56-cbfd-4ca9-8b9b-b2a9daa2d45a 739
POLICY_SVC_TLS_FQDN_STATE a7d94d56-cbfd-4ca9-8b9b-b2a9daa2d45a 737
POLICY_SVC_TRANSPORT_NODE a7d94d56-cbfd-4ca9-8b9b-b2a9daa2d45a 740
ShardingMaster a7d94d56-cbfd-4ca9-8b9b-b2a9daa2d45a 739
POLICY_SVC_PORTMIRRORINGINSTANCE a7d94d56-cbfd-4ca9-8b9b-b2a9daa2d45a 739
AUTO_DRAFT_PURGE_TASK a7d94d56-cbfd-4ca9-8b9b-b2a9daa2d45a 739
POLICY_SVC_SEGMENT a7d94d56-cbfd-4ca9-8b9b-b2a9daa2d45a 737
POLICY_SVC_IP_DISCOVERY a7d94d56-cbfd-4ca9-8b9b-b2a9daa2d45a 740
POLICY_SVC_NSSERVICE a7d94d56-cbfd-4ca9-8b9b-b2a9daa2d45a 739
SERVICE_CONFIG_PRECEDENCE_PROVIDER a7d94d56-cbfd-4ca9-8b9b-b2a9daa2d45a 737
Group Type: HTTPS
Group Status: STABLE
Members:
UUID FQDN IP STATUS
a7d94d56-cbfd-4ca9-8b9b-b2a9daa2d45a Pod-120-NSXT-LM-1.SDDC.Lab 10.203.120.12 UP
09d4df47-f293-4ea7-8173-92a320fed685 Pod-120-NSXT-LM-2 10.203.120.13 UP
f77633c9-69f2-41a2-b3f8-b14c96a7bec5 Pod-120-NSXT-LM-3 10.203.120.14 UP
Leaders:
SERVICE LEADER LEASE VERSION
api a7d94d56-cbfd-4ca9-8b9b-b2a9daa2d45a 739
Group Type: IDPS_REPORTING
Group Status: STABLE
Members:
UUID FQDN IP STATUS
a7d94d56-cbfd-4ca9-8b9b-b2a9daa2d45a Pod-120-NSXT-LM-1.SDDC.Lab 10.203.120.12 UP
09d4df47-f293-4ea7-8173-92a320fed685 Pod-120-NSXT-LM-2 10.203.120.13 UP
f77633c9-69f2-41a2-b3f8-b14c96a7bec5 Pod-120-NSXT-LM-3 10.203.120.14 UP
Leaders:
SERVICE LEADER LEASE VERSION
idps-reporting a7d94d56-cbfd-4ca9-8b9b-b2a9daa2d45a 739
Group Type: MONITORING
Group Status: STABLE
Members:
UUID FQDN IP STATUS
a7d94d56-cbfd-4ca9-8b9b-b2a9daa2d45a Pod-120-NSXT-LM-1.SDDC.Lab 10.203.120.12 UP
09d4df47-f293-4ea7-8173-92a320fed685 Pod-120-NSXT-LM-2 10.203.120.13 UP
f77633c9-69f2-41a2-b3f8-b14c96a7bec5 Pod-120-NSXT-LM-3 10.203.120.14 UP
Leaders:
SERVICE LEADER LEASE VERSION
monitoring a7d94d56-cbfd-4ca9-8b9b-b2a9daa2d45a 755
ShardingMaster a7d94d56-cbfd-4ca9-8b9b-b2a9daa2d45a 755
CoordinatedDataCollectionLeader a7d94d56-cbfd-4ca9-8b9b-b2a9daa2d45a 755
Group Type: CM-INVENTORY
Group Status: STABLE
Members:
UUID FQDN IP STATUS
a7d94d56-cbfd-4ca9-8b9b-b2a9daa2d45a Pod-120-NSXT-LM-1.SDDC.Lab 10.203.120.12 UP
09d4df47-f293-4ea7-8173-92a320fed685 Pod-120-NSXT-LM-2 10.203.120.13 UP
f77633c9-69f2-41a2-b3f8-b14c96a7bec5 Pod-120-NSXT-LM-3 10.203.120.14 UP
Leaders:
SERVICE LEADER LEASE VERSION
ShardingMaster a7d94d56-cbfd-4ca9-8b9b-b2a9daa2d45a 755
Group Type: MESSAGING-MANAGER
Group Status: STABLE
Members:
UUID FQDN IP STATUS
a7d94d56-cbfd-4ca9-8b9b-b2a9daa2d45a Pod-120-NSXT-LM-1.SDDC.Lab 10.203.120.12 UP
09d4df47-f293-4ea7-8173-92a320fed685 Pod-120-NSXT-LM-2 10.203.120.13 UP
f77633c9-69f2-41a2-b3f8-b14c96a7bec5 Pod-120-NSXT-LM-3 10.203.120.14 UP
Leaders:
SERVICE LEADER LEASE VERSION
messaging-manager a7d94d56-cbfd-4ca9-8b9b-b2a9daa2d45a 763
Group Type: SITE_MANAGER
Group Status: STABLE
Members:
UUID FQDN IP STATUS
a7d94d56-cbfd-4ca9-8b9b-b2a9daa2d45a Pod-120-NSXT-LM-1.SDDC.Lab 10.203.120.12 UP
09d4df47-f293-4ea7-8173-92a320fed685 Pod-120-NSXT-LM-2 10.203.120.13 UP
f77633c9-69f2-41a2-b3f8-b14c96a7bec5 Pod-120-NSXT-LM-3 10.203.120.14 UP
Leaders:
SERVICE LEADER LEASE VERSION
site-manager a7d94d56-cbfd-4ca9-8b9b-b2a9daa2d45a 765
Group Type: CORFU_NONCONFIG
Group Status: STABLE
Members:
UUID FQDN IP STATUS
a7d94d56-cbfd-4ca9-8b9b-b2a9daa2d45a Pod-120-NSXT-LM-1.SDDC.Lab 10.203.120.12 UP
09d4df47-f293-4ea7-8173-92a320fed685 Pod-120-NSXT-LM-2 10.203.120.13 UP
f77633c9-69f2-41a2-b3f8-b14c96a7bec5 Pod-120-NSXT-LM-3 10.203.120.14 UP
Pod-120-NSXT-LM-1>The output shows that the leader is a7d94d56-cbfd-4ca9-8b9b-b2a9daa2d45a and this is the NSX Manager Node with the IP address of 10.203.120.12/24.
Continue with >> Lab: NSX Manager backup configuration