Fixing the 'Cannot show information Failed to get API session' error when using the OCI CLI network commands on OCI instances
Introduction
Encountering the error "Cannot show information: Failed to get API session" when using OCI CLI network commands on Oracle Cloud Infrastructure (OCI) instances can be frustrating, especially when you're managing critical network configurations.
In this tutorial, we'll walk you through the common cause of this issue and provide clear, step-by-step instructions to resolve it.
Prerequisites
- Oracle Linux Instance running inside OCI
The Issue
The commands sudo oci-network-config show and sudo oci-network-config configure are part of the Oracle Cloud Infrastructure (OCI) networking utilities. These commands are used to manage and troubleshoot networking configurations in environments that interact with OCI.
Here’s a breakdown of each command:
sudo oci-network-config show
- Purpose: This command is used to display the current networking configuration on an OCI instance.
- Key Use Cases:
- Troubleshooting network issues.
- Verifying the current Virtual Network Interface Card (VNIC) configuration, such as private IPs, public IPs, subnet information, and VLANs.
- Ensuring that the instance has the correct IP and routing configurations in a multi-cloud or hybrid setup.
sudo oci-network-config configure
- Purpose: This command is used to reconfigure the networking settings of an instance, typically to make changes or to restore network connectivity.
- Key Use Cases:
- Attaching or detaching secondary VNICs.
- Configuring new IP addresses on existing VNICs.
- Dynamically modifying the network settings after updates to OCI resources like subnets or VLANs.
- Ensuring that instances comply with updated OCI network security rules or routing changes.
Below you will see an example where we will try to run the sudo oci-network-config show command and we are getting the Cannot show information: Failed to get API session. error.
- Issue the command
sudo oci-network-config showto retrieve all network configurations from the instance. - Notice the error:
Cannot show information: Failed to get API session.The information regarding the VNICS of the instance will not be provided on the Operating System Level and not on the OCI level.
This is not possible as we will get the same error when we issue the command oci-network-config show that is Cannot show information: Failed to get API session.
Why are we getting this error?
- A VCN is not an object owned by an instance, which means the instance cannot directly access VCN information without proper authentication.
- To enable the instance to fetch VCN details from the API, you must create a dynamic group that includes the instance and assign a policy granting the necessary permissions.
To enable an Oracle Cloud Infrastructure (OCI) instance to fetch Virtual Cloud Network (VCN) details via API, the following steps are typically required:
- Create a Dynamic Group: This dynamic group includes the instance(s) that require access to the API. You define the group using rules based on attributes like instance OCID or compartment.
- Assign Permissions with a Policy: You need to create an Identity and Access Management (IAM) policy that grants the dynamic group permission to read or manage VCN-related resources. For example:
allow dynamic-group <dynamic-group-name> to read virtual-network-family in compartment <compartment-name>
- Use Instance, Principals, for Authentication: Instances in the dynamic group authenticate directly using their identity, allowing secure API access without embedding credentials in the application. This method simplifies security management while maintaining robust access control.
Let's try it out.
The Fix
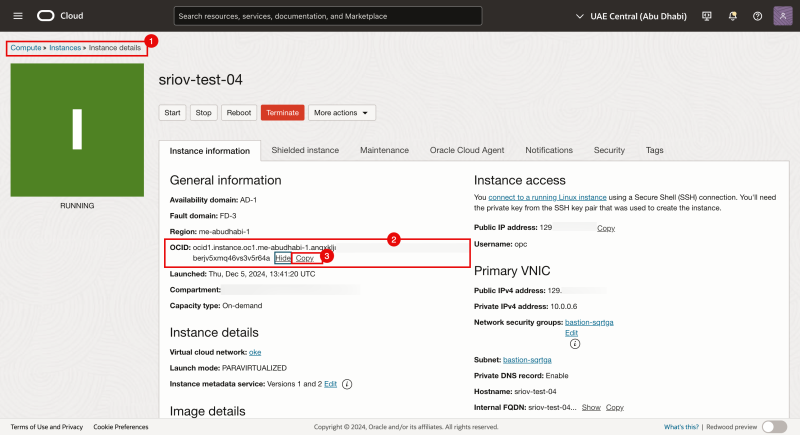
- Click on the hamburger menu by navigating through Compute > Instance and click on the compute instance you want to issue the commands
sudo oci-network-config showandsudo oci-network-config configureon. - Click on Show to display the Instance OCID value.
- Click on copy to copy the Instance OCID value.
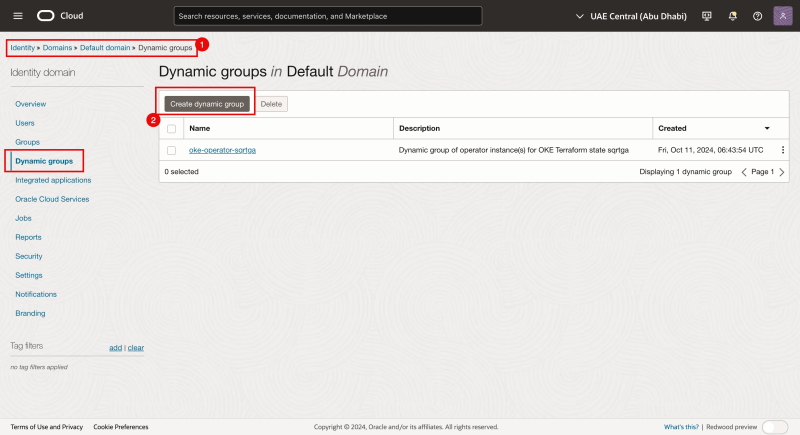
- Click on the hamburger menu by navigating through Identity > Domains > Default domain > Dynamic groups.
- Click on the Create dynamic group button.
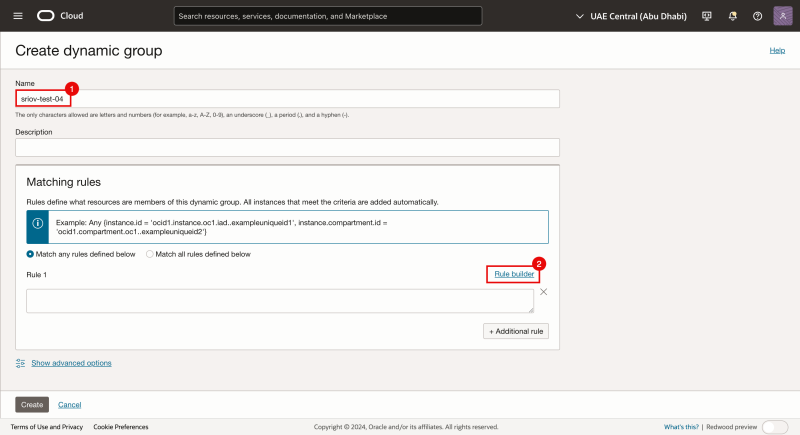
- Specify a name for the Dynamic group (we will use sriov-test-04)
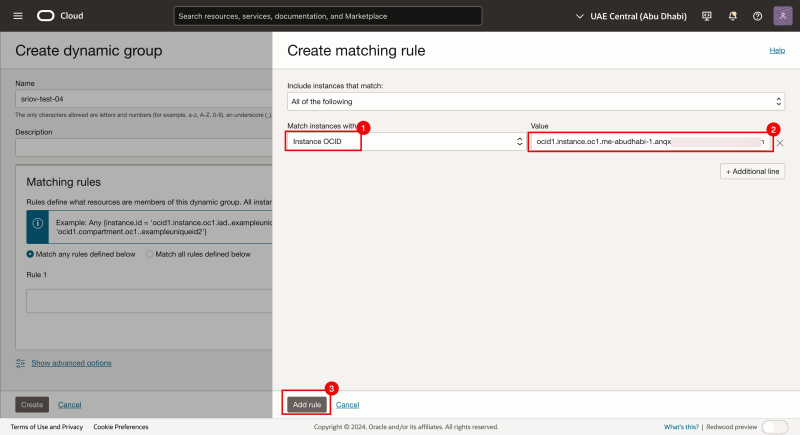
- Click on rule builder.
- Match instances with Instance OCID.
- Paste the OCID value of the instance (that we just copied)
- Click on the Add rule button.
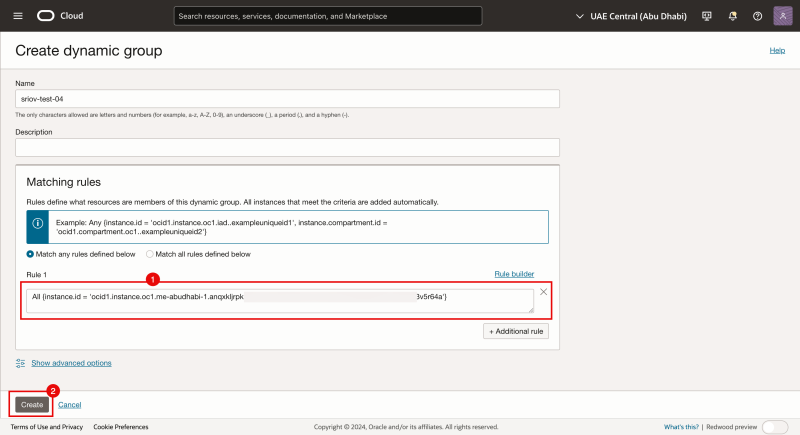
- Notice that a new rule is added to the group.
- Click on the Create button.
Now that we have the group where the instance is now part of, we need to create a policy inside the compartments where the Instance is part to allow instances in this group to perform operations on VCN objects (like subnets).
In our case, this is oraseemeaocids4 > NETWORK > Iwan
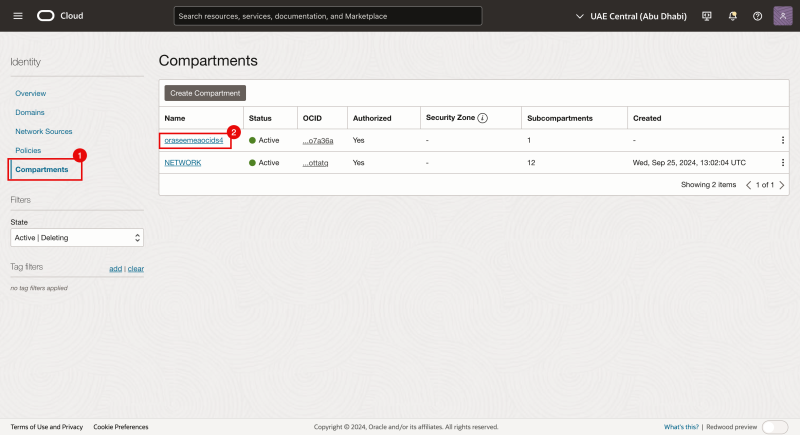
- Click on the hamburger menu by navigating through Identity > Compartments
- Click on the root compartment (in our case this is oraseemeaocids4).
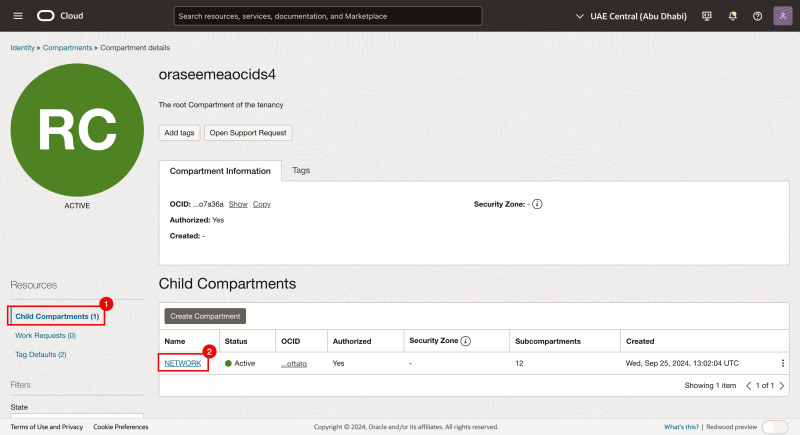
- Notice that we are now in the child compartments.
- Click on the next child compartment (in our case this is NETWORK).
- Notice that we are now in the next child's compartments.
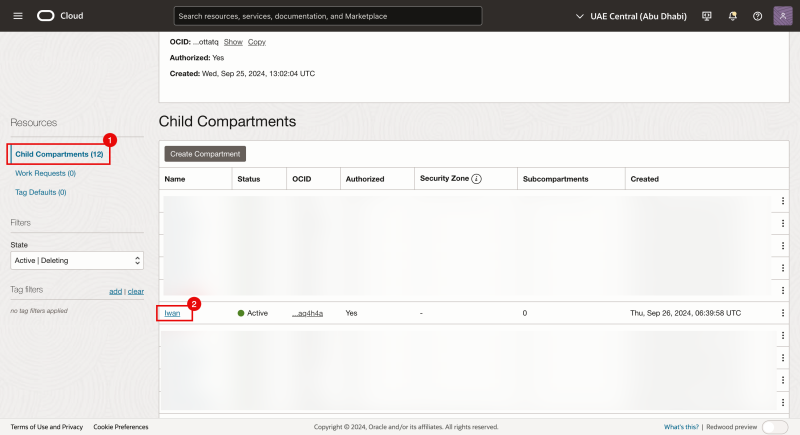
- Click on the next child compartment (in our case this is Iwan).
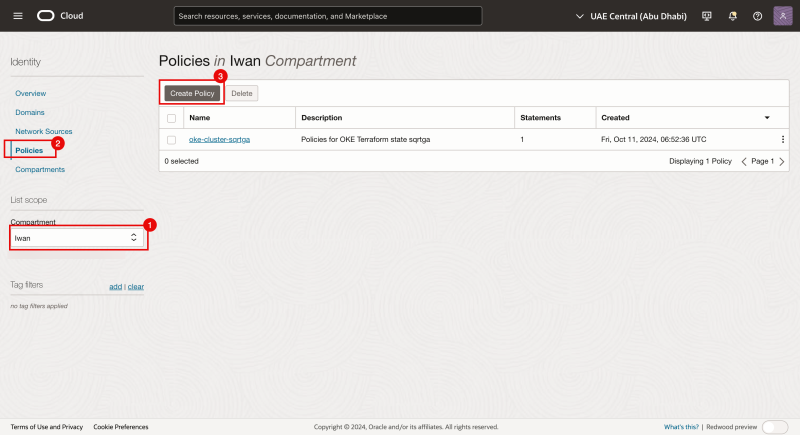
- Make sure the right compartment is selected.
- Click on Policies.
- Click on the Create Policy button.
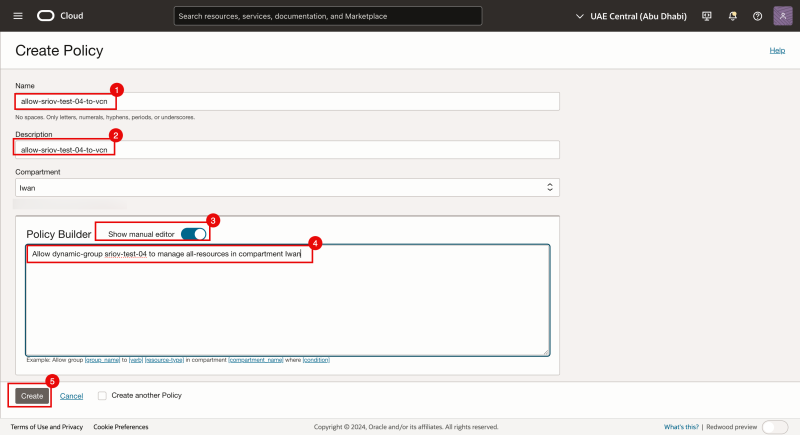
- Specify a name for the Policy (we will use allow-sriov-test-04-to-vcn).
- Specify a description for the Policy (we will use allow-sriov-test-04-to-vcn).
- Toggle the Show manual editor to on.
- Specify the following policy
allow dynamic-group sriov-test-04 to manage all resources in compartment Iwan - Click on the Create button.
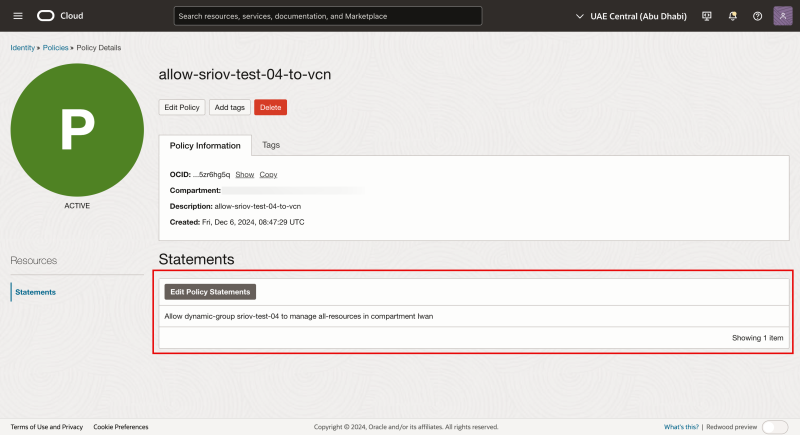
Notice the new Policy statement inside the newly created policy.
Now that we have allowed the instance to perform API calls (through OCI CLI) to the VCN, let's jump back on the instance.
- Issue the command
sudo oci-network-config showto retrieve all network configurations from the instance on the OCI level. - Notice that the error is now gone and OCI-level network output is provided.
- Also notice that the Operating System level network output is also provided after the OCI level network output.
