Configure the OCI Load Balancer to access multiple applications (Instances) using different Domain Names
In this article, I am going to explain how you can use the OCI Load Balancer (in a Hub and Spoke Network Architecture) to redirect network traffic to different backend sets (Instances) based on a URL (Domain name.)
This tutorial will use the previously written tutorials below as its main foundation:
- [Deploy a Windows Instance in Oracle Cloud Infrastructure]
- [Install a pfSense Firewall in Oracle Cloud Infrastructure]
- [Route Hub and Spoke VCN with pfSense Firewall in the Hub VCN]
- [Connect On-premises to OCI using an IPSec VPN with Hub and Spoke VCN Routing Architecture]
- [Add LB and WAF to a Hub to an Hub and Spoke VCN Routing architecture]
In the [previous article], we tested the Load Balancer with a Web Application Firewall (WAF) Policy we can take the Load Balancing testing one step further.
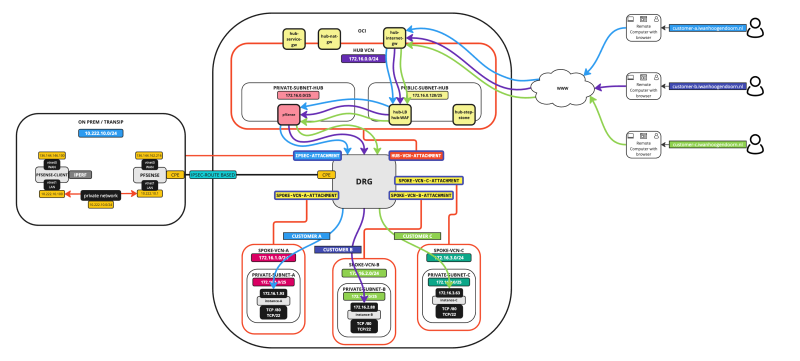
Let's assume we have dedicated our Spoke VCNs to different customers (or applications). Now we want to use ONE SINGLE LOAD BALANCER to redirect traffic (by the Load Balancer) to these different Customer Instances (inside the different) Spoke VCNs based on the URL that is used externally (from the Internet).
Below you will see an illustration of the traffic flow when you use different URLs to access different Instances (or applications) from the internet.
- Blue: This is the traffic flow for the first customer using the URL: customer-a.iwanhoogendoorn.nl to access the Instance in VCN-A.
- Purple: This is the traffic flow for the first customer using the URL: customer-b.iwanhoogendoorn.nl to access the Instance in VCN-B.
- Green: This is the traffic flow for the first customer using the URL: customer-c.iwanhoogendoorn.nl to access the Instance in VCN-C.
The Steps
- [ ] STEP 01: Change the WAF Policy
- [ ] STEP 02: Configure the DNS for the (public) domain names
- [ ] STEP 03: Configure Hostnames on the OCI Load Balancer
- [ ] STEP 04: Create multiple Back End Sets on the OCI Load Balancer
- [ ] STEP 05: Create multiple Listeners on the OCI Load Balancer
- [ ] STEP 06: Test out connectivity with the different (public) domain names
STEP 01 - Change the WAF Policy
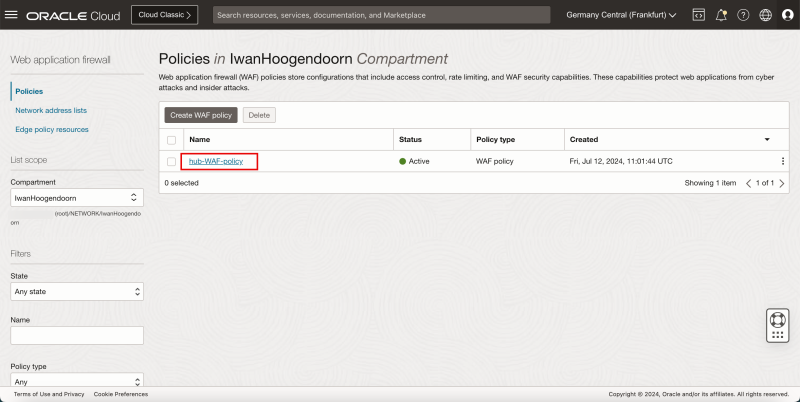
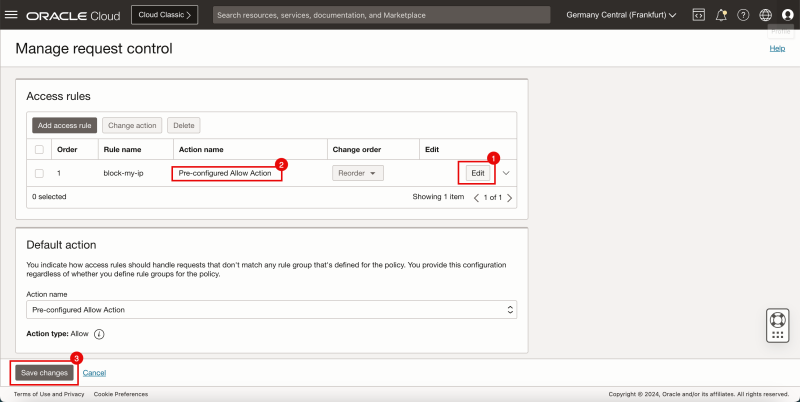
- First, let's change the WAF policy to allow traffic again.
- Go to the Web Application Firewall and select the policy we created earlier.
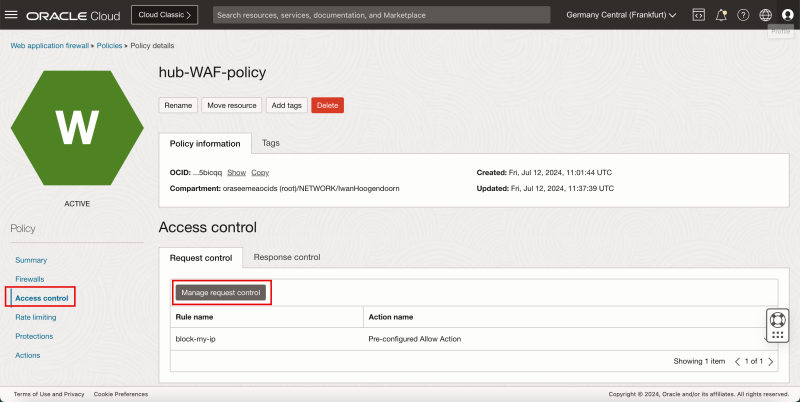
- Click on Access control.
- Click on the Manage request control button.
- Click the Edit button to edit the Access Rule.
- Change the action to Pre-configured Allow Action to allow all the traffic again.
- Click on the Save changes button.
STEP 02 - Configure the DNS for the public domain names
Use your DNS Server to configure the domain names (hostnames/URLs) and map this to the PUBLIC IP address of the Load Balancer. In my case below you will see the following mapping.
The domain name that I am testing with is: iwanhoogendoorn.nl
| Name | Type | Value |
|---|---|---|
| customer-a | A | 144.xxx.xxx.xxx (Public IP address of the OCI Load Balancer) |
| customer-b | A | 144.xxx.xxx.xxx (Public IP address of the OCI Load Balancer) |
| customer-c | A | 144.xxx.xxx.xxx (Public IP address of the OCI Load Balancer) |
This will create the following (sub) domains:
- customer-a.iwanhoogendoorn.nl
- customer-b.iwanhoogendoorn.nl
- customer-c.iwanhoogendoorn.nl
STEP 03 - Configure Hostnames on the OCI Load Balancer
- Let's first configure the hostnames on the OCI Load Balancer.
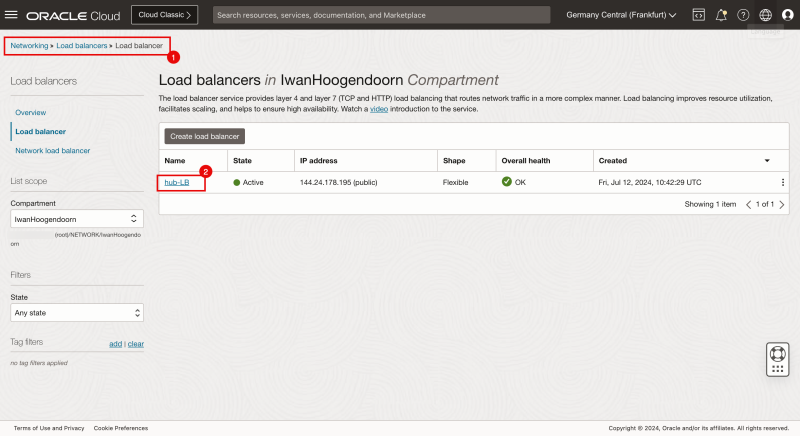
- Browse to Networking > Load Balancers.
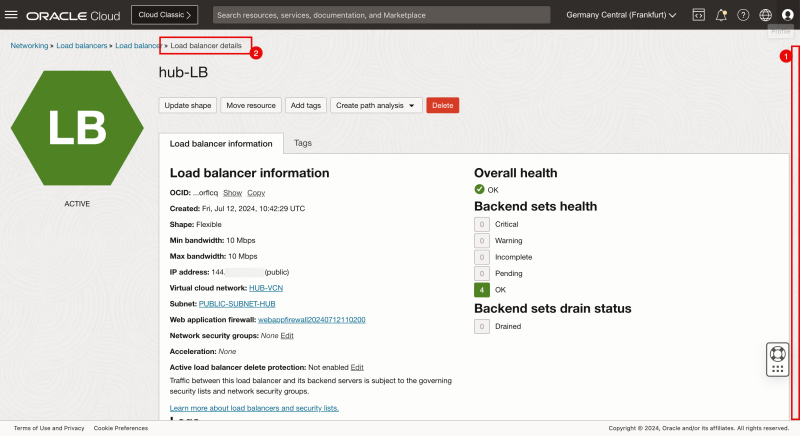
- Select the Load Balancer that we previously created.
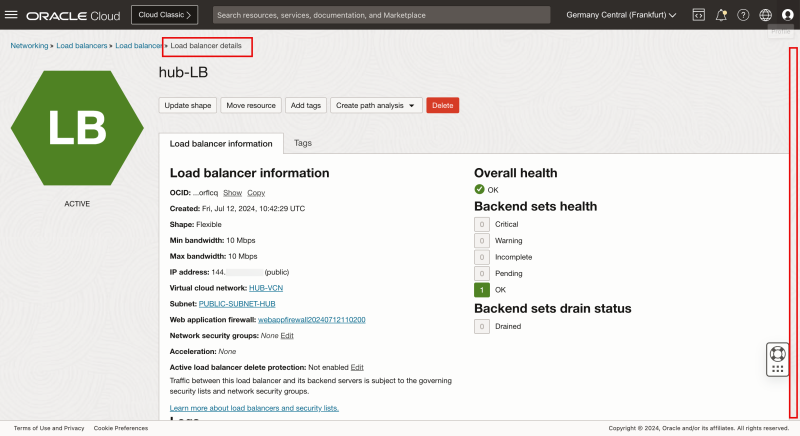
- Make sure you can see the Load Balancer details.
- Scroll down.
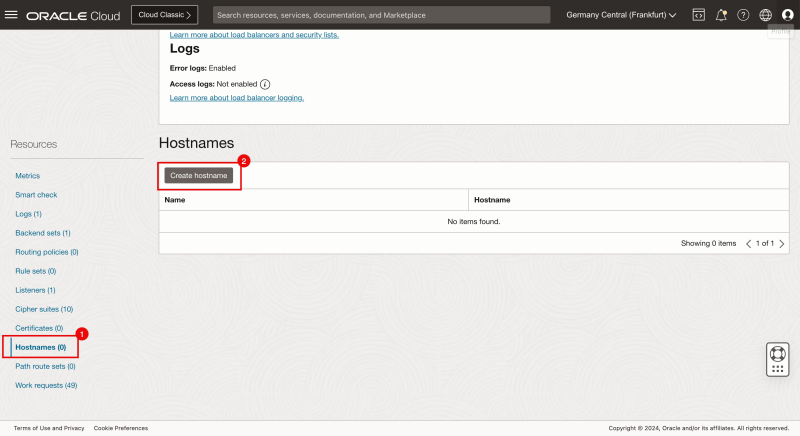
- Click on Hostnames.
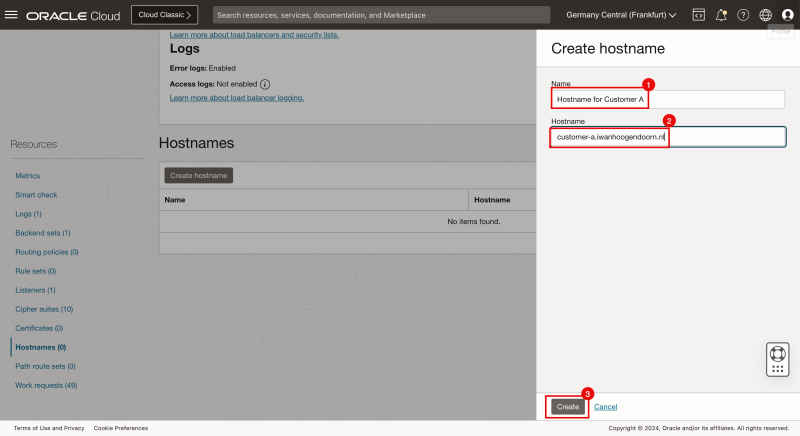
- Click on the Create Hostname button.
- Provide a name for the hostname.
- Provide a hostname, in my case this will be customer-a.iwanhoogendoorn.nl.
- Click on the Create button.
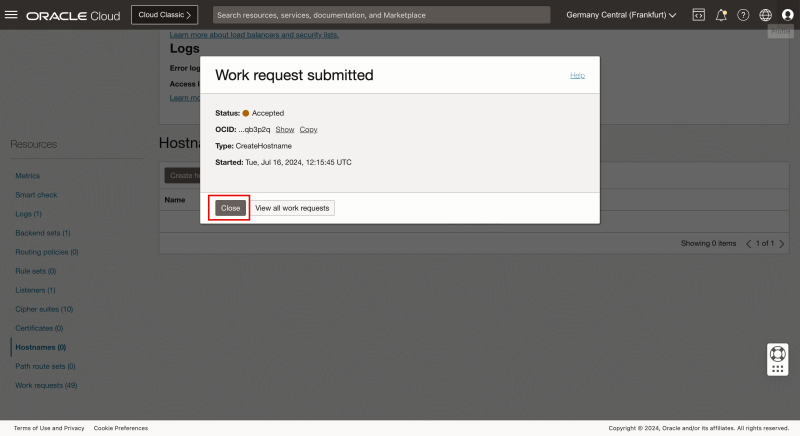
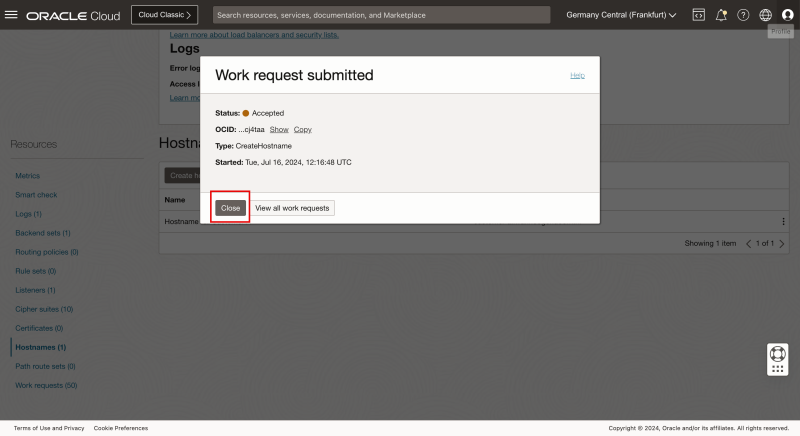
- Notice that the Work request has been submitted, and click on the Close button.
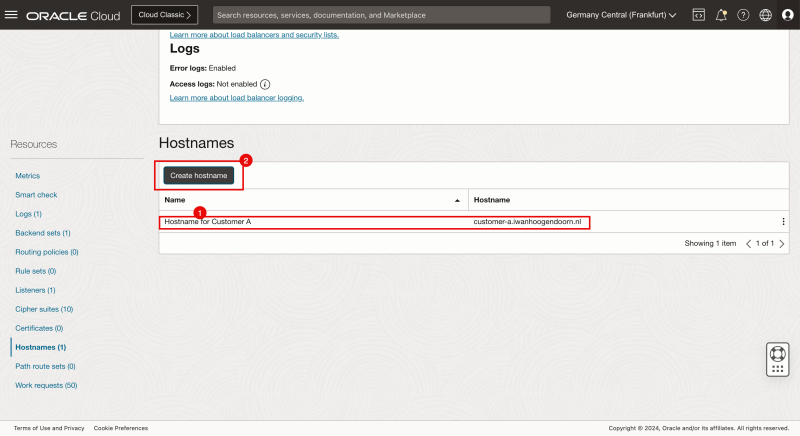
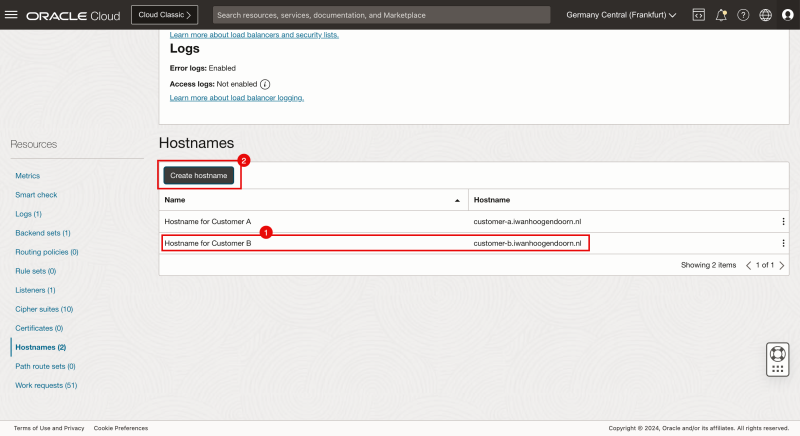
- Notice that the hostname for Customer A has been created successfully.
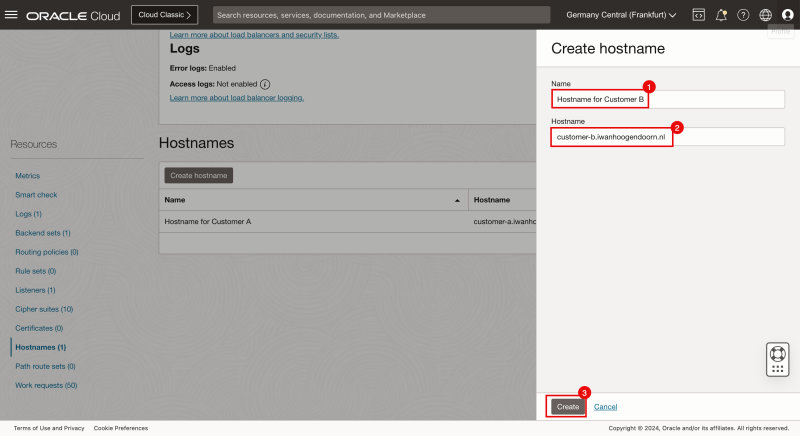
- Click on the Create Hostname button.
- Provide a name for the hostname.
- Provide a hostname, in my case this will be customer-b.iwanhoogendoorn.nl.
- Click on the Create button.
- Notice that the Work request has been submitted, and click on the Close button.
- Notice that the hostname for Customer B has been created successfully.
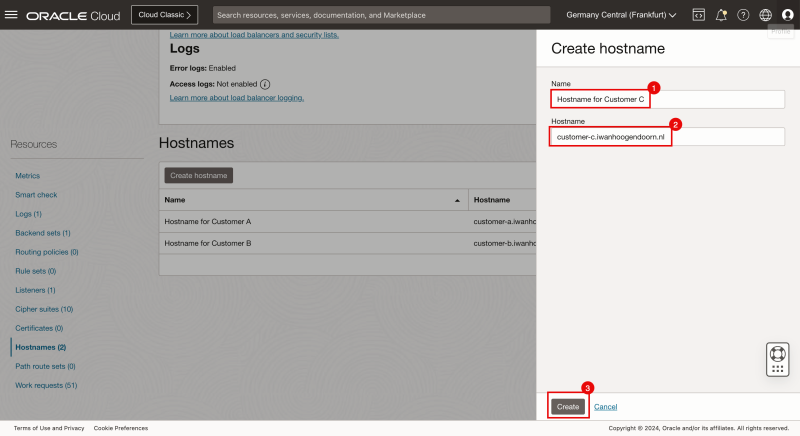
- Click on the Create Hostname button.
- Provide a name for the hostname.
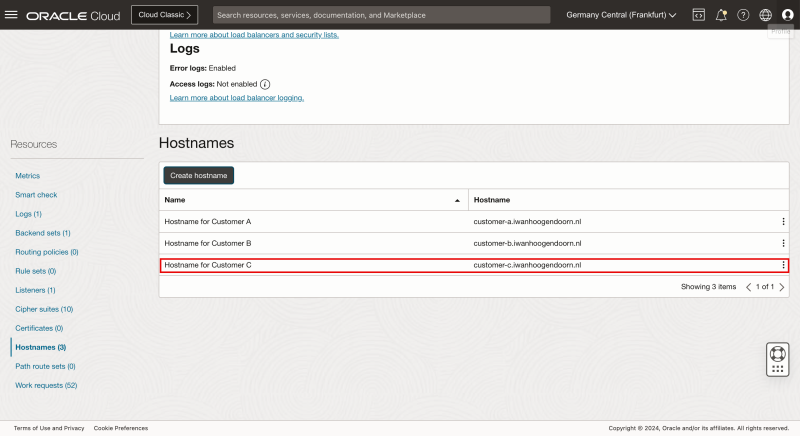
- Provide a hostname, in my case this will be customer-c.iwanhoogendoorn.nl.
- Click on the Create button.
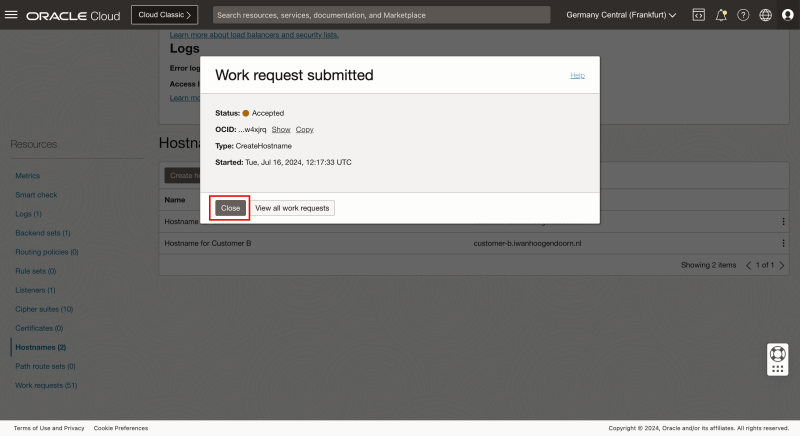
- Notice that the Work request has been submitted, and click on the Close button.
- Notice that the hostname for Customer C has been created successfully.
- Click on the Create Hostname button.
STEP 04 - Create multiple Back End Sets on the OCI Load Balancer
- Let's now configure the Backend sets on the OCI Load Balancer.
- We will create three backend sets, one for each customer.
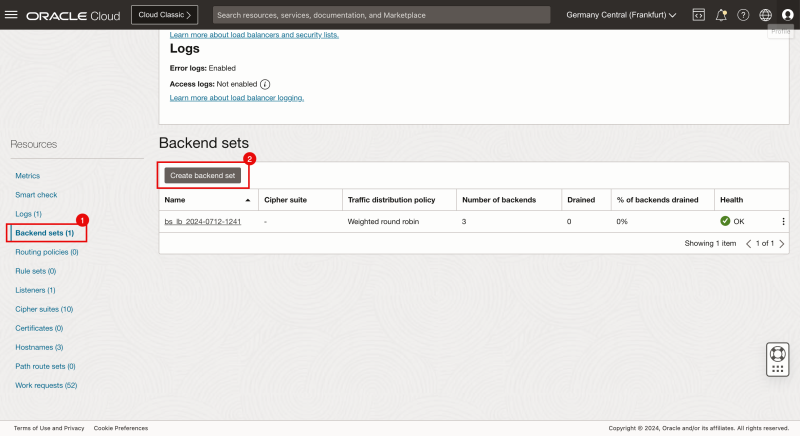
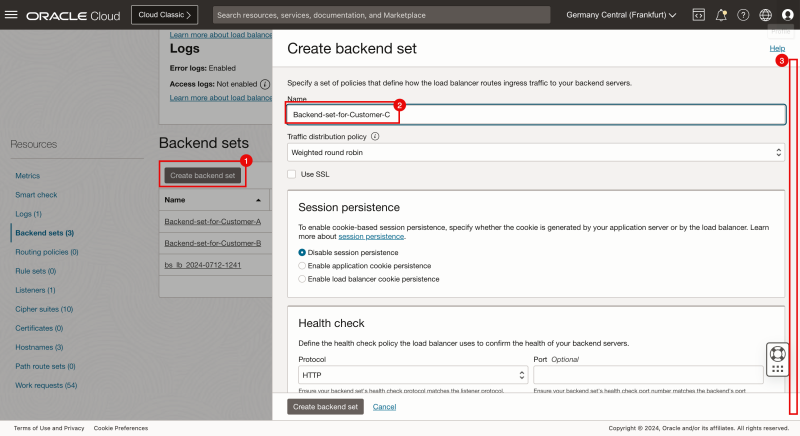
- Click on Backend sets.
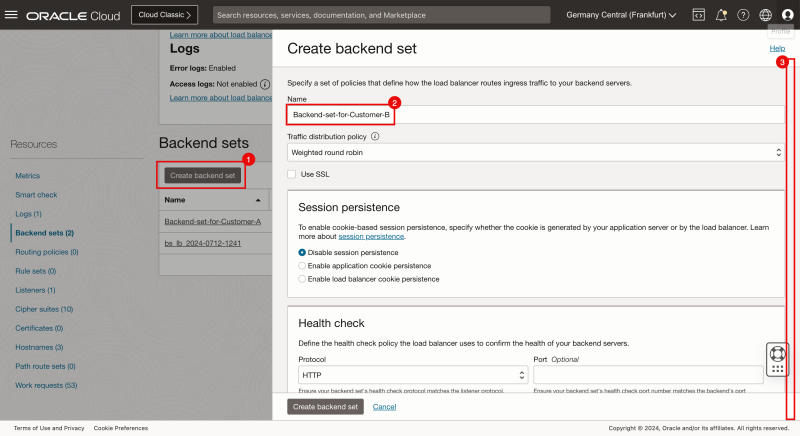
- Click on the Create backend set button.
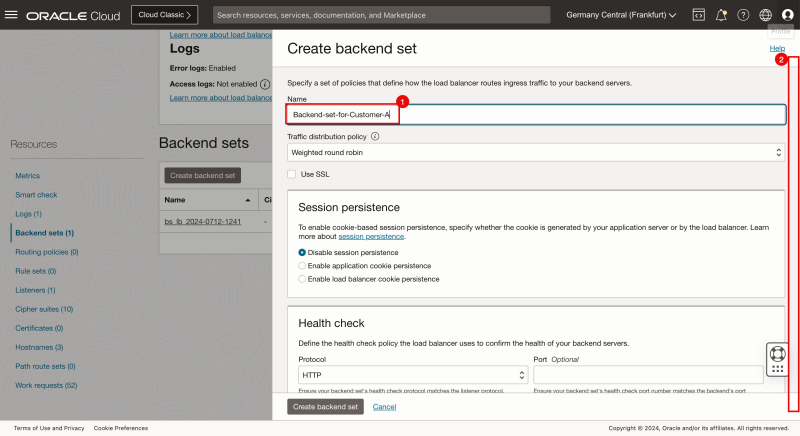
- Provide a name for the Backend set for Customer A.
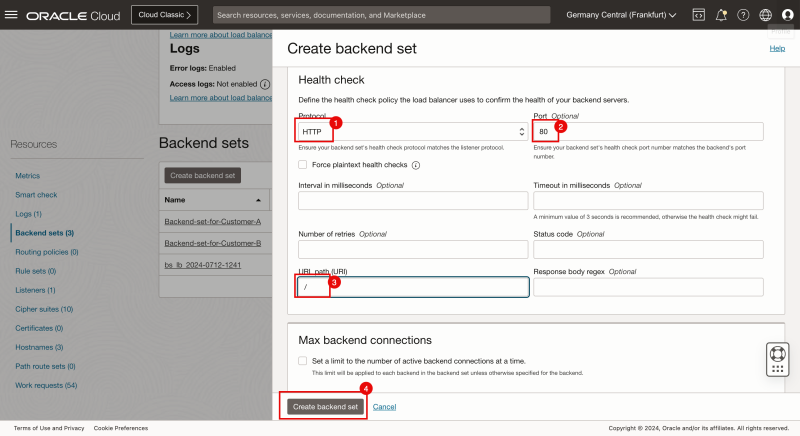
- Scroll down.
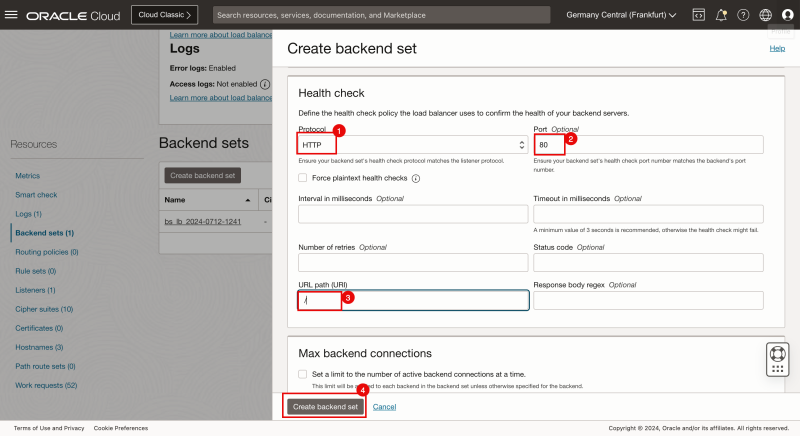
- Select HTTP as the protocol for the health check.
- Specify port 80 as the port for the health check.
- Specify / for the URL path.
- Click on the Create backend set button.
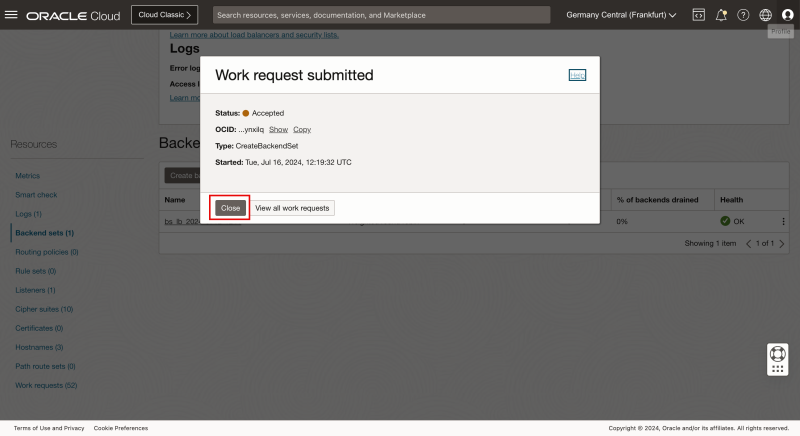
- Notice that the Work request has been submitted, and click on the Close button.
- Click on the Create backend set button.
- Provide a name for the Backend set for Customer B.
- Scroll down.
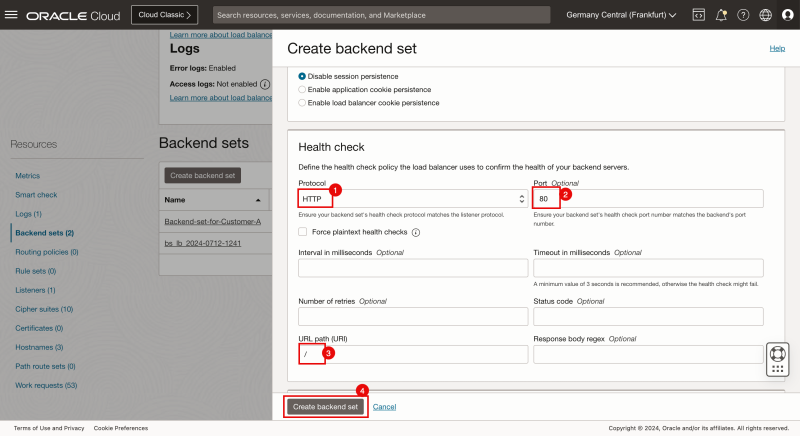
- Select HTTP as the protocol for the health check.
- Specify port 80 as the port for the health check.
- Specify / for the URL path.
- Click on the Create backend set button.
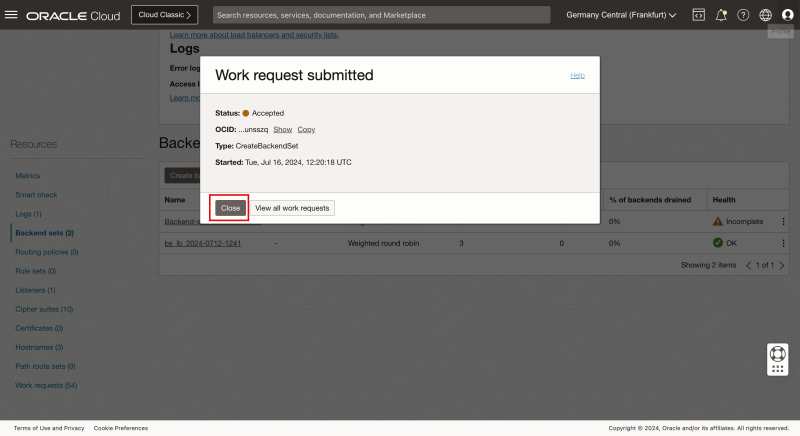
- Notice that the Work request has been submitted, and click on the Close button.
- Click on the Create backend set button.
- Provide a name for the Backend set for Customer C*.
- Scroll down.
- Select HTTP as the protocol for the health check.
- Specify port 80 as the port for the health check.
- Specify / for the URL path.
- Click on the Create backend set button.
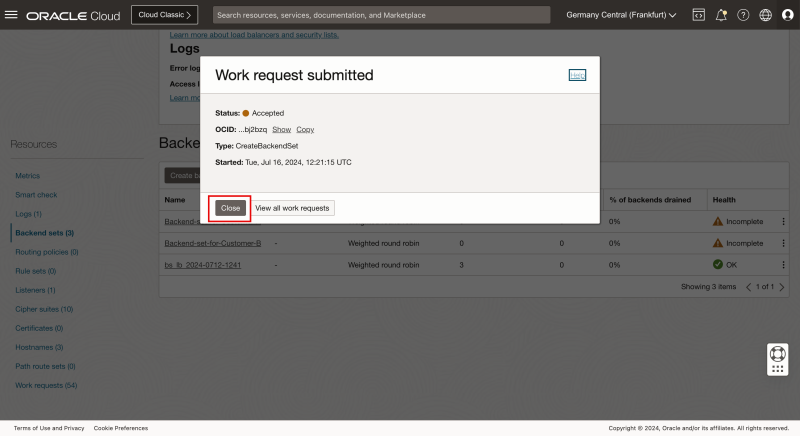
- Notice that the Work request has been submitted, and click on the Close button.
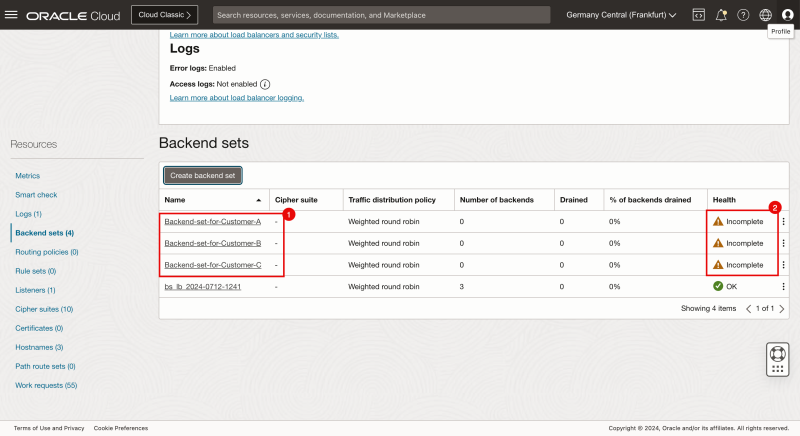
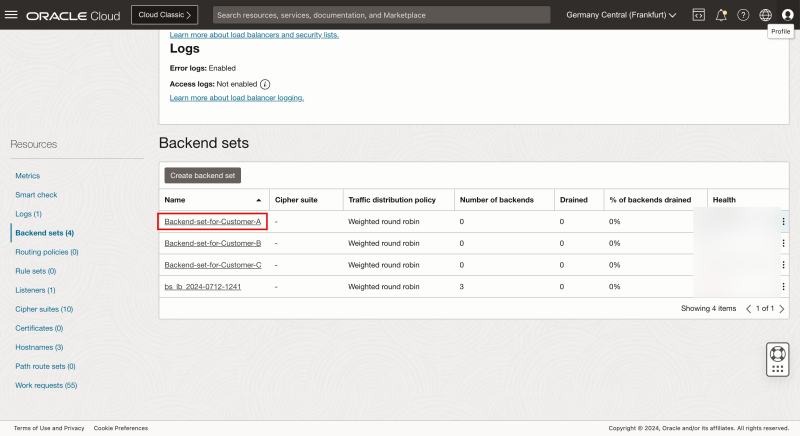
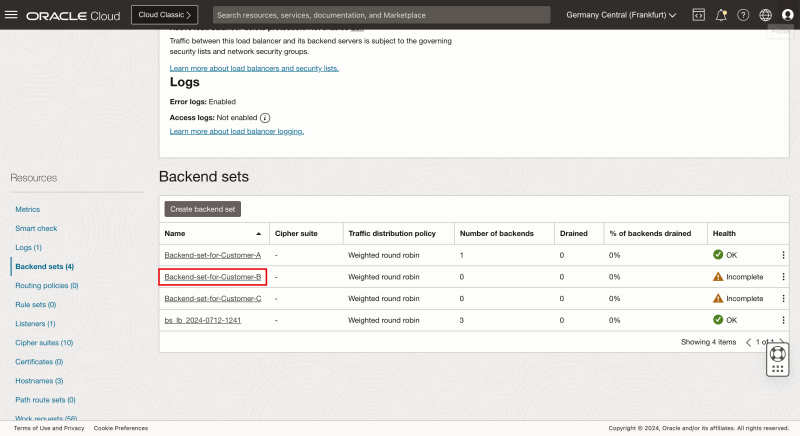
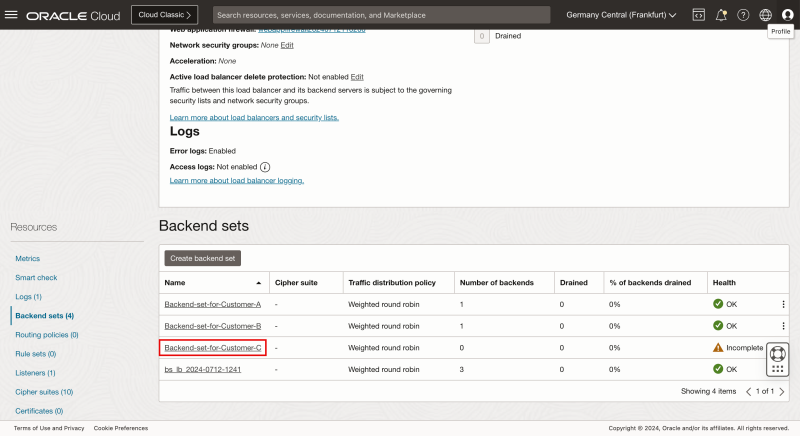
- Notice that all the backend sets are created for all customers.
- Notice that the Health is showing up as Incomplete. This is because we still need to specify the actual backend where the health check can be performed.
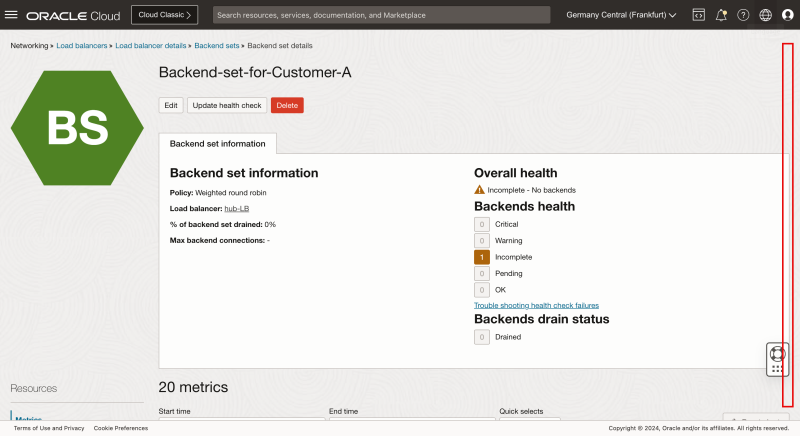
- Click on the Backend set for Customer A.
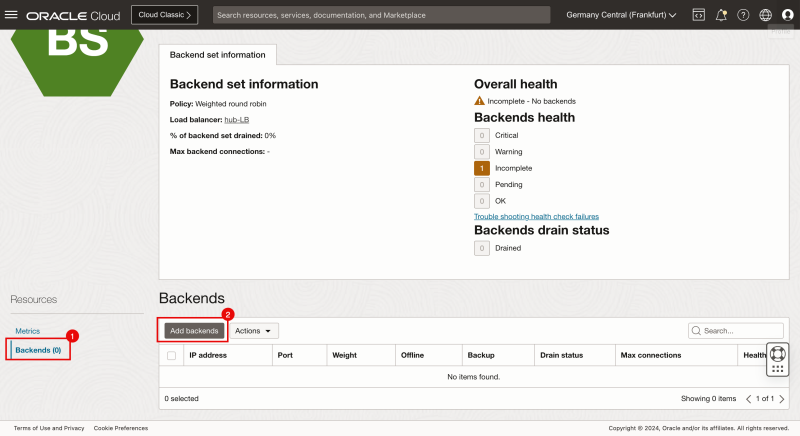
- Scroll down.
- Click on Backends.
- Click on the Add Backends button.
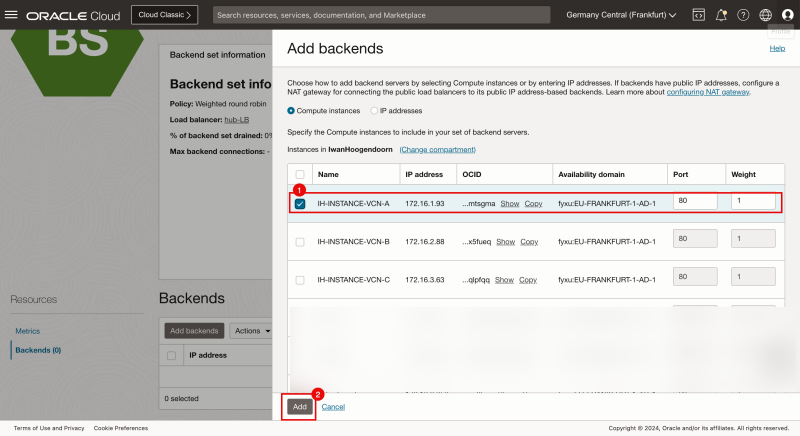
- Select the Instance that is hosted in the Spoke VCN A.
- Click on the Add button.
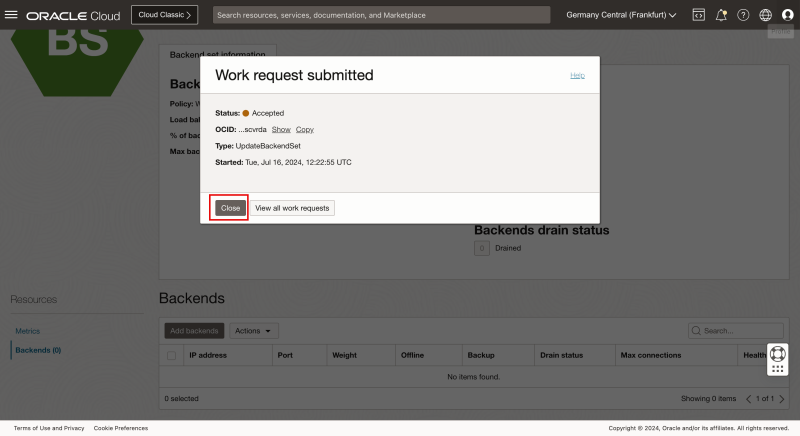
- Notice that the Work request has been submitted, and click on the Close button.
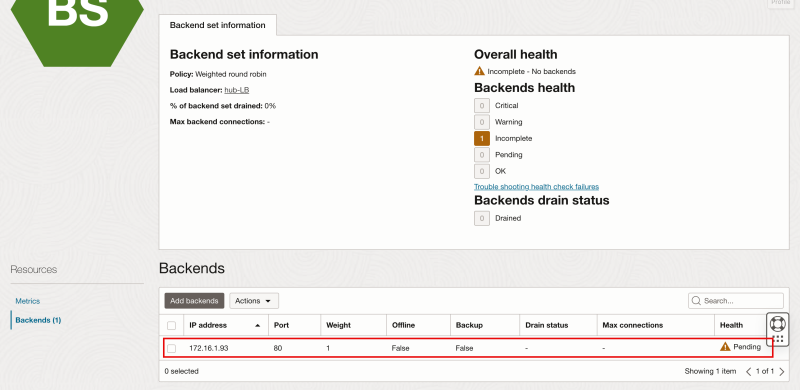
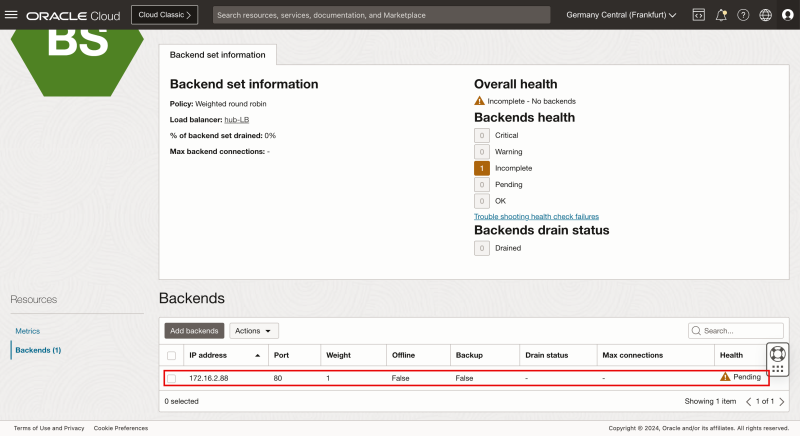
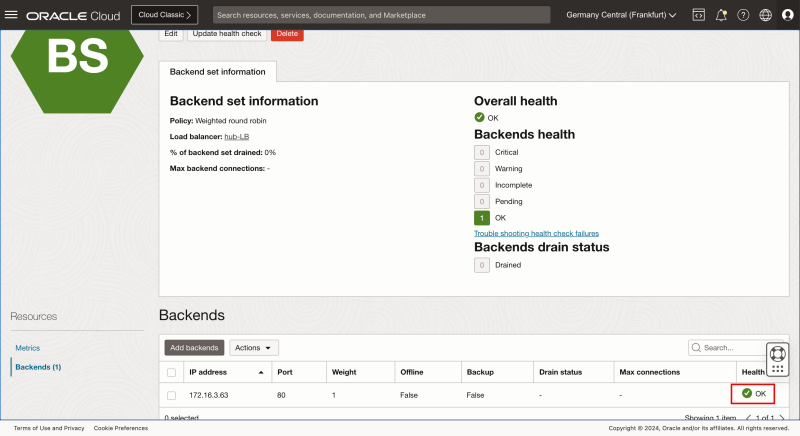
- When you have added the Instance to the Backend set the initial health status will be Pending.
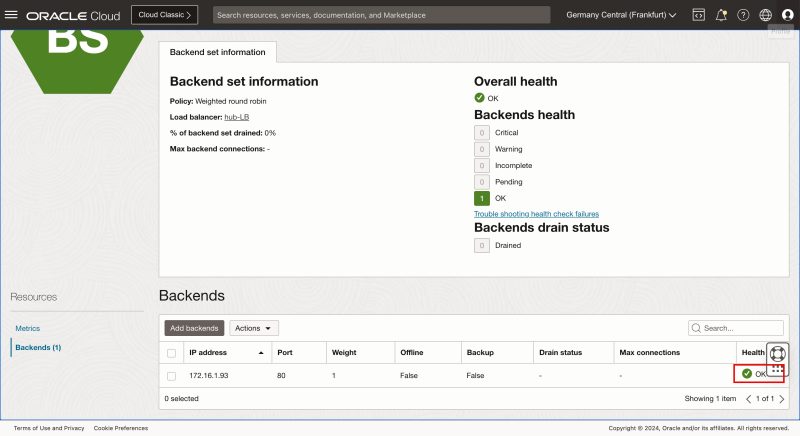
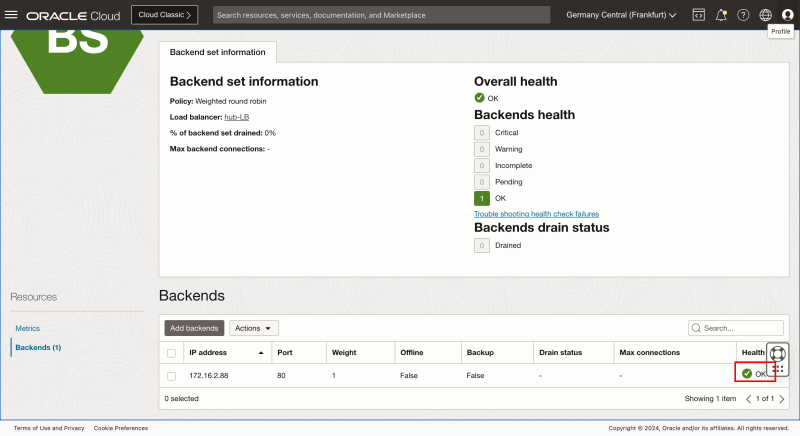
- After a minute the Health status will change from pending to OK.
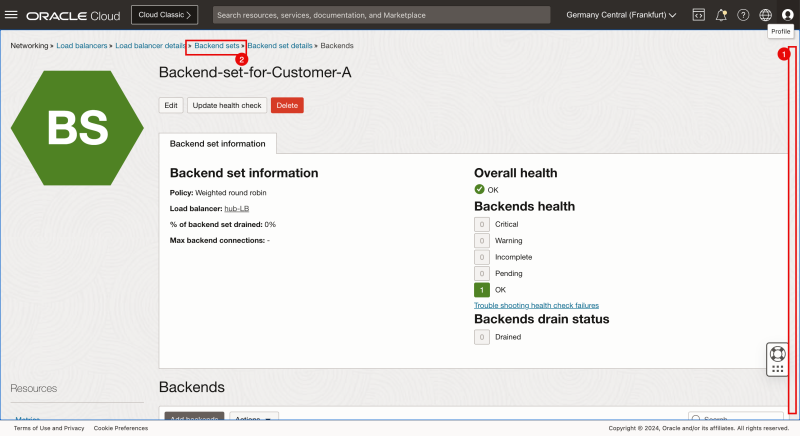
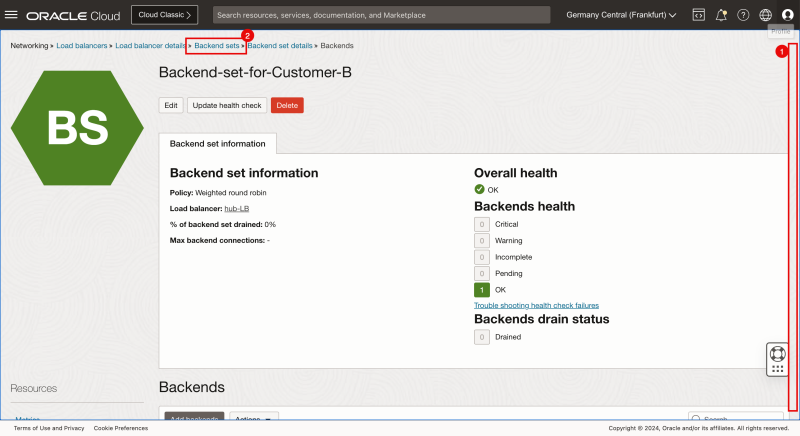
- Scroll up.
- Click on the Backend sets breadcrumbs menu to return to the Backend sets page.
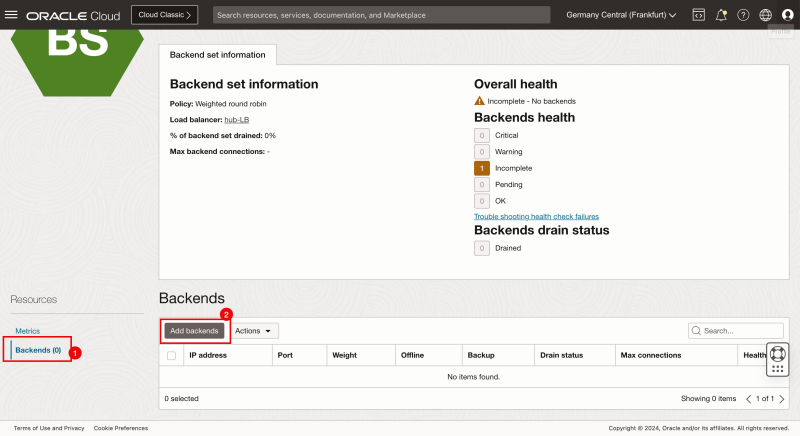
- Click on the Backend set for Customer B.
- Click on Backends.
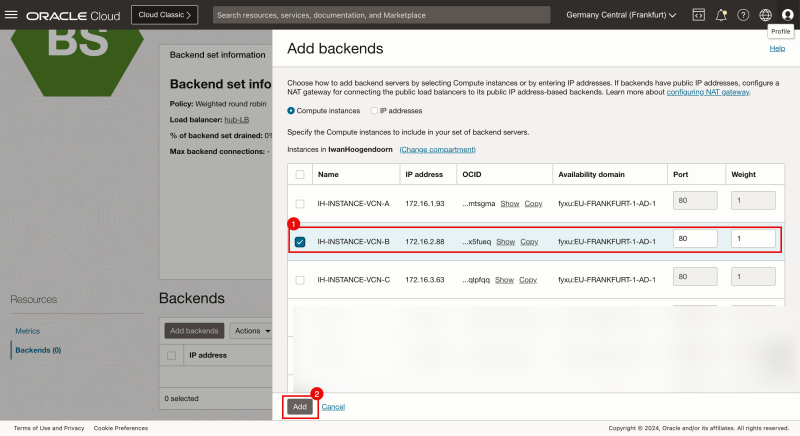
- Click on the Add Backends button.
- Select the Instance that is hosted in the Spoke VCN B.
- Click on the Add button.
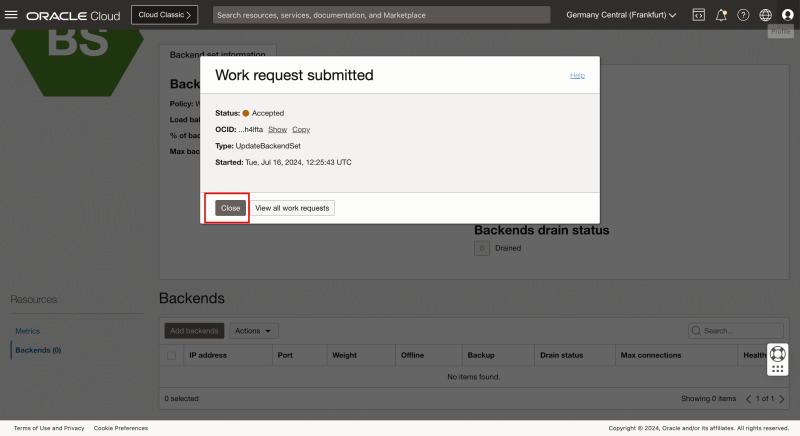
- Notice that the Work request has been submitted, and click on the Close button.
- When you have added the Instance to the Backend set the initial health status will be Pending.
- After a minute the Health status will change from pending to OK.
- Scroll up.
- Click on the Backend sets breadcrumbs menu to return to the Backend sets page.
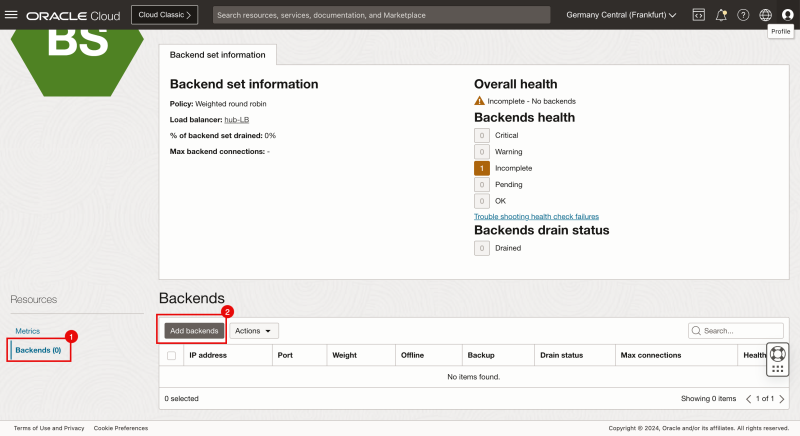
- Click on the Backend set for Customer C.
- Click on Backends.
- Click on the Add Backends button.
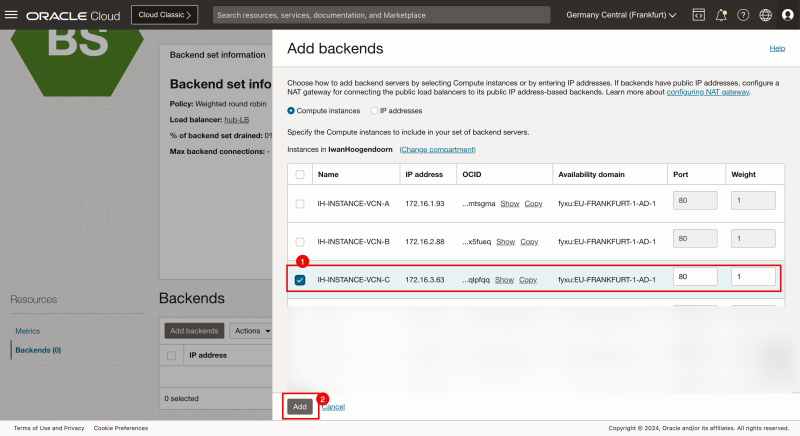
- Select the Instance that is hosted in the Spoke VCN C.
- Click on the Add button.
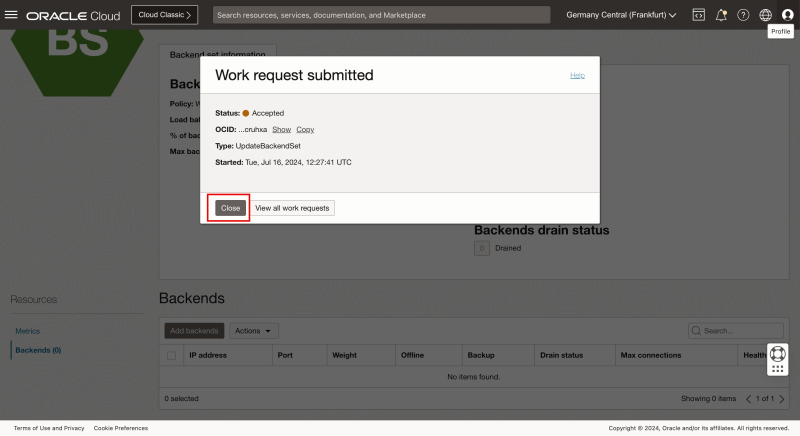
- Notice that the Work request has been submitted, and click on the Close button.
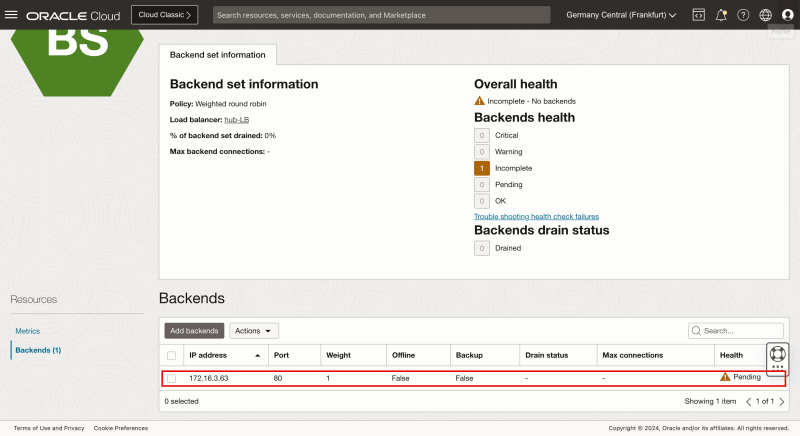
- When you have added the Instance to the Backend set the initial health status will be Pending.
- After a minute the Health status will change from pending to OK.
- Scroll up.
- Click on the Backend sets breadcrumbs menu to return to the Backend sets page.
STEP 05 - Create multiple Listeners on the OCI Load Balancer
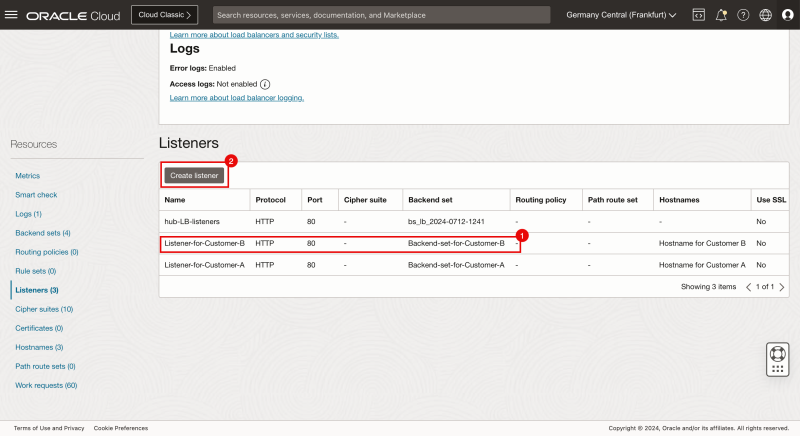
- Let's now configure the Listeners for each customer based on the domain names.
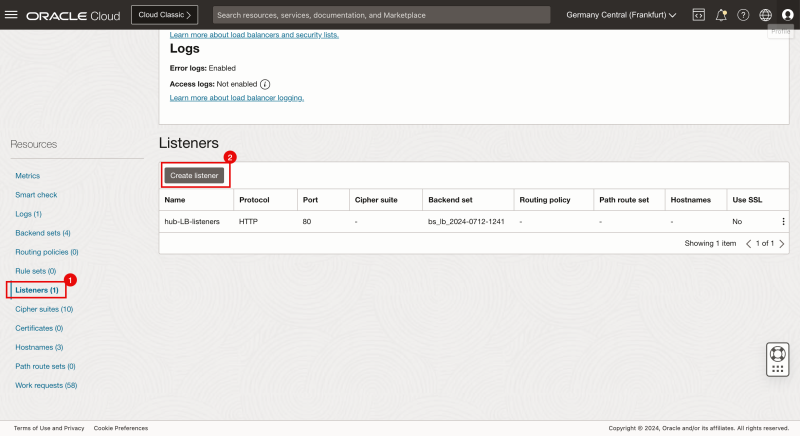
- Click on Listeners.
- Click on the Create listener button.
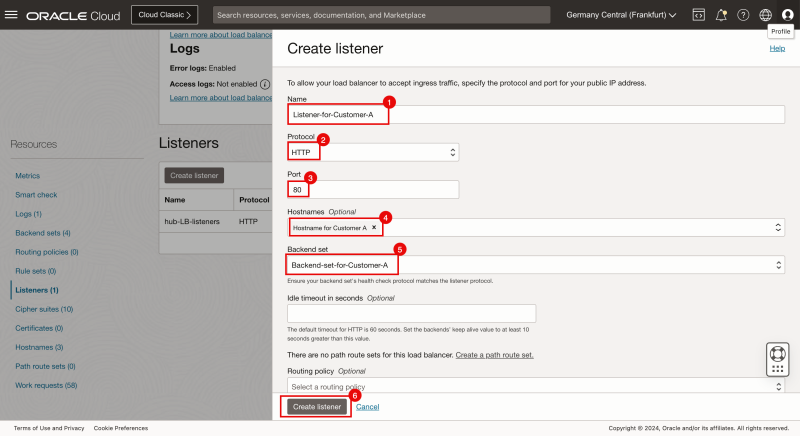
- Provide a name for the listener or Customer A.
- Select HTTP for the protocol.
- Specify port 80.
- Select the hostname for Customer A we created earlier.
- Select the backend set for Customer A we created earlier.
- Click on the Create listener button.
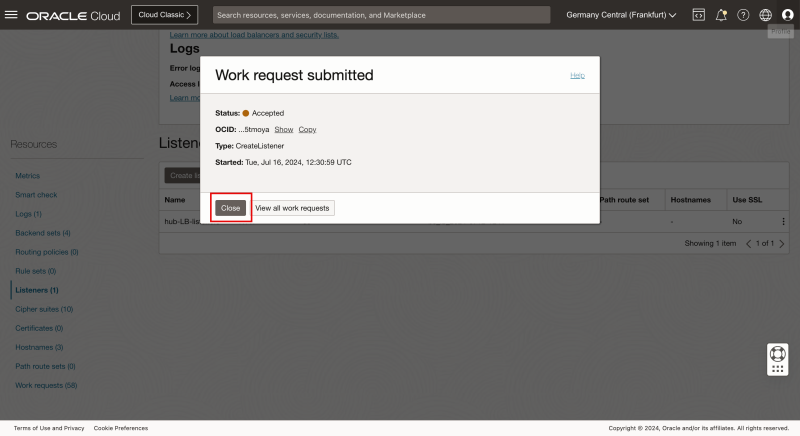
- Notice that the Work request has been submitted, and click on the Close button.
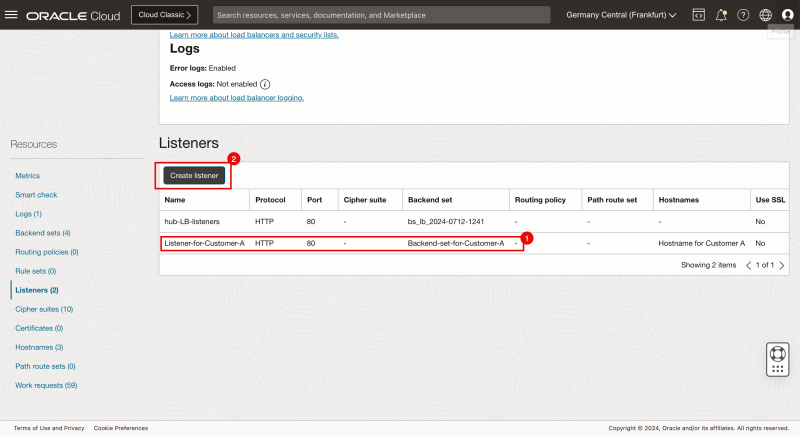
- Notice that the listener for Customer A is created successfully.
- Click on the Create listeners button.
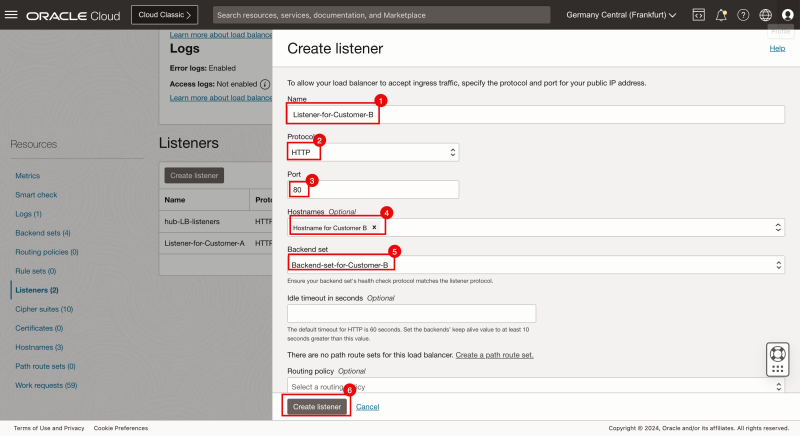
- Provide a name for the listener or Customer B.
- Select HTTP for the protocol.
- Specify port 80.
- Select the hostname for Customer B we created earlier.
- Select the backend set for Customer B we created earlier.
- Click on the Create listener button.
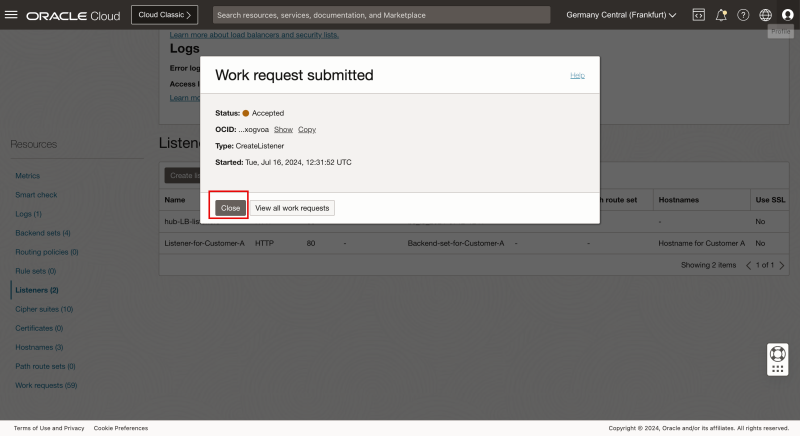
- Notice that the Work request has been submitted, and click on the Close button.
- Notice that the listener for Customer B is created successfully.
- Click on the Create listeners button.
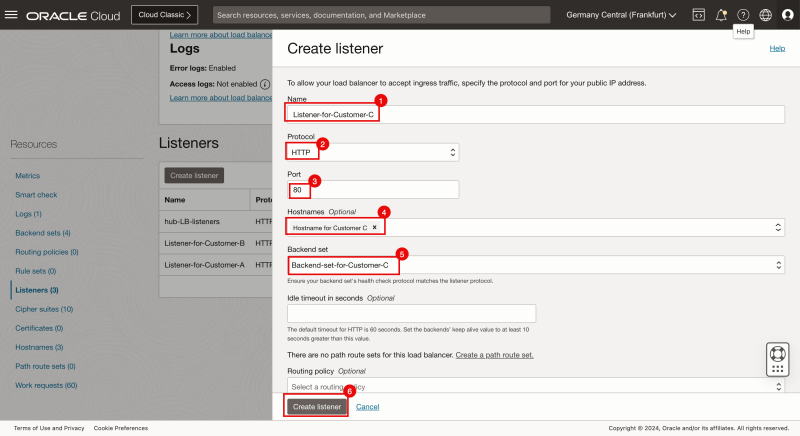
- Provide a name for the listener or Customer C.
- Select HTTP for the protocol.
- Specify port 80.
- Select the hostname for Customer C we created earlier.
- Select the backend set for Customer C we created earlier.
- Click on the Create listener button.
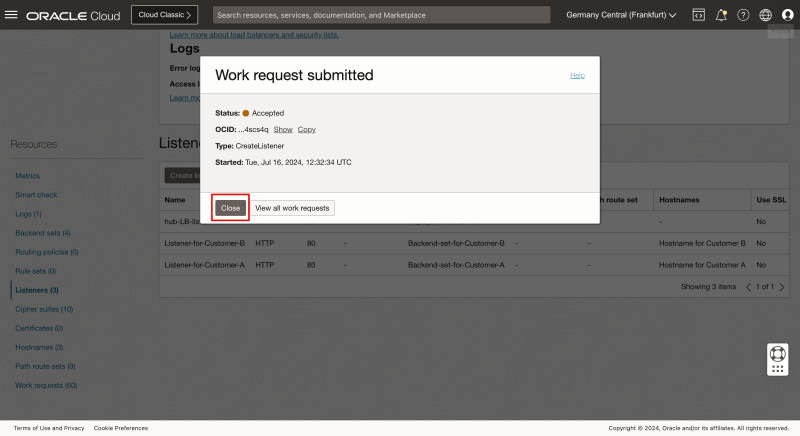
- Notice that the Work request has been submitted, and click on the Close button.
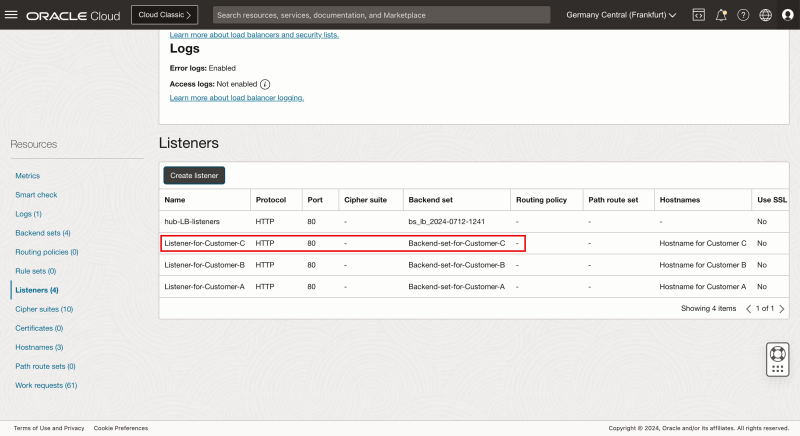
- Notice that the listener for Customer C is created successfully.
STEP 06 - Test out connectivity with the different public domain names
- Open a new browser.
- Type/Paste in the URL for customer A (customer-a.iwanhoogendoorn.nl).
- Notice that the Load Balancer redirects the traffic to the Instance in the Spoke VCN A.
- Open a new browser (tab).
- Type/Paste in the URL for customer B (customer-b.iwanhoogendoorn.nl).
- Notice that the Load Balancer redirects the traffic to the Instance in the Spoke VCN B.
- Open a new browser (tab).
- Type/Paste in the URL for customer C (customer-c.iwanhoogendoorn.nl).
- Notice that the Load Balancer redirects the traffic to the Instance in the Spoke VCN C.
We have now successfully tested that the Load Balancer distributing the traffic based on a different URL (Hostname).
Conclusion
In this article, we have configured the load balancer so that it is capable of redirecting traffic based on different customer hostnames (URLs).
